Page 58 of 580
WARNING!
ALL the head restraints MUST be reinstalled in the
vehicle to properly protect the occupants. Follow the
re-installation instructions above prior to operating the
vehicle or occupying a seat.
STEERING WHEEL
Tilt/Telescoping Steering Column
This feature allows you to tilt the steering column upward
or downward. It also allows you to lengthen or shorten the
steering column. The tilt/telescoping lever is located below
the steering wheel at the end of the steering column.
To unlock the steering column, push the control handle
downward (toward the floor). To tilt the steering column,
move the steering wheel upward or downward as desired.
To lengthen or shorten the steering column, pull the
steering wheel outward or push it inward as desired. To
Page 60 of 580

WARNING!(Continued)
•Do not place anything on the steering wheel that
insulates against heat, such as a blanket or steering
wheel covers of any type and material. This may
cause the steering wheel heater to overheat.
MIRRORS
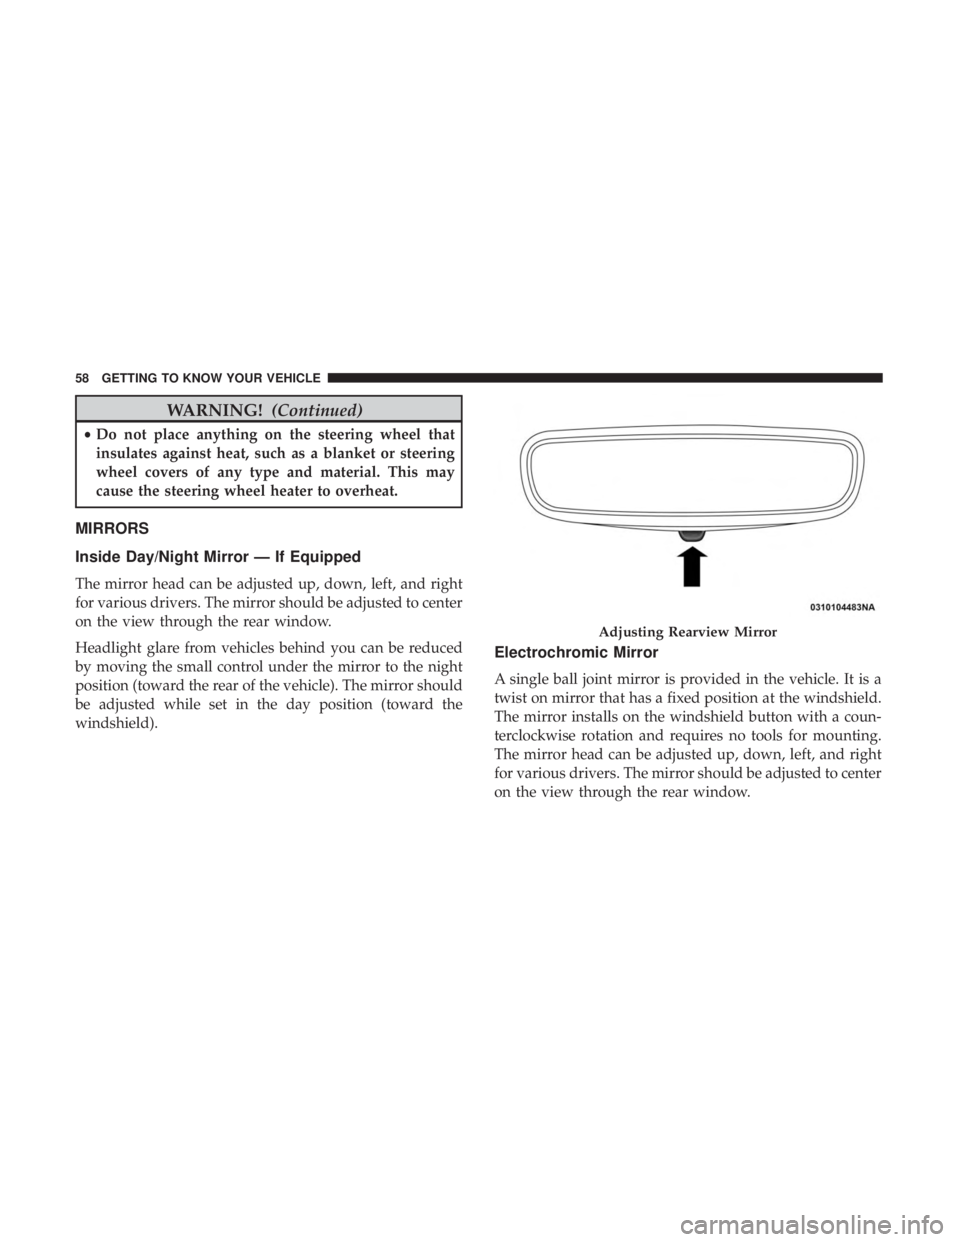
Inside Day/Night Mirror — If Equipped
The mirror head can be adjusted up, down, left, and right
for various drivers. The mirror should be adjusted to center
on the view through the rear window.
Headlight glare from vehicles behind you can be reduced
by moving the small control under the mirror to the night
position (toward the rear of the vehicle). The mirror should
be adjusted while set in the day position (toward the
windshield).
Electrochromic Mirror
A single ball joint mirror is provided in the vehicle. It is a
twist on mirror that has a fixed position at the windshield.
The mirror installs on the windshield button with a coun-
terclockwise rotation and requires no tools for mounting.
The mirror head can be adjusted up, down, left, and right
for various drivers. The mirror should be adjusted to center
on the view through the rear window.
Page 72 of 580
Windshield Washer Operation
To use the washer, pull the lever rearward toward you and
hold while spray is desired. If the lever is pulled while in
the intermittent setting, the wipers will turn on and operate
for several wipe cycles after the lever is released, and then
resume the intermittent interval previously selected.If the lever is pulled while the wipers are in the off position,
the wipers will operate for several wipe cycles, then turn
off.
Page 147 of 580
ONBOARD DIAGNOSTIC SYSTEM — OBD II
Your vehicle is equipped with a sophisticated Onboard
Diagnostic system called OBD II. This system monitors the
performance of the emissions, engine, and transmission
control systems. When these systems are operating prop-
erly, your vehicle will provide excellent performance and
fuel economy, as well as engine emissions well within
current government regulations.
If any of these systems require service, the OBD II system
will turn on the Malfunction Indicator Light (MIL). It will
also store diagnostic codes and other information to assist
your service technician in making repairs. Although your
vehicle will usually be drivable and not need towing, see
an authorized dealer for service as soon as possible.
Page 156 of 580
For vehicles not equipped with an instrument cluster display,
perform the following steps:
1. Center the steering wheel (front wheels pointingstraight forward).
2. Shift the transmission into PARK.
3. Apply the parking brake.
4. Start the engine.
5. Rotate the steering wheel slightly more than one-half turn to the left.
6. Push the “ESC Off” button located in the lower switch bank below the climate control four times within 20
seconds. The “ESC Off Indicator Light” should turn on
and turn off two times.
7. Rotate the steering wheel back to center and then an additional slightly more than one-half turn to the right.
8. Turn the ignition to the OFF mode and then back to ON. If the sequence was completed properly, the “ESC Off
Indicator Light” will blink several times to confirm HSA
is disabled.
9. Repeat these steps if you want to return this feature to its previous setting.
Towing With HSA
HSA will also provide assistance to mitigate roll back while
towing a trailer.
Page 173 of 580

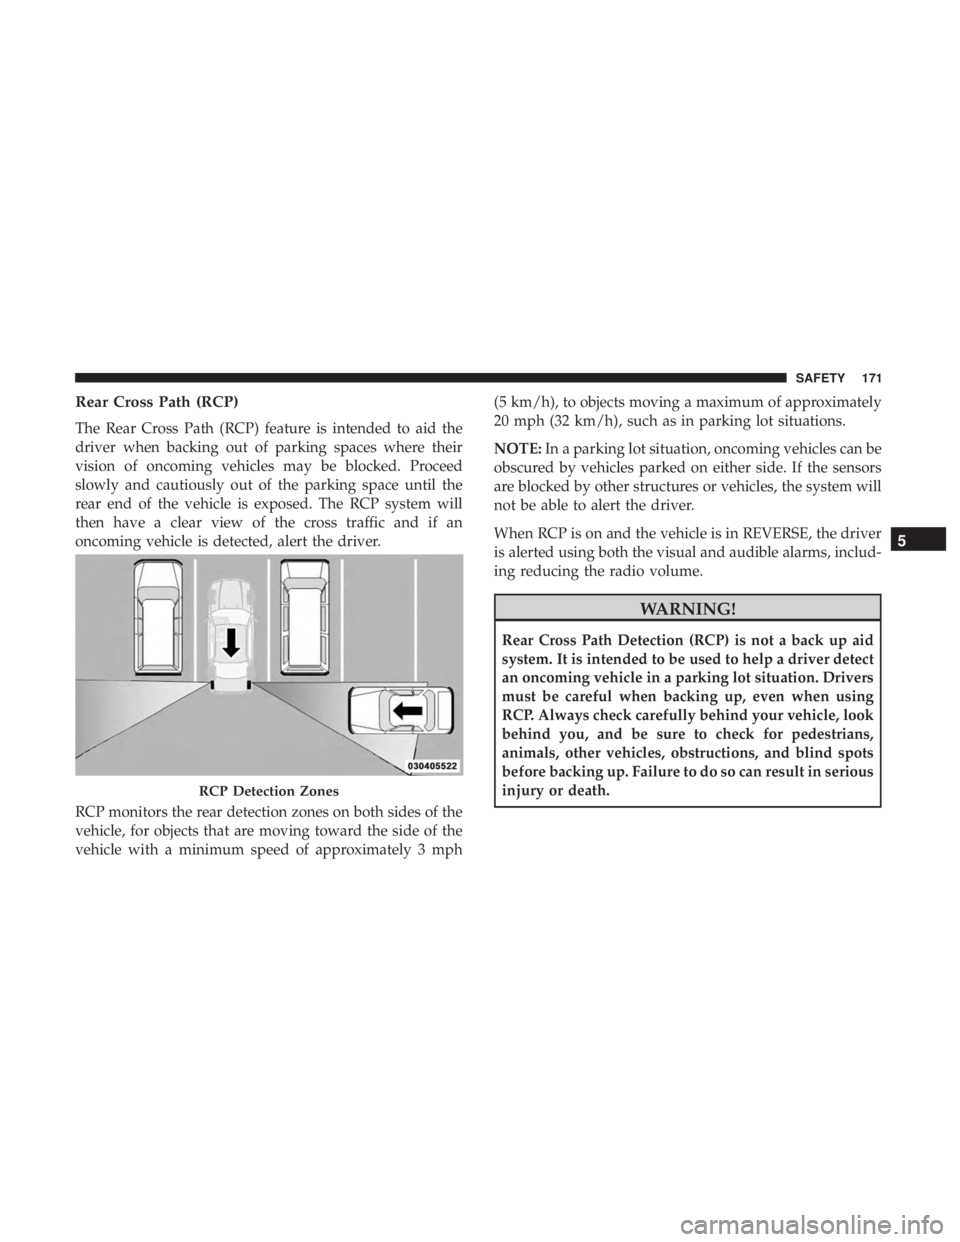
Rear Cross Path (RCP)
The Rear Cross Path (RCP) feature is intended to aid the
driver when backing out of parking spaces where their
vision of oncoming vehicles may be blocked. Proceed
slowly and cautiously out of the parking space until the
rear end of the vehicle is exposed. The RCP system will
then have a clear view of the cross traffic and if an
oncoming vehicle is detected, alert the driver.
RCP monitors the rear detection zones on both sides of the
vehicle, for objects that are moving toward the side of the
vehicle with a minimum speed of approximately 3 mph(5 km/h), to objects moving a maximum of approximately
20 mph (32 km/h), such as in parking lot situations.
NOTE:
In a parking lot situation, oncoming vehicles can be
obscured by vehicles parked on either side. If the sensors
are blocked by other structures or vehicles, the system will
not be able to alert the driver.
When RCP is on and the vehicle is in REVERSE, the driver
is alerted using both the visual and audible alarms, includ-
ing reducing the radio volume.
Page 228 of 580

WARNING!(Continued)
anchor for the center position. You must use the
LATCH anchors to install the child seat in position
(3), behind the driver. You may use either the LATCH
anchors or the vehicle’s seat belt for installing the
child seat in position (1), behind the front passenger.
Please refer to “Installing the LATCH-Compatible
Child Restraint System” for typical installation in-
structions.
Always follow the directions of the child restraint manu-
facturer when installing your child restraint. Not all child
restraint systems will be installed as described here.
To Install A LATCH-Compatible Child Restraint
If the selected seating position has a Switchable Automatic
Locking Retractor (ALR) seat belt, stow the seat belt,
following the instructions below. See the section “Installing
Child Restraints Using the Vehicle Seat Belt” to check what
type of seat belt each seating position has.
1.
Loosen the adjusters on the lower straps and on the tether
strap of the child seat so that you can more easily attach
the hooks or connectors to the vehicle anchorages.
2. Place the child seat between the lower anchorages for that seating position. For some second row seats, you
may need to recline the seat and / or raise the head
restraint to get a better fit. If the rear seat can be moved
forward and rearward in the vehicle, you may wish to
move it to its rear-most position to make room for the
child seat. You may also move the front seat forward to
allow more room for the child seat.
3. Attach the lower hooks or connectors of the child restraint to the lower anchorages in the selected seating
position.
4. If the child restraint has a tether strap, connect it to the top tether anchorage. See the section “Installing Child
Restraints Using the Top Tether Anchorage” for direc-
tions to attach a tether anchor.
5. Tighten all of the straps as you push the child restraint rearward and downward into the seat. Remove slack in
the straps according to the child restraint manufactur-
er ’s instructions.
6. Test that the child restraint is installed tightly by pulling back and forth on the child seat at the belt path. It
should not move more than 1 inch (25.4 mm) in any
direction.
226 SAFETY
Page 229 of 580
How To Stow An Unused Switchable-ALR (ALR)
Seat Belt:
When using the LATCH attaching system to install a child
restraint, stow all ALR seat belts that are not being used by
other occupants or being used to secure child restraints.
An unused belt could injure a child if they play with it and
accidentally lock the seat belt retractor. Before installing a
child restraint using the LATCH system, buckle the seat
belt behind the child restraint and out of the child’s reach.
If the buckled seat belt interferes with the child restraint
installation, instead of buckling it behind the child re-
straint, route the seat belt through the child restraint belt
path and then buckle it. Do not lock the seat belt. Remind
all children in the vehicle that the seat belts are not toys and
that they should not play with them.