2017 Hyundai Sonata Plug-in Hybrid clock
[x] Cancel search: clockPage 16 of 744

I
IN
N S
ST
T R
R U
U M
M E
EN
N T
T
P
P A
A N
N E
EL
L
O
O V
VE
ER
R V
V I
IE
E W
W
1-5
Your vehicle at a glance
1
The actual shape may differ from the illustration. 1. Light control/Turn signals ..............3-116
2. Steering wheel audio controls*/
Bluetooth®wireless technology
hands-free controls* ..........................4-3
3. Instrument cluster ..........................3-60
4. Horn ................................................3-18
5. Driver’s front air bag........................2-49
6. Wiper/Washer................................3-128
7. Cruise controls* ..............................5-60
8. Engine Start/Stop button ..................5-5
9. Automatic transaxle
..........................5-12
10. Drive mode integrated control system ..................................5-41/5-43
11. Rear parking assist system ........3-131
12. EPB (Electronic Parking Brake)* ..5-22
13. AUTO HOLD ................................5-28
14. Audio system/Navigation system ....4-4
15. Digital Clock ................................3-159
16. Climate control system ..............3-136
17. Power outlet ................................3-157
18. AUX, USB and iPod
®port ..............4-2
19. Passenger’s front air bag ..............2-49
20. Glove box ....................................3-154
21. HEV button ..................................H-26
* : if equipped
OLFH016004N
■ Type A
■Type B
Page 22 of 744

Safety Precautions
Adjusting the seats so that you are sit-
ting in a safe, comfortable position
plays an important role in driver and
passenger safety together with the
seat belts and air bags in an accident.
Air bags
You can take steps to reduce the risk
of being injured by an inflating air
bag. Sitting too close to an air bag
greatly increases the risk of injury in
the event the air bag inflates.The National Highway Traffic Safety
Administration (NHTSA) recommends
that drivers allow at least 10 inches
(25 cm) between the center of the
steering wheel and their chest.
Seat belts
Always fasten your seat belt before
starting any trip.
At all times, passengers should sit
upright and be properly restrained.
Infants and small children must be
restrained in appropriate child restraint
systems. Children who have outgrown
a booster seat and adults must be
restrained using the seat belts.
Do not use a cushion that
reduces friction between the seat
and the passenger. The passen-
ger’s hips may slide under the
lap portion of the seat belt during
an accident or a sudden stop.
Serious or fatal internal injuries
could result because the seat
belt cannot operate properly.
WARNING To reduce the risk of serious
injury or death from an inflating
air bag, take the following pre-
cautions:
Adjust the driver’s seat as far to
the rear as possible while main-
taining the ability to maintain
full control of the vehicle.
Adjust the front passenger seat
as far to the rear as possible.
Hold the steering wheel by the
rim with hands at the 9 o’clock
and 3 o’clock positions to mini-
mize the risk of injuries to your
hands and arms.
NEVER place anything or any-
one between the steering wheel
and the air bag.
Do not allow the front passen-
ger to place feet or legs on the
dashboard to minimize the risk
of leg injuries.
WARNING
2-5
Safety system of your vehicle
2
Page 68 of 744

2-51
Safety system of your vehicle
2
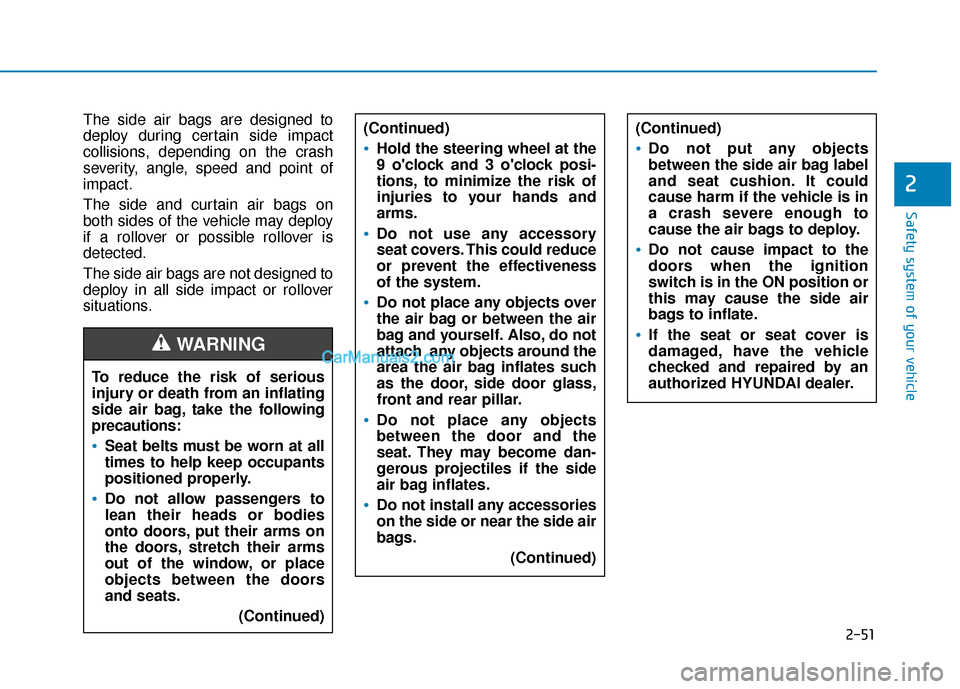
The side air bags are designed to
deploy during certain side impact
collisions, depending on the crash
severity, angle, speed and point of
impact.
The side and curtain air bags on
both sides of the vehicle may deploy
if a rollover or possible rollover is
detected.
The side air bags are not designed to
deploy in all side impact or rollover
situations.To reduce the risk of serious
injury or death from an inflating
side air bag, take the follo wing
precautions:
Seat belts must be worn at all
times to help keep occupants
positioned properly.
Do not allow passengers to
lean their heads or bodies
onto doors, put their arms on
the doors, stretch their arms
out of the window, or place
objects between the doors
and seats.
(Continued)
WARNING
(Continued)
Hold the steering wheel at the
9 o'clock and 3 o'clock posi-
tions, to minimize the risk of
injuries to your hands and
arms.
Do not use any accessory
seat covers. This could reduce
or prevent the effectiveness
of the system.
Do not place any objects over
the air bag or between the air
bag and yourself. Also, do not
attach any objects around the
area the air bag inflates such
as the door, side door glass,
front and rear pillar.
Do not place any objects
between the door and the
seat. They may become dan-
gerous projectiles if the side
air bag inflates.
Do not install any accessories
on the side or near the side air
bags.(Continued)
(Continued)
Do not put any objects
between the side air bag label
and seat cushion. It could
cause harm if the vehicle is in
a crash severe enough to
cause the air bags to deploy.
Do not cause impact to the
doors when the ignition
switch is in the ON position or
this may cause the side air
bags to inflate.
If the seat or seat cover is
damaged, have the vehicle
checked and repaired by an
authorized HYUNDAI dealer.
Page 72 of 744

2-55
Safety system of your vehicle
2
There are even circumstancesunder which contact with the air
bag can cause fatal injuries, espe-
cially if the occupant is positioned
excessively close to the air bag.
You can take steps to reduce the risk
of being injured by an inflating air
bag. The greatest risk is sitting too
close to the air bag. An air bag needs
about 10 inches (25 cm) of space to
inflate. NHTSA recommends that
drivers allow at least 10 inches
(25 cm) between the center of the
steering wheel and the chest. When the SRSCM detects a suffi-
ciently severe impact to the front of
the vehicle, it will automatically
deploy the front air bags.
OHM039102N
■Driver’s front air bag (1)
To reduce the risk of serious
injury or death from an inflating
air bag, take the following pre-
cautions:
NEVER place a child restraint
in the front passenger seat.
Always properly restrain chil-
dren under age 13 in the rear
seats of the vehicle.
Adjust the front passenger’s
and driver’s seats as far to the
rear as possible while allow-
ing you to maintain full con-
trol of the vehicle.
Hold the steering wheel with
hands at the 9 o’clock and 3
o’clock positions.
Never place anything or any-
one between the air bag and
the seat occupant.
Do not allow the front passen-
ger to place their feet or legs
on the dashboard.
WARNING
Page 89 of 744

Wipers and washers ..........................................3-128
Windshield Wipers ........................................................3-128
Windshield Washers .....................................................3-129
Driver Assist System .........................................3-130
Rear view camera .........................................................3-130
Rear parking assist system ........................................3-131
Rear parking assist system precautions .................3-134
Defroster .............................................................3-135
Rear Window Defroster ..............................................3-135
Automatic climate control system ...................3-136
Automatic heating and air conditioning ..................3-137
Manual heating and air conditioning .......................3-138
System operation ..........................................................3-146
System maintenance ....................................................3-148
Windshield defrosting and defogging ............3-150
Automatic Climate Control System ...........................3-151
Defogging logic ............................................................3-152
Climate control additional features.................3-153
Automatic Ventilation ...................................................3-153
Sunroof Inside Air Recirculation ...............................3-153
Storage compartment ........................................3-154
Center Console Storage ..............................................3-154
Glove Box ........................................................................\
3-154
Sunglass Holder.............................................................3-155
Multi box ........................................................................\
.3-155
Interior features.................................................3-156
Cup Holder ......................................................................3-\
156
Sunvisor ........................................................................\
...3-157
Power Outlet ..................................................................3-157
Clock ........................................................................\
.........3-159
Clothes Hanger ..............................................................3-160
Floor Mat Anchor(s).....................................................3-161
Side Curtain ....................................................................3-16\
2
Luggage Net Holder .....................................................3-1623
Page 141 of 744

3-54
Convenient features of your vehicle
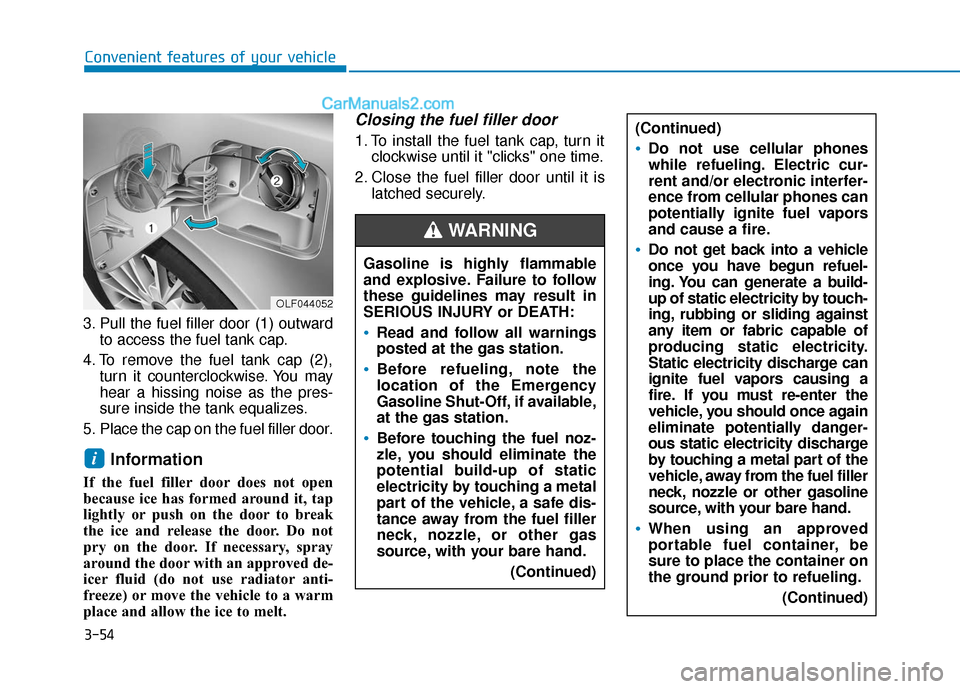
3. Pull the fuel filler door (1) outward to access the fuel tank cap.
4. To remove the fuel tank cap (2), turn it counterclockwise. You may
hear a hissing noise as the pres-
sure inside the tank equalizes.
5. Place the cap on the fuel filler door.
Information
If the fuel filler door does not open
because ice has formed around it, tap
lightly or push on the door to break
the ice and release the door. Do not
pry on the door. If necessary, spray
around the door with an approved de-
icer fluid (do not use radiator anti-
freeze) or move the vehicle to a warm
place and allow the ice to melt.
Closing the fuel filler door
1. To install the fuel tank cap, turn it clockwise until it "clicks" one time.
2. Close the fuel filler door until it is latched securely.
i
Gasoline is highly flammable
and explosive. Failure to follow
these guidelines may result in
SERIOUS INJURY or DEATH:
Read and follow all warnings
posted at the gas station.
Before refueling, note the
location of the Emergency
Gasoline Shut-Off, if available,
at the gas station.
Before touching the fuel noz-
zle, you should eliminate the
potential build-up of static
electricity by touching a metal
part of the vehicle, a safe dis-
tance away from the fuel filler
neck, nozzle, or other gas
source, with your bare hand.
(Continued)
WARNING
(Continued)
Do not use cellular phones
while refueling. Electric cur-
rent and/or electronic interfer-
ence from cellular phones can
potentially ignite fuel vapors
and cause a fire.
Do not get back into a vehicle
once you have begun refuel-
ing. You can generate a build-
up of static electricity by touch-
ing, rubbing or sliding against
any item or fabric capable of
producing static electricity.
Static electricity discharge can
ignite fuel vapors causing a
fire. If you must re-enter the
vehicle, you should once again
eliminate potentially danger-
ous static electricity discharge
by touching a metal part of the
vehicle, away from the fuel filler
neck, nozzle or other gasoline
source, with your bare hand.
When using an approved
portable fuel container, be
sure to place the container on
the ground prior to refueling.(Continued)
OLF044052
Page 144 of 744

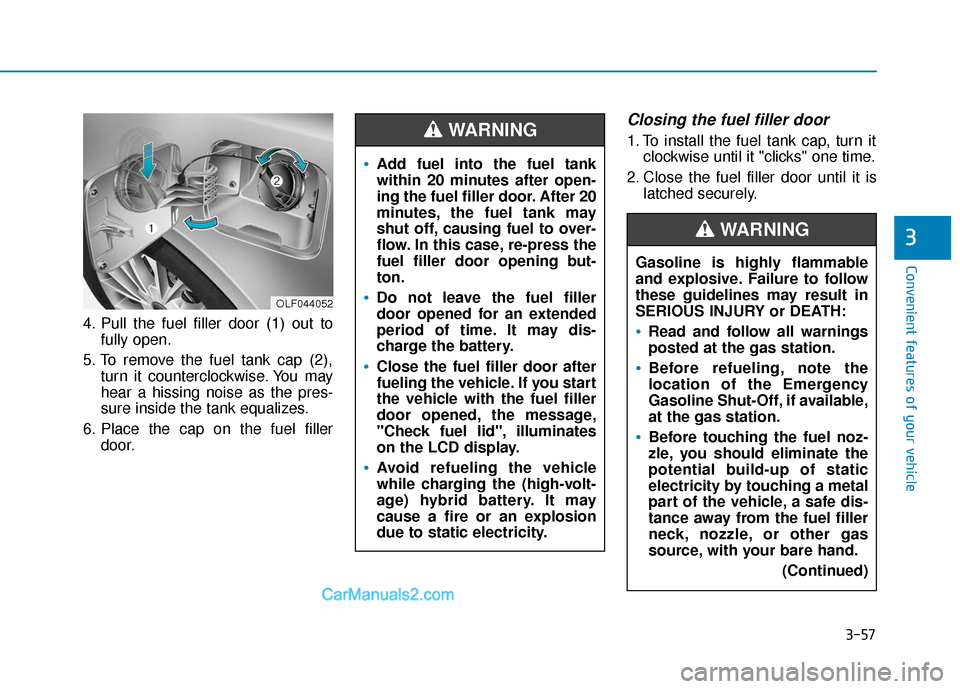
3-57
Convenient features of your vehicle
4. Pull the fuel filler door (1) out tofully open.
5. To remove the fuel tank cap (2), turn it counterclockwise. You may
hear a hissing noise as the pres-
sure inside the tank equalizes.
6. Place the cap on the fuel filler door.
Closing the fuel filler door
1. To install the fuel tank cap, turn itclockwise until it "clicks" one time.
2. Close the fuel filler door until it is latched securely.
3
OLF044052
Gasoline is highly flammable
and explosive. Failure to follow
these guidelines may result in
SERIOUS INJURY or DEATH:
Read and follow all warnings
posted at the gas station.
Before refueling, note the
location of the Emergency
Gasoline Shut-Off, if available,
at the gas station.
Before touching the fuel noz-
zle, you should eliminate the
potential build-up of static
electricity by touching a metal
part of the vehicle, a safe dis-
tance away from the fuel filler
neck, nozzle, or other gas
source, with your bare hand.
(Continued)
WARNING
Add fuel into the fuel tank
within 20 minutes after open-
ing the fuel filler door. After 20
minutes, the fuel tank may
shut off, causing fuel to over-
flow. In this case, re-press the
fuel filler door opening but-
ton.
Do not leave the fuel filler
door opened for an extended
period of time. It may dis-
charge the battery.
Close the fuel filler door after
fueling the vehicle. If you start
the vehicle with the fuel filler
door opened, the message,
"Check fuel lid", illuminates
on the LCD display.
Avoid refueling the vehicle
while charging the (high-volt-
age) hybrid battery. It may
cause a fire or an explosion
due to static electricity.
WARNING
Page 246 of 744

3-159
Convenient features of your vehicle
3
Clock
With Audio system
Whenever the battery terminals or
related fuses are disconnected, you
must reset the time.
To set the time:Engine Start/Stop button must be in
the ACC or ON position.
• H (Hour, 1)
Each time you press the "H" button,
the clock will change backward by
one hour. Pressing and holding the
"H" button will change the clock
backward continuously.
Release the button at the desired time.
• M (Minute, 2)
Each time you press the "M" button ,
the clock will change backward by
one minute. Pressing and holding the
"M" button will change the clock
backward continuously.
Release the button at the desired time.
• Display conversion
To change the 12 hour format to the
24 hour format, press the "H" and
"M" button simultaneously for more
than 4 seconds.
For example, if the "H" and "M" but-
ton is pressed when the time is 10:15
p.m., the display will change to 22:15
With Navigation system
You can set the clock by using the
Navigation system.
Do not adjust the clock while
driving, you may lose your
steering control and cause an
accident that results in severe
personal injury or death.
WARNING
OLF044237
OLF044238