2017 Hyundai Sonata ignition
[x] Cancel search: ignitionPage 102 of 563

3-17
Convenient features of your vehicle
3
Auto Door Lock/Unlock Features
Impact sensing door unlocksystem
All doors will be automatically
unlocked when an impact causes the
air bags to deploy.
Speed sensing door lock system
All doors will be automatically locked
when vehicle speed exceeds 9 mph
(15 km/h).
All of the doors will be automatically
unlocked after the engine is turned off.
Shift lever auto door lock
All doors will be automatically locked
when shifting the shift lever out of P
(Park) with the engine running.
You can activate or deactivate the
Auto Door Lock/Unlock features from
the User Settings Mode on the LCD
display.
For more information, refer to the
"LCD Display" section in this
chapter.
Do not pull the inner door han-
dle of driver's (or passenger's)
door while the vehicle is mov-
ing.
WARNING
Always secure your vehicle.
Leaving your vehicle unlocked
increases the potential risk to
you or others from someone
hiding in your vehicle.
To secure your vehicle, while
depressing the brake, move the
shift lever to the P (Park) posi-
tion, engage the parking brake,
and place the ignition switch in
the LOCK/OFF position, close
all windows, lock all doors, and
always take the key with you.
WARNING
If people must spend a longer
time in the vehicle while it is
very hot or cold outside, there
is rick of injuries or danger to
life. Do not lock the vehicle from
the outside when there are peo-
ple in it.
WARNING
Opening a door when some-
thing is approaching may cause
damage or injury. Be careful
when opening doors and watch
for vehicles, motorcycles, bicy-
cles or pedestrians approach-
ing the vehicle in the path of the
door.
CAUTION
Page 104 of 563

3-19
Convenient features of your vehicle
This system helps to protect your
vehicle and valuables. The horn will
sound and the hazard warning lights
will blink continuously if any of the
following occurs:
- A door is opened without using theremote key or smart key.
- The trunk is opened without using the remote key or smart key.
- The engine hood is opened.
The alarm continues for 30 seconds, then the system resets. To turn off
the alarm, unlock the doors with
the remote key or smart key.
The Theft Alarm System automati-
cally sets 30 seconds after you lock
the doors and the trunk. For the sys-
tem to activate, you must lock the
doors and the trunk from outside the
vehicle with the remote key or smart
key or by pressing the button on the
outside of the door handles with the
smart key in your possession.
The hazard warning lights will blink
and the chime will sound once to
indicate the system is armed. Once the security system is set,
opening any door, the trunk, or the
hood without using the remote key or
smart key will cause the alarm to
activate.
The Theft Alarm System will not set if
the hood, the trunk, or any door is
not fully closed. If the system will not
set, check the hood, the trunk, or the
doors are fully closed.
Do not attempt to alter this system or
add other devices to it.Information
• Do not lock the doors until all pas-
sengers have left the vehicle. If the
remaining passenger leaves the
vehicle when the system is armed,
the alarm will be activated.
• If the vehicle is not disarmed with the remote key or smart key, open the
doors by using the mechanical key
and place the ignition switch in the
ON position (for remote key) or start
the engine (for smart key) by direct-
ly pressing the ignition switch with
the smart key.
• When the system is disarmed but a door or trunk is not opened within 30
seconds, the system will be rearmed.
i
T TH
H E
EF
FT
T -
-A
A L
LA
A R
RM
M
S
S Y
Y S
ST
T E
EM
M
3
Page 105 of 563
3-20
Convenient features of your vehicle
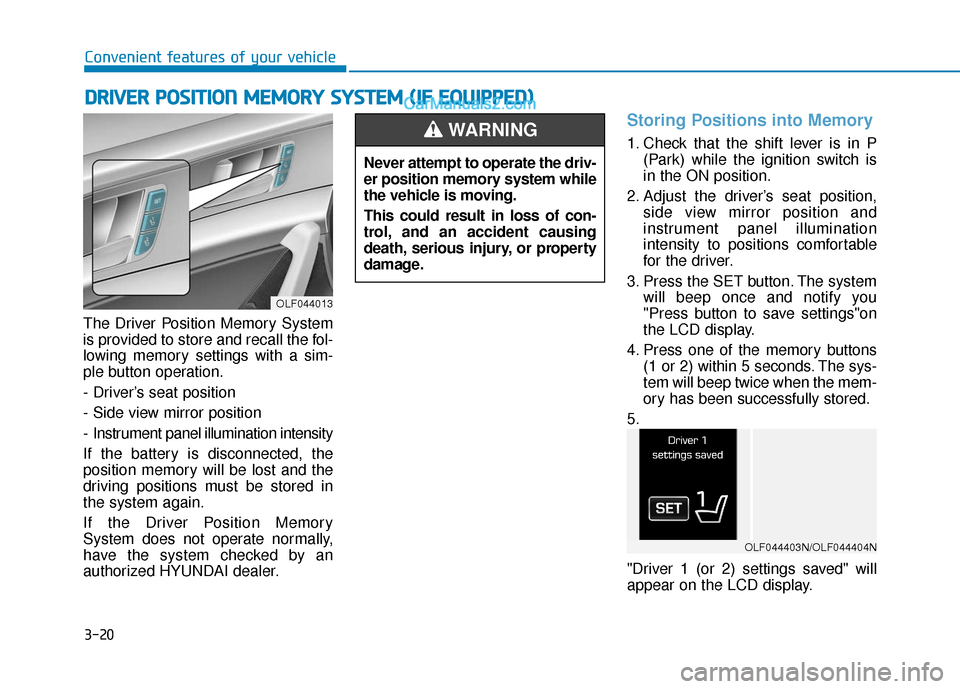
The Driver Position Memory System
is provided to store and recall the fol-
lowing memory settings with a sim-
ple button operation.
- Driver’s seat position
- Side view mirror position
- Instrument panel illumination intensity
If the battery is disconnected, the
position memory will be lost and the
driving positions must be stored in
the system again.
If the Driver Position Memory
System does not operate normally,
have the system checked by an
authorized HYUNDAI dealer.
Storing Positions into Memory
1. Check that the shift lever is in P (Park) while the ignition switch is
in the ON position.
2. Adjust the driver’s seat position, side view mirror position and
instrument panel illumination
intensity to positions comfortable
for the driver.
3. Press the SET button. The system will beep once and notify you
"Press button to save settings"on
the LCD display.
4. Press one of the memory buttons (1 or 2) within 5 seconds. The sys-
tem will beep twice when the mem-
ory has been successfully stored.
5.
"Driver 1 (or 2) settings saved" will
appear on the LCD display.
D D R
RI
IV
V E
ER
R
P
P O
O S
SI
IT
T I
IO
O N
N
M
M E
EM
M O
OR
RY
Y
S
S Y
Y S
ST
T E
EM
M
(
( I
IF
F
E
E Q
Q U
UI
IP
P P
PE
ED
D )
)
OLF044013
Never attempt to operate the driv-
er position memory system while
the vehicle is moving.
This could result in loss of con-
trol, and an accident causing
death, serious injury, or property
damage.
WARNING
OLF044403N/OLF044404N
Page 106 of 563
3-21
Convenient features of your vehicle
3
Recalling positions from memory
1. Check that the shift lever is in P(Park) while the ignition switch is
in the ON position.
2. Press the desired memory button (1 or 2). The system will beep once,
and then the driver’s seat position,
side view mirror position and instru-
ment panel illumination intensity
will automatically adjust to the
stored positions.
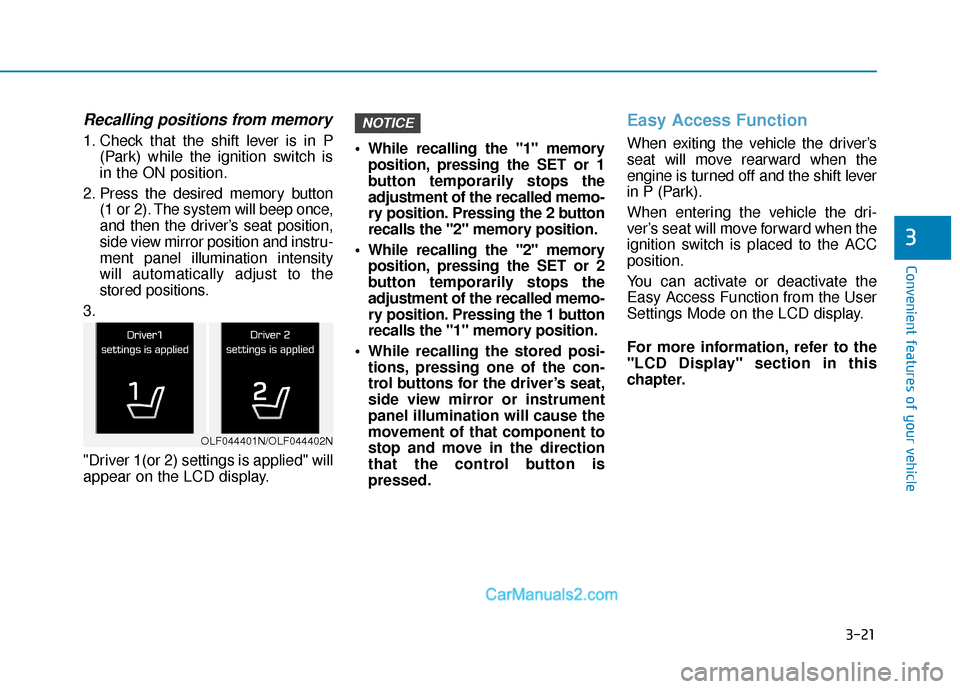
3.
"Driver 1(or 2) settings is applied" will
appear on the LCD display. While recalling the "1" memory
position, pressing the SET or 1
button temporarily stops the
adjustment of the recalled memo-
ry position. Pressing the 2 button
recalls the "2" memory position.
While recalling the "2" memory position, pressing the SET or 2
button temporarily stops the
adjustment of the recalled memo-
ry position. Pressing the 1 button
recalls the "1" memory position.
While recalling the stored posi- tions, pressing one of the con-
trol buttons for the driver’s seat,
side view mirror or instrument
panel illumination will cause the
movement of that component to
stop and move in the direction
that the control button is
pressed.
Easy Access Function
When exiting the vehicle the driver’s
seat will move rearward when the
engine is turned off and the shift lever
in P (Park).
When entering the vehicle the dri-
ver’s seat will move forward when the
ignition switch is placed to the ACC
position.
You can activate or deactivate the
Easy Access Function from the User
Settings Mode on the LCD display.
For more information, refer to the
"LCD Display" section in this
chapter.
NOTICE
OLF044401N/OLF044402N
Page 107 of 563

3-22
Convenient features of your vehicle
S
ST
T E
EE
ER
R I
IN
N G
G
W
W H
HE
EE
EL
L
Electric Power Steering (EPS)
The system assists you with steering
the vehicle. If the engine is turned off
or if the power steering system
becomes inoperative, you may still
steer the vehicle, but it will require
increased steering effort.
Should you notice any change in the
effort required to steer during normal
vehicle operation, have the system
checked by an authorized HYUNDAI
dealer.
Information
The following symptoms may occur
during normal vehicle operation:
• The steering effort may be high
immediately after placing the igni-
tion switch in the ON position.
This happens as the system per-
forms the EPS system diagnostics.
When the diagnostics is completed,
the steering wheel will return to its
normal condition.
• A click noise may be heard from the EPS relay after the ignition switch is
in the ON or OFF position.
• Motor noise may be heard when the vehicle is at a stop or at a low driv-
ing speed.
• When you operate the steering wheel in low temperature, abnormal
noise may occur. If temperature
rises, the noise will disappear. This
is a normal condition.
i
If the Electric Power Steering
System does not operate nor-
mally, the warning light ( ) will
illuminate on the instrument
cluster. You may steer the vehi-
cle, but it will require increased
steering efforts. Take your vehi-
cle to an authorized HYUNDAI
dealer and have the system
checked as soon as possible.
CAUTION
Page 108 of 563
3-23
Convenient features of your vehicle
3
Tilt Steering / Telescope Steering
Adjust the steering wheel so it points
toward your chest, not toward your
face. Make sure you can see the
instrument panel warning lights and
gauges. After adjusting, push the
steering wheel both up and down to
be certain it is locked in position.
Always adjust the position of the
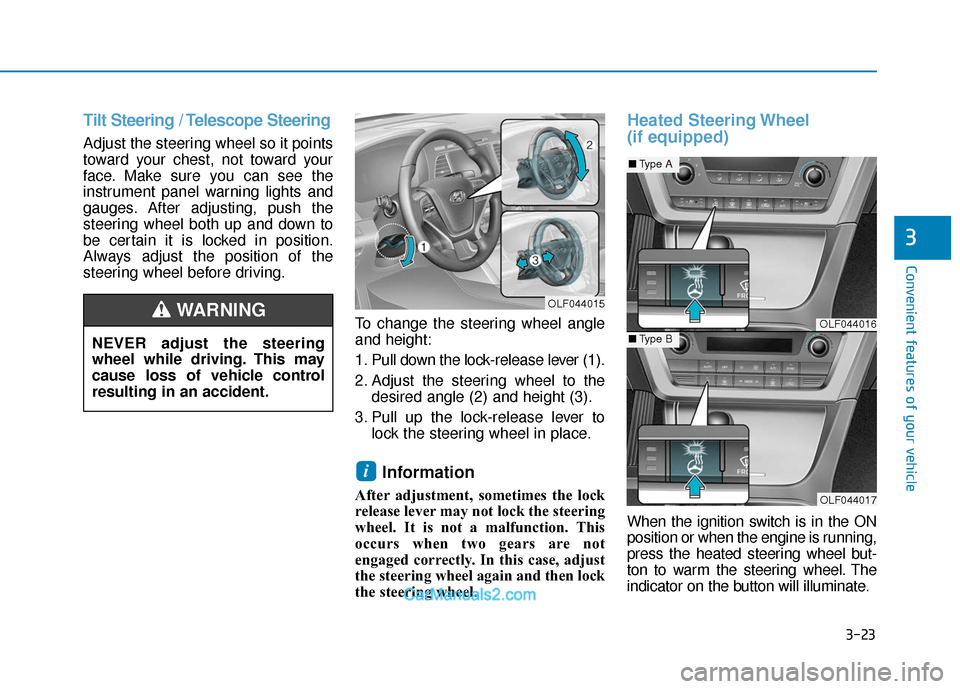
steering wheel before driving.To change the steering wheel angle
and height:
1. Pull down the lock-release lever (1).
2. Adjust the steering wheel to thedesired angle (2) and height (3).
3. Pull up the lock-release lever to lock the steering wheel in place.
Information
After adjustment, sometimes the lock
release lever may not lock the steering
wheel. It is not a malfunction. This
occurs when two gears are not
engaged correctly. In this case, adjust
the steering wheel again and then lock
the steering wheel.
Heated Steering Wheel
(if equipped)
When the ignition switch is in the ON
position or when the engine is running,
press the heated steering wheel but-
ton to warm the steering wheel. The
indicator on the button will illuminate.
i
OLF044015
OLF044016
OLF044017
■Type A
■Type BNEVER adjust the steering
wheel while driving. This may
cause loss of vehicle control
resulting in an accident.
WARNING
Page 113 of 563
3-28
Convenient features of your vehicle
Compass function
The Compass can be turned ON and
OFF and will remember the last state
when the ignition is cycled. To turn
the display feature ON/OFF:
1. Press and release the buttonwithin 1 second to turn the display
feature OFF.
2. Press and release the button again within 1 second to turn the
display back ON.
Additional options can be set with
press and hold sequences of the
button and are detailed below.
There is a difference between mag-
netic north and true north. To com-
pensate for this difference you will
need to adjust the Zone setting based
on where you live.
B520C05NF
Page 115 of 563
3-30
Convenient features of your vehicle
Programming HomeLink®
Please note the following:
When programming a garage dooropener, it is advised to park the
vehicle outside of the garage.
It is recommended that a new bat- tery be placed in the hand-held
transmitter of the device being pro-
grammed to HomeLink
®for quicker
training and accurate transmission
of the radio-frequency signal.
Some vehicles may require the ignition switch to be placed in the
ACC (or "Accessories") position for
programming and/or operation of
HomeLink
®.
In the event that there are still pro- gramming difficulties or questions
after following the programming
steps listed below, contact
HomeLink
®at: www.homelink.com
or by calling 1-800-355-3515.
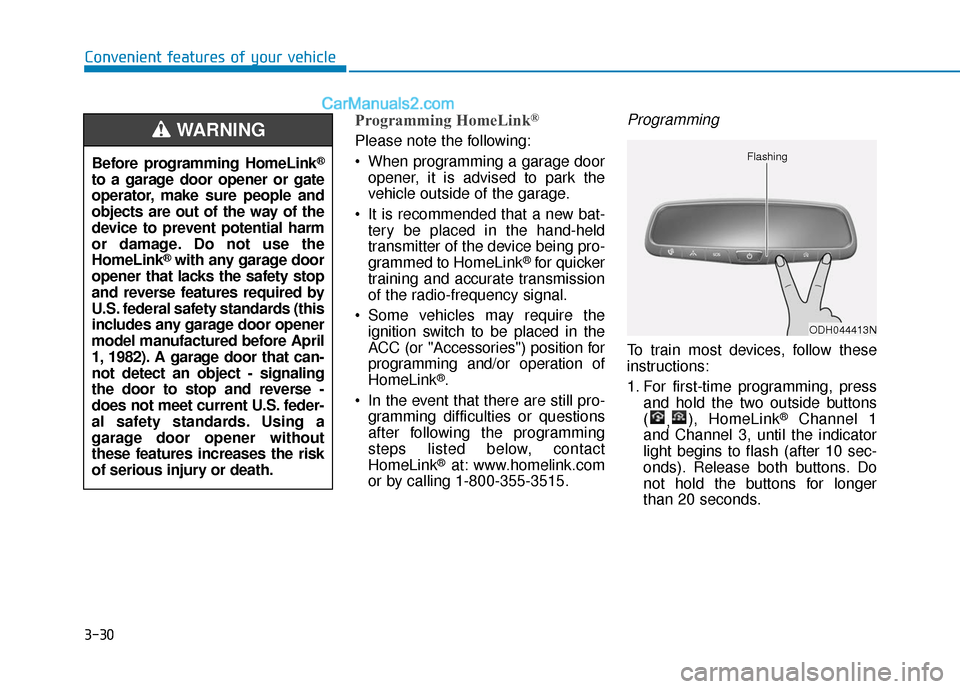
Programming
To train most devices, follow these
instructions:
1. For first-time programming, press and hold the two outside buttons
( ,), HomeLink
®Channel 1
and Channel 3, until the indicator
light begins to flash (after 10 sec-
onds). Release both buttons. Do
not hold the buttons for longer
than 20 seconds.
ODH044413N
Flashing
Before programming HomeLink®
to a garage door opener or gate
operator, make sure people and
objects are out of the way of the
device to prevent potential harm
or damage. Do not use the
HomeLink
®with any garage door
opener that lacks the safety stop
and reverse features required by
U.S. federal safety standards (this
includes any garage door opener
model manufactured before April
1, 1982). A garage door that can-
not detect an object - signaling
the door to stop and reverse -
does not meet current U.S. feder-
al safety standards. Using a
garage door opener without
these features increases the risk
of serious injury or death.
WARNING