2017 Hyundai Sonata Hybrid belt
[x] Cancel search: beltPage 474 of 562

7
Maintenance
7-17
Normal Maintenance Schedule (CONT.)
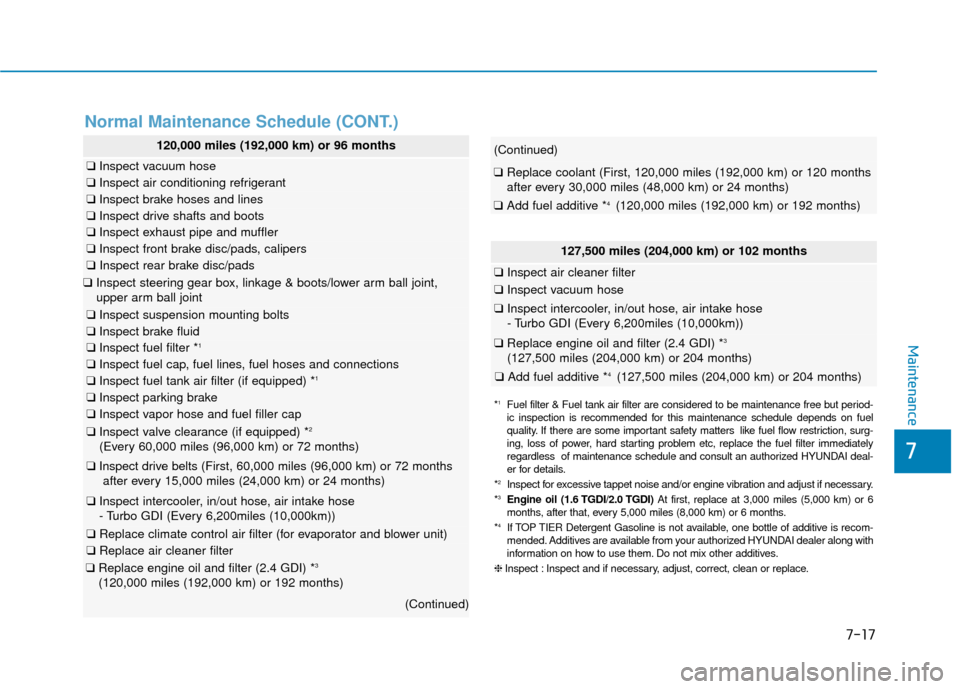
120,000 miles (192,000 km) or 96 months
❑Inspect vacuum hose
❑Inspect air conditioning refrigerant
❑Inspect brake hoses and lines
❑Inspect drive shafts and boots
❑Inspect exhaust pipe and muffler
❑Inspect front brake disc/pads, calipers
❑Inspect rear brake disc/pads
❑Inspect steering gear box, linkage & boots/lower arm ball joint,
upper arm ball joint
❑ Inspect suspension mounting bolts
❑Inspect brake fluid
❑Inspect fuel filter *1
❑Inspect fuel cap, fuel lines, fuel hoses and connections
❑Inspect fuel tank air filter (if equipped) *1
❑Inspect parking brake
❑Inspect vapor hose and fuel filler cap
❑Inspect valve clearance (if equipped) *2
(Every 60,000 miles (96,000 km) or 72 months)
❑Inspect drive belts (First, 60,000 miles (96,000 km) or 72 months
after every 15,000 miles (24,000 km) or 24 months)
❑ Inspect intercooler, in/out hose, air intake hose
- Turbo GDI (Every 6,200miles (10,000km))
❑ Replace climate control air filter (for evaporator and blower unit)
❑Replace air cleaner filter
❑Replace engine oil and filter (2.4 GDI) *3
(120,000 miles (192,000 km) or 192 months)
(Continued)
*1Fuel filter & Fuel tank air filter are considered to be maintenance free\
but period-
ic inspection is recommended for this maintenance schedule depends on fuel
quality. If there are some important safety matters like fuel flow restriction, surg-
ing, loss of power, hard starting problem etc, replace the fuel filter immediately
regardless of maintenance schedule and consult an authorized HYUNDAI deal-
er for details.
*
2Inspect for excessive tappet noise and/or engine vibration and adjust if necessary.
*3Engine oil (1.6 TGDI/2.0 TGDI) At first, replace at 3,000 miles (5,000 km) or 6
months, after that, every 5,000 miles (8,000 km) or 6 months.
*
4If TOP TIER Detergent Gasoline is not available, one bottle of additive is recom-
mended. Additives are available from your authorized HYUNDAI dealer along with
information on how to use them. Do not mix other additives.
❈ Inspect : Inspect and if necessary, adjust, correct, clean or replace.
127,500 miles (204,000 km) or 102 months
❑ Inspect air cleaner filter
❑Inspect vacuum hose
❑Inspect intercooler, in/out hose, air intake hose
- Turbo GDI (Every 6,200miles (10,000km))
❑Replace engine oil and filter (2.4 GDI) *3
(127,500 miles (204,000 km) or 204 months)
❑ Add fuel additive *4 (127,500 miles (204,000 km) or 204 months)
(Continued)
❑Replace coolant (First, 120,000 miles (192,000 km) or 120 months
after every 30,000 miles (48,000 km) or 24 months)
❑ Add fuel additive *4 (120,000 miles (192,000 km) or 192 months)
Page 475 of 562

Maintenance
7-18
Normal Maintenance Schedule (CONT.)
135,000 miles (216,000 km) or 108 months
❑Inspect air cleaner filter
❑Inspect vacuum hose
❑Inspect air conditioning refrigerant
❑Inspect brake hoses and lines
❑Inspect drive shafts and boots
❑Inspect exhaust pipe and muffler
❑Inspect front brake disc/pads, calipers
❑Inspect rear brake disc/pads
❑Inspect steering gear box, linkage & boots/lower arm ball joint,
upper arm ball joint
❑ Inspect suspension mounting bolts
❑Inspect drive belts
(First, 60,000 miles (96,000 km) or 72 months
after every 15,000 miles (24,000 km) or 24 months)
❑ Inspect intercooler, in/out hose, air intake hose
- Turbo GDI (Every 6,200miles (10,000km))
❑ Replace climate control air filter (for evaporator and blower unit)
❑Replace engine oil and filter (2.4 GDI) *3
(135,000 miles (216,000 km) or 216 months)
❑Replace spark plugs (iridium coated), (1.6TGDI/2.0TGDI)
❑ Add fuel additive *4 (135,000 miles (216,000 km) or 216 months)
142,500 miles (228,000 km) or 114 months
❑Inspect air cleaner filter
❑Inspect vacuum hose
❑Inspect intercooler, in/out hose, air intake hose
- Turbo GDI (Every 6,200miles (10,000km))
❑Replace engine oil and filter (2.4 GDI) *3
(142,500 miles (228,000 km) or 228 months)
❑ Add fuel additive *4 (142,500 miles (228,000 km) or 228 months)
*3Engine oil (1.6 TGDI/2.0 TGDI) At first, replace at 3,000 miles (5,000 km) or
6 months, after that, every 5,000 miles (8,000 km) or 6 months.
*
4If TOP TIER Detergent Gasoline is not available, one bottle of additive is rec-
ommended. Additives are available from your authorized HYUNDAI dealer
along with information on how to use them. Do not mix other additives.
❈ Inspect : Inspect and if necessary, adjust, correct, clean or replace.
Page 476 of 562

7
Maintenance
7-19
150,000 miles (240,000 km) or 120 months
❑Inspect vacuum hose
❑Inspect air conditioning refrigerant
❑Inspect brake hoses and lines
❑Inspect drive shafts and boots
❑Inspect exhaust pipe and muffler
❑Inspect front brake disc/pads, calipers
❑Inspect rear brake disc/pads
❑Inspect steering gear box, linkage & boots/lower arm ball joint,
upper arm ball joint
❑ Inspect suspension mounting bolts
❑Inspect brake fluid
❑Inspect fuel filter *1
❑Inspect fuel lines, fuel hoses and connections
❑Inspect fuel tank air filter (if equipped) *1
❑Inspect parking brake
❑Inspect vapor hose and fuel filler cap
❑Inspect drive belts
(First, 60,000 miles (96,000 km) or 72 months
after every 15,000 miles (24,000 km) or 24 months)
❑ Inspect intercooler, in/out hose, air intake hose
- Turbo GDI (Every 6,200miles (10,000km))
❑Inspect ecoshift dual clutch transmission fluid (if equipped)
❑ Replace climate control air filter (for evaporator and blower unit)
❑Replace air cleaner filter
(Continued)
(Continued)
❑Replace engine oil and filter (2.4 GDI) *3
(150,000 miles (240,000 km) or 240 months)
❑Replace coolant (First, 60,000 miles (96,000 km) or 60 months
after every 30,000 miles (48,000 km) or 24 months)
❑ Add fuel additive *4 (150,000 miles (240,000 km) or 240 months)
Normal Maintenance Schedule (CONT.)
No check, No service required
❑Automatic transmission fluid (if equipped)
*1Fuel filter & Fuel tank air filter are considered to be maintenance free\
but peri-
odic inspection is recommended for this maintenance schedule depends on
fuel quality. If there are some important safety matters like fuel flow restric-
tion, surging, loss of power, hard starting problem etc, replace the fuel filter
immediately regardless of maintenance schedule and consult an authorized
HYUNDAI dealer for details.
*
3Engine oil (1.6 TGDI/2.0 TGDI) At first, replace at 3,000 miles (5,000 km) or
6 months, after that, every 5,000 miles (8,000 km) or 6 months.
*
4If TOP TIER Detergent Gasoline is not available, one bottle of additive is rec-
ommended. Additives are available from your authorized HYUNDAI dealer
along with information on how to use them. Do not mix other additives.
❈ Inspect : Inspect and if necessary, adjust, correct, clean or replace.
Page 478 of 562

7-21
7
Maintenance
E
EX
X P
PL
LA
A N
N A
AT
TI
IO
O N
N
O
O F
F
S
S C
C H
H E
ED
D U
U L
LE
E D
D
M
M A
AI
IN
N T
TE
EN
N A
AN
N C
CE
E
I
IT
T E
EM
M S
S
Engine Oil and Filter
The engine oil and filter should be
changed at the intervals specified in
the maintenance schedule. If the car
is being driven in severe conditions,
more frequent oil and filter changes
are required.
Drive Belts
Inspect all drive belts for evidence of
cuts, cracks, excessive wear or oil
saturation and replace if necessary.
Drive belts should be checked peri-
odically for proper tension and
adjusted as necessary.
Fuel Filter
A clogged filter can limit the speed at
which the vehicle may be driven,
damage the emission system and
cause multiple issues such as hard
starting. If an excessive amount of
foreign matter accumulates in the
fuel tank, the filter may require
replacement more frequently. After
installing a new filter, run the engine
for several minutes, and check for
leaks at the connections. Fuel filters
should be installed by an authorized
HYUNDAI dealer.
Fuel Lines, Fuel Hoses and
Connections
Check the fuel lines, fuel hoses and
connections for leakage and dam-
age. Have an authorized HYUNDAI
dealer replace any damaged or leak-
ing parts immediately.
Vapor Hose and Fuel Filler
Cap
The vapor hose and fuel filler cap
should be inspected at those inter-
vals specified in the maintenance
schedule. Make sure a new vapor
hose or fuel filler cap is correctly
replaced.
Air Cleaner Filter
A genuine HYUNDAI air cleaner filter
is recommended when the filter is
replaced.
Spark Plugs
Make sure to install new spark plugs
of the correct heat range.
Page 506 of 562

7-49
7
Maintenance
4. Tire ply composition andmaterial
The number of layers or plies of rub-
ber-coated fabric in the tire. Tire
manufacturers also must indicate the
materials in the tire, which include
steel, nylon, polyester, and others.
The letter "R" means radial ply con-
struction; the letter "D" means diago-
nal or bias ply construction; and the
letter "B" means belted-bias ply con-
struction.
5. Maximum permissible infla-tion pressure
This number is the greatest amount
of air pressure that should be put in
the tire. Do not exceed the maximum
permissible inflation pressure. Refer
to the Tire and Loading Information
label for recommended inflation
pressure.
6. Maximum load rating
This number indicates the maximum
load in kilograms and pounds that
can be carried by the tire. When
replacing the tires on the vehicle,
always use a tire that has the same
load rating as the factory installed
tire.
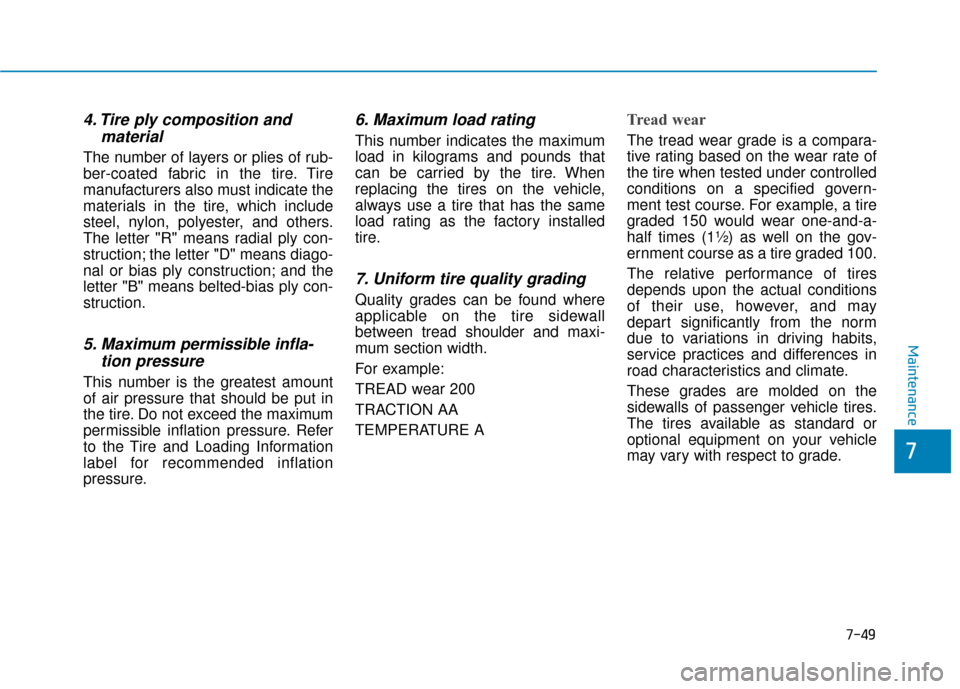
7. Uniform tire quality grading
Quality grades can be found where
applicable on the tire sidewall
between tread shoulder and maxi-
mum section width.
For example:
TREAD wear 200
TRACTION AA
TEMPERATURE A
Tread wear
The tread wear grade is a compara-
tive rating based on the wear rate of
the tire when tested under controlled
conditions on a specified govern-
ment test course. For example, a tire
graded 150 would wear one-and-a-
half times (1½) as well on the gov-
ernment course as a tire graded 100.
The relative performance of tires
depends upon the actual conditions
of their use, however, and may
depart significantly from the norm
due to variations in driving habits,
service practices and differences in
road characteristics and climate.
These grades are molded on the
sidewalls of passenger vehicle tires.
The tires available as standard or
optional equipment on your vehicle
may vary with respect to grade.
Page 508 of 562

7-51
7
Maintenance
Tire Terminology and
Definitions
Air Pressure
The amount of air inside the tire
pressing outward on the tire. Air
pressure is expressed in pounds per
square inch (psi) or kilopascal (kPa).
Accessory Weight
This means the combined weight of
optional accessories. Some exam-
ples of optional accessories are
automatic transmission, power
seats, and air conditioning.
Aspect Ratio
The relationship of a tire’s height to
its width.
Belt
A rubber coated layer of cords that is
located between the plies and the
tread. Cords may be made from steel
or other reinforcing materials.
Bead
The tire bead contains steel wires
wrapped by steel cords that hold the
tire onto the rim.
Bias Ply Tire
A pneumatic tire in which the plies
are laid at alternate angles less than
90 degrees to the centerline of the
tread.
Cold Tire Pressure
The amount of air pressure in a tire,
measured in pounds per square inch
(psi) or kilopascals (kPa) before a tire
has built up heat from driving.
Curb Weight
This means the weight of a motor
vehicle with standard and optional
equipment including the maximum
capacity of fuel, oil and coolant, but
without passengers and cargo.
DOT Markings
A code molded into the sidewall of a
tire signifying that the tire is in com-
pliance with the U.S. Department of
Transportation motor vehicle safety
standards. The DOT code includes
the Tire Identification Number (TIN),
an alphanumeric designator which
can also identify the tire manufactur-
er, production plant, brand and date
of production.
Page 512 of 562

7-55
7
Maintenance
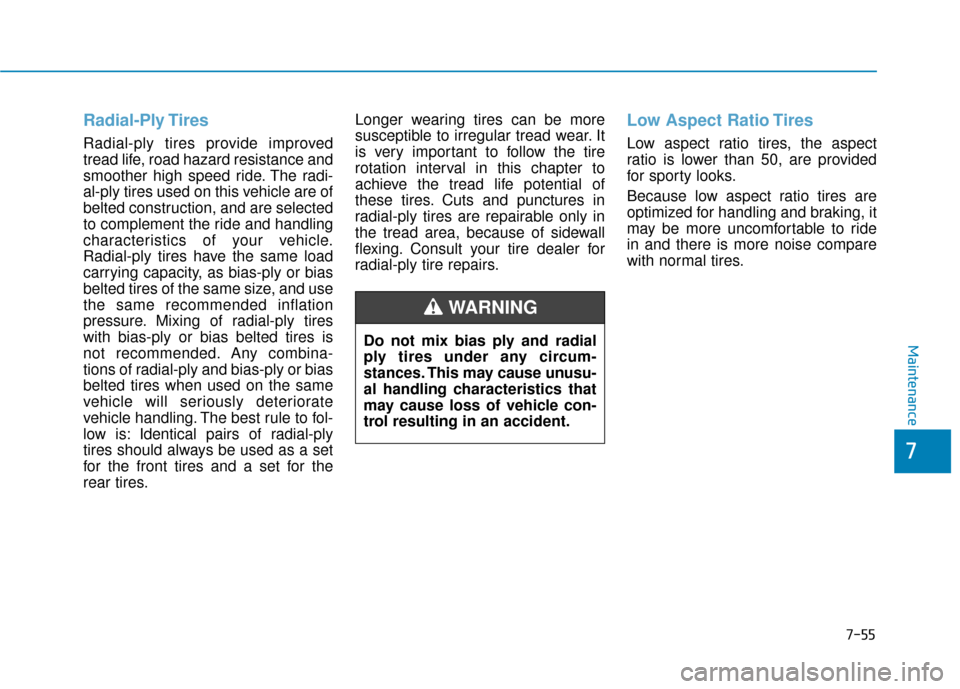
Radial-Ply Tires
Radial-ply tires provide improved
tread life, road hazard resistance and
smoother high speed ride. The radi-
al-ply tires used on this vehicle are of
belted construction, and are selected
to complement the ride and handling
characteristics of your vehicle.
Radial-ply tires have the same load
carrying capacity, as bias-ply or bias
belted tires of the same size, and use
the same recommended inflation
pressure. Mixing of radial-ply tires
with bias-ply or bias belted tires is
not recommended. Any combina-
tions of radial-ply and bias-ply or bias
belted tires when used on the same
vehicle will seriously deteriorate
vehicle handling. The best rule to fol-
low is: Identical pairs of radial-ply
tires should always be used as a set
for the front tires and a set for the
rear tires.Longer wearing tires can be more
susceptible to irregular tread wear. It
is very important to follow the tire
rotation interval in this chapter to
achieve the tread life potential of
these tires. Cuts and punctures in
radial-ply tires are repairable only in
the tread area, because of sidewall
flexing. Consult your tire dealer for
radial-ply tire repairs.
Low Aspect Ratio Tires
Low aspect ratio tires, the aspect
ratio is lower than 50, are provided
for sporty looks.
Because low aspect ratio tires are
optimized for handling and braking, it
may be more uncomfortable to ride
in and there is more noise compare
with normal tires.
Do not mix bias ply and radial
ply tires under any circum-
stances. This may cause unusu-
al handling characteristics that
may cause loss of vehicle con-
trol resulting in an accident.
WARNING
Page 536 of 562

7-79
7
Maintenance
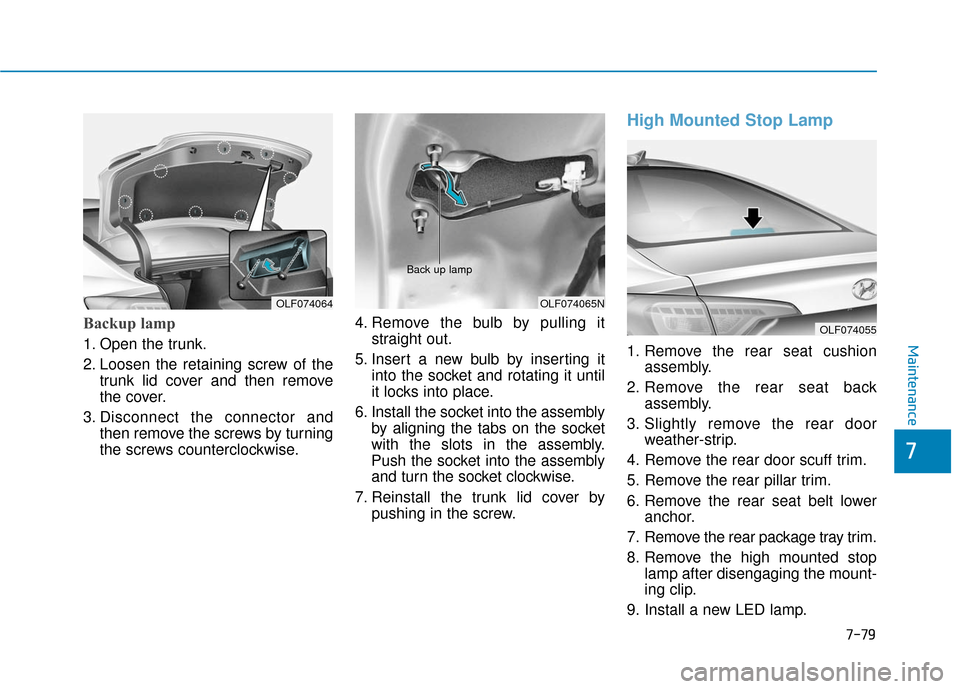
Backup lamp
1. Open the trunk.
2. Loosen the retaining screw of thetrunk lid cover and then remove
the cover.
3. Disconnect the connector and then remove the screws by turning
the screws counterclockwise. 4. Remove the bulb by pulling it
straight out.
5. Insert a new bulb by inserting it into the socket and rotating it until
it locks into place.
6. Install the socket into the assembly by aligning the tabs on the socket
with the slots in the assembly.
Push the socket into the assembly
and turn the socket clockwise.
7. Reinstall the trunk lid cover by pushing in the screw.
High Mounted Stop Lamp
1. Remove the rear seat cushion assembly.
2. Remove the rear seat back assembly.
3. Slightly remove the rear door weather-strip.
4. Remove the rear door scuff trim.
5. Remove the rear pillar trim.
6. Remove the rear seat belt lower anchor.
7. Remove the rear package tray trim.
8. Remove the high mounted stop lamp after disengaging the mount-
ing clip.
9. Install a new LED lamp.
OLF074064OLF074065N
Back up lamp
OLF074055