2017 Hyundai Santa Fe Sport break
[x] Cancel search: breakPage 7 of 614
1
2
3
4
5
6
7
8I
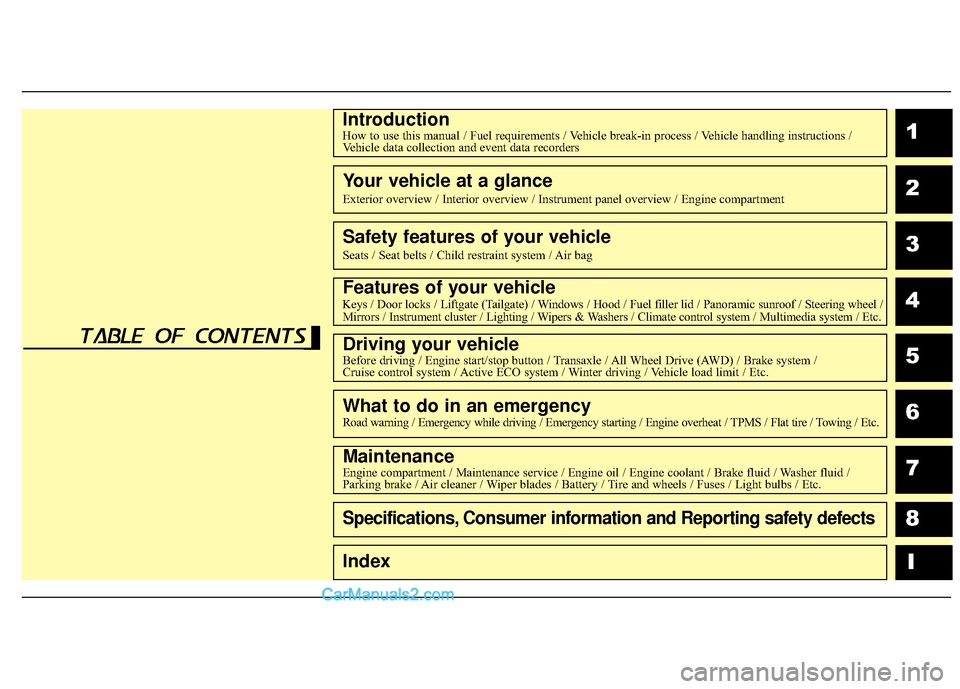
IntroductionHow to use this manual / Fuel requirements / Vehicle break-in process / Vehicle handling instructions /Vehicle data collection and event data recorders
Your vehicle at a glance
Exterior overview / Interior overview / Instrument panel overview / Engi\
ne compartment
Safety features of your vehicle
Seats / Seat belts / Child restraint system / Air bag
Features of your vehicleKeys / Door locks / Liftgate (Tailgate) / Windows / Hood / Fuel filler lid / Panoramic sunroof / Steering wheel /
Mirrors / Instrument cluster / Lighting / Wipers & Washers / Climate control system / Multimedia system / Etc.
Driving your vehicleBefore driving / Engine start/stop button / Transaxle / All Wheel Drive (AWD) / Brake system /
Cruise control system / Active ECO system / Winter driving / Vehicle load limit / Etc.
What to do in an emergencyRoad warning / Emergency while driving / Emergency starting / Engine overheat / TPMS / Flat tire / Towing / Etc.
MaintenanceEngine compartment / Maintenance service / Engine oil / Engine coolant /\
Brake fluid / Washer fluid /
Parking brake / Air cleaner / Wiper blades / Battery / Tire and wheels / Fuses / Light bulbs / Etc.
Specifications, Consumer information and Reporting safety defects
Index
table of contents
Page 8 of 614
1
Introduction
How to use this manual . . . . . . . . . . . . . . . . . . . . . . 1-2
Fuel requirements . . . . . . . . . . . . . . . . . . . . . . . . . . 1-2
• Gasoline containing alcohol and methanol . . . . . . . . . 1-3
• Other fuels . . . . . . . . . . . . . . . . . . . . . . . . . . . . . . . . . . . 1-\
3
• Gasoline containing MMT . . . . . . . . . . . . . . . . . . . . . . 1-4
• Do not use methanol . . . . . . . . . . . . . . . . . . . . . . . . . . . 1-4
• Fuel Additives . . . . . . . . . . . . . . . . . . . . . . . . . . . . . . . . 1-4
• Operation in foreign countries . . . . . . . . . . . . . . . . . . . 1-5
Vehicle break-in process . . . . . . . . . . . . . . . . . . . . . 1-6
Vehicle handling instructions . . . . . . . . . . . . . . . . . 1-6
Vehicle data collection and event data recorders . 1-7
Page 13 of 614
Introduction
61
VEHICLE BREAK-IN PROCESS
No special break-in period is needed.
By following a few simple precautions
for the first 600 miles (1,000 km) you
may add to the performance, econo-
my and life of your vehicle.
Do not race the engine.
While driving, keep your enginespeed (rpm, or revolutions per
minute) between 2,000 rpm and
4,000 rpm.
Do not maintain a single vehicle speed for long periods of time,
either fast or slow. Varying the
engine speed is needed to proper-
ly break-in the engine.
Avoid hard stops, except in emer- gencies, to allow the brakes to seat
properly. As with other vehicles of this type,
failure to operate this vehicle correct-
ly may result in loss of control, an
accident or vehicle rollover.
Specific design characteristics (high-
er ground clearance, track, etc.) give
this vehicle a higher center of gravity
than other types of vehicles. It is not
designed for cornering at the same
speeds as a conventional 2-wheel
drive sedans or sports coupe. Avoid
sharp turns or abrupt maneuvers.
Failure to operate this vehicle cor-
rectly may result in loss of control, an
accident or vehicle rollover.
Be sure
to read the “Reducing the risk of a
rollover” driving guidelines, in
section 5 of this manual.CALIFORNIA PROPO-
SITION 65 WARNING
Items contained in motor vehi-
cles or emitted from them are
known to the State of California
to cause cancer and birth
defects or reproductive harm.
These include:
ment components and materi-
als
subject to heat and wear
In addition, battery posts, termi-
nals and related accessories
contain lead, lead compounds
and other chemicals known to
the State of California to cause
cancer and reproductive harm.
VEHICLE HANDLING
INSTRUCTIONS
Page 66 of 614
Safety features of your vehicle
44
3
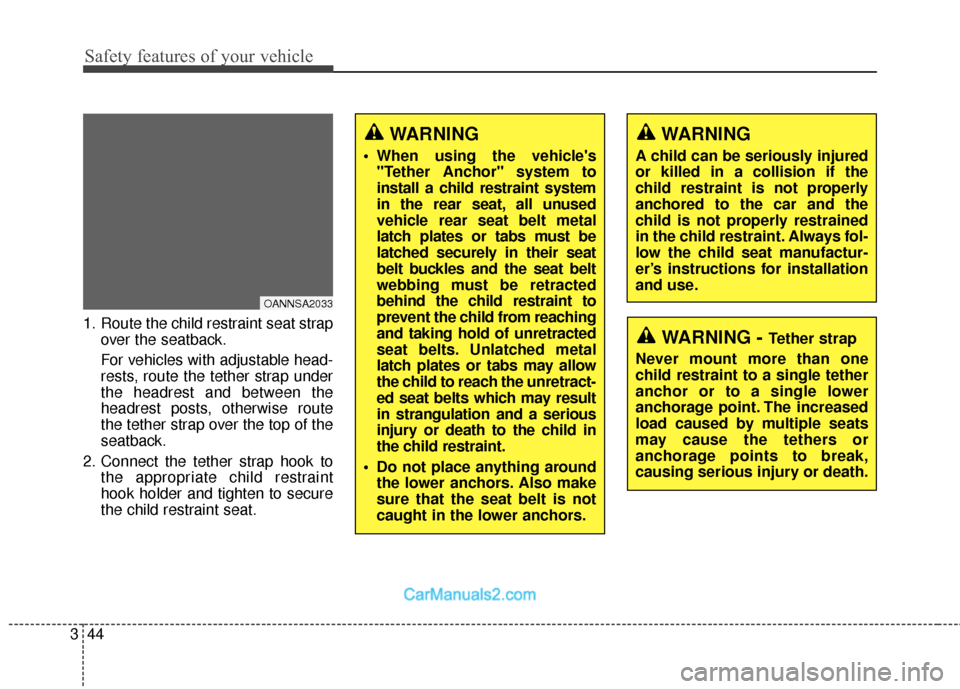
1. Route the child restraint seat strap
over the seatback.
For vehicles with adjustable head-
rests, route the tether strap under
the headrest and between the
headrest posts, otherwise route
the tether strap over the top of the
seatback.
2. Connect the tether strap hook to the appropriate child restraint
hook holder and tighten to secure
the child restraint seat.WARNING - Tether strap
Never mount more than one
child restraint to a single tether
anchor or to a single lower
anchorage point. The increased
load caused by multiple seats
may cause the tethers or
anchorage points to break,
causing serious injury or death.
WARNING
A child can be seriously injured
or killed in a collision if the
child restraint is not properly
anchored to the car and the
child is not properly restrained
in the child restraint. Always fol-
low the child seat manufactur-
er’s instructions for installation
and use.
WARNING
When using the vehicle's "Tether Anchor" system to
install a child restraint system
in the rear seat, all unused
vehicle rear seat belt metal
latch plates or tabs must be
latched securely in their seat
belt buckles and the seat belt
webbing must be retracted
behind the child restraint to
prevent the child from reaching
and taking hold of unretracted
seat belts. Unlatched metal
latch plates or tabs may allow
the child to reach the unretract-
ed seat belts which may result
in strangulation and a serious
injury or death to the child in
the child restraint.
Do not place anything around the lower anchors. Also make
sure that the seat belt is not
caught in the lower anchors.
OANNSA2033
Page 68 of 614
Safety features of your vehicle
46
3
LATCH anchors have been provided
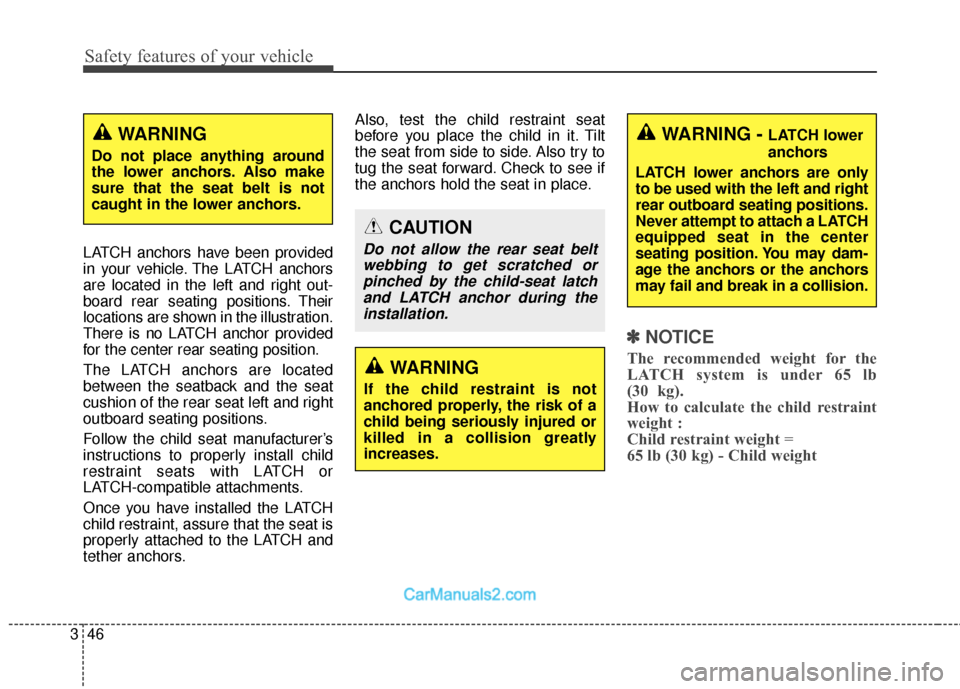
in your vehicle. The LATCH anchors
are located in the left and right out-
board rear seating positions. Their
locations are shown in the illustration.
There is no LATCH anchor provided
for the center rear seating position.
The LATCH anchors are located
between the seatback and the seat
cushion of the rear seat left and right
outboard seating positions.
Follow the child seat manufacturer’s
instructions to properly install child
restraint seats with LATCH or
LATCH-compatible attachments.
Once you have installed the LATCH
child restraint, assure that the seat is
properly attached to the LATCH and
tether anchors. Also, test the child restraint seat
before you place the child in it. Tilt
the seat from side to side. Also try to
tug the seat forward. Check to see if
the anchors hold the seat in place.
✽ ✽
NOTICE
The recommended weight for the
LATCH system is under 65 lb
(30 kg).
How to calculate the child restraint
weight :
Child restraint weight =
65 lb (30 kg) - Child weightWARNING
If the child restraint is not
anchored properly, the risk of a
child being seriously injured or
killed in a collision greatly
increases.
WARNING - LATCH lower
anchors
LATCH lower anchors are only
to be used with the left and right
rear outboard seating positions.
Never attempt to attach a LATCH
equipped seat in the center
seating position. You may dam-
age the anchors or the anchors
may fail and break in a collision.
CAUTION
Do not allow the rear seat belt webbing to get scratched orpinched by the child-seat latchand LATCH anchor during theinstallation.
WARNING
Do not place anything around
the lower anchors. Also make
sure that the seat belt is not
caught in the lower anchors.
Page 143 of 614
Features of your vehicle
46
4
Opening the fuel filler door
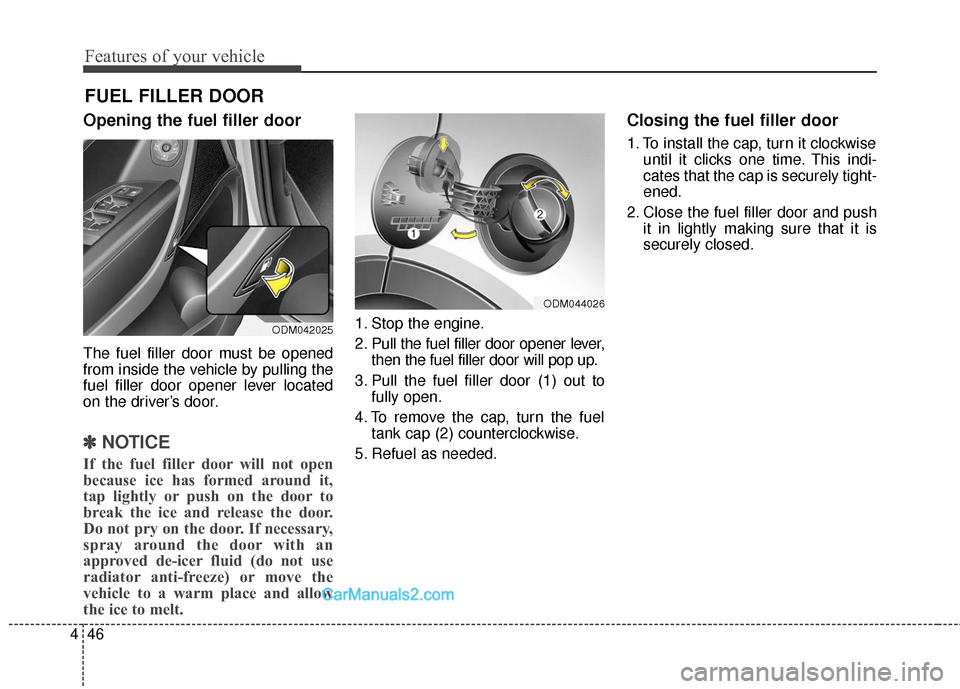
The fuel filler door must be opened
from inside the vehicle by pulling the
fuel filler door opener lever located
on the driver’s door.
✽ ✽
NOTICE
If the fuel filler door will not open
because ice has formed around it,
tap lightly or push on the door to
break the ice and release the door.
Do not pry on the door. If necessary,
spray around the door with an
approved de-icer fluid (do not use
radiator anti-freeze) or move the
vehicle to a warm place and allow
the ice to melt.
1. Stop the engine.
2. Pull the fuel filler door opener lever,
then the fuel filler door will pop up.
3. Pull the fuel filler door (1) out to fully open.
4. To remove the cap, turn the fuel tank cap (2) counterclockwise.
5. Refuel as needed.
Closing the fuel filler door
1. To install the cap, turn it clockwise until it clicks one time. This indi-
cates that the cap is securely tight-
ened.
2. Close the fuel filler door and push it in lightly making sure that it is
securely closed.
FUEL FILLER DOOR
ODM042025
ODM044026
Page 145 of 614
Features of your vehicle
48
4
(Continued)
When refueling, always shut
the engine off. Sparks pro-
duced by electrical compo-
nents related to the engine
can ignite fuel vapors causing
a fire. Once refueling is com-
plete, check to make sure the
filler cap and filler door are
securely closed, before start-
ing the engine.
DO NOT use matches or a lighter and DO NOT SMOKE or
leave a lit cigarette in your
vehicle while at a gas station
especially during refueling.
Automotive fuel is highly
flammable and can, when
ignited, result in fire.
If a fire breaks out during refu- eling, leave the vicinity of the
vehicle, and immediately con-
tact the manager of the gas
station and then contact the
local fire department or 911.
Follow any safety instructions
they provide.(Continued)
When using an approvedportable fuel container, be sure
to place the container on the
ground prior to refueling. Static
electricity discharge from the
container can ignite fuel vapors
causing a fire. Once refueling
has begun, contact with the
vehicle should be maintained
until the filling is complete.
Use only approved portable
plastic fuel containers designed
to carry and store gasoline.
Do not use cellular phones while refueling. Electric cur-
rent and/or electronic interfer-
ence from cellular phones can
potentially ignite fuel vapors
causing a fire.
(Continued)CAUTION
Make sure to refuel your vehi-cle according to the "Fuelrequirements" suggested insection 1.
If the fuel filler cap requires replacement, use only a gen-uine HYUNDAI cap or theequivalent specified for yourvehicle. An incorrect fuel fillercap can result in a seriousmalfunction of the fuel systemor emission control system.
Do not spill fuel on the exterior surfaces of the vehicle. Anytype of fuel spilled on paintedsurfaces may damage the paint.
After refueling, make sure the fuel cap is installed securelyto prevent fuel spillage in theevent of an accident.
Page 151 of 614
Features of your vehicle
54
4
Closing the sunroof
To close (or tilt down) the sunroof
- Pull the sunroof glass control lever
downward (or forward).
❈ When you pull the sunroof glass
control lever downward (or for-
ward) with the sunshade opened,
the glass will be closed (or tilt
down).
To stop the sunroof movement at any
point, pull or push the sunroof control
lever momentarily.
Automatic reversal
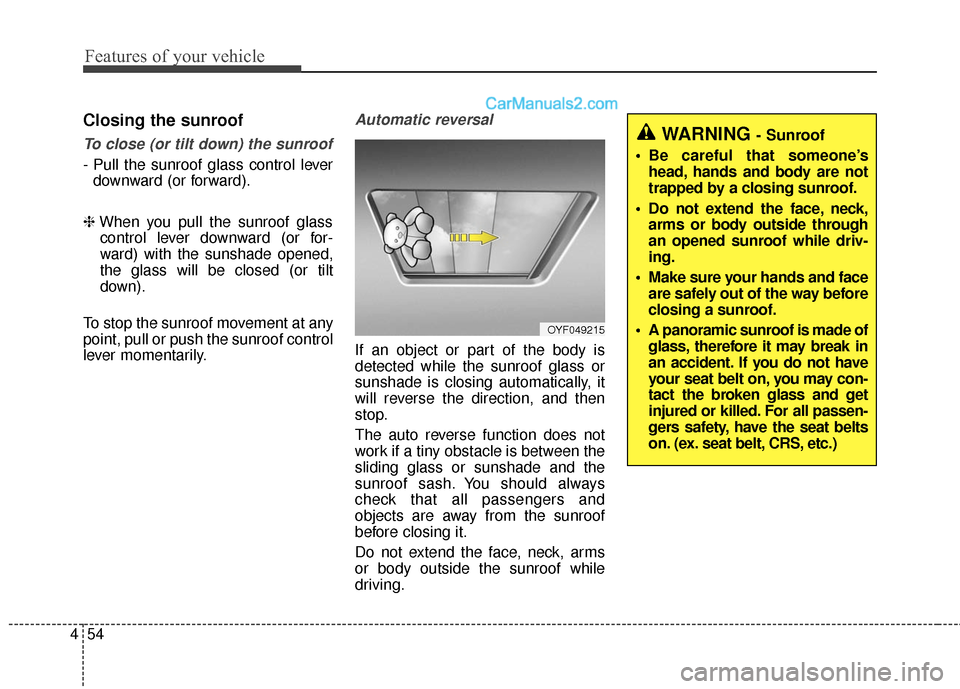
If an object or part of the body is
detected while the sunroof glass or
sunshade is closing automatically, it
will reverse the direction, and then
stop.
The auto reverse function does not
work if a tiny obstacle is between the
sliding glass or sunshade and the
sunroof sash. You should always
check that all passengers and
objects are away from the sunroof
before closing it.
Do not extend the face, neck, arms
or body outside the sunroof while
driving.
OYF049215
WARNING - Sunroof
Be careful that someone’s head, hands and body are not
trapped by a closing sunroof.
Do not extend the face, neck, arms or body outside through
an opened sunroof while driv-
ing.
Make sure your hands and face are safely out of the way before
closing a sunroof.
A panoramic sunroof is made of glass, therefore it may break in
an accident. If you do not have
your seat belt on, you may con-
tact the broken glass and get
injured or killed. For all passen-
gers safety, have the seat belts
on. (ex. seat belt, CRS, etc.)