2017 Hyundai Santa Fe Replace light
[x] Cancel search: Replace lightPage 52 of 569
331
Safety features of your vehicle
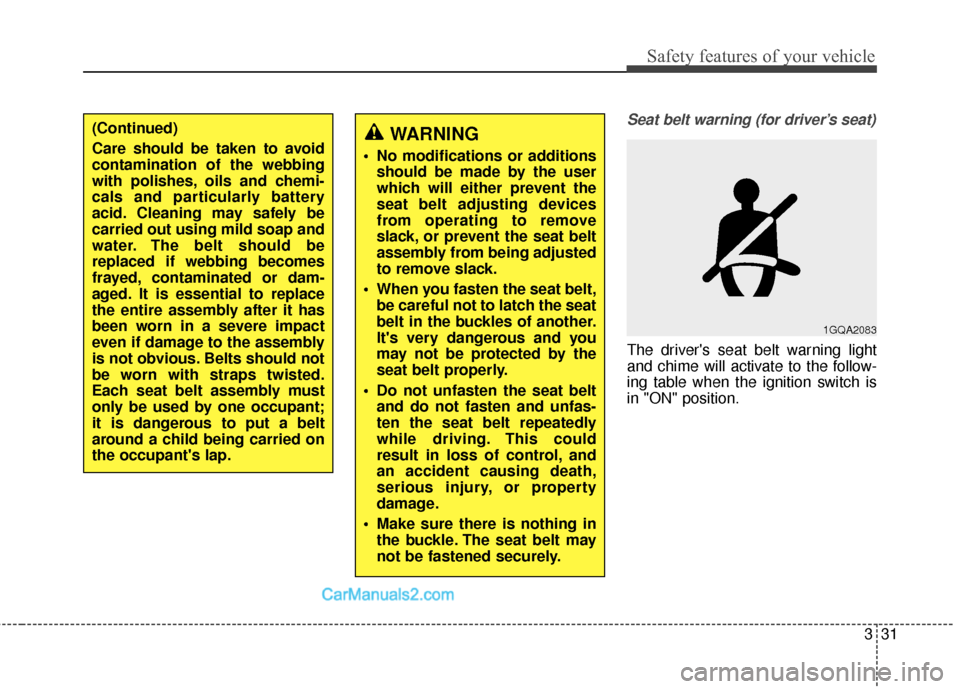
Seat belt warning (for driver’s seat)
The driver's seat belt warning light
and chime will activate to the follow-
ing table when the ignition switch is
in "ON" position.
WARNING
No modifications or additionsshould be made by the user
which will either prevent the
seat belt adjusting devices
from operating to remove
slack, or prevent the seat belt
assembly from being adjusted
to remove slack.
When you fasten the seat belt, be careful not to latch the seat
belt in the buckles of another.
It's very dangerous and you
may not be protected by the
seat belt properly.
Do not unfasten the seat belt and do not fasten and unfas-
ten the seat belt repeatedly
while driving. This could
result in loss of control, and
an accident causing death,
serious injury, or property
damage.
Make sure there is nothing in the buckle. The seat belt may
not be fastened securely.
1GQA2083
(Continued)
Care should be taken to avoid
contamination of the webbing
with polishes, oils and chemi-
cals and particularly battery
acid. Cleaning may safely be
carried out using mild soap and
water. The belt should be
replaced if webbing becomes
frayed, contaminated or dam-
aged. It is essential to replace
the entire assembly after it has
been worn in a severe impact
even if damage to the assembly
is not obvious. Belts should not
be worn with straps twisted.
Each seat belt assembly must
only be used by one occupant;
it is dangerous to put a belt
around a child being carried on
the occupant's lap.
Page 81 of 569

Safety features of your vehicle
60
3
Occupant classification system(Continued)
If the SRS air bag warning light
" " does not illuminate, or
continuously remains on after
illuminating for about 6 sec-
onds or blinks when the igni-
tion switch is turned to the ON
position, or after the engine is
started, comes on while driv-
ing, the SRS is not working
properly. If this occurs, have
your vehicle immediately
inspected by an authorized
HYUNDAI dealer.
Before you replace a fuse or disconnect a battery terminal,
turn the ignition switch to the
LOCK position and remove
the ignition key for ignition
key, and turn the engine
start/stop button to the OFF
position for smart key. Never
remove or replace the air bag
related fuse(s) when the igni-
tion switch is in the ON posi-
tion. Failure to heed this warn-
ing will cause the SRS air bag
warning light to illuminate.
OANNSA2003/OANNSA2002/OANNSA2004
■ Type B
■Type A
■ Type C
WARNING
If an air bag deploys, theremay be a loud noise followed
by a fine dust released in the
vehicle. These conditions are
normal and are not hazardous
- the air bags are packed in
this fine powder. The dust
generated during air bag
deployment may cause skin
or eye irritation as well as
aggravate asthma for some
persons. Always wash all
exposed skin areas thorough-
ly with cold water and a mild
soap after an accident in
which the air bags were
deployed.
The SRS can function only when the ignition switch is in
the ON position.
(Continued)
Page 90 of 569
369
Safety features of your vehicle
(Continued)
If the SRS air bag warninglight remains illuminated
while the vehicle is being driv-
en, have an authorized
HYUNDAI dealer inspect the
air bag system as soon as
possible.
Air bags can only be used once – have an authorized
HYUNDAI dealer replace the
air bag immediately after
deployment.
The SRS is designed to deploy the front air bags only
when frontal impact is suffi-
ciently severe and when the
impact angle is toward from
the forward longitudinal axis
of the vehicle. Additionally,
the air bags will only deploy
once. Seat belts must be worn
at all times.
(Continued)(Continued)
No objects should be placedover or near the air bag mod-
ules on the steering wheel,
instrument panel, and the
front passenger's panel above
the glove box, because any
such object could cause harm
if the vehicle is in a crash
severe enough to cause the
air bags to deploy.
Never place covers, blankets or seat warmers on the pas-
senger seat as these may
interfere with the occupant
classification system.
Do not tamper with or discon- nect SRS wiring or other com-
ponents of the SRS system.
Doing so could result in
injury, due to accidental
deployment of the air bags or
by rendering the SRS inopera-
tive.
(Continued)(Continued)
Front and side air bags caninjure occupants improperly
positioned in the front seats.
Move your seat as far back as practical from the front air
bags, while still maintaining
control of the vehicle.
You and your passengers should never sit or lean
unnecessarily close to the air
bags. Improperly positioned
driver and passengers can be
severely injured by inflating
air bags.
Never lean against the door or center console – always sit in
an upright position.
Do not allow a passenger to ride in the front seat when the
PASSENGER AIR BAG "OFF"
indicator is illuminated,
because the air bag will not
deploy in the event of a mod-
erate or severe frontal crash.
(Continued)
Page 110 of 569
47
Features of your vehicle
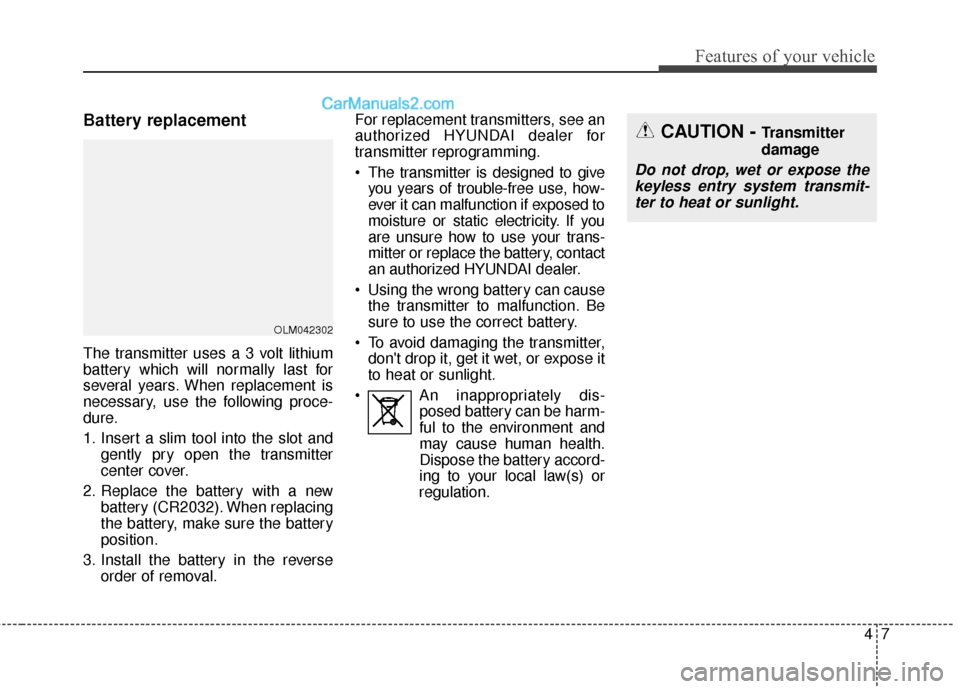
Battery replacement
The transmitter uses a 3 volt lithium
battery which will normally last for
several years. When replacement is
necessary, use the following proce-
dure.
1. Insert a slim tool into the slot andgently pry open the transmitter
center cover.
2. Replace the battery with a new battery (CR2032). When replacing
the battery, make sure the battery
position.
3. Install the battery in the reverse order of removal. For replacement transmitters, see an
authorized HYUNDAI dealer for
transmitter reprogramming.
The transmitter is designed to give
you years of trouble-free use, how-
ever it can malfunction if exposed to
moisture or static electricity. If you
are unsure how to use your trans-
mitter or replace the battery, contact
an authorized HYUNDAI dealer.
Using the wrong battery can cause the transmitter to malfunction. Be
sure to use the correct battery.
To avoid damaging the transmitter, don't drop it, get it wet, or expose it
to heat or sunlight.
An inappropriately dis- posed battery can be harm-
ful to the environment and
may cause human health.
Dispose the battery accord-
ing to your local law(s) or
regulation.
OLM042302
CAUTION - Transmitter
damage
Do not drop, wet or expose the keyless entry system transmit-ter to heat or sunlight.
Page 119 of 569
Features of your vehicle
16
4
This device complies with Part 15
of the FCC rules.
Operation is subject to the following
two conditions:
1. This device may not cause harm-
ful interference, and
2. This device must accept any inter- ference received, including inter-
ference that may cause undesired
operation.Battery replacement
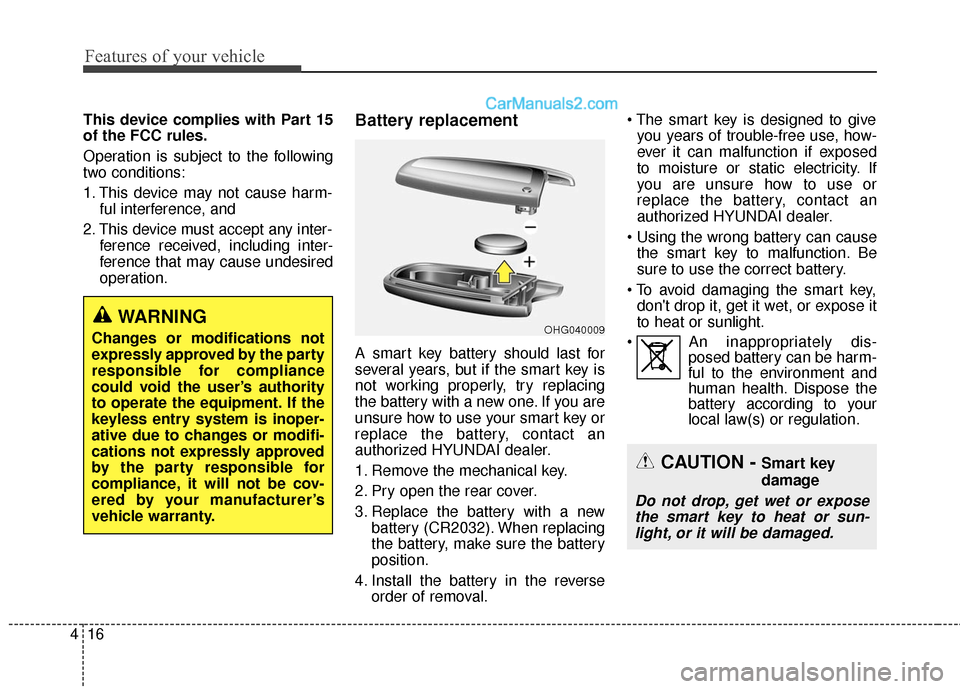
A smart key battery should last for
several years, but if the smart key is
not working properly, try replacing
the battery with a new one. If you are
unsure how to use your smart key or
replace the battery, contact an
authorized HYUNDAI dealer.
1. Remove the mechanical key.
2. Pry open the rear cover.
3. Replace the battery with a newbattery (CR2032). When replacing
the battery, make sure the battery
position.
4. Install the battery in the reverse order of removal.
you years of trouble-free use, how-
ever it can malfunction if exposed
to moisture or static electricity. If
you are unsure how to use or
replace the battery, contact an
authorized HYUNDAI dealer.
the smart key to malfunction. Be
sure to use the correct battery.
don't drop it, get it wet, or expose it
to heat or sunlight.
An inappropriately dis- posed battery can be harm-
ful to the environment and
human health. Dispose the
battery according to your
local law(s) or regulation.
CAUTION - Smart key
damage
Do not drop, get wet or expose
the smart key to heat or sun-light, or it will be damaged.
OHG040009WARNING
Changes or modifications not
expressly approved by the party
responsible for compliance
could void the user’s authority
to operate the equipment. If the
keyless entry system is inoper-
ative due to changes or modifi-
cations not expressly approved
by the party responsible for
compliance, it will not be cov-
ered by your manufacturer’s
vehicle warranty.
Page 151 of 569
Features of your vehicle
48
4
(Continued)
When refueling, always shut
the engine off. Sparks pro-
duced by electrical compo-
nents related to the engine
can ignite fuel vapors causing
a fire. Once refueling is com-
plete, check to make sure the
filler cap and filler door are
securely closed, before start-
ing the engine.
DO NOT use matches or a lighter and DO NOT SMOKE or
leave a lit cigarette in your
vehicle while at a gas station
especially during refueling.
Automotive fuel is highly
flammable and can, when
ignited, result in fire.
If a fire breaks out during refu- eling, leave the vicinity of the
vehicle, and immediately con-
tact the manager of the gas
station and then contact the
local fire department or 911.
Follow any safety instructions
they provide.(Continued)
When using an approvedportable fuel container, be sure
to place the container on the
ground prior to refueling. Static
electricity discharge from the
container can ignite fuel vapors
causing a fire. Once refueling
has begun, contact with the
vehicle should be maintained
until the filling is complete.
Use only approved portable
plastic fuel containers designed
to carry and store gasoline.
Do not use cellular phones while refueling. Electric cur-
rent and/or electronic interfer-
ence from cellular phones can
potentially ignite fuel vapors
causing a fire.
(Continued)CAUTION
Make sure to refuel your vehi-cle according to the "Fuelrequirements" suggested insection 1.
If the fuel filler cap requires replacement, use only a gen-uine HYUNDAI cap or theequivalent specified for yourvehicle. An incorrect fuel fillercap can result in a seriousmalfunction of the fuel systemor emission control system.
Do not spill fuel on the exterior surfaces of the vehicle. Anytype of fuel spilled on paintedsurfaces may damage the paint.
After refueling, make sure the fuel cap is installed securelyto prevent fuel spillage in theevent of an accident.
Page 166 of 569
463
Features of your vehicle
To adjust the Zone setting:
1. Determine the desired ZoneNumber based upon your current
location on the Zone Map.
2. Press and hold the button for 6 seconds, the current Zone
Number will appear on the display.
3. Pressing and holding the button again will cause the numbers to
increment (Note: they will repeat
…13, 14, 15, 1, 2, …). Releasing
the button when the desired Zone
Number appears on the display
will set the new Zone.
4. Within about 5 seconds the com- pass will start displaying a com-
pass heading again.
There are some conditions that can
cause changes to the vehicle mag-
nets, such as installing a ski rack or
a CB antenna. Body repair work on
the vehicle can also cause changes
to the vehicle's magnetic field. In
these situations, the compass will
need to be re-calibrated to quickly
correct for these changes. To re-cali-
brate the compass: 1. Press and hold the button for
more than 9 seconds. When the
compass memory is cleared a "C"
will appear in the display.
2. To calibrate the compass, drive the vehicle in 2 complete circles at
less than 5 mph (8 km/h). Integrated HomeLink®Wireless
Control System
The HomeLink
®Wireless Control
System provides a convenient way to
replace up to three hand-held radio-
frequency (RF) transmitters with a
single built-in device. This innovative
feature will learn the radio frequency
codes of most current transmitters to
operate devices such as gate opera-
tors, garage door openers, entry
door locks, security systems, even
home lighting. Both standard and
rolling code-equipped transmitters
can be programmed by following the
outlined procedures. Additional
HomeLink
®information can be found
at: www.homelink.com or by calling
1-800-355-3515.
Page 168 of 569
465
Features of your vehicle
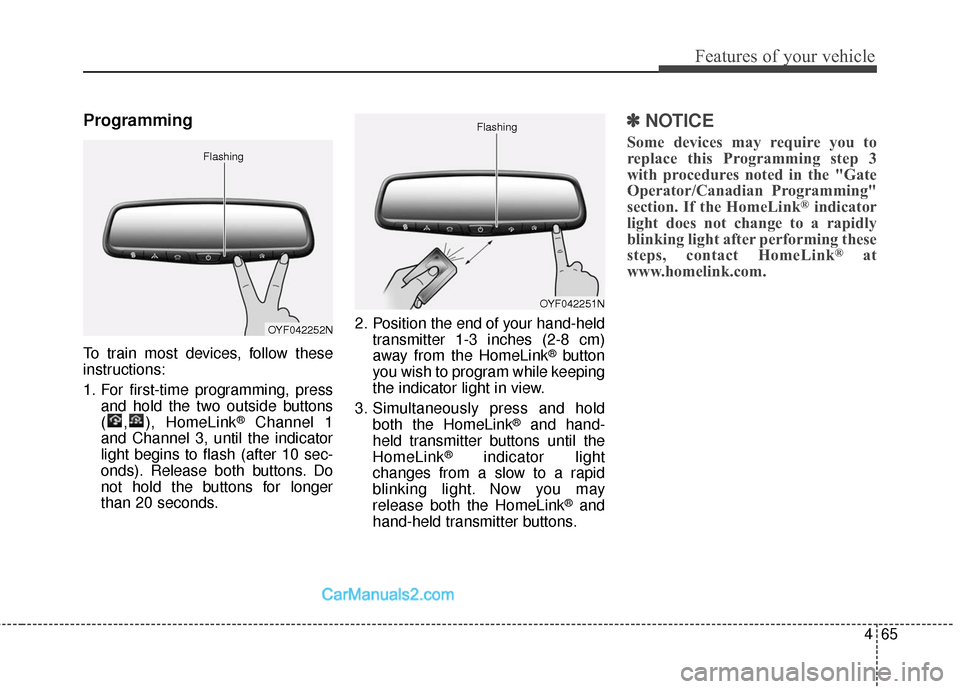
Programming
To train most devices, follow these
instructions:
1. For first-time programming, pressand hold the two outside buttons
( , ), HomeLink
®Channel 1
and Channel 3, until the indicator
light begins to flash (after 10 sec-
onds). Release both buttons. Do
not hold the buttons for longer
than 20 seconds. 2. Position the end of your hand-held
transmitter 1-3 inches (2-8 cm)
away from the HomeLink
®button
you wish to program while keeping
the indicator light in view.
3. Simultaneously press and hold both the HomeLink
®and hand-
held transmitter buttons until the
HomeLink
®indicator light
changes from a slow to a rapid
blinking light. Now you may
release both the HomeLink
®and
hand-held transmitter buttons.
✽ ✽ NOTICE
Some devices may require you to
replace this Programming step 3
with procedures noted in the "Gate
Operator/Canadian Programming"
section. If the HomeLink
®indicator
light does not change to a rapidly
blinking light after performing these
steps, contact HomeLink
®at
www.homelink.com.
OYF042252N
Flashing
OYF042251N
Flashing