Page 448 of 569

What to do in an emergency
28
6
Emergency towing precautions
Turn the ignition switch to ACC so
the steering wheel isn’t locked.
Place the transaxle shift lever in N (Neutral).
Release the parking bake.
Press the brake pedal with more force than normal since you will
have reduced brake performance.
More steering effort will be required because the power steer-
ing system will be disabled.
If you are driving down a long hill, the brakes may overheat and brake
performance will be reduced. Stop
often and let the brakes cool off.CAUTION - Automatic
transaxle
If the car is being towed with all four wheels on the ground, itcan be towed only from thefront. Be sure that the transaxleis in neutral. Be sure the steer-ing is unlocked by placing theignition switch in the ACC posi-tion. A driver must be in thetowed vehicle to operate thesteering and brakes.
To avoid serious damage to the automatic transaxle, limitthe vehicle speed to 10 mph(15 km/h) and drive less than 1mile (1.5 km) when towing.
Before towing, check under your vehicle for leaking auto-matic transaxle fluid. If theautomatic transaxle fluid isleaking, a flatbed equipmentor towing dolly must be used.
WARNING
Use extreme caution when tow-
ing the vehicle.
Avoid sudden starts or erratic driving maneuvers which
would place excessive stress
on the emergency towing hook
and towing cable or chain. The
hook and towing cable or
chain may break and cause
serious injury or damage.
If the disabled vehicle cannot be moved, do not forcibly con-
tinue the towing. Contact an
authorized HYUNDAI dealer or
a commercial tow truck serv-
ice for assistance.
Tow the vehicle as straight ahead as possible.
Keep away from the vehicle during towing.
Page 494 of 569

Maintenance
46
7
Battery recharging
Your vehicle has a maintenance-free,
calcium-based battery.
If the battery becomes discharged
in a short time (because, for exam-
ple, the headlights or interior lights
were left on while the vehicle was
not in use), recharge it by slow
charging (trickle) for 10 hours.
If the battery gradually discharges because of high electric load while
the vehicle is being used, recharge
it at 20-30A for two hours.(Continued)
When lifting a plastic-casedbattery, excessive pressure
on the case may cause battery
acid to leak, resulting in per-
sonal injury. Lift with a battery
carrier or with your hands on
opposite corners.
Never attempt to recharge the battery when the battery
cables are connected.
The electrical ignition system works with high voltage.
Never touch these compo-
nents with the engine running
or the ignition switched on.
Failure to follow the above
warnings can result in serious
bodily injury or death.CALIFORNIA PROPO-
SITION 65 WARNING
Battery posts, terminals, and
related accessories contain
lead and lead compounds,
chemicals known to the State of
California to cause cancer, birth
defects, and reproductive harm.
Batteries also contain other
chemicals known to the State of
California to cause cancer.
Wash hands after handling.
CAUTION
Always charge the battery fully to prevent battery casedamage in low temperaturearea.
If you connect unauthorized electronic devices to the bat-tery, the battery may dis-charge. Never use unautho-rized devices.
Page 513 of 569

765
Maintenance
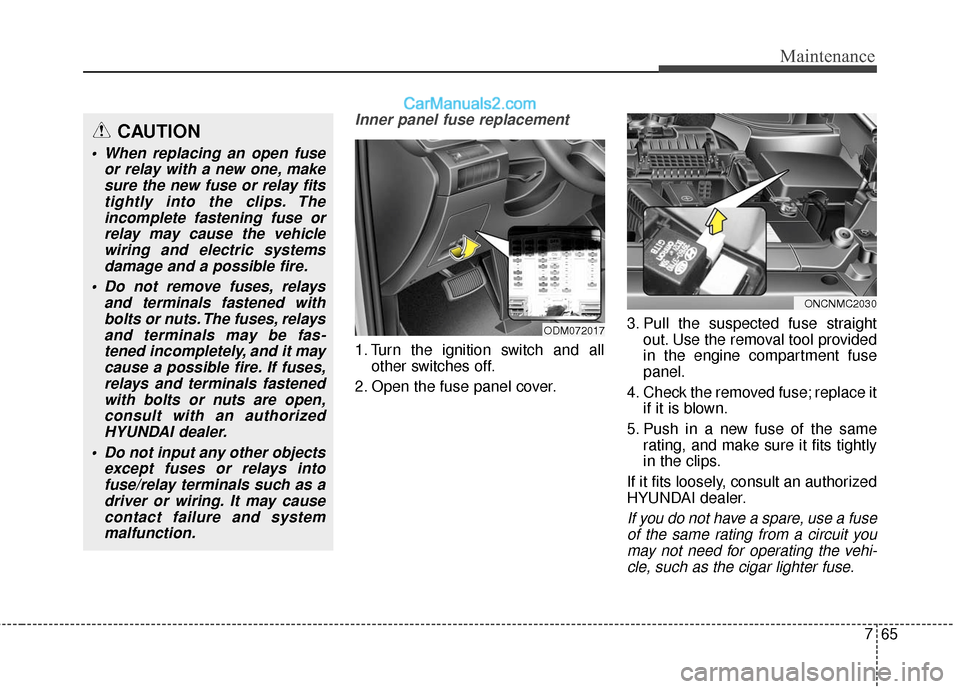
Inner panel fuse replacement
1. Turn the ignition switch and allother switches off.
2. Open the fuse panel cover. 3. Pull the suspected fuse straight
out. Use the removal tool provided
in the engine compartment fuse
panel.
4. Check the removed fuse; replace it if it is blown.
5. Push in a new fuse of the same rating, and make sure it fits tightly
in the clips.
If it fits loosely, consult an authorized
HYUNDAI dealer.
If you do not have a spare, use a fuse of the same rating from a circuit youmay not need for operating the vehi-cle, such as the cigar lighter fuse.
ODM072017
ONCNMC2030
CAUTION
When replacing an open fuse or relay with a new one, makesure the new fuse or relay fitstightly into the clips. Theincomplete fastening fuse orrelay may cause the vehiclewiring and electric systemsdamage and a possible fire.
Do not remove fuses, relays and terminals fastened withbolts or nuts. The fuses, relaysand terminals may be fas-tened incompletely, and it maycause a possible fire. If fuses,relays and terminals fastenedwith bolts or nuts are open,consult with an authorizedHYUNDAI dealer.
Do not input any other objects except fuses or relays intofuse/relay terminals such as adriver or wiring. It may causecontact failure and systemmalfunction.
Page 514 of 569
Maintenance
66
7
If the headlights or other electrical
components do not work and the
fuses are OK, check the fuse block in
the engine compartment. If a fuse is
blown, it must be replaced.Fuse switch
Always, put the mode switch at the
ON position.
If you move the switch to the OFF
position, some items such as audio
and digital clock must be reset and
transmitter (or smart key) may not
work properly.
Engine compartment panel fuse
replacement
1. Turn the ignition switch and all other switches off.
2. Remove the fuse box cover by pressing the tab and pulling up.
ODM072019
CAUTION
Always place the fuse switch inthe ON position while drivingthe vehicle.
ONCNMC2032
Page 517 of 569

769
Maintenance
DescriptionFuse ratingProtected Component
A/BAG IND10AInstrument Cluster, A/C Control Module
A/BAG15AACU, Passenger Occupant Detection Sensor
5 MODULE7.5ARR_BLOWER, AVM, AC_INVERTER_UNIT,Smart Key Control Module, BCM, Rear Seat Warmer
LH/RH,Driver/Passenger Seat Warmer Module,
1 MODULE7.5ASport Mode Switch, Key Solenoid, Console Switch LH/RH,Rear Power Window Switch LH/RH,
Data Link Connector
FOG LAMP REAR10A-
2 MEMORY10ABCM, Tire Pressure Monitoring Module, Electro Chromic Mirror, Driver/Passenger Door Module, Auto
Light & Photo Sensor, A/C Control Module, Instrument Cluster, FRT_DRV_SEAT
2 SMART KEY7.5ASmart Key Control Module, Immobilizer Module
3 MODULE10A
BCM, Instrument Cluster, Tire Pressure Monitoring Module, A/C Control Module,
Driver/Passenger Door Module, ATM Shift Lever Indicator, Rear Seat Warmer LH/RH, 4WD ECU,
Driver/Passenger Seat Warmer Module, MTS Module, Rear(SMART) Parking Assist Sensor LH/RH,
A/V & Navigation Head Unit, Rear Parking Assist Sensor (Center)LH/RH, AMP, SAS_ESP,EPB_EXT,
Electro Chromic Mirror, BSD
4 SMART KEY10AStart/Stop Button Switch, Immobilizer Module
INTERIOR LAMP15ACargo Lamp, Vanity Lamp LH/RH, Overhead Console Lamp, Center Room Lamp, Personal Lamp
LH/RH
MULTI MEDIA15AAudio, A/V & Navigation Head Unit, MTS Module,D_CLOCK
MDPS7.5AMDPS Unit
HTD STRG15ASteering Wheel Switch
FOG LAMP FRONT15AFRT FOG LAMP LH/RH
1 MEMORY10ARF Receiver, Ignition Key Ill. & Door Warning Switch
Page 522 of 569
Maintenance
74
7
DescriptionFuse ratingProtected Component
MULTI
FUSE
MDPS80AMDPS Unit
2 B+60ASmart Junction Box (IPS 1 (4CH), IPS 2 (1CH), IPS 5 (1CH), Fuse - SUNROOF 1, P/SEAT
PASS, P/SEAT DRV), RR A/CON
BLOWER40ABlower Relay
RR HTD40ARear Defogger Relay
ABS140AESC Module, Multipurpose Check Connector
ABS240AESC Module
C/FAN60ACooling Fan Relay
3 B+60ASmart Junction Box (Fuse - MODULE 1, SMART KEY 4, SUNROOF 2, SMART KEY 1, Leak
Current Autocut Device)
FUSE
4 B+50ASmart Junction Box (IPS 3 (4CH), IPS 6 (2CH), Fuse - F/LID, STOP LAMP, DR LOCK, BRAKE
SWITCH), FUEL LID
ECU40AECU Box
IG140AW/O Smart Key : Ignition Switch, With Smart Key - ACC Relay, IG1 Relay
IG240AStart Relay, IG2 Relay, W/O Smart Key : Ignition Switch
TRAILER30ATrailer Power Outlet
1 B+50ASmart Junction Box (Fuse - S/HEATER RR, S/HEATER FRT, P/WDW RH, P/WDW LH)
HORN15AHorn Relay
DEICER15AFront Deicer Relay
POWER OUTLET25APower Outlet Relay
AC INVERTER30AAC Inverter Module
Page 523 of 569
775
Maintenance
DescriptionFuse ratingProtected Component
FUSE
POWER TAILGATE30APower Tail Gate Module
IDB15AIDB Module
4WD20A4WD ECM
AMS10ABattery Sensor
AMS (WIPER)10ABCM, PCM
WIPER FRT25AWiper LO Relay, Front Wiper Motor
B/UP LAMP10AA/T - Rear Combination Lamp (IN) LH/RH, Electro Chromic Mirror, Audio, A/V & Navigation
Head Unit
ABS37.5AESC Module
5 SENSOR7.5APCM
TCU15AA/T : Transaxle Range Switch
F/PUMP15AFuel Pump Relay
1 ECU 15APCM
2 ECU10AIDB Module
3 SENSOR10AFuel Pump Relay
IGN COIL20ACondenser, Ignition Coil #1/#2/#3/#4
2 SENSOR10APurge Control Solenoid Valve, Variable Intake Solenoid Valve(G4KJ), Oil Control Valve #1/#2
1 SENSOR15AOxygen sensor(#1/#2/#3/#4), PCM, Oxygen Sensor(Down), E/R Fuse & Relay Box (Cooling
Fan Relay)
B/A HORN10ABurgl Aralarm Horn Relay
Page 524 of 569

Maintenance
76
7
LIGHT BULBS
Use only the bulbs of the specified
wattage.
✽
✽ NOTICE
After heavy, driving rain or wash-
ing, headlamp and taillamp lenses
could appear frosty. This condition
is caused by the temperature differ-
ence between the lamp inside and
outside. This is similar to the con-
densation on your windows inside
your vehicle during the rain and
doesn't indicate a problem with
your vehicle. If the water leaks into
the lamp bulb circuitry, have the
vehicle checked by an authorized
HYUNDAI dealer.WARNING - Working on
the lights
Prior to working on the light,
firmly apply the parking brake,
ensure that the ignition switch
is turned to the "LOCK" posi-
tion and turn off the lights to
avoid sudden movement of the
vehicle and burning your fin-
gers or receiving an electric
shock.
CAUTION
Be sure to replace the burned-
out bulb with one of the samewattage rating. Otherwise, itmay cause damage to the fuseor electric wiring system.
CAUTION
If you don't have necessarytools, the correct bulbs and theexpertise, consult an authorizedHYUNDAI dealer. In many cases,it is difficult to replace vehiclelight bulbs because other partsof the vehicle must be removedbefore you can get to the bulb.This is especially true if youhave to remove the headlightassembly to get to the bulb(s).Removing/installing the head-light assembly can result indamage to the vehicle.