Page 124 of 553
3-22
Convenient features of your vehicle
Information
The heated steering wheel will turn off
automatically approximately 30 min-
utes after the heated steering wheel is
turned on.
When the engine is turned off during
the engine and the heated steering
wheel is on, the timer function of heat-
ed steering wheel will be reset.
To reuse heated steering wheel, press
button again.
Do not install any cover or acces-
sory on the steering wheel. This
cover or accessory could cause
damage to the heated steeringwheel system.Horn
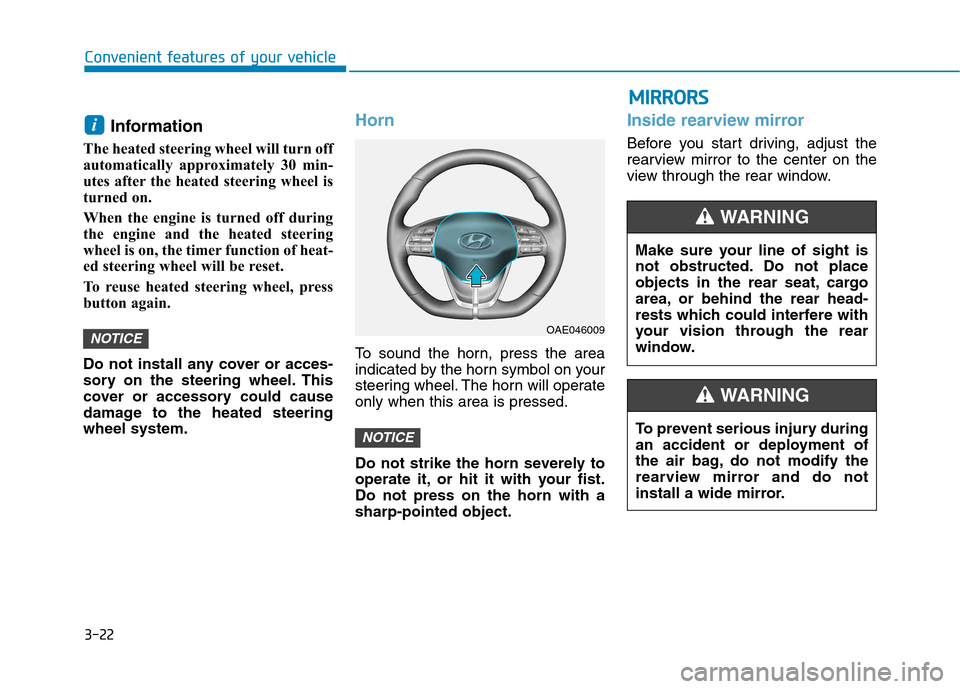
To sound the horn, press the area
indicated by the horn symbol on your
steering wheel. The horn will operateonly when this area is pressed.
Do not strike the horn severely to
operate it, or hit it with your fist.Do not press on the horn with asharp-pointed object.
Inside rearview mirror
Before you start driving, adjust the
rearview mirror to the center on the
view through the rear window.
NOTICE
NOTICE
i
OAE046009
MM IIRR RR OO RRSS
Make sure your line of sight is
not obstructed. Do not place
objects in the rear seat, cargo
area, or behind the rear head-
rests which could interfere with
your vision through the rear
window.
WARNING
To prevent serious injury during
an accident or deployment of
the air bag, do not modify the
rearview mirror and do not
install a wide mirror.
WARNING
Page 125 of 553

3-23
Convenient features of your vehicle
3
When cleaning the mirror, use a
paper towel or similar material
dampened with glass cleaner. Do
not spray glass cleaner directly on
the mirror as that may cause the
liquid cleaner to enter the mirrorhousing.
Day/night rearview mirror (if equipped)
Make this adjustment before you
start driving and while the day/night
lever is in the day position.
Pull the day/night lever toward you to reduce glare from the headlights of
the vehicles behind you during night
driving.
Remember that you lose somerearview clarity in the night position.
Electric Chromic Mirror (ECM)
(if equipped)
The electric rearview mirror automati-cally controls the glare from the head-
lamp of the car behind you in night-
time or low light driving conditions.
When the engine is running, the
glare is automatically controlled by
the sensor mounted in the rearview
mirror. The sensor detects the light
level around the vehicle, and auto-matically adjusts to control the head-
lamp glare from vehicles behind you.
Whenever the shift lever is placed in
R (Reverse), the mirror will automat-
ically go to the brightest setting in
order to improve the drivers view
behind the vehicle.
NOTICE
NEVER adjust the mirror while
driving. This may cause loss of
vehicle control resulting in anaccident.
WARNING
OAE046010
Day Night
Page 126 of 553
3-24
Convenient features of your vehicle
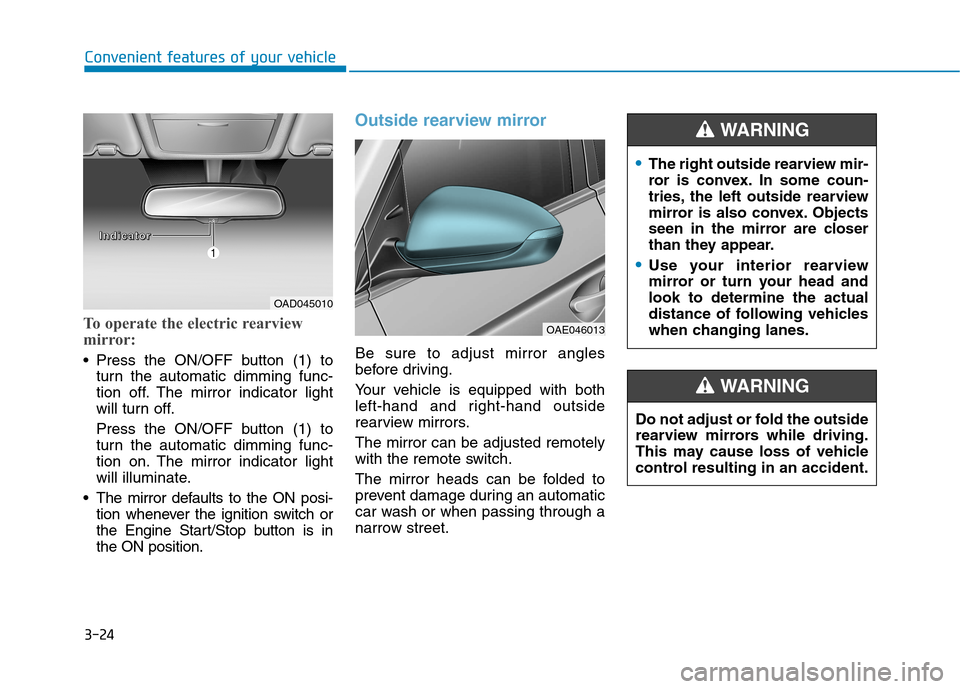
To operate the electric rearview
mirror:
Press the ON/OFF button (1) toturn the automatic dimming func-
tion off. The mirror indicator light
will turn off.
Press the ON/OFF button (1) to
turn the automatic dimming func-
tion on. The mirror indicator light
will illuminate.
The mirror defaults to the ON posi- tion whenever the ignition switch or
the Engine Start/Stop button is inthe ON position.
Outside rearview mirror
Be sure to adjust mirror angles
before driving.
Your vehicle is equipped with both
left-hand and right-hand outside
rearview mirrors. The mirror can be adjusted remotely
with the remote switch.
The mirror heads can be folded to
prevent damage during an automatic
car wash or when passing through a
narrow street.
OAD045010
OAE046013
IIIInnnnddddiiiiccccaaaattttoooorrrr
The right outside rearview mir-
ror is convex. In some coun-
tries, the left outside rearview
mirror is also convex. Objects
seen in the mirror are closer
than they appear.
Use your interior rearview
mirror or turn your head andlook to determine the actual
distance of following vehicles
when changing lanes.
WARNING
Do not adjust or fold the outside
rearview mirrors while driving.
This may cause loss of vehicle
control resulting in an accident.
WARNING
Page 128 of 553
3-26
Convenient features of your vehicle
Folding the outside rearviewmirror
Manual type
To fold the outside rearview mirror,
grasp the housing of the mirror and
then fold it toward the rear of the
vehicle.
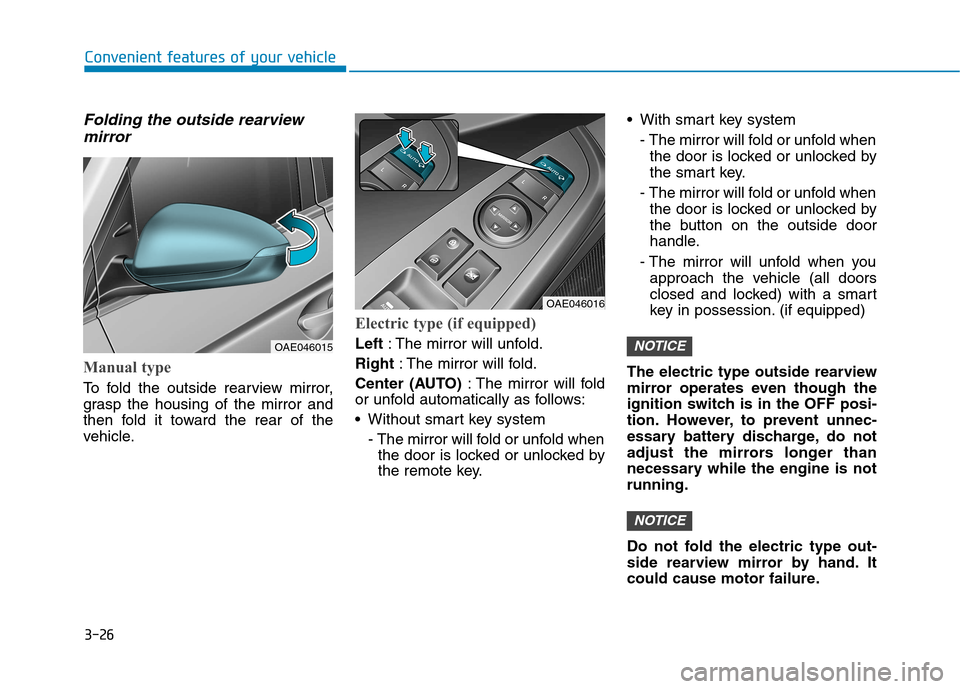
Electric type (if equipped)
Left : The mirror will unfold.
Right : The mirror will fold.
Center (AUTO) : The mirror will fold
or unfold automatically as follows:
Without smart key system
- The mirror will fold or unfold whenthe door is locked or unlocked by
the remote key. With smart key system
- The mirror will fold or unfold whenthe door is locked or unlocked by
the smart key.
- The mirror will fold or unfold when the door is locked or unlocked by
the button on the outside door
handle.
- The mirror will unfold when you approach the vehicle (all doors
closed and locked) with a smart
key in possession. (if equipped)
The electric type outside rearview
mirror operates even though the
ignition switch is in the OFF posi-
tion. However, to prevent unnec-
essary battery discharge, do not
adjust the mirrors longer than
necessary while the engine is notrunning.
Do not fold the electric type out-
side rearview mirror by hand. It
could cause motor failure.
NOTICE
NOTICEOAE046015
OAE046016
Page 134 of 553

3-32
Convenient features of your vehicle
To prevent possible damage tothe power window system, do
not open or close two windows
or more at the same time. This
will also ensure the longevity of
the fuse.
Never try to operate the main switch on the driver's door and
the individual door window
switch in opposite directions at
the same time. If this is done, the
window will stop and cannot be
opened or closed.
NOTICE
NEVER leave the keys in your
vehicle with unsupervised
children, when the engine isrunning.
NEVER leave any child unat-
tended in the vehicle. Even
very young children may inad-
vertently cause the vehicle to
move, entangle themselves in
the windows, or otherwise
injure themselves or others.
Always double check to make
sure all arms, hands, headand other obstructions are
safely out of the way before
closing a window.
Do not allow children to play
with the power windows. Keep
the driver’s door power window
lock switch in the LOCK posi-
tion (pressed). Serious injury
can result from unintentional
window operation by the child.
Do not extend your head,
arms or body outside the win-
dows while driving.
WARNING
Page 137 of 553
3-35
Convenient features of your vehicle
3
Periodically remove any dirt thatmay accumulate on the sunroof guide rail or between the sun-
roof and roof panel, which can
make a noise.
Do not try to open the sunroof when the temperature is below
freezing or when the sunroof is
covered with snow or ice, the
motor could be damaged. In
cold and wet climates, the sun-
roof may not work properly.
Information
After washing the vehicle or after a
rain, be sure to wipe off the water on
the sunroof before operating the sun-
roof.
Sunshade
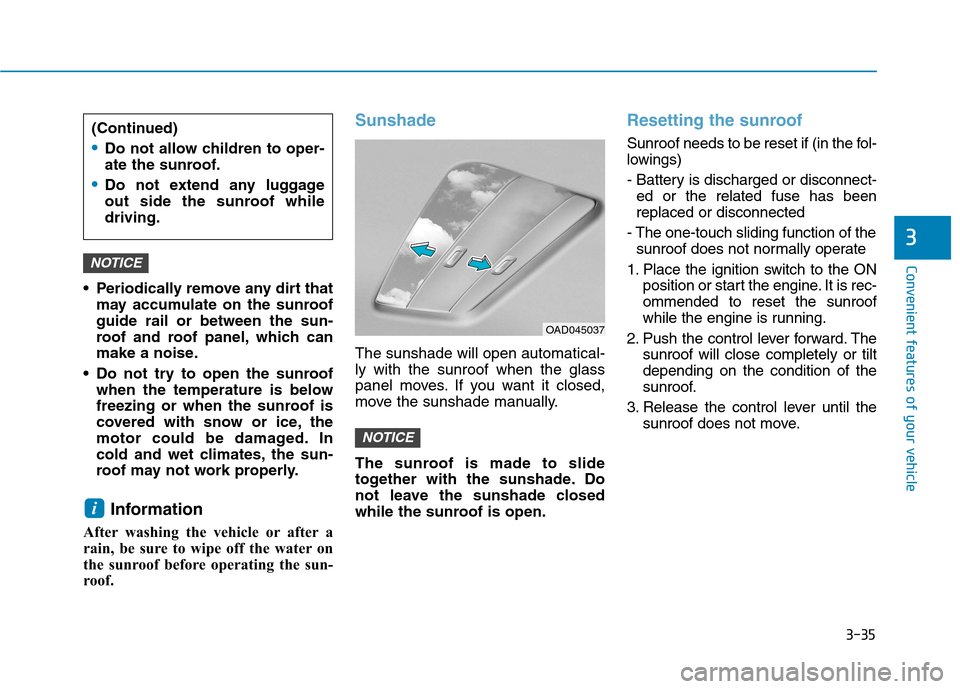
The sunshade will open automatical- ly with the sunroof when the glass
panel moves. If you want it closed,
move the sunshade manually.
The sunroof is made to slide
together with the sunshade. Do
not leave the sunshade closed
while the sunroof is open.
Resetting the sunroof
Sunroof needs to be reset if (in the fol-
lowings)
- Battery is discharged or disconnect- ed or the related fuse has been replaced or disconnected
- The one-touch sliding function of the sunroof does not normally operate
1. Place the ignition switch to the ON position or start the engine. It is rec-ommended to reset the sunroof
while the engine is running.
2. Push the control lever forward. The sunroof will close completely or tiltdepending on the condition of the
sunroof.
3. Release the control lever until the sunroof does not move.
NOTICE
i
NOTICE
OAD045037
(Continued)
Do not allow children to oper-
ate the sunroof.
Do not extend any luggage
out side the sunroof whiledriving.
Page 139 of 553

3-37
Convenient features of your vehicle
3
3. Go to the front of the vehicle, raisethe hood slightly, push the second-
ary latch up (1) inside of the hoodcenter and lift the hood (2).
4. Pull out the support rod. 5. Hold the hood opened with the
support rod (1).
Closing the hood
1. Before closing the hood, check thefollowing:
ment must be correctly installed.
bustible material must be removed
from the engine compartment.
2. Return the support rod to its clip to prevent it from rattling.
3. Lower the hood halfway (lifted approximately 30cm from the
closed position) and push down to
securely lock in place. Then double
check to be sure the hood is secure.
OAE046027
Grasp the support rod in the
area wrapped in rubber. The
rubber will help prevent you
from being burned by hotmetal when the engine is hot.
The support rod must be
inserted completely into the
hole provided whenever you
inspect the engine compart-
ment. This will prevent the
hood from falling and possi-
bly injuring you.
WARNING
OAD045039
Page 141 of 553
3-39
Convenient features of your vehicle
3
Information
To prevent damage to the tailgate lift
cylinders and the attached hardware,
always close the tailgate before driv-
ing.
In cold and wet climates, tailgate
lock and tailgate mechanisms may
not work properly due to freezingconditions.Fuel filler door
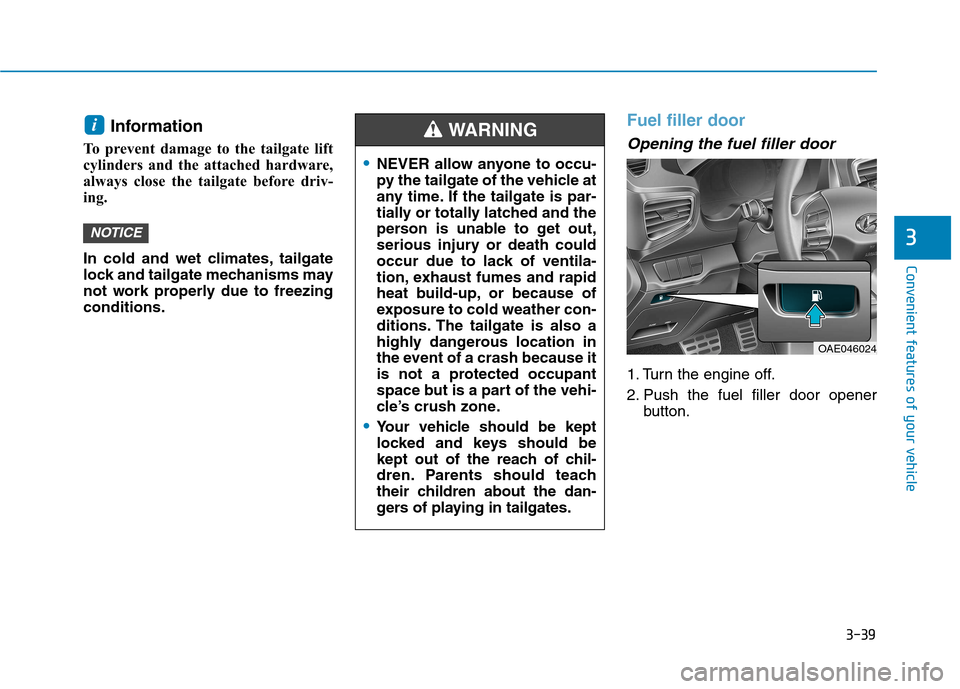
Opening the fuel filler door
1. Turn the engine off.
2. Push the fuel filler door opener button.
NOTICE
i
NEVER allow anyone to occu-
py the tailgate of the vehicle at
any time. If the tailgate is par-
tially or totally latched and the
person is unable to get out,
serious injury or death could
occur due to lack of ventila-
tion, exhaust fumes and rapid
heat build-up, or because of
exposure to cold weather con-
ditions. The tailgate is also a
highly dangerous location in
the event of a crash because it
is not a protected occupant
space but is a part of the vehi-
cle’s crush zone.
Your vehicle should be kept
locked and keys should be
kept out of the reach of chil-
dren. Parents should teach
their children about the dan-
gers of playing in tailgates.
WARNING
OAE046024