2017 Hyundai Ioniq Electric ESP
[x] Cancel search: ESPPage 157 of 582
2-59
Safety system of your vehicle
2
SRS warning light
The SRS (Supplement Restraint
System) air bag warning light on the
instrument panel displays the air bag
symbol depicted in the illustration. The
system checks the air bag electrical
system for malfunctions. The light indi-
cates that there is a potential problem
with your air bag system.During a moderate to severe frontal
collision, sensors will detect the vehi-
cle’s rapid deceleration. If the rate of
deceleration is high enough, the con-
trol unit will inflate the front air bags,
at the time and with the force needed.
The front air bags help protect the driv-
er and front passenger by respondingto frontal impacts in which seat belts
alone cannot provide adequate
restraint. When needed, the side air
bags help provide protection in the
event of a side impact by supportingthe side upper body area.
Air bags are activated (able to inflate
if necessary) only when the POWER
button is in the ON position.
Air bags inflate in the event of certain frontal or side collisions to help pro-
tect the occupants from serious
physical injury.
There is no single speed at which the air bags will inflate. Generally, air bagsare designed to inflate based upon
the severity of a collision and its direc-
tion. These two factors determinewhether the sensors produce an elec-
tronic deployment/inflation signal.
If your SRS malfunctions, the
air bag may not inflate properlyduring an accident increasing
the risk of serious injury ordeath.
If any of the following condi-
tions occur, your SRS is mal-functioning:
The light does not turn on for
approximately six seconds
when the POWER button is inthe ON position.
The light stays on after illumi-
nating for approximately sixseconds.
The light comes on while the
vehicle is in motion.
The light blinks when the
vehicle is running.
We recommend that an author-
ized HYUNDAI dealer inspect the
SRS as soon as possible if any
of these conditions occur.
WARNING
Page 158 of 582
2-60
Safety system of your vehicle
Air bag deployment depends on anumber of factors including vehicle speed, angles of impact and the
density and stiffness of the vehicles
or objects which your vehicle
impacts during a collision. The
determining factors are not limited
to those mentioned above.
The front air bags will completely inflate and deflate in an instant. It is
virtually impossible for you to see
the air bags inflate during an acci-
dent. It is much more likely that youwill simply see the deflated air bags
hanging out of their storage com-
partments after the collision. To help provide protection, the air
bags must inflate rapidly. The speedof air bag inflation is a consequence
of extremely short time in which to
inflate the air bag between the
occupant and the vehicle structures
before the occupant impacts those
structures. This speed of inflation
reduces the risk of serious or life-
threatening injuries and is thus a
necessary part of air bag design.
However, the rapid air bag inflation
can also cause injuries which can
include facial abrasions, bruises
and broken bones because theinflation speed also causes the air
bags to expand with a great deal of
force.
There are even circumstances under which contact with the air
bag can cause fatal injuries, espe-cially if the occupant is positioned
excessively close to the air bag. You can take steps to reduce the risk
of being injured by an inflating air
bag. The greatest risk is sitting too
close to the air bag. An air bag needs
space to inflate. It is recommended
that drivers sit as far as possible
between the center of the steeringwheel and the chest while still main-
taining control of the vehicle.
Page 175 of 582
3-6
Convenient features of your vehicle
Smart key precautions
The smart key will not work if any of
the following occur:
The smart key is close to a radiotransmitter such as a radio station
or an airport which can interfere
with normal operation of the trans-
mitter.
The smart key is near a mobile two way radio system or a cellular
phone.
Another vehicle’s smart key is being operated close to your vehi-
cle.
When the smart key does not work
correctly, open and close the door
with the mechanical key. If you have
a problem with the smart key, it is
recommended that you contact an
authorized HYUNDAI dealer.
If the smart key is in close proximity
to your mobile phone, the signal
could be blocked by your mobile
phones normal operational signals.
This is especially important when the
phone is active such as making and
receiving calls, text messaging,
and/or sending/receiving emails. Avoid placing the smart key and yourmobile phone in the same pants or
jacket pocket and always try to main-
tain an adequate distance between
the two devices.
Information
Changes or modifications not express-
ly approved by the party responsible
for compliance could void the user’s
authority to operate the equipment. If
the keyless entry system is inoperative
due to changes or modifications not
expressly approved by the party
responsible for compliance, it will not
be covered by your manufacturer’s
vehicle warranty.
Keep the smart key away from
electromagnetic materials that
blocks electromagnetic waves to
the key surface.
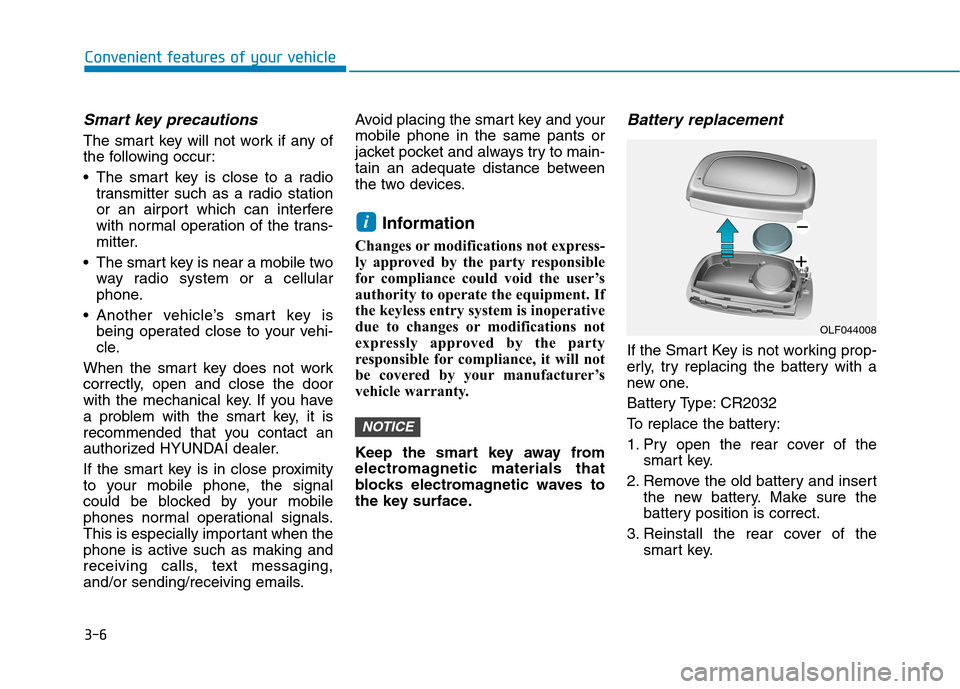
Battery replacement
If the Smart Key is not working prop-
erly, try replacing the battery with a
new one.
Battery Type: CR2032
To replace the battery:
1. Pry open the rear cover of the smart key.
2. Remove the old battery and insert the new battery. Make sure the
battery position is correct.
3. Reinstall the rear cover of the smart key.
NOTICE
i
OLF044008
Page 236 of 582
3-67
Convenient features of your vehicle
3
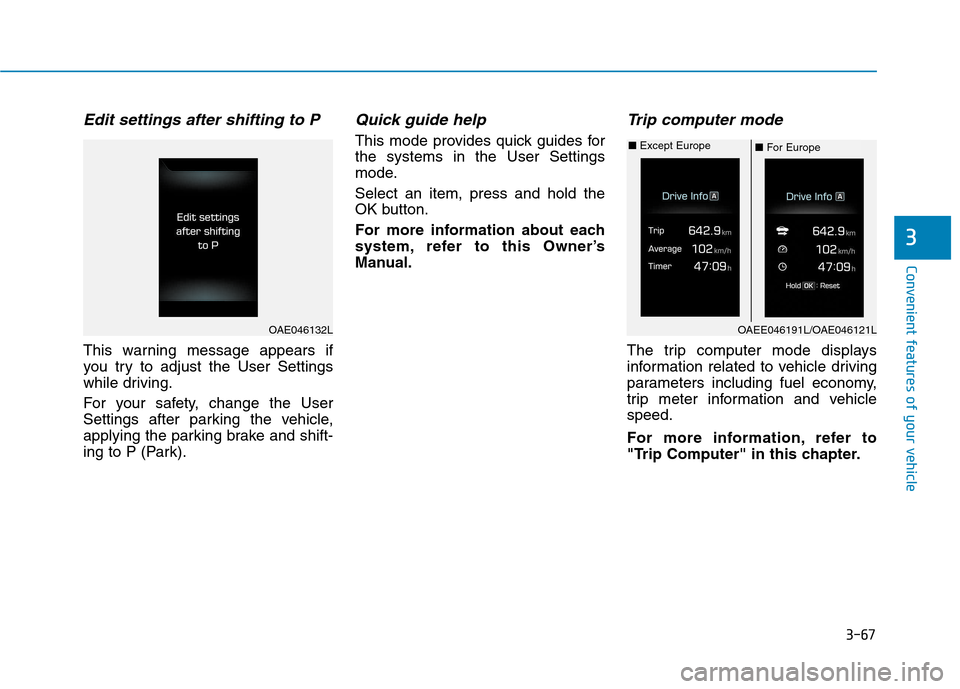
Edit settings after shifting to P
This warning message appears if
you try to adjust the User Settings
while driving.
For your safety, change the User
Settings after parking the vehicle,
applying the parking brake and shift-
ing to P (Park).
Quick guide help
This mode provides quick guides forthe systems in the User Settings
mode. Select an item, press and hold the
OK button.
For more information about each
system, refer to this Owner’s
Manual.
Trip computer mode
The trip computer mode displays
information related to vehicle driving
parameters including fuel economy,
trip meter information and vehiclespeed.
For more information, refer to
"Trip Computer" in this chapter.
OAE046132LOAEE046191L/OAE046121L
■For Europe
■
Except Europe
Page 250 of 582
3-81
Convenient features of your vehicle
3
Battery saver function
The purpose of this feature is to pre-
vent the battery from being dis-
charged. The system automatically
turns off the position lamp when the
driver turns the vehicle off and opens
the driver-side door.
With this feature , the position lamps
will turn off automatically if the driver
parks on the side of road at night.
If necessary, to keep the lamps on
when the vehicle is turned off, perform
the following:
1) Open the driver-side door.
2) Turn the position lamps OFF and
ON again using the light switch on
the steering column.
Headlamp delay function
(if equipped)
If you place the POWER button to
the ACC or OFF position with theheadlamps ON, the headlamps(and/or position lamps) remain on for
about 5 minutes. However, with the
vehicle off if the driver’s door isopened and closed, the headlamps(and/or position lam ps) are turned off
after 15 seconds. The headlamps (and/or position
lamps) can be turned off by pressing
the lock button on the smart key
twice or turning the light switch to the
OFF or AUTO position. However, if
you turn the light switch to the AUTO
position when it is dark outside, the
headlamps will not be turned off.
You can activate or deactivate the
Headlamp Delay function from theUser Settings Mode on the LCD dis-
play. For more details, refer to
"LCD Display" in this chapter. If the driver gets out of the vehicle
through other doors (except dri-
ver's door), the battery saver func-tion does not operate and the
headlamp delay function does not
turn off automatically. Therefore, It
causes the battery to be dis-
charged. In this case, make sure to
turn off the lamp before getting out
of the vehicle.
Daytime running light (DRL)
The Daytime Running Lights (DRL)
can make it easier for others to see
the front of your vehicle during the
day, especially after dawn and beforesunset.
The DRL system will turn the dedi- cated lamp OFF when:
1. The headlights are in the ON posi-
tion.
2. The vehicle is turned off.
NOTICE
Page 257 of 582
3-88
Convenient features of your vehicle
LO (1) : The wiper runs at a lowerspeed.
HI (2) : The wiper runs at a higher
speed.
Information
If there is heavy accumulation of snow
or ice on the windshield, defrost the
windshield for about 10 minutes, or
until the snow and/or ice is removed
before using the windshield wipers to
ensure proper operation.
If you do not remove the snow and/or
ice before using the wiper and washer,
it may damage the wiper and washer
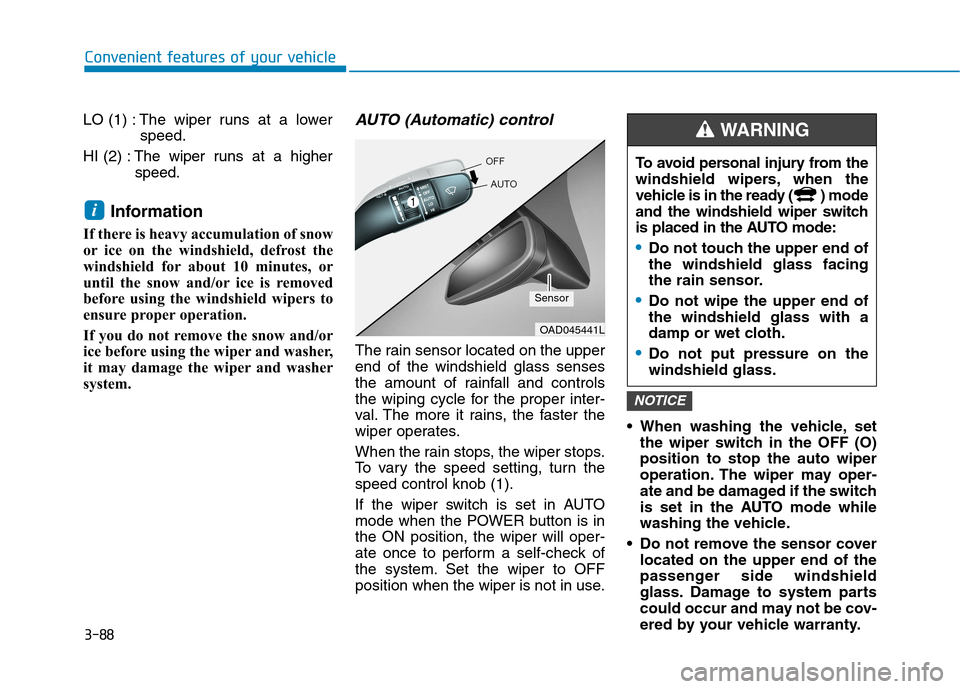
system.AUTO (Automatic) control
The rain sensor located on the upperend of the windshield glass senses
the amount of rainfall and controls
the wiping cycle for the proper inter-
val. The more it rains, the faster the
wiper operates.
When the rain stops, the wiper stops.
To vary the speed setting, turn thespeed control knob (1).
If the wiper switch is set in AUTO
mode when the POWER button is inthe ON position, the wiper will oper-
ate once to perform a self-check of
the system. Set the wiper to OFF
position when the wiper is not in use. When washing the vehicle, set
the wiper switch in the OFF (O)position to stop the auto wiper
operation. The wiper may oper-
ate and be damaged if the switch
is set in the AUTO mode while
washing the vehicle.
Do not remove the sensor cover located on the upper end of the
passenger side windshield
glass. Damage to system parts
could occur and may not be cov-
ered by your vehicle warranty.
NOTICE
i
OAD045441L
Sensor To avoid personal injury from the
windshield wipers, when the
vehicle is in the ready ( ) mode
and the windshield wiper switch
is placed in the AUTO mode:
Do not touch the upper end of the windshield glass facing
the rain sensor.
Do not wipe the upper end of the windshield glass with a
damp or wet cloth.
Do not put pressure on the windshield glass.
WARNING
Page 259 of 582
3-90
Rear view camera (if equipped)
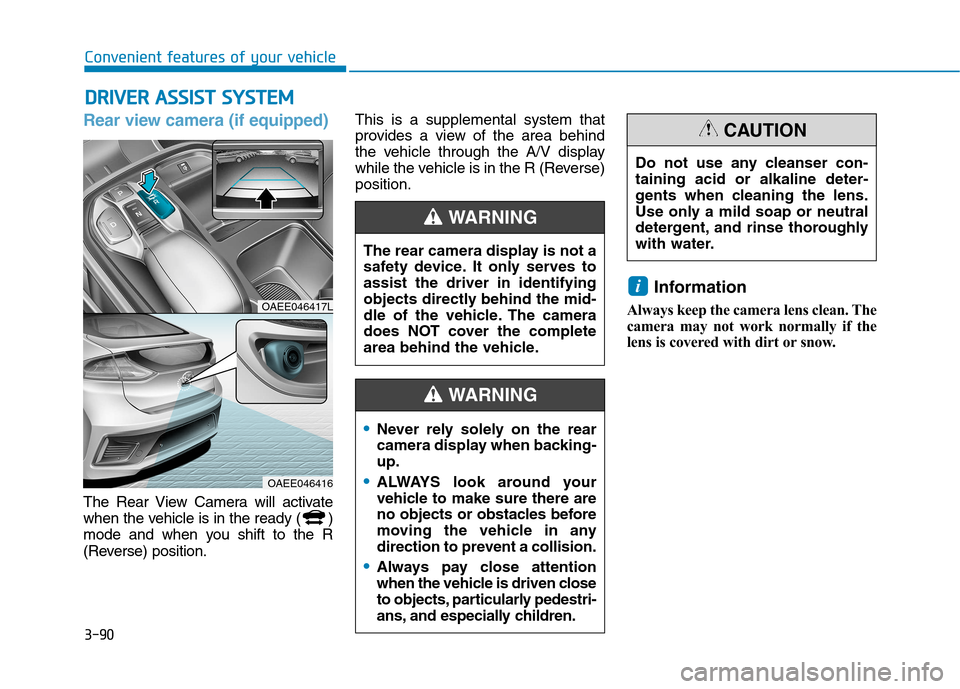
The Rear View Camera will activate
when the vehicle is in the ready ( )
mode and when you shift to the R
(Reverse) position.This is a supplemental system that
provides a view of the area behind
the vehicle through the A/V display
while the vehicle is in the R (Reverse)position.
Information
Always keep the camera lens clean. The
camera may not work normally if the
lens is covered with dirt or snow.
i
DD RRIIVV EERR AA SSSSIISS TT SS YY SSTT EEMM
Convenient features of your vehicle
The rear camera display is not a
safety device. It only serves toassist the driver in identifying
objects directly behind the mid-
dle of the vehicle. The camera
does NOT cover the complete
area behind the vehicle.
WARNING
OAEE046417L
OAEE046416 Do not use any cleanser con- taining acid or alkaline deter-
gents when cleaning the lens.
Use only a mild soap or neutral
detergent, and rinse thoroughly
with water.
CAUTION
Never rely solely on the rear
camera display when backing-up.
ALWAYS look around your
vehicle to make sure there are
no objects or obstacles before
moving the vehicle in any
direction to prevent a collision.
Always pay close attention
when the vehicle is driven close
to objects, particularly pedestri-
ans, and especially children.
WARNING
Page 260 of 582
3-91
Convenient features of your vehicle
3
Rear parking assist system (if equipped)
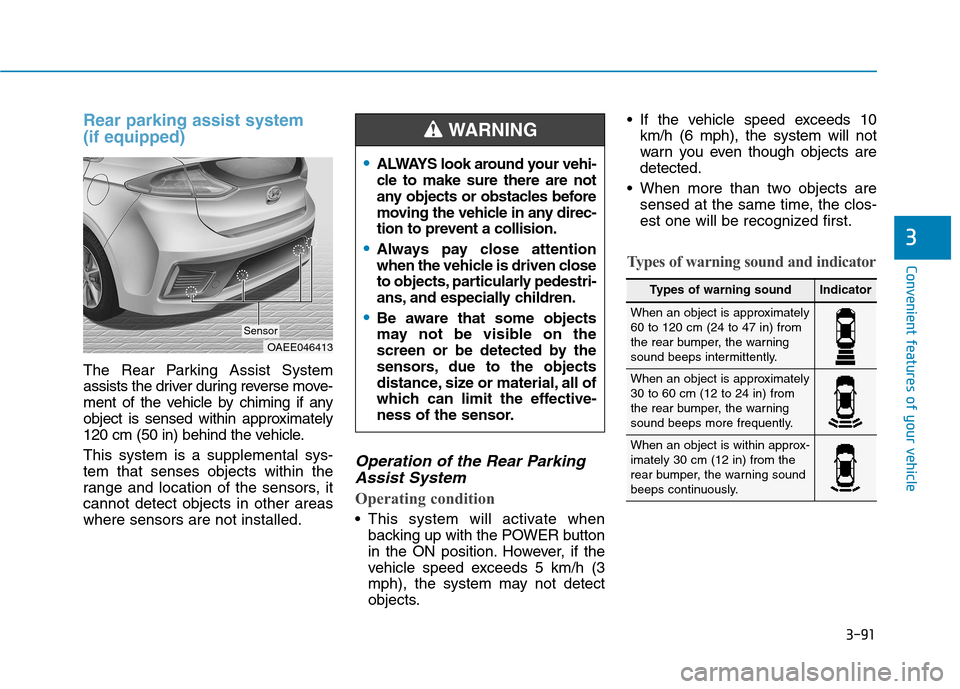
The Rear Parking Assist System
assists the driver during reverse move-
ment of the vehicle by chiming if any
object is sensed within approximately
120 cm (50 in) behind the vehicle. This system is a supplemental sys- tem that senses objects within the
range and location of the sensors, itcannot detect objects in other areaswhere sensors are not installed.
Operation of the Rear ParkingAssist System
Operating condition
This system will activate when backing up with the POWER button
in the ON position. However, if the
vehicle speed exceeds 5 km/h (3
mph), the system may not detect
objects. If the vehicle speed exceeds 10
km/h (6 mph), the system will not
warn you even though objects aredetected.
When more than two objects are sensed at the same time, the clos-
est one will be recognized first.
Types of warning sound and indicator
OAEE046413
Sensor
ALWAYS look around your vehi-
cle to make sure there are not
any objects or obstacles before
moving the vehicle in any direc-
tion to prevent a collision.
Always pay close attention
when the vehicle is driven close
to objects, particularly pedestri-
ans, and especially children.
Be aware that some objects
may not be visible on the
screen or be detected by the
sensors, due to the objects
distance, size or material, all of
which can limit the effective-
ness of the sensor.
WARNING
Types of warning soundIndicator
When an object is approximately 60 to 120 cm (24 to 47 in) from
the rear bumper, the warning
sound beeps intermittently.
When an object is approximately 30 to 60 cm (12 to 24 in) from
the rear bumper, the warning
sound beeps more frequently.
When an object is within approx- imately 30 cm (12 in) from the
rear bumper, the warning sound
beeps continuously.