2017 Hyundai Ioniq Electric regen
[x] Cancel search: regenPage 210 of 582
3-41
Convenient features of your vehicle
3
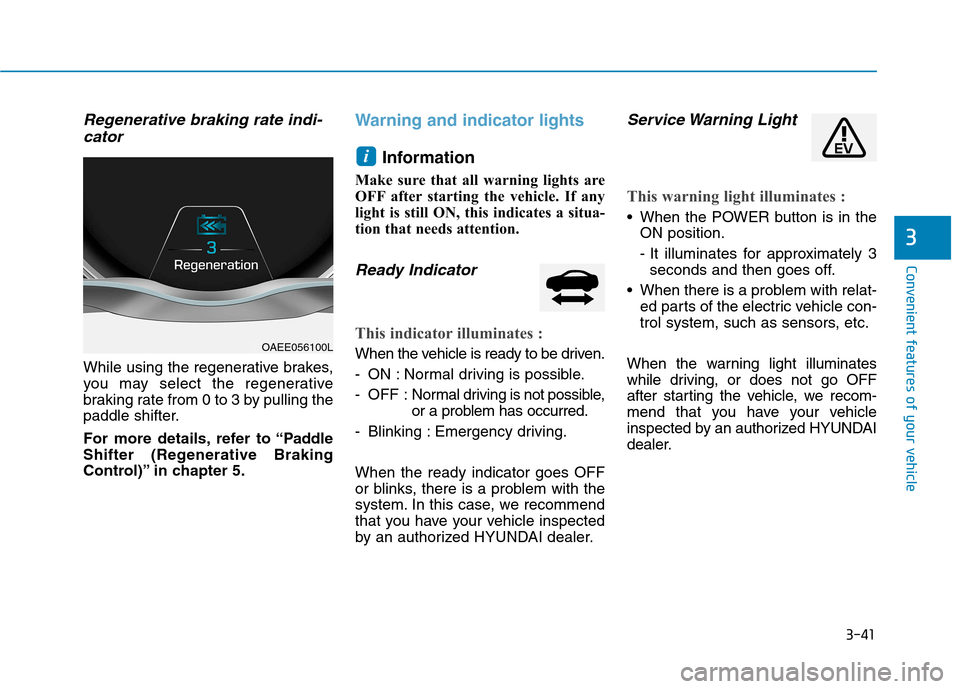
Regenerative braking rate indi-cator
While using the regenerative brakes,
you may select the regenerative
braking rate from 0 to 3 by pulling the
paddle shifter.
For more details, refer to “Paddle
Shifter (Regenerative Braking
Control)” in chapter 5.
Warning and indicator lights
Information
Make sure that all warning lights are
OFF after starting the vehicle. If any
light is still ON, this indicates a situa-
tion that needs attention.
Ready Indicator
This indicator illuminates :
When the vehicle is ready to be driven.
- ON : Normal driving is possible.
- OFF : Nor mal driving is not possible,
or a problem has occurred.
- Blinking : Emergency driving. When the ready indicator goes OFF
or blinks, there is a problem with the
system. In this case, we recommend
that you have your vehicle inspected
by an authorized HYUNDAI dealer.
Service Warning Light
This warning light illuminates :
When the POWER button is in the ON position.
- It illuminates for approximately 3seconds and then goes off.
When there is a problem with relat- ed parts of the electric vehicle con-
trol system, such as sensors, etc.
When the warning light illuminates
while driving, or does not go OFF
after starting the vehicle, we recom-
mend that you have your vehicle
inspected by an authorized HYUNDAI
dealer.
i
OAEE056100L
Page 213 of 582
3-44
Convenient features of your vehicle
If the brake fluid level in the reser-
voir is low:
1. Drive carefully to the nearest safelocation and stop your vehicle.
2. With the vehicle turned off, check the brake fluid level immediately and add fluid as required (For
more details, refer to “Brake
Fluid” in chapter 7) . After adding
brake fluid, check all brake compo-
nents for fluid leaks. If a brake fluid
leak is found, or if the warning light
remains on, or if the brakes do not
operate properly, do not drive the
vehicle. We recommend you to
have the vehicle inspected by an
authorized HYUNDAI dealer.
Dual-diagonal braking system
Your vehicle is equipped with dual-
diagonal braking systems. This
means you still have braking on two
wheels even if one of the dual sys-
tems should fail. With only one of the dual systems
working, more than normal pedal
travel and greater pedal pressure is
required to stop the vehicle. Also, the vehicle will not stop in as
short a distance with only a portion
of the brake system working.
If the brakes fail while you are driv- ing, use the paddle shifter (left side
lever) to increase regenerative brak-
ing control and stop the vehicle as
soon as it is safe to do so.
Regenerative Brake
Warning Light
This warning light illuminates :
When the regenerative brake does
not operate and the brake does not
perform well. This causes the Brake
Warning light (red) and Regenerative
Brake Warning Light (yellow) to illu-
minate simultaneously.
In this case, drive safely and we rec-
ommend that you have your vehicle
inspected by an authorized HYUNDAI
dealer.
The operation of the brake pedal may
be more difficult than normal and the
braking distance can increase.
Parking Brake & Brake Fluid
Warning Light
Driving the vehicle with a warn-
ing light ON is dangerous. If the
Parking Brake & Brake Fluid
Warning Light illuminates with
the parking brake released, itindicates that the brake fluid
level is low.
In this case, we recommend
that you have the vehicle
inspected by an authorized
HYUNDAI dealer.
WARNING
(yellow)
Page 230 of 582
3-61
Convenient features of your vehicle
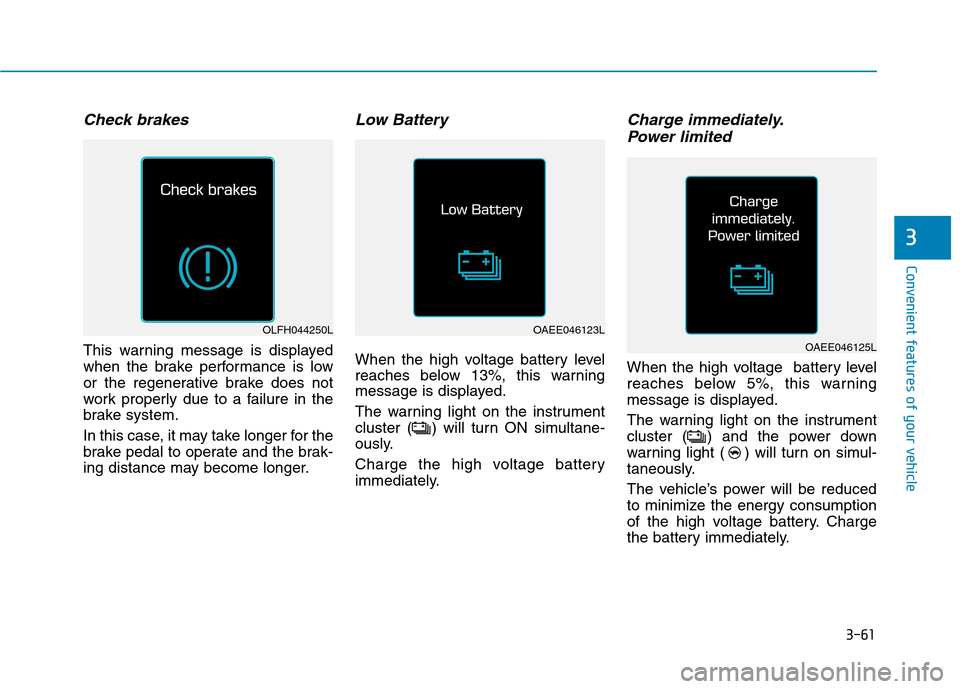
Check brakes
This warning message is displayed
when the brake performance is low
or the regenerative brake does not
work properly due to a failure in the
brake system.
In this case, it may take longer for the
brake pedal to operate and the brak-
ing distance may become longer.
Low Battery
When the high voltage battery level
reaches below 13%, this warning
message is displayed.
The warning light on the instrument
cluster ( ) will turn ON simultane-
ously.
Charge the high voltage battery
immediately.
Charge immediately.Power limited
When the high voltage battery level
reaches below 5%, this warning
message is displayed.
The warning light on the instrument
cluster ( ) and the power down
warning light ( ) will turn on simul-
taneously.
The vehicle’s power will be reduced
to minimize the energy consumption
of the high voltage battery. Charge
the battery immediately.
3
OLFH044250LOAEE046123L
OAEE046125L
Page 340 of 582
Driving your vehicle
Before driving.........................................................5-3Before entering the vehicle ...........................................5-3
Before starting...................................................................5-3
Power button ..........................................................5-4 POWER button positions .................................................5-6
Starting the vehicle...........................................................5-8
Turing off the vehicle ....................................................5-10
Reduction gear .....................................................5-11 Reduction gear operation .............................................5-11
Parking ...............................................................................5-13
LCD display messages ....................................................5-14
Good driving practices ...................................................5-16
Paddle shifter
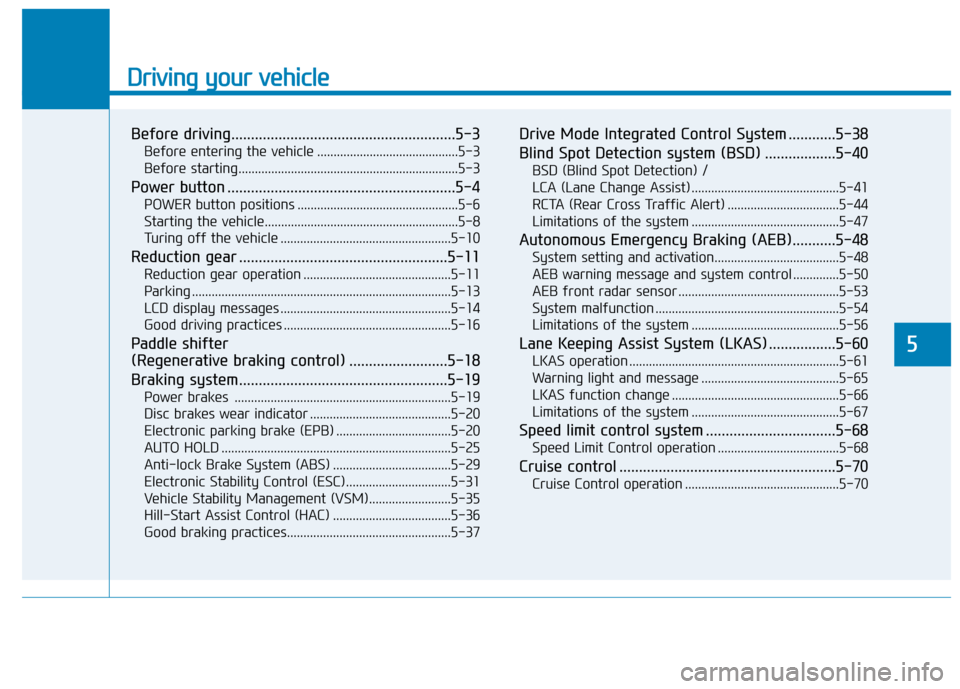
(Regenerative braking control) .........................5-18
Braking system.....................................................5-19 Power brakes ..................................................................5-19
Disc brakes wear indicator ...........................................5-20
Electronic parking brake (EPB) ...................................5-20
AUTO HOLD ......................................................................5-25
Anti-lock Brake System (ABS) ....................................5-29
Electronic Stability Control (ESC)................................5-31
Vehicle Stability Management (VSM).........................5-35
Hill-Start Assist Control (HAC) ....................................5-36
Good braking practices..................................................5-37 Drive Mode Integrated Control System ............5-38
Blind Spot Detection system (BSD) ..................5-40
BSD (Blind Spot Detection) /
LCA (Lane Change Assist) .............................................5-41RCTA (Rear Cross Traffic Alert) ..................................5-44
Limitations of the system .............................................5-47
Autonomous Emergency Braking (AEB)...........5-48 System setting and activation......................................5-48
AEB warning message and system control ..............5-50
AEB front radar sensor .................................................5-53
System malfunction ........................................................5-54
Limitations of the system .............................................5-56
Lane Keeping Assist System (LKAS) .................5-60 LKAS operation ................................................................5-61
Warning light and message ..........................................5-65
LKAS function change ...................................................5-66
Limitations of the system .............................................5-67
Speed limit control system .................................5-68 Speed Limit Control operation .....................................5-68
Cruise control .......................................................5-70 Cruise Control operation ...............................................5-70
5
Page 357 of 582
5-18
Driving your vehicle
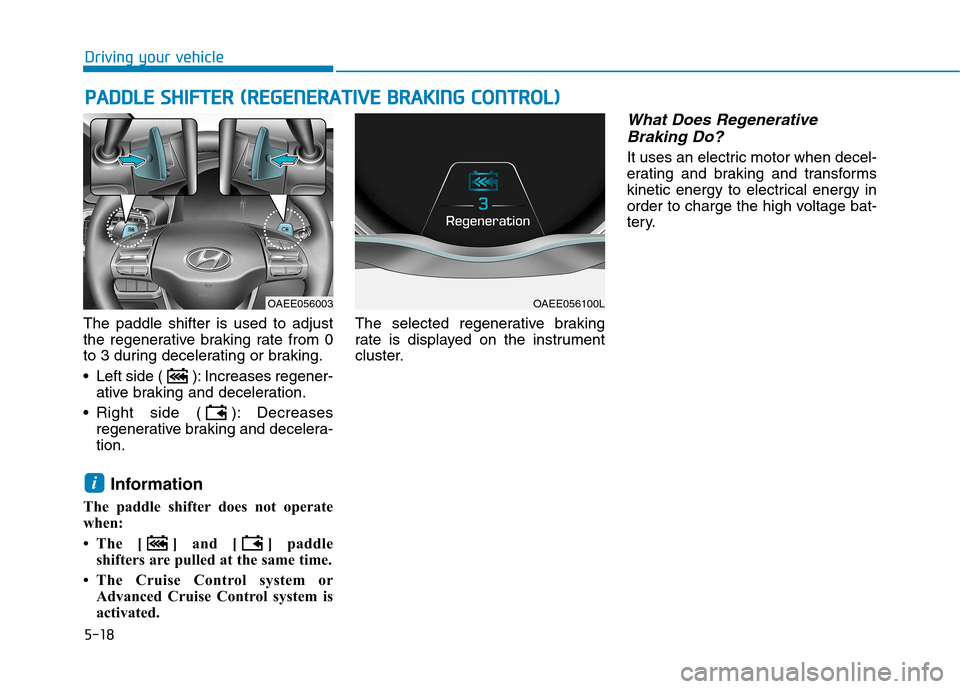
The paddle shifter is used to adjust
the regenerative braking rate from 0
to 3 during decelerating or braking.
Left side ( ): Increases regener-ative braking and deceleration.
Right side ( ): Decreases regenerative braking and decelera- tion.
Information
The paddle shifter does not operate
when:
The [ ] and [ ] paddle shifters are pulled at the same time.
The Cruise Control system or Advanced Cruise Control system is
activated. The selected regenerative braking
rate is displayed on the instrument
cluster.
What Does Regenerative
Braking Do?
It uses an electric motor when decel-
erating and braking and transforms
kinetic energy to electrical energy in
order to charge the high voltage bat-
tery.
i
PP AA DDDDLLEE SS HH IIFF TT EERR (( RR EEGG EENN EERR AA TTIIVV EE BB RRAA KKIINN GG CC OO NNTTRR OO LL))
OAEE056100LOAEE056003
Page 358 of 582
5-19
Driving your vehicle
5
Power brakes
Your vehicle has power-assisted
brakes that adjust automatically
through normal usage.
If the vehicle is not in the ready
( ) mode or the vehicle is turned
off while driving, the power assist for
the brakes will not work. You can still
stop your vehicle by applying greater
force to the brake pedal than typical.
The stopping distance, however, will
be longer than with power brakes.
When the vehicle is not in the ready
( ) mode, the reserve brake
power is partially depleted each time
the brake pedal is applied. Do not
pump the brake pedal when the
power assist has been interrupted.
Pump the brake pedal only when
necessary to maintain steering con-
trol on slippery surfaces.
BBRRAA KKIINN GG SS YY SSTT EEMM
Take the following precautions:
Do not drive with your foot resting on the brake pedal.This will create abnormal high
brake temperatures, exces-sive brake lining and pad
wear, and increased stoppingdistances.
When descending down a
long or steep hill, use the pad-
dle shifter (left side lever) to
increase regenerative braking
control in order to control
your speed without using the
brake pedal excessively.
Applying the brakes continu-
ously will cause the brakes to
overheat and could result in a
temporary loss of braking per-
formance.
(Continued)
(Continued)
Wet brakes may impair the
vehicle's ability to safely slow
down; the vehicle may alsopull to one side when the
brakes are applied. Applying
the brakes lightly will indicate
whether they have been
affected in this way. Always
test your brakes in this fash-
ion after driving through deep
water. To dry the brakes, light-
ly tap the brake pedal to heatup the brakes while maintain-
ing a safe forward speed until
brake performance returns to
normal. Avoid driving at highspeeds until the brakes func-
tion correctly.
WARNING
Page 444 of 582
6-3
What to do in an emergency
If you have a flat tire while driving
If a tire goes flat while you are driv- ing:
Take your foot off the acceleratorpedal and let the vehicle slow
down while driving straight ahead.
Do not apply the brakes immedi-
ately to slow down the vehicle, butuse the paddle shifter (left side
lever) to increase regenerative
braking control. Also, do notattempt to pull off the road as this
may cause loss of vehicle control
resulting in an accident. When the
vehicle has slowed to such a
speed that it is safe to do so, brakecarefully and pull off the road.
Drive off the road as far as possible
and park on firm, level ground. If
you are on a divided highway, do
not park in the median area
between the two traffic lanes.
When the vehicle is stopped, press the hazard warning flasher button,
shift to P (Park), apply the parking
brake, and place the POWER but-ton in the OFF position. Have all passengers get out of the
vehicle. Be sure they all get out on
the side of the vehicle that is away
from traffic.
When changing a flat tire, follow the instructions provided later in
this chapter. (Refer to "If You Have
a Flat Tire" provided in this chap-
ter.)
6
Page 575 of 582
I-6Hazard warning flasher...................................................6-2
Hazardous driving conditions .......................................5-93
Headlamp delay function..............................................3-81
Headlamp leveling device ............................................3-82
Headlamp position ........................................................3-78
Headlight bulb replacement..........................................7-67
Headrest ........................................................................2-16
Front seat headrests ...................................................2-17
Rear seat headrests.....................................................2-20
Heated steering wheel...................................................3-16
Heater............................................................................3-98
Height adjustment .........................................................2-30
High beam operation ....................................................3-78
Highway driving ...........................................................5-95
Hill-start assist control (HAC) .....................................5-36
Hood .............................................................................3-31
Horn ..............................................................................3-17
How to use this manual ..................................................F-5
If the vehicle doesn't turn over or turns over slowly .....6-4
If the vehicle overheats...................................................6-8
If the vehicle stalls at a crossroad or crossing................6-2
If the vehicle stalls while driving ...................................6-2
If the vehicle turns over normally but doesn't start........6-4
If the vehicle will not start .............................................6-4 If you have a flat tire ....................................................6-16
If you have a flat tire while driving ...............................6-3
Immobilizer system ........................................................3-7
Impact sensing door unlock ..........................................3-11
Important safety precautions ..........................................2-2
Air bag hazards ............................................................2-2
Always wear your seat belt..........................................2-2
Control your speed.......................................................2-3
Driver distraction .........................................................2-2
Keep your vehicle in safe condition ............................2-3
Restrain all children .....................................................2-2
In case of emergency while driving ...............................6-2
Indicator light ...............................................................3-41
Inside rearview mirror ..................................................3-17
Instrument cluster .........................................................3-35 Assist mode................................................................3-68
Gauges and meters .....................................................3-37
Instrument panel illumination....................................3-36
LCD display control ..................................................3-65
LCD display messages...............................................3-52
LCD modes ................................................................3-66
Reduction gear shift indicator ...................................3-40
Regenerative braking rate indicator...........................3-41
Shift indicator pop-up ................................................3-40
Trip computer ............................................................3-73
User settings mode.....................................................3-69
Warning and indicator lights......................................3-41
Instrument panel fuse replacement ...............................7-43
Instrument panel overview .............................................1-8
Index
H
I