2017 HYUNDAI I30 light
[x] Cancel search: lightPage 93 of 659

3-91
Convenient features of your vehicle
3
Daytime running light (DRL) (if equipped)
The Daytime Running Lights (DRL)
can make it easier for others to see
the front of your vehicle during the
day, especially after dawn and before
sunset.
The DRL system will turn the dedi-
cated lamp OFF when:
1. The headlights or front fog lights
are in the ON position.
2. The position light switch is in the ON position.
3. The engine is turned off.
Headlight leveling device (if equipped)
Manual type
To adjust the headlight beam level
according to the number of the pas-
sengers and loading weight in the
luggage area, turn the beam leveling
switch.
The higher the number of the switch
position, the lower the headlight
beam level. Always keep the head-
light beam at the proper leveling
position, or headlights may dazzle
other road users. Listed below are the examples of
proper switch settings. For loading
conditions other than those listed
below, adjust the switch position so
that the beam level may be the near-
est as the condition obtained accord-
ing to the list.
OPD046035
Loading conditionSwitch
position
Driver only0
Driver + Front passenger0
Full passengers (including driver)1
Full passengers (including driver)
+ Maximum permissible loading2
Driver + Maximum permissible
loading 3
Page 94 of 659

3-92
Automatic type
It automatically adjusts the headlight
beam level according to the number
of passengers and loading weight in
the luggage area.
And it offers proper headlight beam
under various conditions.
Static bending light
(if equipped)
While driving a corner, for greater
visibility and safety, either the left or
right side static bending light will turn
on automatically. The static bending
light will turn on when one of the fol-
lowing conditions occur.
Vehicle speed is less than 10 km/h(6 mph) and steering wheel angle
is turned approximately 80 degrees
with the low beam on.
Vehicle speed is between 10 km/h (6 mph) to 90 km/h (56 mph) and
steering wheel angle is turned
approximately 35 degrees with the
low beam on.
When the vehicle is in reverse with one of the conditions above satis-
fied, the light opposite to the direc-
tion the steering wheel is steered
will turn on.
Welcome system (if equipped)
Welcome light (if equipped)
Puddle lamp (if equipped)
When all the doors (and tailgate) are
closed and locked, the puddle lamp
will come on for about 15 seconds if
any of the below is performed.
When the door unlock button ispressed on the remote key or
smart key.
When the button of the outside door handle is pressed with the
smart key in possession.
Convenient features of your vehicle
If it does not work properly even
though your car is inclined
backward according to passen-
ger's posture, or the headlight
beam is irradiated to the high or
low position, we recommend
that the system be inspected by
an authorized HYUNDAI dealer.
Do not attempt to inspect or
replace the wiring yourself.
WARNING
OPDE046051
Page 95 of 659

3-93
Convenient features of your vehicle
Door handle lamp (if equipped)
When all the doors (and tailgate) are
closed and locked, the door handle
lamp will come on for about 15 sec-
onds if any of the below is performed.
When the door unlock button ispressed on the remote key or
smart key.
When the button of the outside door handle is pressed with the
smart key in possession.
Headlamp and position lamp
When the headlamp (lamp switch in
the headlamp or AUTO position) is on
and all doors (and tailgate) are locked
and closed, the position lamp and
headlamp will come on for 15 seconds
if/or any of the below is performed.
When the door unlock button ispressed on the remote key or
smart key.
At this time, if you press the door lock
or unlock button, the position lamp and
headlamp will turn off immediately.
You can activate or deactivate the
Welcome Light from the User
Settings mode on the LCD display.
For more details, refer to "LCD
Display" in this chapter.
Interior lamp
When the interior lamp switch is in
the DOOR position and all doors (and
tailgate) are closed and locked, the
room lamp will come on for 30 sec-
onds if any of the below is performed.
When the door unlock button is pressed on the remote key or
smart key.
When the button of the outside door handle is pressed with the
smart key in possession.
At this time, if you press the door lock
or unlock button, the room lamp will
turn off immediately.
Interior lights
Do not use the interior lights for
extended periods when the engine
is turned off or the battery will dis-
charge.
Interior lamp AUTO cut
The interior lamps will automatically
go off approximately 20 minutes after
the engine is turned off and the
doors closed. If a door is opened, the
lamp will go off 40 minutes after the
engine is turned off. If the doors are
locked and the vehicle enters the
armed stage of the theft alarm sys-
tem, the lamps will go off five sec-
onds later.
NOTICE
3
Do not use the interior lights
when driving in the dark. The inte-
rior lights may obscure your view
and cause an accident.
WARNING
Page 98 of 659

3-96
Convenient features of your vehicle
Vanity mirror lamp (if equipped)
Push the switch to turn the light on or
off.
: The lamp will turn on if thisbutton is pressed.
: The lamp will turn off if this button is pressed.
Always have the switch in the off
position when the vanity mirror
lamp is not in use. If the sunvisor
is closed without the lamp off, it
may discharge the battery or dam-
age the sunvisor.
Puddle lamp (if equipped)
Welcome light
When all doors (and tailgate) are
closed and locked, the puddle lamp
will come on for 15 seconds if the
door is unlocked by the smart key or
outside door handle button.
For more details, refer to "Welcome
System" in this chapter.
Escort light
When the ignition switch is in the
OFF position and the driver's door is
opened, the puddle lamp will come
on for 30 seconds. If the driver's door
is closed within the 30 seconds, the
puddle lamp will turn off after 15 sec-
onds. If the driver's door is closed
and locked, the puddle lamp will turn
off immediately.
The Puddle Lamp Escort Light will
turn on only the first time the driver's
door is opened after the engine is
turned off.
NOTICE
OPD046043OLF044259
Page 100 of 659

3-98
Convenient features of your vehicle
Windshield wipers
Operates as follows when the igni-
tion switch is turned ON.: For a single wiping cycle, movethe lever down and release it.
The wipers will operate continu-
ously if the lever is held in this
position.
O : Wiper is not in operation
--- : Wiper operates intermittently at the same wiping intervals. Use
this mode in light rain or mist. To
vary the speed setting, turn the
speed control knob.
1 : Normal wiper speed
2 : Fast wiper speed
Information
If there is heavy accumulation of snow
or ice on the windshield, defrost the
windshield for about 10 minutes, or until
the snow and/or ice is removed before
using the windshield wipers to ensure
proper operation.
If you do not remove the snow and/or ice
before using the wiper and washer, it may
damage the wiper and washer system.
AUTO (Automatic) control (if equipped)
The rain sensor located on the upper
end of the windshield glass senses
the amount of rainfall and controls
the wiping cycle for the proper inter-
val. The more it rains, the faster the
wiper operates.
When the rain stops, the wiper stops.
To vary the speed setting, turn the
speed control knob (1).
If the wiper switch is set in AUTO
mode when the ignition switch is in
the ON position, the wiper will oper-
ate once to perform a self-check of
the system. Set the wiper to OFF
position when the wiper is not in use.
When washing the vehicle, set the
wiper switch in the O position to
stop the auto wiper operation. The
wiper may operate and be damaged
if the switch is set in the AUTO
mode while washing the vehicle.
Do not remove the sensor cover located on the upper end of the
passenger side windshield glass.
Damage to system parts could
occur and may not be covered by
your vehicle warranty.
NOTICE
i
OPDE046061
To avoid personal injury from the
windshield wipers, when the
engine is running and the wind-
shield wiper switch is placed in
the AUTO mode:
Do not touch the upper end of
the windshield glass facing the
rain sensor.
Do not wipe the upper end of
the windshield glass with a
damp or wet cloth.
Do not put pressure on the
windshield glass.
WARNING
■ Type A
■Type B
Page 106 of 659

3-104
Convenient features of your vehicle
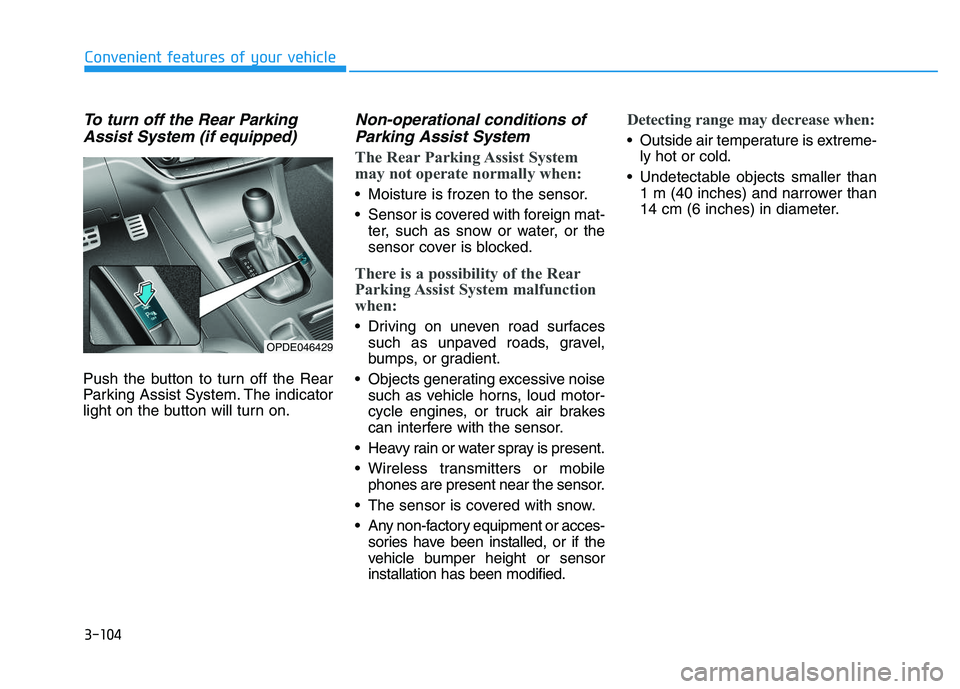
To turn off the Rear ParkingAssist System (if equipped)
Push the button to turn off the Rear
Parking Assist System. The indicator
light on the button will turn on.
Non-operational conditions ofParking Assist System
The Rear Parking Assist System
may not operate normally when:
Moisture is frozen to the sensor.
Sensor is covered with foreign mat-
ter, such as snow or water, or the
sensor cover is blocked.
There is a possibility of the Rear
Parking Assist System malfunction
when:
Driving on uneven road surfacessuch as unpaved roads, gravel,
bumps, or gradient.
Objects generating excessive noise such as vehicle horns, loud motor-
cycle engines, or truck air brakes
can interfere with the sensor.
Heavy rain or water spray is present.
Wireless transmitters or mobile phones are present near the sensor.
The sensor is covered with snow.
Any non-factory equipment or acces- sories have been installed, or if the
vehicle bumper height or sensor
installation has been modified.
Detecting range may decrease when:
Outside air temperature is extreme-ly hot or cold.
Undetectable objects smaller than 1 m (40 inches) and narrower than
14 cm (6 inches) in diameter.
OPDE046429
Page 118 of 659

3-116
Convenient features of your vehicle
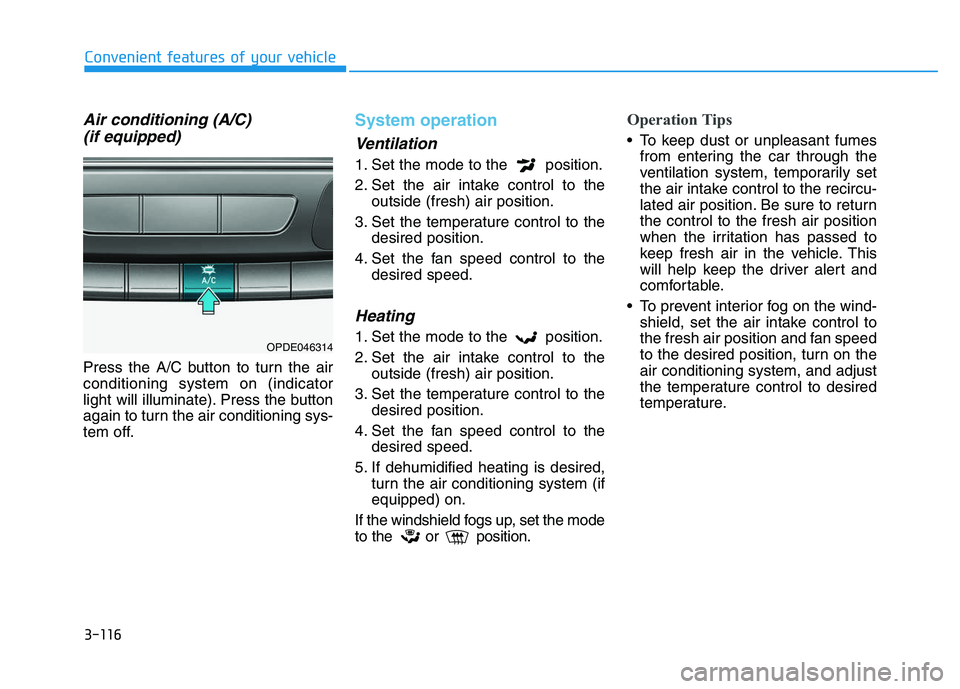
Air conditioning (A/C) (if equipped)
Press the A/C button to turn the air
conditioning system on (indicator
light will illuminate). Press the button
again to turn the air conditioning sys-
tem off.
System operation
Ventilation
1. Set the mode to the position.
2. Set the air intake control to the
outside (fresh) air position.
3. Set the temperature control to the desired position.
4. Set the fan speed control to the desired speed.
Heating
1. Set the mode to the position.
2. Set the air intake control to theoutside (fresh) air position.
3. Set the temperature control to the desired position.
4. Set the fan speed control to the desired speed.
5. If dehumidified heating is desired, turn the air conditioning system (if
equipped) on.
If the windshield fogs up, set the mode
to the or position.
Operation Tips
To keep dust or unpleasant fumes from entering the car through the
ventilation system, temporarily set
the air intake control to the recircu-
lated air position. Be sure to return
the control to the fresh air position
when the irritation has passed to
keep fresh air in the vehicle. This
will help keep the driver alert and
comfortable.
To prevent interior fog on the wind- shield, set the air intake control to
the fresh air position and fan speed
to the desired position, turn on the
air conditioning system, and adjust
the temperature control to desired
temperature.
OPDE046314
Page 120 of 659

3-118
Convenient features of your vehicle
Air conditioning system operation
tips
If the vehicle has been parked indirect sunlight during hot weather,
open the windows for a short time
to let the hot air inside the vehicle
escape.
achieved, switch back from the
recirculated air to the fresh outside
air position.
To help reduce moisture inside of the windows on rainy or humid
days, decrease the humidity inside
the vehicle by operating the air
conditioning system with the win-
dows and sunroof closed.
Use the air conditioning system every month for a few minutes to
ensure maximum system perform-
ance.
excessively, the difference between
the temperature of the outside air
and that of the windshield could
cause the outer surface of the
windshield to fog up, causing loss
of visibility. In this case, set the
mode selection button to the
position and set the fan speed con-
trol knob to the lowest speed set-
ting.
System maintenance
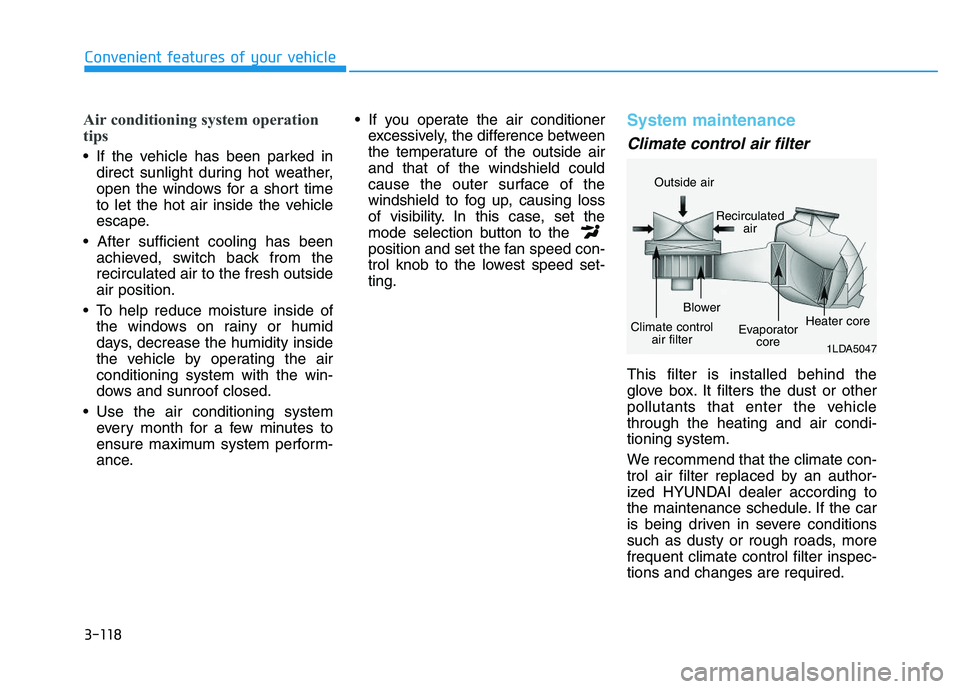
Climate control air filter
This filter is installed behind the
glove box. It filters the dust or other
pollutants that enter the vehicle
through the heating and air condi-
tioning system.
We recommend that the climate con-
trol air filter replaced by an author-
ized HYUNDAI dealer according to
the maintenance schedule. If the car
is being driven in severe conditions
such as dusty or rough roads, more
frequent climate control filter inspec-
tions and changes are required.
1LDA5047
Outside air
Recirculatedair
Climate control air filter Blower
Evaporatorcore Heater core