Page 333 of 586
5-13
Driving your vehicle
5
Button PositionAction Notice
ON
Press the Engine Start/Stop button while it is
in the ACC position without depressing the
brake pedal.
The warning lights can be checked before
the engine is started. Do not leave the Engine Start/Stop button in
the ON position when the engine is not run-
ning to prevent the battery from discharging.
START
To start the engine, depress the brake pedal
and press the Engine Start/Stop button with
the shift lever in the P (Park) or in the N
(Neutral) position.
For your safety, start the engine with the shift
lever in the P (Park) position. If you press the Engine Start/Stop button with-
out depressing the brake pedal, the engine
does not start and the Engine Start/Stop but-
ton changes as follows:
OFF
→ →
ACC →
→
ON →
→
OFF
However, the engine may start if you depress
the brake pedal within 0.5 second after press-
ing the Engine Start/Stop button from the OFF
position.
- Vehicle with automatic transmission
Page 353 of 586
5-33
Driving your vehicle
5
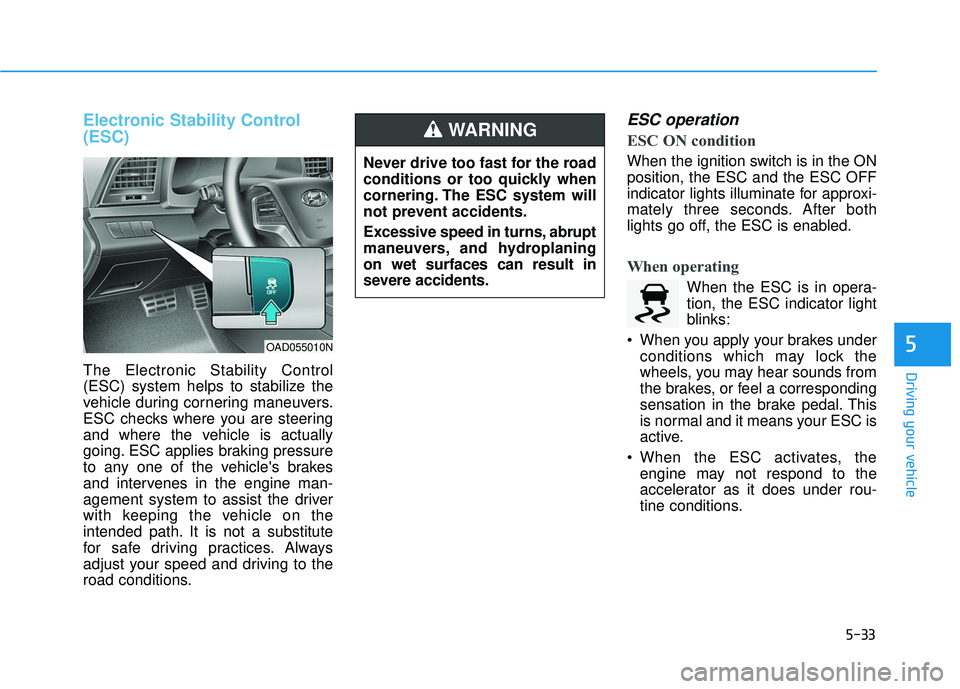
Electronic Stability Control
(ESC)
The Electronic Stability Control
(ESC) system helps to stabilize the
vehicle during cornering maneuvers.
ESC checks where you are steering
and where the vehicle is actually
going. ESC applies braking pressure
to any one of the vehicle's brakes
and intervenes in the engine man-
agement system to assist the driver
with keeping the vehicle on the
intended path. It is not a substitute
for safe driving practices. Always
adjust your speed and driving to the
road conditions.
ESC operation
ESC ON condition
When the ignition switch is in the ON
position, the ESC and the ESC OFF
indicator lights illuminate for approxi-
mately three seconds. After both
lights go off, the ESC is enabled.
When operating
When the ESC is in opera-
tion, the ESC indicator light
blinks:
When you apply your brakes under conditions which may lock the
wheels, you may hear sounds from
the brakes, or feel a corresponding
sensation in the brake pedal. This
is normal and it means your ESC is
active.
When the ESC activates, the engine may not respond to the
accelerator as it does under rou-
tine conditions.
Never drive too fast for the road
conditions or too quickly when
cornering. The ESC system will
not prevent accidents.
Excessive speed in turns, abrupt
maneuvers, and hydroplaning
on wet surfaces can result in
severe accidents.
WARNING
OAD055010N
Page 355 of 586
5-35
Driving your vehicle
5
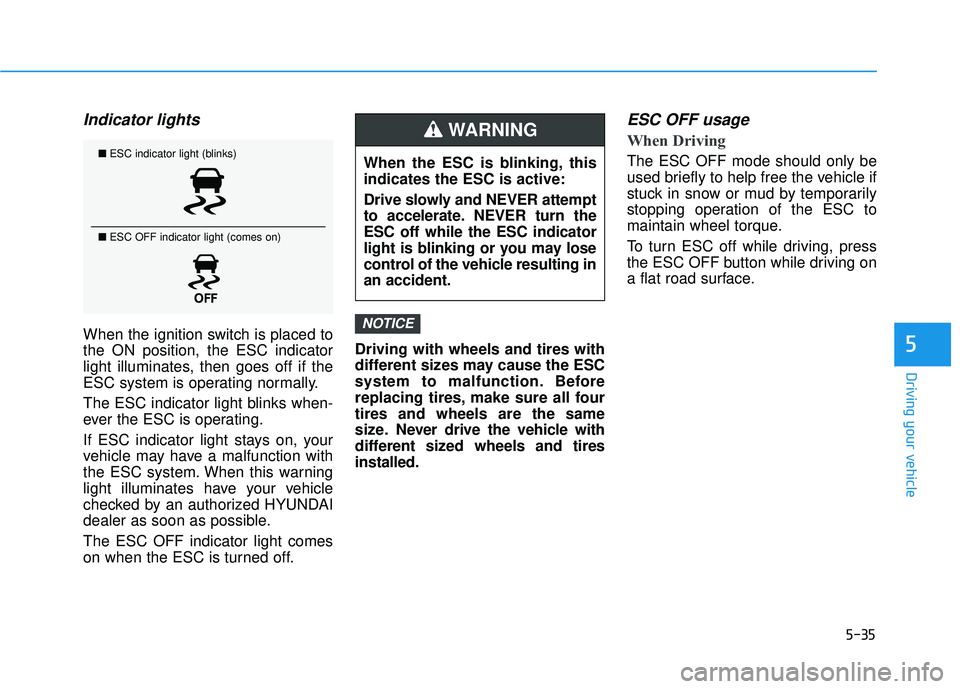
Indicator lights
When the ignition switch is placed to
the ON position, the ESC indicator
light illuminates, then goes off if the
ESC system is operating normally.
The ESC indicator light blinks when-
ever the ESC is operating.
If ESC indicator light stays on, your
vehicle may have a malfunction with
the ESC system. When this warning
light illuminates have your vehicle
checked by an authorized HYUNDAI
dealer as soon as possible.
The ESC OFF indicator light comes
on when the ESC is turned off.Driving with wheels and tires with
different sizes may cause the ESC
system to malfunction. Before
replacing tires, make sure all four
tires and wheels are the same
size. Never drive the vehicle with
different sized wheels and tires
installed.
ESC OFF usage
When Driving
The ESC OFF mode should only be
used briefly to help free the vehicle if
stuck in snow or mud by temporarily
stopping operation of the ESC to
maintain wheel torque.
To turn ESC off while driving, press
the ESC OFF button while driving on
a flat road surface.
NOTICE
When the ESC is blinking, this
indicates the ESC is active:
Drive slowly and NEVER attempt
to accelerate. NEVER turn the
ESC off while the ESC indicator
light is blinking or you may lose
control of the vehicle resulting in
an accident.
WARNING
■
ESC indicator light (blinks)
■ ESC OFF indicator light (comes on)
Page 356 of 586
5-36
Driving your vehicle
To prevent damage to the trans-
mission:
Do not allow wheel(s) of one axle to spin excessively while
the ESC, ABS, and parking brake
warning lights are displayed.
The repairs would not be cov-
ered by the vehicle warranty.
Reduce engine power and do
not spin the wheel(s) excessive-
ly while these lights are dis-
played.
When operating the vehicle on a dynamometer, make sure the
ESC is turned off (ESC OFF light
illuminated).
Information
Turning the ESC off does not affect
ABS or standard brake system opera-
tion.
Vehicle Stability Management
(VSM)
The Vehicle Stability Management
(VSM) is a function of the Electronic
Stability Control (ESC) system. It
helps ensure the vehicle stays stable
when accelerating or braking sud-
denly on wet, slippery and rough
roads where traction over the four
tires can suddenly become uneven.
VSM operation
VSM ON condition
The VSM operates when:
The Electronic Stability Control(ESC) is on.
Vehicle speed is approximately above 9 mph (15 km/h) on curve
roads.
Vehicle speed is approximately above 12 mph (20 km/h) when the
vehicle is braking on rough roads.
When operating
When you apply your brakes under
conditions which may activate the
ESC, you may hear sounds from the
brakes, or feel a corresponding sen-
sation in the brake pedal. This is nor-
mal and it means your VSM is active.
i
NOTICE
Take the following precautions
when using the Vehicle Stability
Management (VSM):
ALWAYS check the speed and
the distance to the vehicle
ahead. The VSM is not a sub-
stitute for safe driving prac-
tices.
Never drive too fast for the
road conditions. The VSM sys-
tem will not prevent acci-
dents. Excessive speed in bad
weather, slippery and uneven
roads can result in severe
accidents.
WARNING
Page 427 of 586
6-2
The hazard warning flasher serves
as a warning to other drivers to exer-
cise extreme caution when approach-
ing, overtaking, or passing your vehi-
cle.
It should be used whenever emer-
gency repairs are being made or
when the vehicle is stopped near the
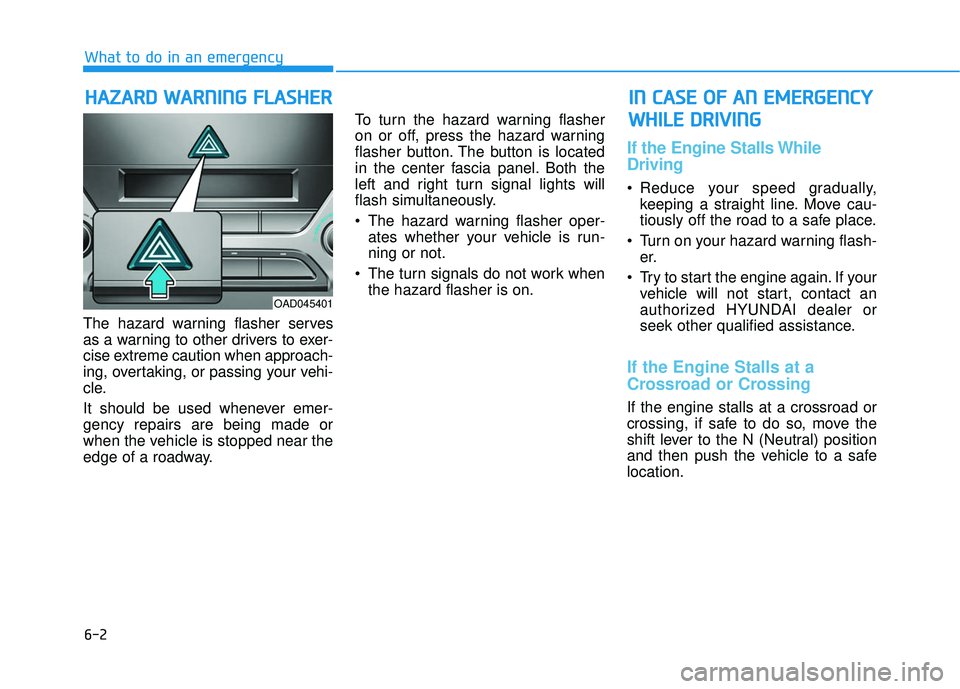
edge of a roadway.To turn the hazard warning flasher
on or off, press the hazard warning
flasher button. The button is located
in the center fascia panel. Both the
left and right turn signal lights will
flash simultaneously.
• The hazard warning flasher oper-
ates whether your vehicle is run-
ning or not.
The turn signals do not work when the hazard flasher is on.
If the Engine Stalls While
Driving
Reduce your speed gradually,keeping a straight line. Move cau-
tiously off the road to a safe place.
Turn on your hazard warning flash- er.
Try to start the engine again. If your vehicle will not start, contact an
authorized HYUNDAI dealer or
seek other qualified assistance.
If the Engine Stalls at a
Crossroad or Crossing
If the engine stalls at a crossroad or
crossing, if safe to do so, move the
shift lever to the N (Neutral) position
and then push the vehicle to a safe
location.
H HA
AZ
ZA
A R
RD
D
W
W A
AR
RN
N I
IN
N G
G
F
F L
LA
A S
SH
H E
ER
R
What to do in an emergency
I
IN
N
C
C A
A S
SE
E
O
O F
F
A
A N
N
E
E M
M E
ER
R G
G E
EN
N C
CY
Y
W
W H
HI
IL
L E
E
D
D R
RI
IV
V I
IN
N G
G
OAD045401
Page 466 of 586

7-6
Maintenance
Owner Maintenance Schedule
When you stop for fuel:
Check the engine oil level.
Check coolant level in the enginecoolant reservoir.
Check the windshield washer fluid level.
Check for low or under-inflated tires.
While operating your vehicle:
Note any changes in the sound ofthe exhaust or any smell of
exhaust fumes in the vehicle.
Check for vibrations in the steering wheel. Notice if there is any
increased steering effort or loose-
ness in the steering wheel, or
change in its straight-ahead posi-
tion.
Notice if your vehicle constantly turns slightly or "pulls" to one side
when traveling on smooth, level
road.
When stopping, listen and check for unusual sounds, pulling to one
side, increased brake pedal travel
or "hard-to-push" brake pedal.
If any slipping or changes in the operation of your transmission
occurs, check the transmission
fluid level.
Check the automatic transmission/ ecoshift dual clutch transmission P
(Park) function. Check the parking brake.
Check for fluid leaks under your
vehicle (water dripping from the air
conditioning system during or after
use is normal).
At least monthly:
Check coolant level in the enginecoolant reservoir.
Check the operation of all exterior lights, including the brake lights,
turn signals and hazard warning
flashers.
Check the inflation pressures of all tires including the spare for tires
that are worn, show uneven wear,
or are damaged.
Check for loose wheel lug nuts.
Be careful when checking your
engine coolant level when the
engine is hot. This may result in
coolant being blown out of the
opening and cause serious
burns and other injuries.
WARNING
Page 520 of 586
7-60
Maintenance
F
FU
U S
SE
E S
S
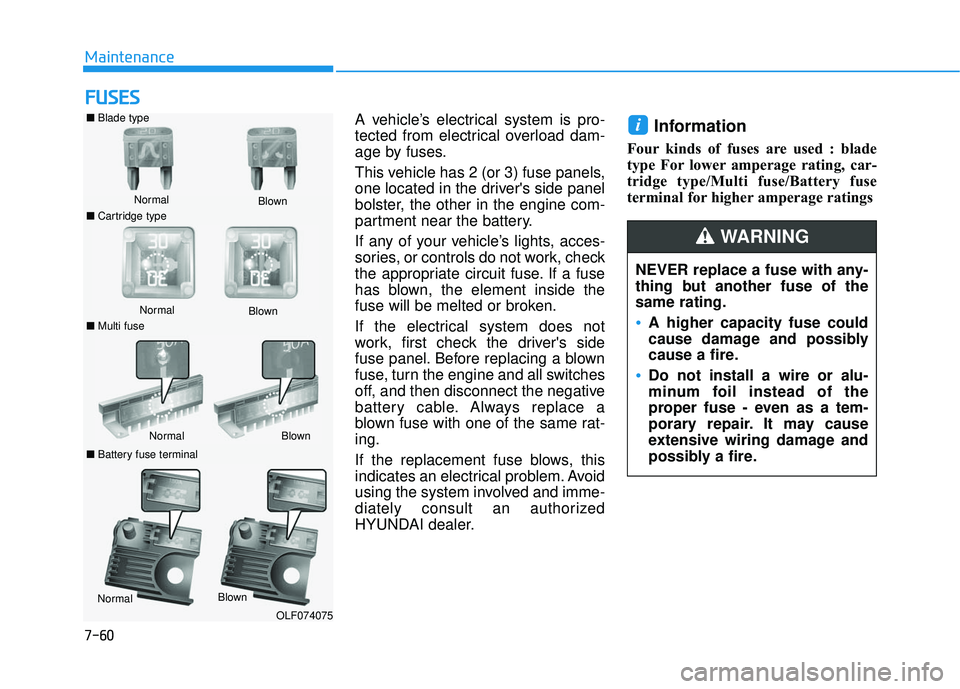
A vehicle’s electrical system is pro-
tected from electrical overload dam-
age by fuses.
This vehicle has 2 (or 3) fuse panels,
one located in the driver's side panel
bolster, the other in the engine com-
partment near the battery.
If any of your vehicle’s lights, acces-
sories, or controls do not work, check
the appropriate circuit fuse. If a fuse
has blown, the element inside the
fuse will be melted or broken.
If the electrical system does not
work, first check the driver's side
fuse panel. Before replacing a blown
fuse, turn the engine and all switches
off, and then disconnect the negative
battery cable. Always replace a
blown fuse with one of the same rat-
ing.
If the replacement fuse blows, this
indicates an electrical problem. Avoid
using the system involved and imme-
diately consult an authorized
HYUNDAI dealer.Information
Four kinds of fuses are used : blade
type For lower amperage rating, car-
tridge type/Multi fuse/Battery fuse
terminal for higher amperage ratings
i
NEVER replace a fuse with any-
thing but another fuse of the
same rating.
A higher capacity fuse could
cause damage and possibly
cause a fire.
Do not install a wire or alu-
minum foil instead of the
proper fuse - even as a tem-
porary repair. It may cause
extensive wiring damage and
possibly a fire.
WARNING
■ Blade type
Normal
■ Cartridge type Blown
Normal
Blown
■ Multi fuse
Normal Blown
■
Battery fuse terminal
Normal Blown
OLF074075
Page 548 of 586
7-88
Maintenance
Interior light bulb replacement 1. Using a flat-blade screwdriver,gently pry the lens from the interi-
or lamp housing.
2. Remove the bulb by pulling it straight out.
3. Install a new bulb in the socket.
4. Align the lens tabs with the interi- or lamp housing notches and snap
the lens into place.
Prior to working on the Interior
Lights, ensure that the "OFF"
button is depressed to avoid
burning your fingers or receiv-
ing an electric shock.
WARNING
Use care not to dirty or damage
lens, lens tab, and plastic hous-
ings.
CAUTION
■
Map lamp
OAD075044
OAD075045
■Luggage room lamp
■Sunvisor lamp
OAD075047
OAD075046
■Room lamp