Page 448 of 586

6-23
What to do in an emergency
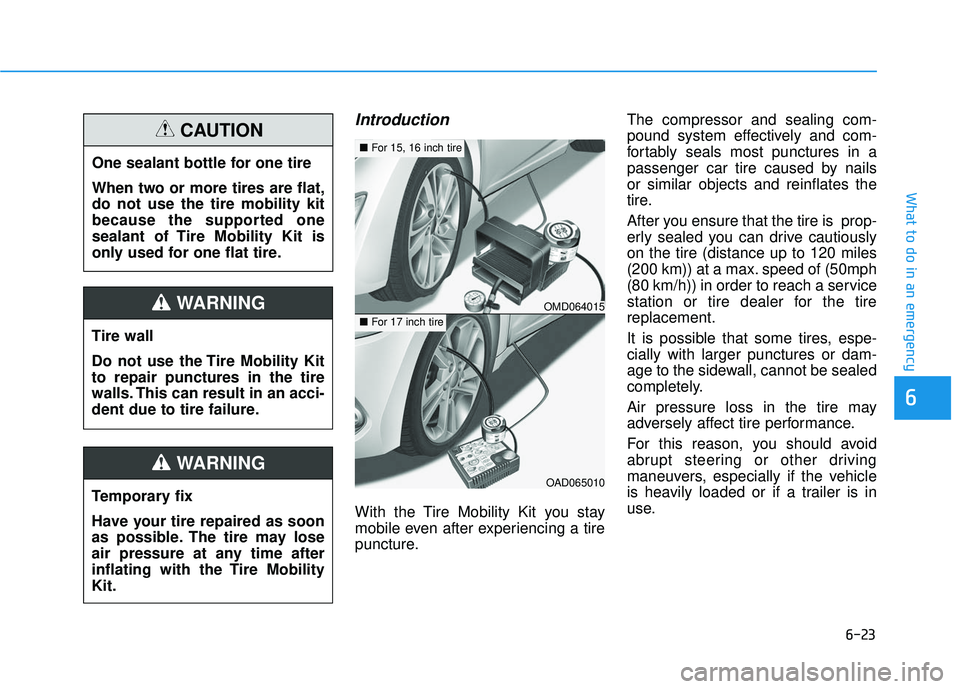
Introduction
With the Tire Mobility Kit you stay
mobile even after experiencing a tire
puncture.The compressor and sealing com-
pound system effectively and com-
fortably seals most punctures in a
passenger car tire caused by nails
or similar objects and reinflates the
tire.
After you ensure that the tire is prop-
erly sealed you can drive cautiously
on the tire (distance up to 120 miles
(200 km)) at a max. speed of (50mph
(80 km/h)) in order to reach a service
station or tire dealer for the tire
replacement.
It is possible that some tires, espe-
cially with larger punctures or dam-
age to the sidewall, cannot be sealed
completely.
Air pressure loss in the tire may
adversely affect tire performance.
For this reason, you should avoid
abrupt steering or other driving
maneuvers, especially if the vehicle
is heavily loaded or if a trailer is in
use.
6
One sealant bottle for one tire
When two or more tires are flat,
do not use the tire mobility kit
because the supported one
sealant of Tire Mobility Kit is
only used for one flat tire.
CAUTION
Tire wall
Do not use the Tire Mobility Kit
to repair punctures in the tire
walls. This can result in an acci-
dent due to tire failure.
WARNING
Temporary fix
Have your tire repaired as soon
as possible. The tire may lose
air pressure at any time after
inflating with the Tire Mobility
Kit.
WARNING
OMD064015
OAD065010
■
For 15, 16 inch tire
■For 17 inch tire
Page 450 of 586
6-25
What to do in an emergency
0. Speed restriction label
1. Sealant bottle and label withspeed restriction
2. Filling hose from sealant bottle to wheel
3. Connectors and cable for power outlet direct connection 4. Holder for the sealant bottle
5. Compressor
6. ON/OFF switch
7. Pressure gauge for displaying the
tire inflation pressure
8. Screw cap for reducing tire infla- tion pressure 9. Hose to connect compressor and
sealant bottle or compressor and
wheel
Connectors, cable and connection
hose are stored in the compressor
housing.
Strictly follow the specified
sequence, otherwise the sealant
may escape under high pressure.
6
Components of the Tire Mobility Kit
OAM060015L
■ For 15, 16 inch tire
Do not use the tire sealant after
the sealant has expired (i.e.
pasted the expiration date on
the sealant container). This can
increase the risk of tire failure.
WARNING
Keep out of reach of children.
Avoid contact with eyes.
Do not swallow.
WARNING
Page 451 of 586
6-26
0. Speed restriction label
1. Sealant bottle and label withspeed restriction
2. Filling hose from sealant bottle to wheel
3. Connectors and cable for power outlet direct connection
4. Holder for the sealant bottle 5. Compressor
6. ON/OFF switch
7. Pressure gauge for displaying the
tire inflation pressure
8. Screw cap for reducing tire infla- tion pressure
9. Hose to connect compressor and sealant bottle or compressor and
wheel Connectors, cable and connection
hose are stored in the compressor
housing.
Strictly follow the specified
sequence, otherwise the sealant
may escape under high pressure.
What to do in an emergency
OEL069020
■
For 17 inch tire
Do not use the tire sealant after
the sealant has expired (i.e.
pasted the expiration date on
the sealant container). This can
increase the risk of tire failure.
WARNING
Keep out of reach of children.
Avoid contact with eyes.
Do not swallow.
WARNING
Page 453 of 586
6-28
What to do in an emergency5. Insert the sealant bottle into thehousing (4) of the compressor so
that the bottle is upright.
6. Ensure that the compressor is switched off, position 0. 7. Plug the compressor power cord
(3) into the vehicle power outlet.
8. With the ignition switch in the ON position, switch on the compres-
sor and let it run for approximately
5~7 minutes to fill the sealant up
to proper pressure. (refer to the
Tire and Wheels, chapter 8). The
inflation pressure of the tire after
filling is unimportant and will be
checked/corrected later.
Be careful not to overinflate the
tire and stay away from the tire
when filling it.
Securely install the sealant fill-
ing hose to the valve. If not,
sealant may flow backward,
possibly clogging the filling
hose.
CAUTION
OHY015012
OAD065022
OLMF064105
■
For 15, 16 inch tire
■For 17 inch tireOAD065013N
Page 454 of 586

6-29
What to do in an emergency
6
9. Switch off the compressor.
10. Detach the hoses from thesealant bottle connector and
from the tire valve.
Return the Tire Mobility Kit to its stor-
age location in the vehicle.
Distributing the sealant
11. Immediately drive approximately 4~6miles (7~10km or about 10
minutes) to evenly distribute the
sealant in the tire.
Do not exceed a speed of 50 mph
(80 km/h). If possible, do not fall
below a speed of 12 mph (20 km/h).
While driving, if you experience any
unusual vibration, ride disturbance or
noise, reduce your speed and drive
with caution until you can safely pull
off of the side of the road.
Call for road side service or towing.
When you use the Tire Mobility Kit,
the tire pressure sensors and wheel
may be damaged by sealant, have it
inspected at an authorized dealer.
Do not attempt to drive your
vehicle if the tire pressure is
below 29 psi (200 kpa). This
could result in an accident due
to sudden tire failure.CAUTION
Do not leave your vehicle run-
ning in a poorly ventilated area
for extended periods of time.
Carbon monoxide poisoning
and suffocation can occur.
WARNING
Page 455 of 586

6-30
What to do in an emergency
Checking the tire inflation pres-
sure
1. After driving approximately 4~6miles (7~10km or about
10 minutes), stop at a safe loca-
tion.
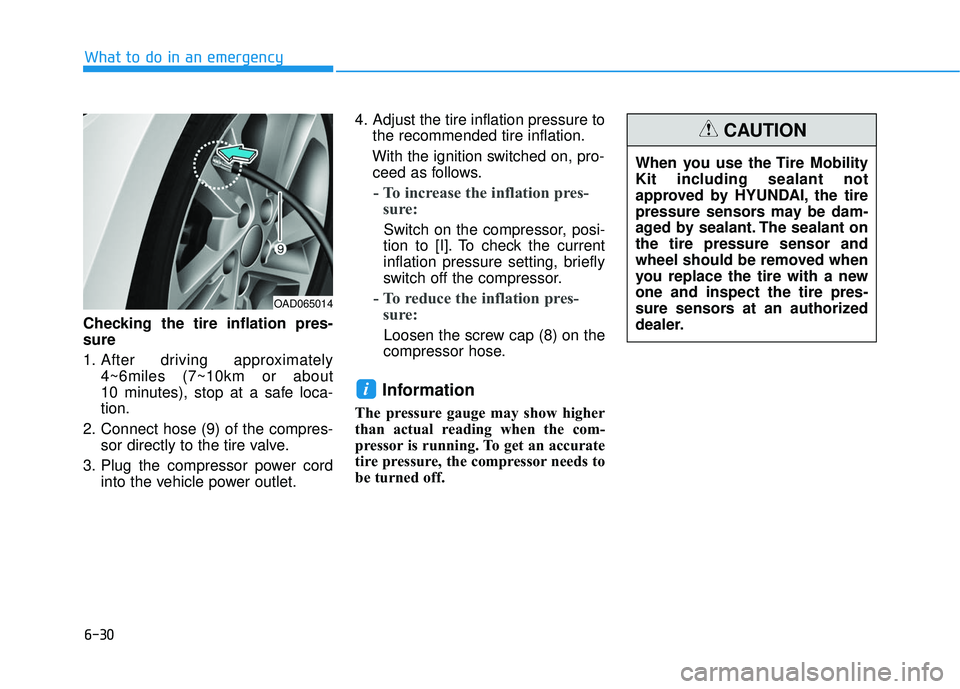
2. Connect hose (9) of the compres- sor directly to the tire valve.
3. Plug the compressor power cord into the vehicle power outlet. 4. Adjust the tire inflation pressure to
the recommended tire inflation.
With the ignition switched on, pro- ceed as follows.
- To increase the inflation pres- sure:
Switch on the compressor, posi-
tion to [I]. To check the current
inflation pressure setting, briefly
switch off the compressor.
- To reduce the inflation pres- sure:
Loosen the screw cap (8) on the
compressor hose.
Information
The pressure gauge may show higher
than actual reading when the com-
pressor is running. To get an accurate
tire pressure, the compressor needs to
be turned off.
i
OAD065014
When you use the Tire Mobility
Kit including sealant not
approved by HYUNDAI, the tire
pressure sensors may be dam-
aged by sealant. The sealant on
the tire pressure sensor and
wheel should be removed when
you replace the tire with a new
one and inspect the tire pres-
sure sensors at an authorized
dealer.
CAUTION
Page 456 of 586
6-31
What to do in an emergency
6
Technical Data (15, 16 inch tire)
System voltage: DC 12 V
Working voltage: DC 10 - 15 V
Amperage rating: max. 15 A
Suitable for use at temperatures:-22 ~ +158°F (-30 ~ +70°C)
Max. working pressure: 87 psi (6 bar)
Size
Compressor: 6.7 x 5.9 x 2.4 in. (170 x 150 x 60 mm)
Sealant bottle: 3.3 x 3.0 ø in. (85 x 77 ø mm)
Compressor weight: 1.8 lbs (0.8 kg)
Sealant volume: 12.2 cu. in. (200 ml)
Technical Data (17 inch tire)
System voltage: DC 12 V
Working voltage: DC 10 - 15 V
Amperage rating: max. 15 A
Suitable for use at temperatures:-22 ~ +158°F (-30 ~ +70°C)
Max. working pressure: 87 psi (6 bar)
Size
Compressor: 6.6 x 5.9 x 2.7 in. (168 x 150 x 68 mm)
Sealant bottle: 4.0 x 3.3 ø in. (104 x 85 ø mm)
Compressor weight: 2.3 lbs (1.05 kg)
Sealant volume: 18.3 cu. in. (300 ml)
Page 461 of 586

7
Maintenance
7
Maintenance
Engine compartment .............................................7-3
Maintenance services ...........................................7-4
Owner's Responsibility .....................................................7-4
Owner Maintenance Precautions..................................7-4
Owner maintenance ...............................................7-5
Owner Maintenance Schedule .......................................7-6
Scheduled maintenance services.........................7-7
Explanation of scheduled maintenance items..7-24
Engine oil ..............................................................7-28
Checking the Engine Oil Level .....................................7-28
Checking the Engine Oil and Filter .............................7-29
Engine coolant......................................................7-30
Checking the Engine Coolant Level ............................7-30
Changing Engine Coolant ..............................................7-32
Brake/clutch fluid ................................................7-33
Checking the Brake/clutch Fluid Level......................7-33
Washer fluid .........................................................7-34
Checking the Washer Fluid Level................................7-34
Parking brake .......................................................7-33
Checking the Parking Brake .........................................7-33
Air cleaner ............................................................7-35
Filter Replacement ..........................................................7-35
Climate control air filter .....................................7-37
Filter Inspection ...............................................................7-37
Wiper blades .........................................................7-39
Blade Inspection ..............................................................7-39
Blade Replacement .........................................................7-39
Battery...................................................................7-41
For Best Battery Service ..............................................7-42
Battery Recharging ........................................................7-42
Reset features .................................................................7-43
Tires and wheels ..................................................7-44
Tire Care ........................................................................\
....7-44
Recommended Cold Tire Inflation Pressures ...........7-45
Check Tire Inflation Pressure ......................................7-46
Tire Rotation...................................................................\
..7-47
Wheel Alignment and Tire Balance ............................7-48
Tire Replacement ............................................................7-48
Wheel Replacement ........................................................7-49
Tire Traction .....................................................................7-4\
9
Tire Maintenance ............................................................7-50
Tire Sidewall Labeling ....................................................7-50
Tire Terminology and Definitions................................7-54
All Season Tires ...............................................................7-57
Summer Tires ...................................................................7-57
Snow Tires ........................................................................\
7-57
Radial-Ply Tires ...............................................................7-58
Low Aspect Ratio Tires..................................................7-58
7