Page 151 of 565

150
uuOperating the Switches Around the Steering Wheel uFog Lights*
Controls
Fog Lights*
When the low beam headlights are on, turn
the fog light switch on to use the fog lights.
Daytime Running Lights
The high beam headlights come on slightly dimmer than normal when the following
conditions have been met:
• The ignition switch is in ON
(w*1.
• The headlight switch is off.
• The parking brake is released.
The lights remain on even if you set th e parking brake. Turning off the ignition
switch or setting the power mode to VEHICLE OFF will turn off the daytime running
lights.
The high beam headlights re turn to the original brightness once the headlight
switch is turned on.
*1: Models with the smart entry system have an ENGINE START/STOP button instead of an
ignition switch.
1 Fog Lights*
When the fog lights are on, the indicator in the
instrument pane l will be on.
2 Fog Light Indicator
* P. 78
Fog Light Switch
* Not available on all models
17 US ODYSSEY (KA KC)-31TK86600.book 150 ページ 2016年10月24日 月曜日 午後4時2分
Page 159 of 565

158
Controls
Adjusting the Mirrors
Interior Rearview Mirror
Adjust the angle of the rearview mirror when you are sitting in the correct driving
position.
Flip the tab to switch the position.
The night position will help to reduce the glare
from headlights behind you when driving
after dark.
When driving after dark, the automatic
dimming rearview mirror reduces the glare
from headlights behind you, based in inputs
from the mirror sensor. This feature is always
active.
■Rearview Mirror with Day and Night Positions*
1Adjusting the Mirrors
Keep the inside and out side mirrors clean and
adjusted for best visibility.
Adjust the mirrors befo re you start driving.
2 Adjusting the Seat Positions P. 161
Tab
Daytime
Position
Night PositionUp
Down
■Automatic Dimming Rearview Mirror*1 Automatic Dimming Rearview Mirror*
The auto dimming function cancels when the shift
position is in
(R.
Sensor
* Not available on all models
17 US ODYSSEY (KA KC)-31TK86600.book 158 ページ 2016年10月24日 月曜日 午後4時2分
Page 298 of 565
297
uuCustomized Features u
Continued
Features
“Trip B” Reset Timing
“Trip A” Reset Timing
Auto Door Lock
Auto Door Unlock
Interior Light Dimming Time
Headlight Auto Off Timer
Key And Remote Unlock Mode
Keyless Lock Answer Back
Security Relock Timer
Maintenance Reset
Default
Vehicle
Settings
Meter
Setup
Lighting Setup
Door
Setup
Maintenance Info.
Source Select Popup
Sound
Default
Cover Art*1
Connect Bluetooth Audio Device*1
Bluetooth Device List*1
Audio
Settings
*1:May change depending on your currently selected source.
17 US ODYSSEY (KA KC)-31TK86600.book 297 ページ 2016年10月24日 月曜日 午後4時2分
Page 302 of 565
301
uuCustomized Features u
Continued
Features
*1:Default SettingSetup
Group Customizable Features Description Selectable Settings
Vehicle
Settings Meter
Setup
“Trip A” Reset Timing
Changes the setting of how to reset trip meter A
and average fuel economy A. When Refueled
/IGN
Off /Manually
Reset
*1
“Trip B” Reset Timing Changes the setting of how to reset trip meter B
and average fuel economy B. When Refueled
/IGN
Off /Manually
Reset*1
Lighting
Setup Interior Light Dimming
Time
Changes the length of time the interior lights stay
on after you close the doors. 60seconds
/
30seconds
*1/
15seconds
Headlight Auto Off Timer Changes the length of time the exterior lights
stay on after you close the driver's door. 60seconds
/
30seconds /
15seconds
*1/
0seconds
17 US ODYSSEY (KA KC)-31TK86600.book 301 ページ 2016年10月24日 月曜日 午後4時2分
Page 310 of 565
309
uuCustomized Features u
Continued
Features
“Trip A” Reset Timing
“Trip B” Reset Timing
Language Selection*
Adjust Outside Temp. Display
Forward Collision Warning Distance
Keyless Start Guidance Screens
Default
Memory Position Link
Door Unlock Mode
Keyless Access Light Flash
Interior Light Dimming Time
Headlight Auto Off Timer
Auto light Sensitivity
Key And Remote Unlock Mode
Keyless Lock Answer Back
Security Relock Timer
Auto Door Lock
Auto Door Unlock
Maintenance Reset
Meter
Setup
Driver
Assist
System
Setup
*
Driving Position Setup*
Keyless Access Setup
Lighting Setup
Door
Setup
Maintenance Info.
Keyless Access Beep
Blind Spot Info*
Power Slide Door Keyless Open Mode
Power Tailgate Keyless Open Mode
Power Tailgate Open by Outer Handle
Power
Tailgate
Setup
*
Vehicle
Settings
* Not available on all models
17 US ODYSSEY (KA KC)-31TK86600.book 309 ページ 2016年10月24日 月曜日 午後4時2分
Page 317 of 565

316
uuCustomized Features u
Features
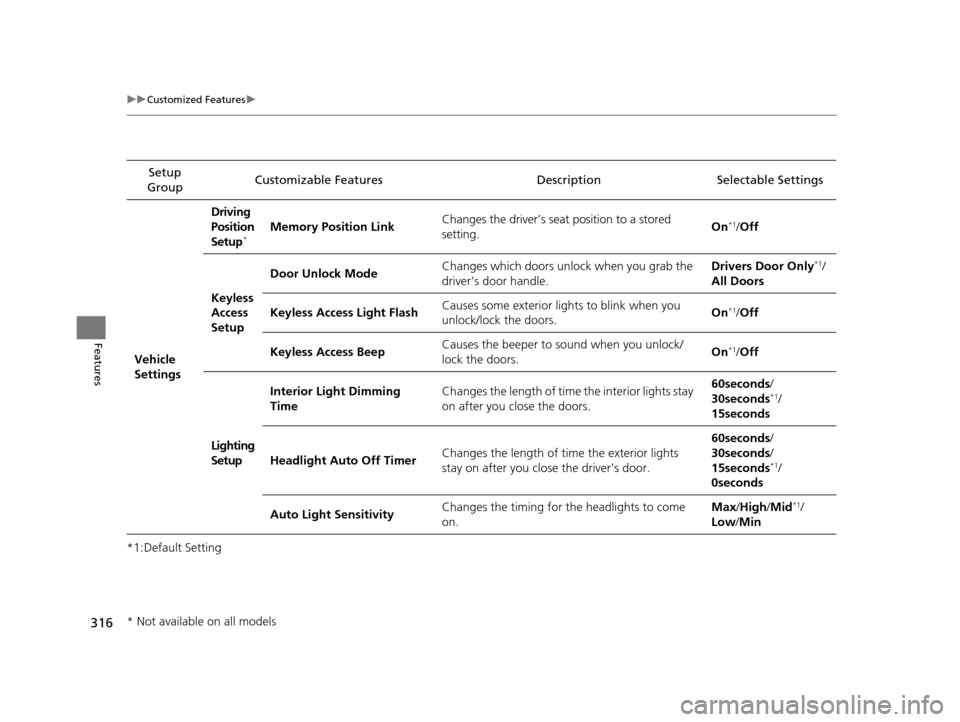
*1:Default SettingSetup
Group Customizable Features Descri
ption Selectable Settings
Vehicle
Settings Driving
Position
Setup
*Memory Position Link
Changes the driver’s seat position to a stored
setting. On*1/
Off
Keyless
Access
Setup Door Unlock Mode
Changes which doors unlock when you grab the
driver’s door handle. Drivers Door Only
*1/
All Doors
Keyless Access Light Flash Causes some exterior lig
hts to blink when you
unlock/lock the doors. On
*1/
Off
Keyless Access Beep Causes the beeper to sound when you unlock/
lock the doors.
On
*1/
Off
Lighting
Setup Interior Light Dimming
Time
Changes the length of time the interior lights stay
on after you close the doors. 60seconds/
30seconds
*1/
15seconds
Headlight Auto Off Timer Changes the length of time the exterior lights
stay on after you close the driver's door. 60seconds/
30seconds/
15seconds
*1/
0seconds
Auto Light Sensitivity Changes the timing for the headlights to come
on. Max
/High /Mid
*1/
Low /Min
* Not available on all models
17 US ODYSSEY (KA KC)-31TK86600.book 316 ページ 2016年10月24日 月曜日 午後4時2分
Page 398 of 565

Continued397
uuBefore Driving uDriving Preparation
Driving
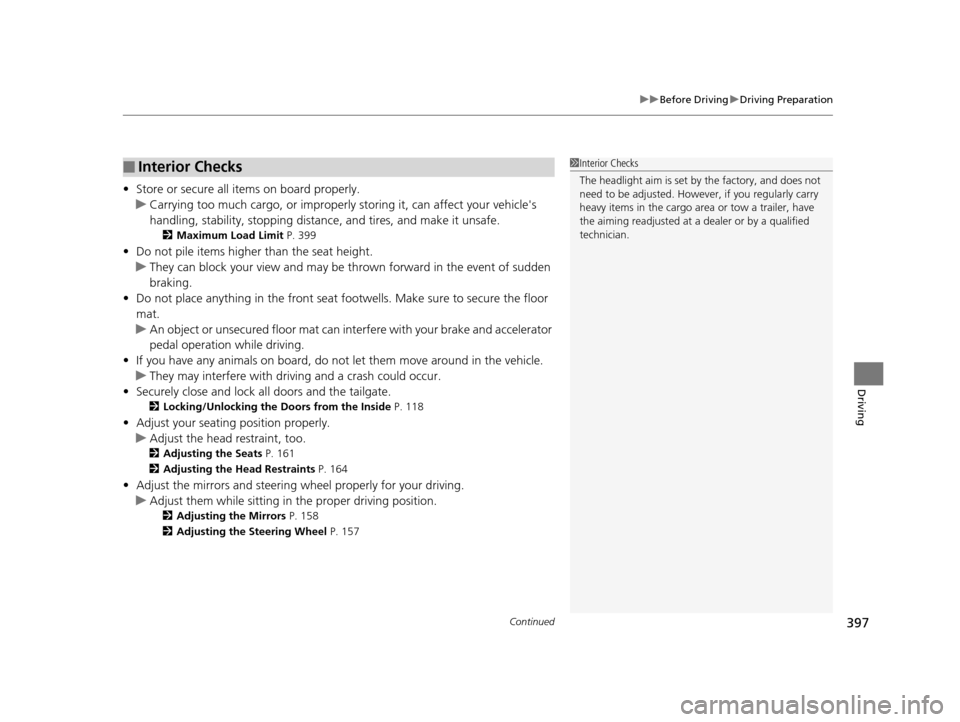
• Store or secure all items on board properly.
u Carrying too much cargo, or improperly storing it, can affect your vehicle's
handling, stability, sto pping distance, and tires, and make it unsafe.
2Maximum Load Limit P. 399
•Do not pile items higher than the seat height.
u They can block your view and may be thrown forward in the event of sudden
braking.
• Do not place anything in the front seat footwells. Make sure to secure the floor
mat.
u An object or unsecured floor mat can in terfere with your brake and accelerator
pedal operation while driving.
• If you have any animals on board, do not let them move around in the vehicle.
u They may interfere with driv ing and a crash could occur.
• Securely close and lock al l doors and the tailgate.
2Locking/Unlocking the Doors from the Inside P. 118
•Adjust your seating position properly.
u Adjust the head restraint, too.
2Adjusting the Seats P. 161
2 Adjusting the Head Restraints P. 164
•Adjust the mirrors and steering wh eel properly for your driving.
u Adjust them while sitting in the proper driving position.
2 Adjusting the Mirrors P. 158
2 Adjusting the Steering Wheel P. 157
■Interior Checks1Interior Checks
The headlight aim is set by the factory, and does not
need to be adjusted. Howeve r, if you regularly carry
heavy items in the cargo area or tow a trailer, have
the aiming readjusted at a dealer or by a qualified
technician.
17 US ODYSSEY (KA KC)-31TK86600.book 397 ページ 2016年10月24日 月曜日 午後4時2分
Page 476 of 565

475Continued
Maintenance
Replacing Light Bulbs
Headlight Bulbs
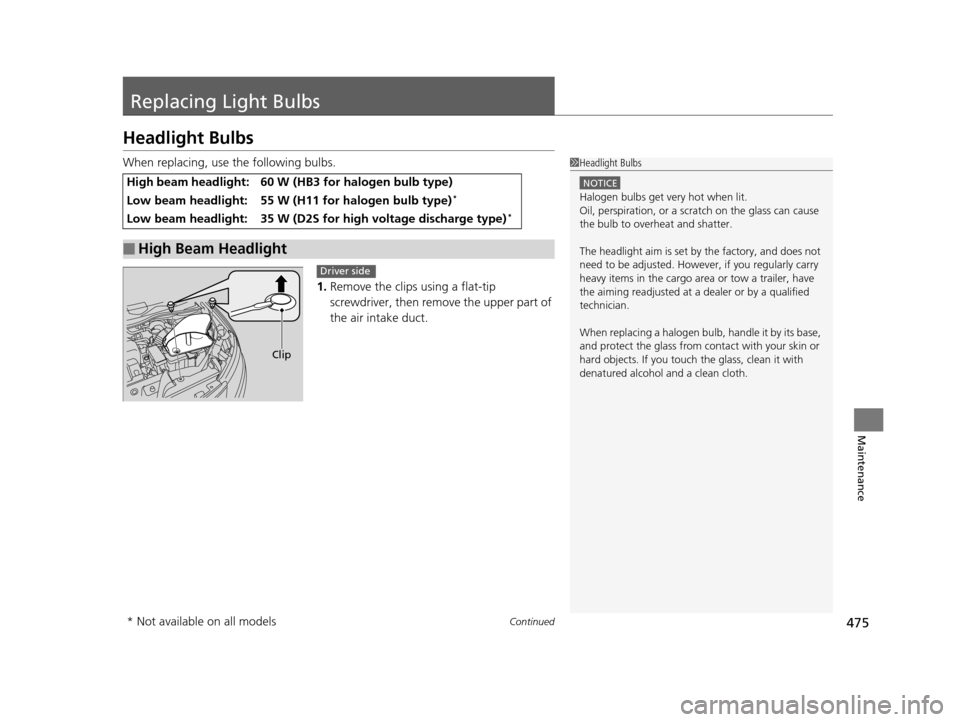
When replacing, use the following bulbs.1.Remove the clips using a flat-tip
screwdriver, then remo ve the upper part of
the air intake duct.
High beam headlight: 60 W (HB3 for halogen bulb type)
Low beam headlight: 55 W (H11 for halogen bulb type)*
Low beam headlight: 35 W (D2S for high voltage discharge type)*
■High Beam Headlight
1 Headlight Bulbs
NOTICE
Halogen bulbs get very hot when lit.
Oil, perspiration, or a scratch on the glass can cause
the bulb to overhe at and shatter.
The headlight aim is set by the factory, and does not
need to be adjusted. Howeve r, if you regularly carry
heavy items in the cargo area or tow a trailer, have
the aiming readjusted at a dealer or by a qualified
technician.
When replacing a halogen bulb, handle it by its base,
and protect the glass from c ontact with your skin or
hard objects. If you touch the glass, clean it with
denatured alcohol and a clean cloth.
Clip
Driver side
* Not available on all models
17 US ODYSSEY (KA KC)-31TK86600.book 475 ページ 2016年10月24日 月曜日 午後4時2分