2017 HONDA FIT Eco button
[x] Cancel search: Eco buttonPage 333 of 465

332
uuWhen Driving uECON Button*
Driving
ECON Button*
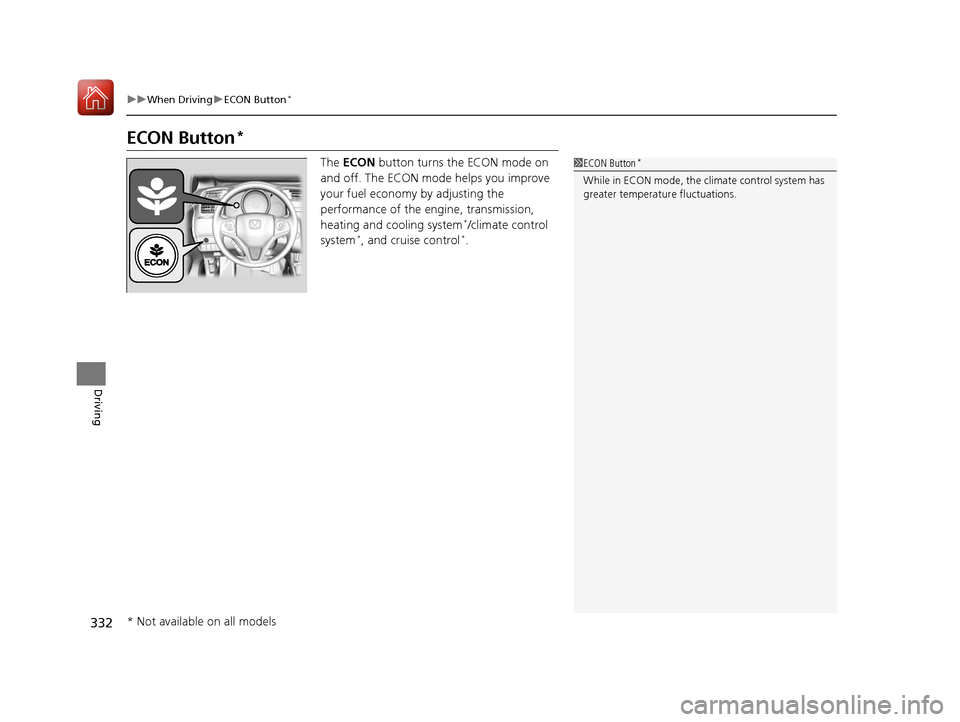
The ECON button turns the ECON mode on
and off. The ECON mode helps you improve
your fuel economy by adjusting the
performance of the engine, transmission,
heating and cooling system
*/climate control
system*, and cruise control*.
1 ECON Button*
While in ECON mode, the climate control system has
greater temperature fluctuations.
* Not available on all models
17 FIT -31T5A6200.book 332 ページ 2016年5月27日 金曜日 午後6時33分
Page 334 of 465

333
uuWhen Driving uCruise Control*
Continued
Driving
Cruise Control*
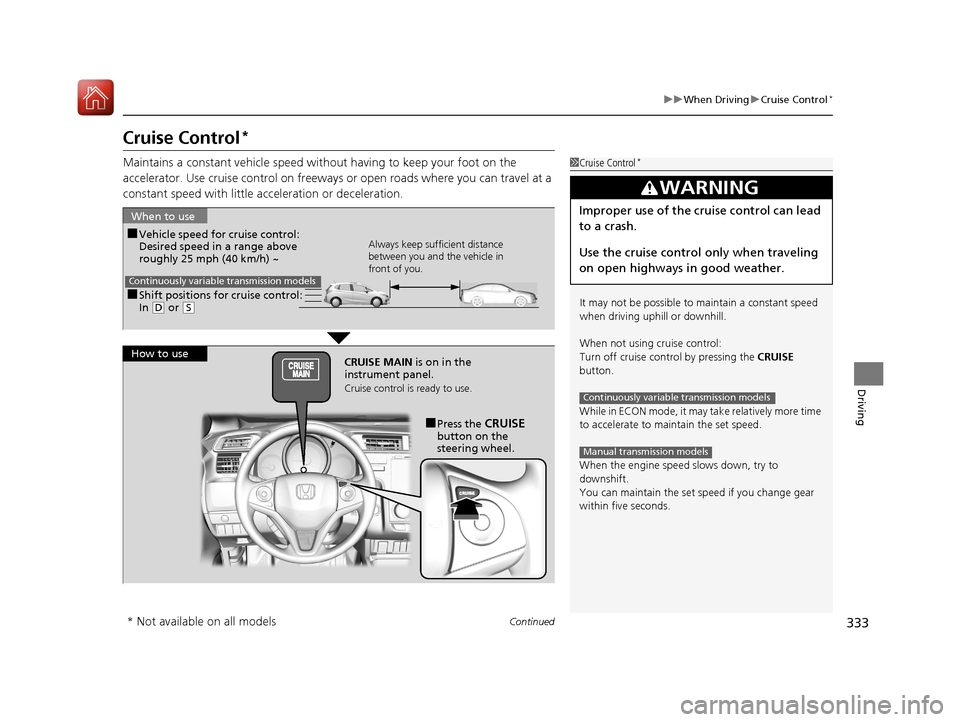
Maintains a constant vehicle speed without having to keep your foot on the
accelerator. Use cruise con trol on freeways or open roads where you can travel at a
constant speed with little ac celeration or deceleration.1Cruise Control*
It may not be possible to maintain a constant speed
when driving uphill or downhill.
When not using cruise control:
Turn off cruise control by pressing the CRUISE
button.
While in ECON mode, it may take relatively more time
to accelerate to maintain the set speed.
When the engine speed slows down, try to
downshift.
You can maintain the set sp eed if you change gear
within five seconds.
3WARNING
Improper use of the cruise control can lead
to a crash.
Use the cruise control only when traveling
on open highways in good weather.
Continuously variable transmission models
Manual transmission models
■Shift positions for cruise control:
In ( D or (S
When to use
Always keep sufficient distance
between you and the vehicle in
front of you.
Continuously variable transmission models
■Vehicle speed for cruise control:
Desired speed in a range above
roughly 25 mph (40 km/h) ~
How to use CRUISE MAIN is on in the
instrument panel.
Cruise control is ready to use.
■Press the CRUISE
button on the
steering wheel.
* Not available on all models
17 FIT -31T5A6200.book 333 ページ 2016年5月27日 金曜日 午後6時33分
Page 336 of 465

335
uuWhen Driving uCruise Control*
Driving
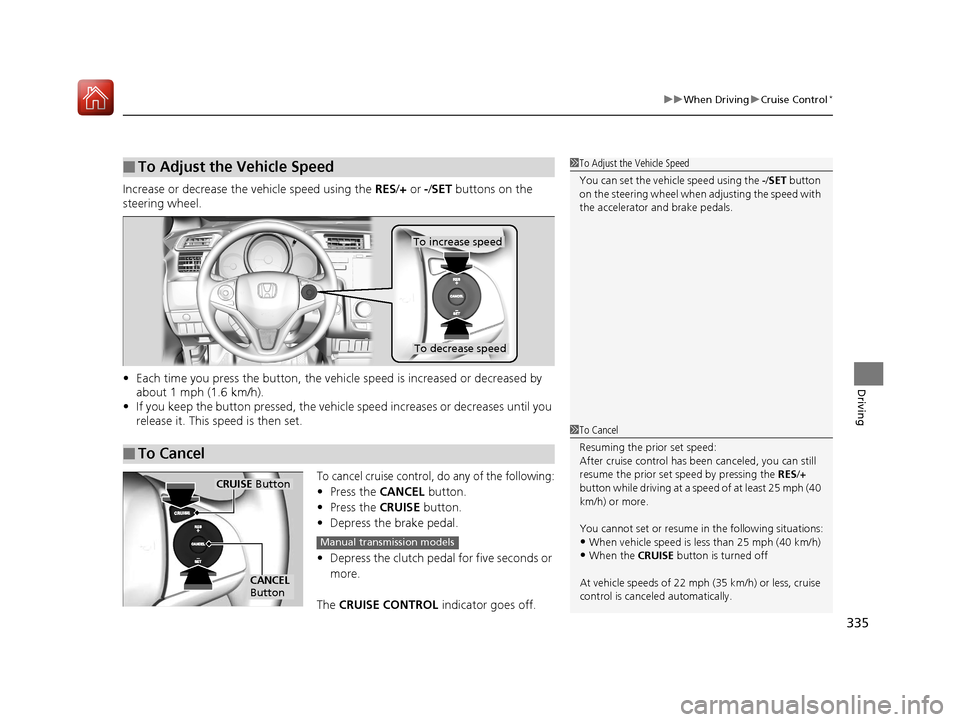
Increase or decrease the vehicle speed using the RES/+ or -/ SET buttons on the
steering wheel.
• Each time you press the button, the vehicl e speed is increased or decreased by
about 1 mph (1.6 km/h).
• If you keep the button pressed, the vehicl e speed increases or decreases until you
release it. This speed is then set.
To cancel cruise control, do any of the following:
• Press the CANCEL button.
• Press the CRUISE button.
• Depress the brake pedal.
• Depress the clutch pedal for five seconds or
more.
The CRUISE CONTROL indicator goes off.
■To Adjust the Vehicle Speed1To Adjust the Vehicle Speed
You can set the vehicle speed using the -/SET button
on the steering wheel when adjusting the speed with
the accelerator and brake pedals.
■To Cancel
To decrease speed
To increase speed
1 To Cancel
Resuming the prior set speed:
After cruise control has be en canceled, you can still
resume the prior set speed by pressing the RES/+
button while driving at a speed of at least 25 mph (40
km/h) or more.
You cannot set or resume in the following situations:
•When vehicle speed is less than 25 mph (40 km/h)•When the CRUISE button is turned off
At vehicle speeds of 22 m ph (35 km/h) or less, cruise
control is canceled automatically.
CRUISE Button
CANCEL
Button
Manual transmission models
17 FIT -31T5A6200.book 335 ページ 2016年5月27日 金曜日 午後6時33分
Page 342 of 465

Continued341
uuWhen Driving uLane Departure Warning (LDW)*
Driving
The system begins to search for lane mark ings when all the following conditions are
met:
• The vehicle is traveling between at 45-90 mph (72-145 km/h).
• The vehicle is on a straight or slightly curved road.
• The turn signals are off.
• The brake pedal is not pressed.
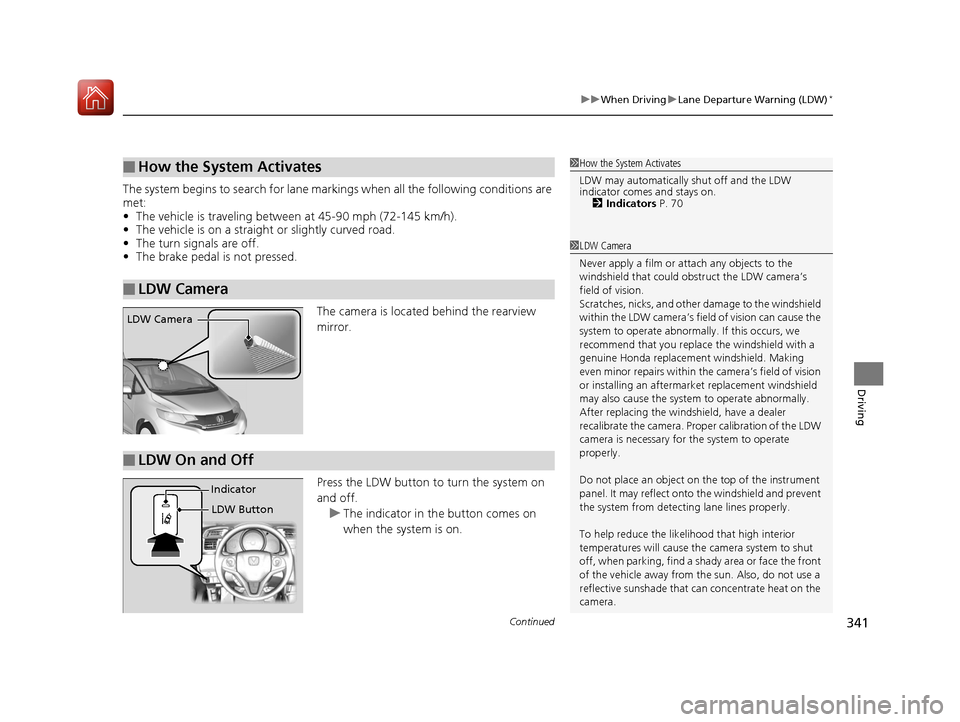
The camera is located behind the rearview
mirror.
Press the LDW button to turn the system on
and off.u The indicator in th e button comes on
when the system is on.
■How the System Activates
■LDW Camera
1 How the System Activates
LDW may automatically shut off and the LDW
indicator comes and stays on.
2 Indicators P. 70
1LDW Camera
Never apply a film or attach any objects to the
windshield that could obs truct the LDW camera’s
field of vision.
Scratches, nicks, and othe r damage to the windshield
within the LDW camera’s fi eld of vision can cause the
system to operate abnormall y. If this occurs, we
recommend that you replac e the windshield with a
genuine Honda replacem ent windshield. Making
even minor repairs within th e camera’s field of vision
or installing an aftermarket replacement windshield
may also cause the system to operate abnormally.
After replacing the winds hield, have a dealer
recalibrate the camera. Prop er calibration of the LDW
camera is necessary for the system to operate
properly.
Do not place an object on the top of the instrument
panel. It may reflect onto the windshield and prevent
the system from detecting lane lines properly.
To help reduce the likel ihood that high interior
temperatures will cause the camera system to shut
off, when parking, find a sh ady area or face the front
of the vehicle away from the sun. Also, do not use a
reflective sunshade that can concentrate heat on the
camera.
LDW Camera
■LDW On and Off
LDW Button
Indicator
17 FIT -31T5A6200.book 341 ページ 2016年5月27日 金曜日 午後6時33分
Page 345 of 465

uuWhen Driving uVehicle Stability Assist (VSA® ), aka Electronic Stability Control (ESC), System
344
Driving
This button is on the driver side control panel.
To partically turn the VSA features on and off,
press and hold it until you hear a beep.
The traction control stops fully functioning,
allows the wheels to spin more freely at low
speed. The VSA® OFF indicator will also come
on.
To turn it on again, press the (VSA ® OFF )
button until you hear a beep.
VSA ® is turned on every time you start the
engine, even if you turned it off the last time
you drove the vehicle.
■VSA ® OFF Button1 Vehicle Stability Assist (VSA ®), aka Electronic Stability Control
(ESC), System
With the button pressed, your vehicle will have
normal braking and corn ering ability, but VSA®
traction and stability enhancement becomes less
effective.
In certain unusual conditions when your vehicle gets
stuck in shallow mud or fr esh snow, it may be easier
to free it with the VSA ® temporarily switched off.
When the button is pressed, the traction control
function becomes less effective. This allows for the
wheels to spin more freely at low speed. You should
only attempt to free your vehicle with the VSA ® off if
you are not able to free it when the VSA ® is on.
Immediately after freeing your vehicle, be sure to
switch VSA ® on again. We do not recommend driving
your vehicle with the VSA ® system switched off.
You may hear a motor sound coming from the
engine compartment while system checks are being
performed immediately after starting the engine or
while driving. This is normal.
VSA ® OFF Indicator
17 FIT -31T5A6200.book 344 ページ 2016年5月27日 金曜日 午後6時33分
Page 348 of 465

347
uuWhen Driving uTire Pressure Monitoring System (TPMS)
Continued
Driving
Tire Pressure Monitoring System (TPMS)
Instead of directly measuring the pressure in each tire, the TPMS on this vehicle
monitors and compares the rolling radius and rotational characteristics of each
wheel and tire while you are driving to determine if one or more tires are
significantly under-inflated. This will caus e the low tire pressure/TPMS indicator to
come on.
You must start TPMS calibration every time you:
• Adjust the pressure in one or more tires.
• Rotate the tires.
• Replace one or more tires.
Before calibrating the TPMS:
• Set the cold tire pressure in all four tires.
2 Checking Tires P. 394
Make sure:
• The vehicle is at a complete stop.
• The shift lever is in
(N.
• The shift lever is in
(P.
• The ignition switch is in ON
(w*1.
*1 : Models with the smart entry system have an ENGINE START/STOP button instead of an ignition switch.
■TPMS Calibration
U.S. models only
1Tire Pressure Monitoring System (TPMS)
The system does not monitor the tires when driving
at low speed.
Conditions such as low ambient temperature and
altitude change directly a ffect tire pressure and can
trigger the low tire pressure/TPMS indicator to come on.
Tire pressure checked and inflated in:
•Warm weather can beco me under-inflated in
colder weather.
•Cold weather can become over-inflated in warmer
weather.
The low tire pressure/TPMS indicator will not come
on as a result of over inflation.
The TPMS may not function pr operly if tire type and
size are mixed. Make sure to use the same size and
type of tire. 2 Checking and Maintaining Tires P. 394
The low tire pressure/TPMS indicator may come on
with a delay or may not come on at all when:
•You rapidly accelerate, decelerate, or turn the
steering wheel.
•You drive on snowy or slippery roads.
•Snow chains are used.
The low tire pressure/TPMS indicator may come on
under the following conditions:
•A compact spare tire is used.•There is a heavier and uneve n load on the tires than
the condition at calibration.
•Snow chains are used.
Manual transmission models
Continuously variable transmission models
All models
17 FIT -31T5A6200.book 347 ページ 2016年5月27日 金曜日 午後6時33分
Page 349 of 465

uuWhen Driving uTire Pressure Monitoring System (TPMS)
348
Driving
Press and hold the TPMS button until the low
tire pressure/TPMS indi cator blinks twice,
indicating the calibration process has begun.
• If the low tire pressure/TPMS indicator does
not blink, confirm the above conditions
then press and hold the TPMS button again.
• The calibration pr ocess finishes
automatically.
*1 : Models with the smart entry system have an ENGINE START/STOP button instead of an ignition switch.
1TPMS Calibration
•TPMS cannot be calibrated if a compact spare tire is
installed.
•The calibration process requires approximately 30
minutes of cumulative dr iving at speeds between
30-60 mph (48-97 km/h).
•During this period, if the ignition is turned on*1 and
the vehicle is not move d within 45 seconds, you
may notice the low tire pressure/TPMS indicator
comes on briefly. This is normal and indicates that
the calibration process is not yet complete.
If the snow chains are installed, remove them before
calibrating the TPMS.
If the low tire pressure/TPMS indicator comes on even
when the properly inflated specified regular tires are
installed, have your vehi cle checked by a dealer.
We recommend that the tires be replaced with the
same brand, model, and size as the originals. Ask a
dealer for details.
TPMS Button
Low Tire Pressure/TPMS Indicator
17 FIT -31T5A6200.book 348 ページ 2016年5月27日 金曜日 午後6時33分
Page 364 of 465

363
Maintenance
This chapter discusses basic maintenance.
Before Performing MaintenanceInspection and Maintenance ............ 364
Safety When Performing Maintenance .... 365Parts and Fluids Used in Maintenance Service ........................................... 366
Maintenance Minder
TM..................... 367
Maintenance Under the Hood
Maintenance Items Under the Hood ..... 371Opening the Hood ........................... 372
Recommended Engine Oil ................ 373
Oil Check ......................................... 374
Adding Engine Oil ............................ 375
Changing the Engine Oil and Oil Filter..... 376
Engine Coolant ................................ 378
Transmission Fluid ............................ 380
Brake Fluid ....................................... 381
Refilling Window Wa sher Fluid......... 382
Replacing Light Bulbs ....................... 383
Checking and Maintaining Wiper
Blades .......................................... 390
Checking and Maintaining Tires
Checking Tires ................................. 394
Tire and Loading Information Label .. 395
Tire Labeling .................................... 395
DOT Tire Quality Grading (U.S. Vehicles) ...... 397Wear Indicators................................ 399 Tire Service Life ................................ 399
Tire and Wheel Replacement ........... 400
Tire Rotation .................................... 401
Winter Tires ..................................... 402
Battery ............................................... 403
Remote Transmitter Care
Replacing the Button Battery ........... 405
Heating and Cooling System
*/Climate
Control System* Maintenance ....... 407
Cleaning
Interior Care .................................... 408
Exterior Care.................................... 410
* Not available on all models
17 FIT -31T5A6200.book 363 ページ 2016年5月27日 金曜日 午後6時33分