Page 153 of 543
151
uuOperating the Switches Around the Steering Wheel uPOWER Button
Controls
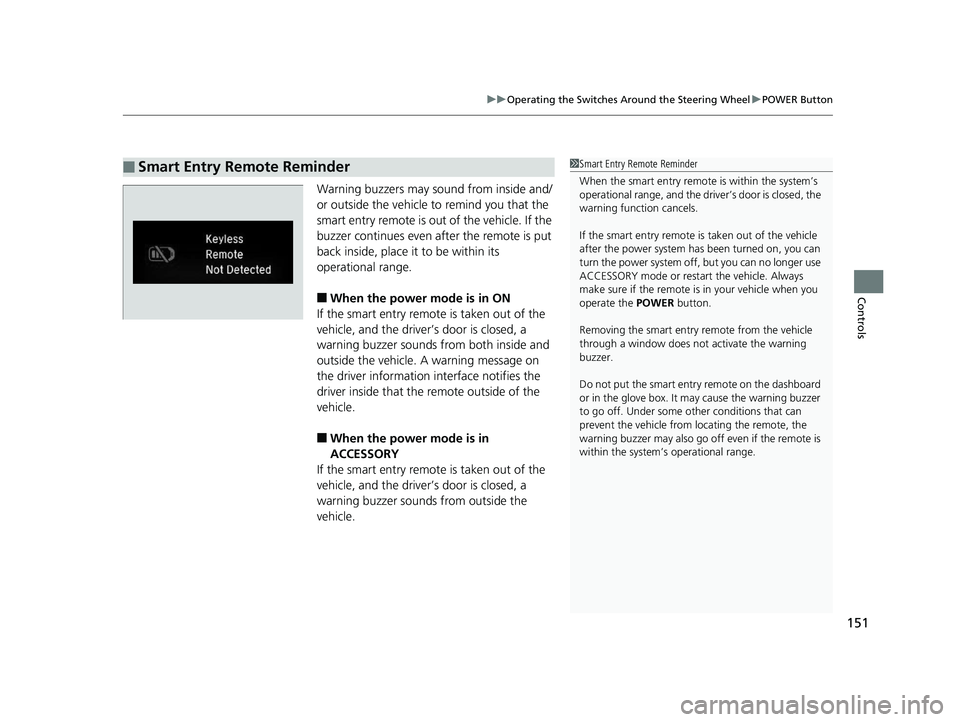
Warning buzzers may sound from inside and/
or outside the vehicle to remind you that the
smart entry remote is out of the vehicle. If the
buzzer continues even after the remote is put
back inside, place it to be within its
operational range.
■When the power mode is in ON
If the smart entry remote is taken out of the
vehicle, and the driver’s door is closed, a
warning buzzer sounds from both inside and
outside the vehicle. A warning message on
the driver information interface notifies the
driver inside that the remote outside of the
vehicle.
■When the power mode is in
ACCESSORY
If the smart entry remote is taken out of the
vehicle, and the driver’s door is closed, a
warning buzzer sounds from outside the
vehicle.
■Smart Entry Remote Reminder1 Smart Entry Remote Reminder
When the smart entry remote is within the system’s
operational range, and the driv er’s door is closed, the
warning function cancels.
If the smart entry remote is taken out of the vehicle
after the power system has been turned on, you can
turn the power system off, but you can no longer use
ACCESSORY mode or restart the vehicle. Always
make sure if the remote is in your vehicle when you
operate the POWER button.
Removing the smart entry remote from the vehicle
through a window does not activate the warning
buzzer.
Do not put the smart entr y remote on the dashboard
or in the glove box. It may cause the warning buzzer
to go off. Under some other conditions that can
prevent the vehicle from locating the remote, the
warning buzzer may al so go off even if the remote is
within the system’s operational range.
17 CLARITY BEV CSS-31TRV6000.book 151 ページ 2017年4月14日 金曜日 午前11 時8分
Page 168 of 543
166
Controls
Adjusting the Seats
Front Seats
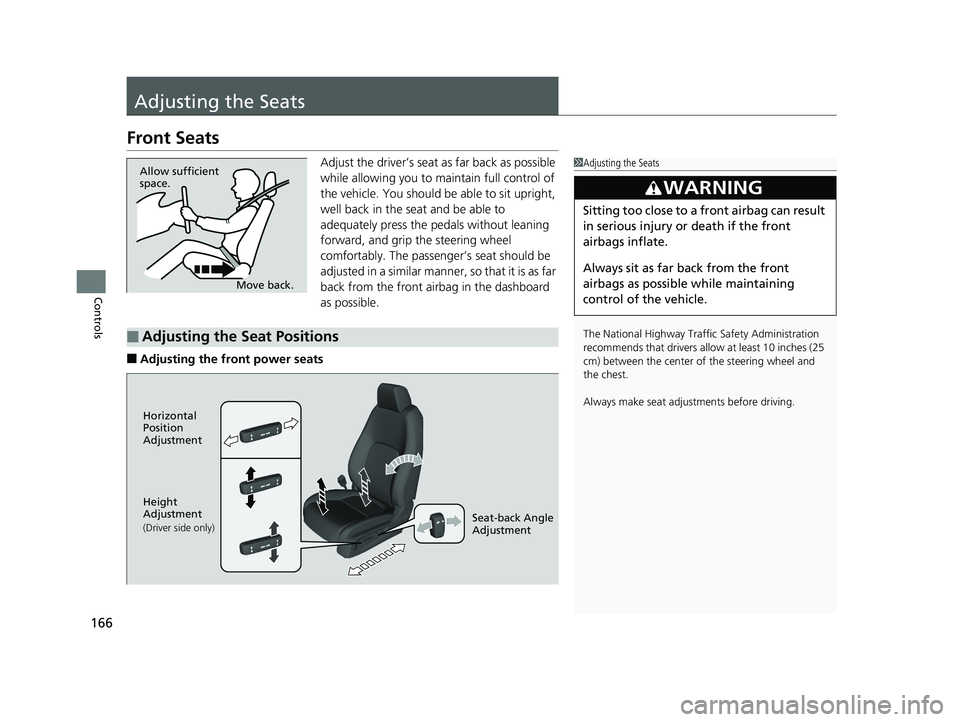
Adjust the driver’s seat as far back as possible
while allowing you to maintain full control of
the vehicle. You should be able to sit upright,
well back in the seat and be able to
adequately press the pedals without leaning
forward, and grip the steering wheel
comfortably. The passenger’s seat should be
adjusted in a similar manner, so that it is as far
back from the front airbag in the dashboard
as possible.
■Adjusting the front power seats
1Adjusting the Seats
The National Highway Traffic Safety Administration
recommends that drivers allow at least 10 inches (25
cm) between the center of the steering wheel and
the chest.
Always make seat adjustments before driving.
3WARNING
Sitting too close to a front airbag can result
in serious injury or death if the front
airbags inflate.
Always sit as far back from the front
airbags as possible while maintaining
control of the vehicle.
Move back.
Allow sufficient
space.
■Adjusting the Seat Positions
Horizontal
Position
Adjustment
Height
Adjustment
(Driver side only)Seat-back Angle
Adjustment
17 CLARITY BEV CSS-31TRV6000.book 166 ページ 2017年4月14日 金曜日 午前11
時8分
Page 186 of 543
184
uuClimate Control System uUsing Automatic Climate Control
Controls
Use the system when the power system is on.
1. Press the AUTO button.
2. Adjust the interior temperature using the driver’s side or passenger’s side
temperature control dial.
3. Press the (ON/OFF) button to cancel.
/ (Fan Control)
Buttons
A/C (Air Conditioning) Icon
MODE Control Icon
(Dashboard vents and back
of the center console)
MODE Control Icon
(Dashboard and floor vents, and
back of the center console)
CLIMATE Button
Driver’s Side Temperature
Control Dial
AUTO Button
SYNC (Synchronization) Button
Passenger’s Side
Temperature Control Dial
MODE Control Icon
(Floor vents) MODE Control Icon
(Floor and defroster vents)
(Recirculation) Button
(Fresh Air) Button (ON/OFF) Button
Fan Control Icon
17 CLARITY BEV CSS-31TRV6000.book 184 ページ 2017年4月14日 金曜日 午前11 時8分
Page 227 of 543
225
uuAudio System Basic Operation uVoice Control Operation
Continued
Features
Voice Control Operation
Your vehicle has a voice control syst em that allows hands-free operation.
The voice control system uses the ( Talk) and (hang-up/back) buttons on
the steering wheel and a microphone near the map lights in the ceiling.
To achieve optimum voice recognition when using the voice control system:
• Make sure the correct screen is displa yed for the voice command that you are
using.
The system recognizes only certain commands.
Available voice command P. 226
• Close the windows.
• Adjust the dashboard and side vents so air does not blow onto the microphone in
the ceiling.
• Speak clearly in a natural speaking vo ice without pausing between words.
• Reduce any background noise if possible. The system may misinterpret your
command if more than one person is speaking at the same time.
■Voice Recognition
1Voice Control Operation
When you press the button, a helpful prompt asks
what you would like to do. Press and release the
button again to bypass th is prompt and give a
command.
1 Voice Recognition
The voice control system can only be used from the
driver’s seat because the microphone unit removes
noises from the front passenger’s side.
17 CLARITY BEV CSS-31TRV6000.book 225 ページ 2017年4月14日 金曜日 午前11 時8分
Page 427 of 543
Continued425
uuCharging uCharge the High Voltage battery using a Level 1, 2 or SAE J1772 DC charger
Driving
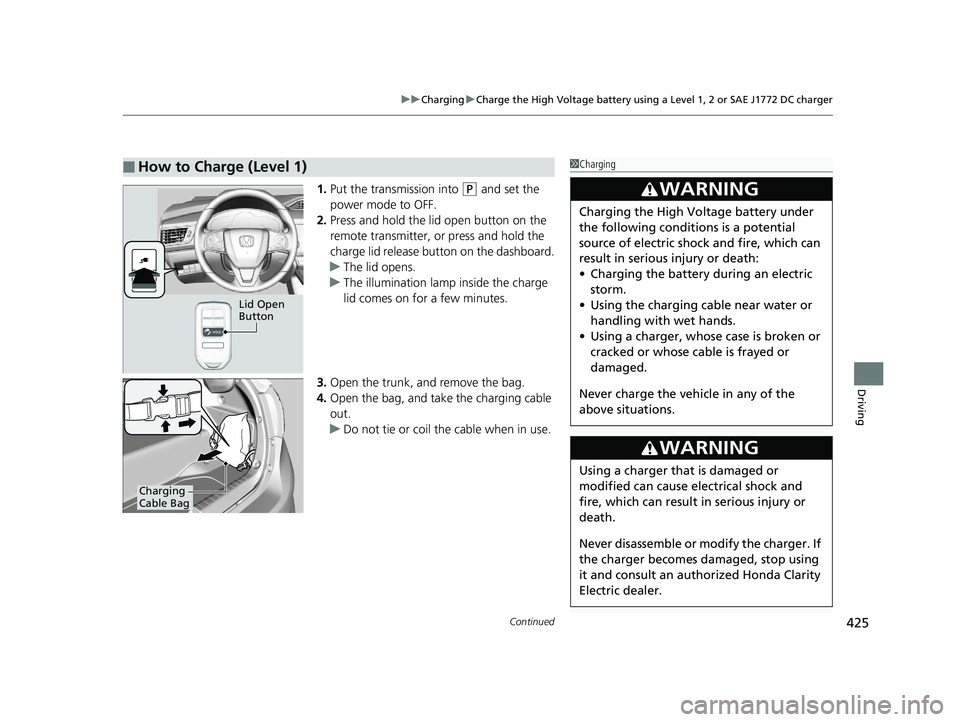
1. Put the transmission into (P and set the
power mode to OFF.
2. Press and hold the lid open button on the
remote transmitter, or press and hold the
charge lid release button on the dashboard.
u The lid opens.
u The illumination lamp inside the charge
lid comes on for a few minutes.
3. Open the trunk, and remove the bag.
4. Open the bag, and take the charging cable
out.
u Do not tie or coil the cable when in use.
■How to Charge (Level 1)
Lid Open
Button
Charging
Cable Bag
1Charging
3WARNING
Charging the High Vo ltage battery under
the following conditions is a potential
source of electric shock and fire, which can
result in serious injury or death:
• Charging the battery during an electric
storm.
• Using the charging cable near water or
handling with wet hands.
• Using a charger, whose case is broken or
cracked or whose cable is frayed or
damaged.
Never charge the vehi cle in any of the
above situations.
3WARNING
Using a charger that is damaged or
modified can cause electrical shock and
fire, which can result in serious injury or
death.
Never disassemble or modify the charger. If
the charger becomes damaged, stop using
it and consult an authorized Honda Clarity
Electric dealer.
17 CLARITY BEV CSS-31TRV6000.book 425 ページ 2017年4月14日 金曜日 午前11 時8分
Page 452 of 543
450
uuMaintenance Under the Hood uOpening the Hood
Maintenance
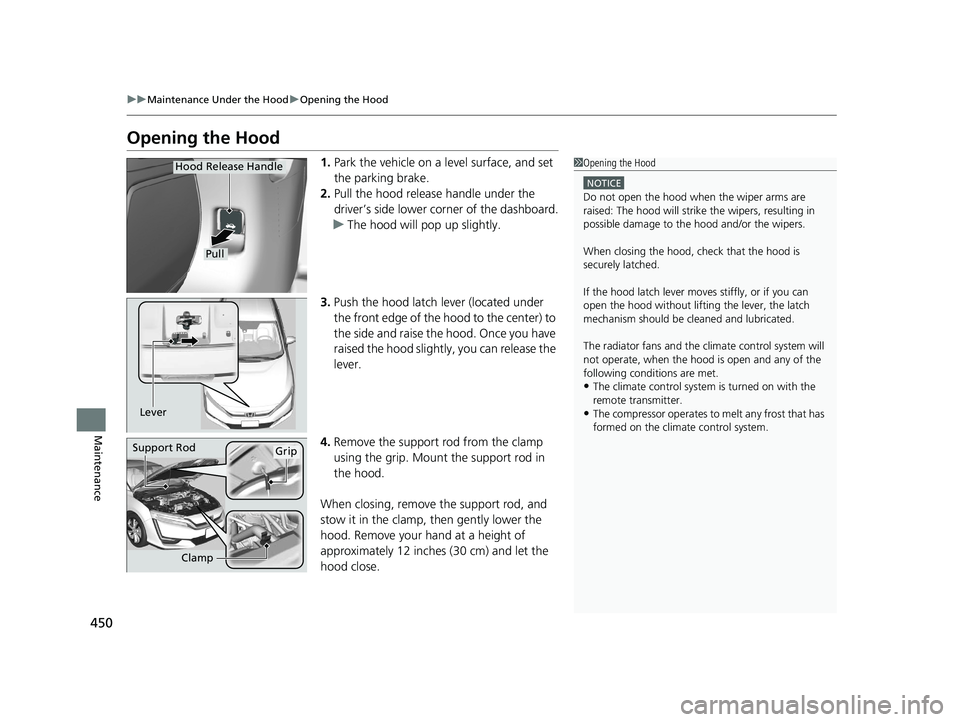
Opening the Hood
1. Park the vehicle on a level surface, and set
the parking brake.
2. Pull the hood release handle under the
driver’s side lower co rner of the dashboard.
u The hood will pop up slightly.
3. Push the hood latch lever (located under
the front edge of the hood to the center) to
the side and raise the hood. Once you have
raised the hood slight ly, you can release the
lever.
4. Remove the support rod from the clamp
using the grip. Mount the support rod in
the hood.
When closing, remove the support rod, and
stow it in the clamp, then gently lower the
hood. Remove your hand at a height of
approximately 12 inches (30 cm) and let the
hood close.1 Opening the Hood
NOTICE
Do not open the hood when the wiper arms are
raised: The hood will strike the wipers, resulting in
possible damage to the hood and/or the wipers.
When closing the hood, check that the hood is
securely latched.
If the hood latch lever moves stiffly, or if you can
open the hood without lifti ng the lever, the latch
mechanism should be cleaned and lubricated.
The radiator fans and the climate control system will
not operate, when the hood is open and any of the
following conditions are met.
•The climate control system is turned on with the
remote transmitter.
•The compressor operates to melt any frost that has
formed on the climate control system.
Pull
Hood Release Handle
Lever
Support RodGrip
Clamp
17 CLARITY BEV CSS-31TRV6000.book 450 ページ 2017年4月14日 金曜日 午前11 時8分
Page 512 of 543
510
uuFuses uFuse Locations
Handling the Unexpected
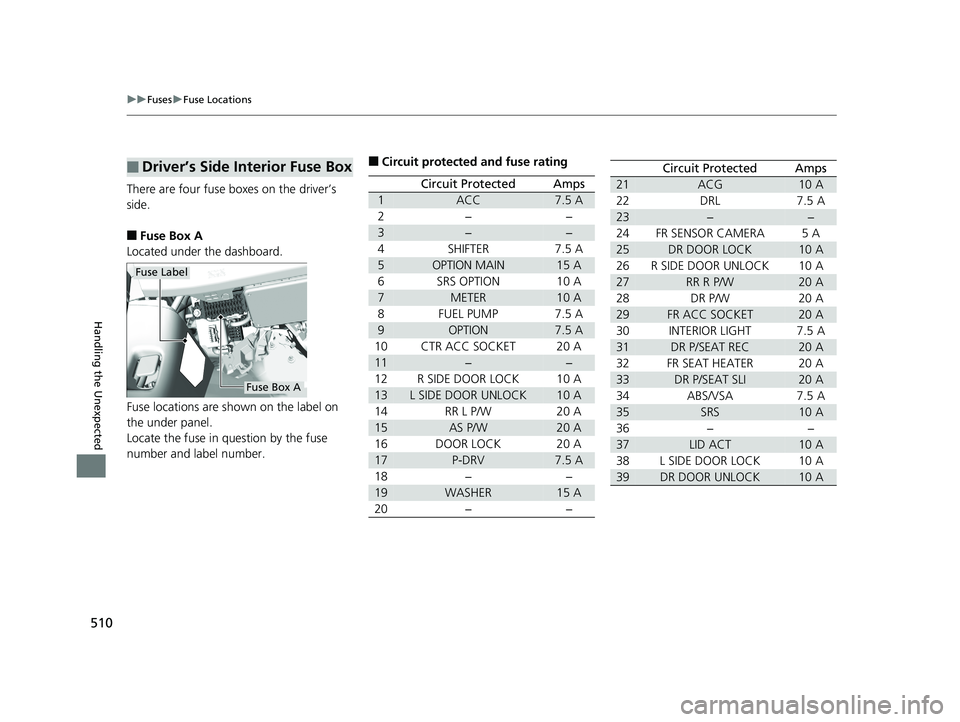
There are four fuse boxes on the driver’s
side.
■Fuse Box A
Located under the dashboard.
Fuse locations are shown on the label on
the under panel.
Locate the fuse in question by the fuse
number and label number.
■Driver’s Side Interior Fuse Box
Fuse Label
Fuse Box A
■Circuit protected and fuse rating
Circuit ProtectedAmps
1ACC7.5 A
2−−
3−−
4SHIFTER7.5 A
5OPTION MAIN15 A
6SRS OPTION10 A
7METER10 A
8FUEL PUMP7.5 A
9OPTION7.5 A
10CTR ACC SOCKET20 A
11−−
12R SIDE DOOR LOCK10 A
13L SIDE DOOR UNLOCK10 A
14RR L P/W20 A
15AS P/W20 A
16DOOR LOCK20 A
17P-DRV7.5 A
18−−
19WASHER15 A
20−−
Circuit ProtectedAmps
21ACG10 A
22DRL7.5 A
23−−
24FR SENSOR CAMERA5 A
25DR DOOR LOCK10 A
26R SIDE DOOR UNLOCK10 A
27RR R P/W20 A
28DR P/W20 A
29FR ACC SOCKET20 A
30INTERIOR LIGHT7.5 A
31DR P/SEAT REC20 A
32FR SEAT HEATER20 A
33DR P/SEAT SLI20 A
34ABS/VSA7.5 A
35SRS10 A
36−−
37LID ACT10 A
38L SIDE DOOR LOCK10 A
39DR DOOR UNLOCK10 A
17 CLARITY BEV CSS-31TRV6000.book 510 ページ 2017年4月14日 金曜日 午前11 時8分
Page 518 of 543
516
Handling the Unexpected
When You Cannot Open the Charge Lid
If you cannot open the charge lid, use the following procedure:1.Pull the release lever under the lower left
corner of the dashboard.
u The lid will pop up slightly.
■What to Do When Unable to Open the Charge Lid1When You Cannot Open the Charge Lid
After taking this step, cont act an authorized Honda
Clarity Electric dealer to have the vehicle checked.
Release Lever
17 CLARITY BEV CSS-31TRV6000.book 516 ページ 2017年4月14日 金曜日 午前11 時8分