2017 GMC SIERRA 1500 key battery
[x] Cancel search: key batteryPage 32 of 494

GMC Sierra/Sierra Denali Owner Manual (GMNA-Localizing-U.S./Canada/
Mexico-9955992) - 2017 - crc - 5/3/16
Keys, Doors, and Windows 31
and all previously known keys
will no longer work with the
vehicle.
6. To learn a second key, turn to OFF, insert the second key to
be learned, and rotate to
ON/RUN.
After two keys are learned, the
remaining keys can be learned by
following the procedure in
“Programming with Two
Recognized Keys.”
The key has a bar-coded key tag
that the dealer or qualified locksmith
can use to make new keys. Store
this information in a safe place, not
in the vehicle.
See your dealer if a replacement
key or additional key is needed.
If it becomes difficult to turn a key,
inspect the key blade for debris.
Periodically clean with a brush
or pick.
With an active OnStar subscription,
an OnStar Advisor may remotely
unlock the vehicle. See OnStar
Overview 0471.Remote Keyless Entry
(RKE) System
See Radio Frequency
Statement 0467.
If there is a decrease in the Remote
Keyless Entry (RKE) operating
range:
. Check the distance. The
transmitter may be too far from
the vehicle.
. Check the location. Other
vehicles or objects may be
blocking the signal.
. Check the transmitter's battery.
See “Battery Replacement” later
in this section.
. If the transmitter is still not
working correctly, see your
dealer or a qualified technician
for service.
Remote Keyless Entry
(RKE) System Operation
The RKE transmitter functions may
work up to 60 m (197 ft) away from
the vehicle. Other conditions can affect the
performance of the transmitter. See
Remote Keyless Entry (RKE)
System
031.
With Remote Start (without
Remote Start Similar)
/:If equipped,/is used to start
the engine from outside the vehicle
using the RKE transmitter. See
Remote Vehicle Start 033.
Q:Press to lock all doors and the
tailgate.
If enabled in vehicle personalization,
the turn signal lamps flash once to
indicate locking has occurred.
If enabled through vehicle
Page 33 of 494
GMC Sierra/Sierra Denali Owner Manual (GMNA-Localizing-U.S./Canada/
Mexico-9955992) - 2017 - crc - 5/3/16
32 Keys, Doors, and Windows
personalization, the horn chirps
when
Qis pressed again within
three seconds. See Vehicle
Personalization 0155.
Pressing
Qarms the alarm system.
See Vehicle Alarm System 038.
If equipped with auto mirror folding,
pressing and holding
Qfor
one second will fold the mirrors. The
auto mirror folding feature will not
operate unless it is enabled. See
Folding Mirrors 043 and Vehicle
Personalization 0155.
K:Press once to unlock only the
driver door. If
Kis pressed again
within three seconds, all remaining
doors and the tailgate unlock. The
interior lamps may come on and
stay on for 20 seconds or until the
ignition is turned on.
If enabled in Vehicle
Personalization, the turn signal
lamps flash twice to indicate
unlocking has occurred. See Vehicle
Personalization 0155. If enabled
through vehicle personalization, the
exterior lamps may turn on. See
Vehicle Personalization 0155. Pressing
Kon the RKE transmitter
disarms the alarm system. See
Vehicle Alarm System 038.
If equipped with auto mirror folding,
pressing and holding
Kfor
one second will unfold the mirrors.
The auto mirror folding feature will
not operate unless it is enabled.
See Folding Mirrors 043 and
Vehicle Personalization 0155.
On some models, press, release
and then press and hold
Kto open
all of the windows. Pressing the
button again will stop the windows.
See Vehicle Personalization 0155.
7:Press and release one time to
initiate vehicle locator. The turn
signal lamps flash and the horn
sounds three times.
Press and hold
7for at least
three seconds to sound the panic
alarm. The turn signal lamps flash
and the horn sounds repeatedly for
30 seconds. The alarm turns off
when the ignition is moved to ON/ RUN or
7is pressed again. The
ignition must be in LOCK/OFF for
the panic alarm to work.
Programming Transmitters to
the Vehicle
Only RKE transmitters programmed
to this vehicle will work. If a
transmitter is lost or stolen, a
replacement can be purchased and
programmed through your dealer.
Each vehicle can have up to
eight transmitters programmed to it.
See your dealer for transmitter
programming.
Battery Replacement
Replace the battery in the
transmitter soon if the REPLACE
BATTERY IN REMOTE KEY
message displays in the DIC.
Caution
When replacing the battery, do
not touch any of the circuitry on
the transmitter. Static from your
body could damage the
transmitter.
Page 34 of 494

GMC Sierra/Sierra Denali Owner Manual (GMNA-Localizing-U.S./Canada/
Mexico-9955992) - 2017 - crc - 5/3/16
Keys, Doors, and Windows 33
To replace the battery:
1. Separate and remove the backcover of the transmitter with a
flat, thin object, such as a coin.
2. Press and slide the batterydown toward the pocket of the
transmitter in the direction of
the key ring. Do not use a
metal object.
3. Remove the battery.
4. Insert the new battery, positive side facing up. Replace with a
CR2032 or equivalent battery.
5. Push together the transmitter back cover top side first, and
then the bottom toward the
key ring.
Remote Vehicle Start
If equipped with the remote start
feature, the climate control system
will come on when the vehicle is
started remotely, depending on the
outside temperature.
The rear defog and heated and
ventilated seats, if equipped, may
also come on. See Heated and
Ventilated Front Seats 055 and
Vehicle Personalization 0155.
Laws in some communities may
restrict the use of remote starters.
Check local regulations for any
requirements on remote starting of
vehicles.
Do not use remote start if the
vehicle is low on fuel.
The vehicle cannot be remote
started if:
. The key is in the ignition.
. The hood is not closed.
. There is an emission control
system malfunction and the
malfunction indicator lamp is on.
. Fuel level is too low.
Page 48 of 494
GMC Sierra/Sierra Denali Owner Manual (GMNA-Localizing-U.S./Canada/
Mexico-9955992) - 2017 - crc - 5/3/16
Keys, Doors, and Windows 47
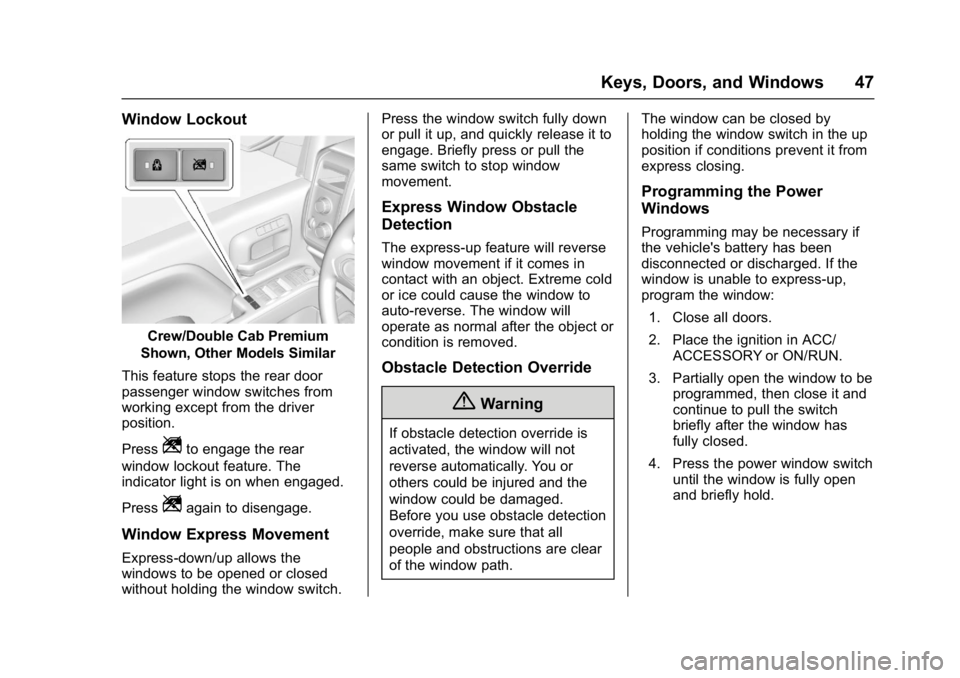
Window Lockout
Crew/Double Cab Premium
Shown, Other Models Similar
This feature stops the rear door
passenger window switches from
working except from the driver
position.
Press
Zto engage the rear
window lockout feature. The
indicator light is on when engaged.
Press
Zagain to disengage.
Window Express Movement
Express-down/up allows the
windows to be opened or closed
without holding the window switch. Press the window switch fully down
or pull it up, and quickly release it to
engage. Briefly press or pull the
same switch to stop window
movement.
Express Window Obstacle
Detection
The express-up feature will reverse
window movement if it comes in
contact with an object. Extreme cold
or ice could cause the window to
auto-reverse. The window will
operate as normal after the object or
condition is removed.
Obstacle Detection Override
{Warning
If obstacle detection override is
activated, the window will not
reverse automatically. You or
others could be injured and the
window could be damaged.
Before you use obstacle detection
override, make sure that all
people and obstructions are clear
of the window path.
The window can be closed by
holding the window switch in the up
position if conditions prevent it from
express closing.
Programming the Power
Windows
Programming may be necessary if
the vehicle's battery has been
disconnected or discharged. If the
window is unable to express-up,
program the window:
1. Close all doors.
2. Place the ignition in ACC/ ACCESSORY or ON/RUN.
3. Partially open the window to be programmed, then close it and
continue to pull the switch
briefly after the window has
fully closed.
4. Press the power window switch until the window is fully open
and briefly hold.
Page 113 of 494

GMC Sierra/Sierra Denali Owner Manual (GMNA-Localizing-U.S./Canada/
Mexico-9955992) - 2017 - crc - 5/3/16
112 Instruments and Controls
Instruments and
Controls
Controls
Steering Wheel Adjustment . . . 113
Steering Wheel Controls . . . . . . 113
Heated Steering Wheel . . . . . . . 114
Horn . . . . . . . . . . . . . . . . . . . . . . . . . . 114
Windshield Wiper/Washer . . . . 114
Compass . . . . . . . . . . . . . . . . . . . . . 115
Clock . . . . . . . . . . . . . . . . . . . . . . . . . 115
Power Outlets . . . . . . . . . . . . . . . . 117
Wireless Charging . . . . . . . . . . . . 118
Warning Lights, Gauges, and
Indicators
Warning Lights, Gauges, andIndicators . . . . . . . . . . . . . . . . . . . 120
Instrument Cluster . . . . . . . . . . . . 121
Speedometer . . . . . . . . . . . . . . . . . 125
Odometer . . . . . . . . . . . . . . . . . . . . . 125
Trip Odometer . . . . . . . . . . . . . . . . 125
Tachometer . . . . . . . . . . . . . . . . . . . 125
Fuel Gauge . . . . . . . . . . . . . . . . . . . 125
Engine Oil Pressure Gauge . . . . . . . . . . . . . . . . . . . . . . 126
Engine Coolant Temperature Gauge . . . . . . . . . . . . . . . . . . . . . . 127 Transmission Temperature
Gauge . . . . . . . . . . . . . . . . . . . . . . 128
Voltmeter Gauge . . . . . . . . . . . . . 128
Safety Belt Reminders . . . . . . . . 129
Airbag Readiness Light . . . . . . . 130
Airbag On-Off Light . . . . . . . . . . . 130
Passenger Airbag Status Indicator . . . . . . . . . . . . . . . . . . . . 132
Charging System Light . . . . . . . 132
Malfunction Indicator Lamp (Check Engine Light) . . . . . . . . 133
Brake System Warning Light . . . . . . . . . . . . . . . . . . . . . . . . 134
Antilock Brake System (ABS) Warning Light . . . . . . . . . . . . . . . 135
Four-Wheel-Drive Light . . . . . . . 136
Tow/Haul Mode Light . . . . . . . . . 136
Hill Descent Control Light . . . . 136
Lane Departure Warning (LDW) Light (2500/3500
Series) . . . . . . . . . . . . . . . . . . . . . . 136
Lane Keep Assist (LKA) Light (1500 Series) . . . . . . . . . . . . . . . 136
Vehicle Ahead Indicator . . . . . . 137
Traction Off Light . . . . . . . . . . . . . 137
StabiliTrak
®OFF Light . . . . . . . . 137
Traction Control System (TCS)/ StabiliTrak
®Light . . . . . . . . . . . 138
Engine Coolant Temperature Warning Light . . . . . . . . . . . . . . . 138
Tire Pressure Light . . . . . . . . . . . 138 Engine Oil Pressure Light . . . . 139
Low Fuel Warning Light . . . . . . 139
Security Light . . . . . . . . . . . . . . . . . 140
High-Beam On Light . . . . . . . . . . 140
Front Fog Lamp Light . . . . . . . . . 140
Lamps On Reminder . . . . . . . . . 140
Cruise Control Light . . . . . . . . . . 140
Door Ajar Light . . . . . . . . . . . . . . . 141
Information Displays
Driver Information
Center (DIC) . . . . . . . . . . . . . . . . 141
Vehicle Messages
Vehicle Messages . . . . . . . . . . . . 144
Battery Voltage and ChargingMessages . . . . . . . . . . . . . . . . . . . 145
Brake System Messages . . . . . 145
Compass Messages . . . . . . . . . . 146
Door Ajar Messages . . . . . . . . . . 146
Engine Cooling System Messages . . . . . . . . . . . . . . . . . . . 146
Engine Oil Messages . . . . . . . . . 147
Engine Power Messages . . . . . 147
Fuel System Messages . . . . . . . 147
Key and Lock Messages . . . . . 148
Lamp Messages . . . . . . . . . . . . . . 148
Object Detection System Messages . . . . . . . . . . . . . . . . . . . 148
Ride Control System Messages . . . . . . . . . . . . . . . . . . . 149
Page 146 of 494
GMC Sierra/Sierra Denali Owner Manual (GMNA-Localizing-U.S./Canada/
Mexico-9955992) - 2017 - crc - 5/3/16
Instruments and Controls 145
Battery Voltage and
Charging Messages
BATTERY LOW START
VEHICLE
When the vehicle’s battery is
severely discharged, this message
will display and four chimes will
sound. Start the vehicle
immediately. If the vehicle is not
started and the battery continues to
discharge, the climate controls,
heated seats, and audio systems
will shut off and the vehicle may
require a jump start. These systems
will function again after the vehicle
is started.
BATTERY SAVER ACTIVE
This message displays when the
battery voltage drops below
expected levels and features are
disabled. Turn off all unnecessary
accessory features.
SERVICE BATTERY
CHARGING SYSTEM
On some vehicles, this message
displays if there is a problem with
the battery charging system. Under
certain conditions, the charging
system light may also turn on in the
instrument cluster. See Charging
System Light 0132. Driving with this
problem could drain the battery.
Turn off all unnecessary
accessories. Have the electrical
system checked as soon as
possible. See your dealer.
TRANSPORT MODE ON
This message is displayed when the
vehicle is in transport mode. Some
features can be disabled while in
this mode, including Remote
Keyless Entry (RKE), remote start,
and the vehicle alarm system. Take
the vehicle to your dealer for service
to turn transport mode off.
Brake System Messages
BRAKE FLUID LOW
This message is displayed when the
brake fluid level is low. See Brake
Fluid 0365.
SERVICE BRAKE ASSIST
This message may be displayed
when there is a problem with the
brake boost assist system. When
this message is displayed, the brake
boost assist motor might be heard
operating and you might notice
pulsation in the brake pedal. This is
normal under these conditions. Take
the vehicle to your dealer for
service.
SERVICE TRAILER BRAKE
SYSTEM
On vehicles with the Integrated
Trailer Brake Control (ITBC) system,
this message displays and a chime
may sound when there is a problem
with the ITBC system.
When this message displays, power
is no longer available to the trailer
brakes.
Page 149 of 494
GMC Sierra/Sierra Denali Owner Manual (GMNA-Localizing-U.S./Canada/
Mexico-9955992) - 2017 - crc - 5/3/16
148 Instruments and Controls
diagnostic system can determine if
the fuel cap has been left off or
improperly installed. A loose or
missing fuel cap allows fuel to
evaporate into the atmosphere.
A few driving trips with the cap
properly installed should turn this
light and message off.
Key and Lock Messages
REPLACE BATTERY IN
REMOTE KEY
This message displays if a Remote
Keyless Entry (RKE) transmitter
battery is low. The battery needs to
be replaced in the transmitter. See
“Battery Replacement”under
Remote Keyless Entry (RKE)
System Operation 031.
Lamp Messages
TURN SIGNAL ON
This message displays and a chime
sounds if a turn signal is left on for
1.2 km (0.75 mi). Move the turn
signal lever to the off position.
Object Detection System
Messages
FORWARD COLLISION
ALERT OFF
This message displays when the
Forward Collision Alert has been
turned off.
FRONT CAMERA BLOCKED
CLEAN WINDSHIELD
This message displays when the
camera is blocked. Cleaning the
outside of the windshield behind the
rearview mirror may correct the
issue. The Lane Departure Warning
(LDW), Lane Keep Assist (LKA),
and Forward Collision Alert (FCA)
will not operate.
LANE DEPARTURE WARNING
UNAVAILABLE
This message displays when
attempting to activate the Lane
Departure Warning (LDW) system
when it is temporarily unavailable.
The LDW system does not need
service. This message could be due to the
camera being blocked. Cleaning the
outside of the windshield behind the
rearview mirror may correct the
issue.
LANE KEEPING ASSIST
UNAVAILABLE
This message displays when the
Lane Keep Assist (LKA) and Lane
Departure Warning (LDW) system is
temporarily unavailable. The LKA
system does not need service.
This message could be due to the
camera being blocked. Cleaning the
outside of the windshield behind the
rearview mirror may correct the
issue.
PARK ASSIST OFF
This message displays when the
Parking Assist system has been
turned off or when there is a
temporary condition causing the
system to be disabled.
SERVICE FRONT CAMERA
If this message remains on after
continued driving, the vehicle needs
service. Do not use the Lane Keep
Page 168 of 494
GMC Sierra/Sierra Denali Owner Manual (GMNA-Localizing-U.S./Canada/
Mexico-9955992) - 2017 - crc - 5/3/16
Lighting 167
roof marker lamps (if equipped),
front/rear sidemarker lamps, and
license plate lamps.
When the vehicle is turned off and
the headlamps are in AUTO, the
headlamps turn off. When the key is
removed, they automatically turn on
for a set time. The time of the delay
can be changed using the DIC. See
Driver Information Center
(DIC)0141.
;:Turns on the parking lamps
including all lamps, except the
headlamps.
2: Turns on the headlamps
together with the parking lamps and
instrument panel lights.
When the headlamps are turned on
while the vehicle is on, the
headlamps turn off automatically
10 minutes after the ignition is
turned off. When the headlamps are
turned on while the vehicle is off,
the headlamps will stay on for
10 minutes before turning off to
prevent the battery from being
drained. Turn the headlamp control
off and then back to the headlamp
on position to make the headlamps stay on for an additional 10 minutes.
To keep the lamps on for more than
10 minutes, the ignition must be in
the ACC/ACCESSORY or ON/RUN
position.
#:
If equipped, turns on the fog
lamps. See Fog Lamps0171.
IntelliBeam®System
If equipped, this system turns the
vehicle's high-beam headlamps on
and off according to surrounding
traffic conditions.
The system turns the high-beam
headlamps on when it is dark
enough and there is no other traffic
present.
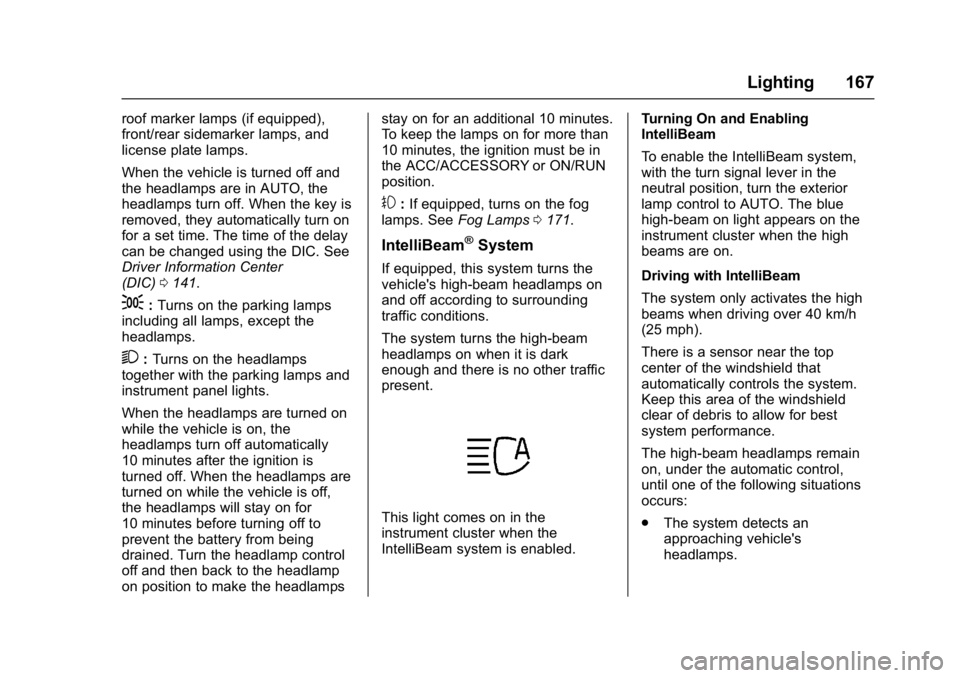
This light comes on in the
instrument cluster when the
IntelliBeam system is enabled. Turning On and Enabling
IntelliBeam
To enable the IntelliBeam system,
with the turn signal lever in the
neutral position, turn the exterior
lamp control to AUTO. The blue
high-beam on light appears on the
instrument cluster when the high
beams are on.
Driving with IntelliBeam
The system only activates the high
beams when driving over 40 km/h
(25 mph).
There is a sensor near the top
center of the windshield that
automatically controls the system.
Keep this area of the windshield
clear of debris to allow for best
system performance.
The high-beam headlamps remain
on, under the automatic control,
until one of the following situations
occurs:
.
The system detects an
approaching vehicle's
headlamps.