2017 GMC SIERRA 1500 roof
[x] Cancel search: roofPage 168 of 494
GMC Sierra/Sierra Denali Owner Manual (GMNA-Localizing-U.S./Canada/
Mexico-9955992) - 2017 - crc - 5/3/16
Lighting 167
roof marker lamps (if equipped),
front/rear sidemarker lamps, and
license plate lamps.
When the vehicle is turned off and
the headlamps are in AUTO, the
headlamps turn off. When the key is
removed, they automatically turn on
for a set time. The time of the delay
can be changed using the DIC. See
Driver Information Center
(DIC)0141.
;:Turns on the parking lamps
including all lamps, except the
headlamps.
2: Turns on the headlamps
together with the parking lamps and
instrument panel lights.
When the headlamps are turned on
while the vehicle is on, the
headlamps turn off automatically
10 minutes after the ignition is
turned off. When the headlamps are
turned on while the vehicle is off,
the headlamps will stay on for
10 minutes before turning off to
prevent the battery from being
drained. Turn the headlamp control
off and then back to the headlamp
on position to make the headlamps stay on for an additional 10 minutes.
To keep the lamps on for more than
10 minutes, the ignition must be in
the ACC/ACCESSORY or ON/RUN
position.
#:
If equipped, turns on the fog
lamps. See Fog Lamps0171.
IntelliBeam®System
If equipped, this system turns the
vehicle's high-beam headlamps on
and off according to surrounding
traffic conditions.
The system turns the high-beam
headlamps on when it is dark
enough and there is no other traffic
present.
This light comes on in the
instrument cluster when the
IntelliBeam system is enabled. Turning On and Enabling
IntelliBeam
To enable the IntelliBeam system,
with the turn signal lever in the
neutral position, turn the exterior
lamp control to AUTO. The blue
high-beam on light appears on the
instrument cluster when the high
beams are on.
Driving with IntelliBeam
The system only activates the high
beams when driving over 40 km/h
(25 mph).
There is a sensor near the top
center of the windshield that
automatically controls the system.
Keep this area of the windshield
clear of debris to allow for best
system performance.
The high-beam headlamps remain
on, under the automatic control,
until one of the following situations
occurs:
.
The system detects an
approaching vehicle's
headlamps.
Page 172 of 494
GMC Sierra/Sierra Denali Owner Manual (GMNA-Localizing-U.S./Canada/
Mexico-9955992) - 2017 - crc - 5/3/16
Lighting 171
The lever returns to its starting
position whenever it is released.
If after signaling a turn or a lane
change the arrows flash rapidly or
do not come on, a signal bulb could
be burned out. If equipped with LED
turn signals, see your dealer.
Replace any burned out bulbs. If a
bulb is not burned out, check the
fuse. SeeFuses0376.
Turn Signal On Chime
If the turn signal is left on for more
than 1.2 km (0.75 mi), a chime
sounds at each flash of the turn
signal. The message TURN
SIGNAL ON will also appear in the
Driver Information Center (DIC). To
turn the chime and message off,
move the turn signal lever to the off
position.Fog Lamps
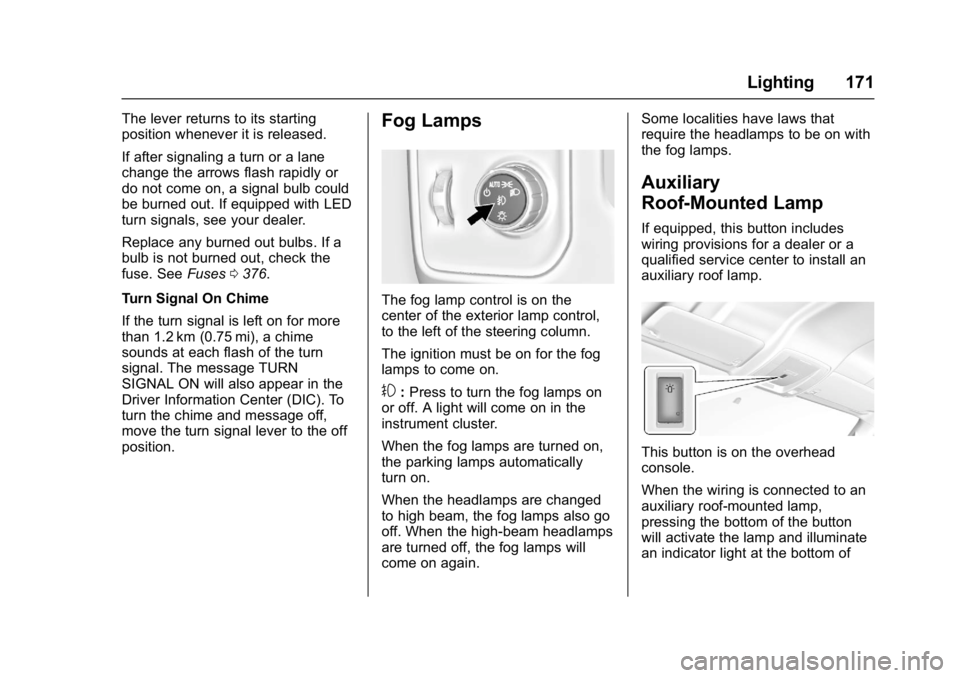
The fog lamp control is on the
center of the exterior lamp control,
to the left of the steering column.
The ignition must be on for the fog
lamps to come on.
#: Press to turn the fog lamps on
or off. A light will come on in the
instrument cluster.
When the fog lamps are turned on,
the parking lamps automatically
turn on.
When the headlamps are changed
to high beam, the fog lamps also go
off. When the high-beam headlamps
are turned off, the fog lamps will
come on again. Some localities have laws that
require the headlamps to be on with
the fog lamps.
Auxiliary
Roof-Mounted Lamp
If equipped, this button includes
wiring provisions for a dealer or a
qualified service center to install an
auxiliary roof lamp.
This button is on the overhead
console.
When the wiring is connected to an
auxiliary roof-mounted lamp,
pressing the bottom of the button
will activate the lamp and illuminate
an indicator light at the bottom of
Page 173 of 494
GMC Sierra/Sierra Denali Owner Manual (GMNA-Localizing-U.S./Canada/
Mexico-9955992) - 2017 - crc - 5/3/16
172 Lighting
this button. Pressing the top of the
button will turn off the roof-mounted
lamp and indicator.
The emergency roof lamp circuit is
fused at 30 amps, so the total
current draw of the attached lamps
should be less than this value. The
attachment points for the roof lamp
circuits are two blunt cut wires
above the overhead console: a dark
green with blue stripe switched
power wire and a black ground wire.
For information on roof-mounted
emergency lamp installation, see
www.gmupfitter.com or contact your
dealer.
If the vehicle has this button, the
vehicle may have the snow plow
prep package. SeeAdd-On
Electrical Equipment 0334.Interior Lighting
Instrument Panel
Illumination Control
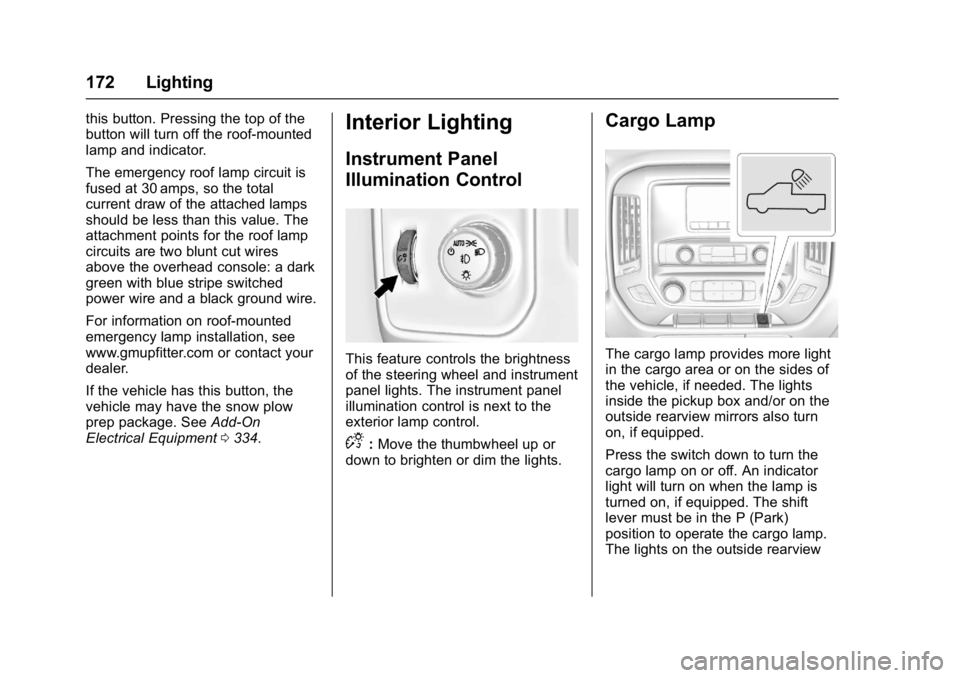
This feature controls the brightness
of the steering wheel and instrument
panel lights. The instrument panel
illumination control is next to the
exterior lamp control.
D:Move the thumbwheel up or
down to brighten or dim the lights.
Cargo Lamp
The cargo lamp provides more light
in the cargo area or on the sides of
the vehicle, if needed. The lights
inside the pickup box and/or on the
outside rearview mirrors also turn
on, if equipped.
Press the switch down to turn the
cargo lamp on or off. An indicator
light will turn on when the lamp is
turned on, if equipped. The shift
lever must be in the P (Park)
position to operate the cargo lamp.
The lights on the outside rearview
Page 191 of 494
GMC Sierra/Sierra Denali Owner Manual (GMNA-Localizing-U.S./Canada/
Mexico-9955992) - 2017 - crc - 5/3/16
190 Infotainment System
Explicit Content Filter
When on, only a filtered list of
channels will be received. When off,
all regular SXM programming
subscribed to will be received.1. Touch SXM Explicit Filter.
2. Select On or Off.
Radio Reception
Frequency interference and static
can occur during normal radio
reception if items such as phone
chargers, vehicle convenience
accessories, and external electronic
devices are plugged into the
accessory power outlet. If there is
interference or static, unplug the
item from the accessory power
outlet.
FM
FM signals only reach about 16 to
65 km (10 to 40 mi). Although the
radio has a built-in electronic circuit
that automatically works to reduce
interference, some static can occur,
especially around tall buildings or
hills, causing the sound to fade in
and out.
AM
The range for most AM stations is
greater than for FM, especially at
night. The longer range can cause
station frequencies to interfere with
each other. Static can also occur
when things like storms and power
lines interfere with radio reception.
When this happens, try reducing the
treble on the radio.
SiriusXM Satellite Radio
Service
If equipped, SiriusXM Satellite
Radio Service provides digital radio
reception. Tall buildings or hills can
interfere with satellite radio signals,
causing the sound to fade in and
out. In addition, traveling or standing
under heavy foliage, bridges,
garages, or tunnels may cause loss
of the SiriusXM signal for a period
of time.
Cell Phone Usage
Cell phone usage, such as making
or receiving phone calls, charging,
or just having the phone on may cause static interference in the
radio. Unplug the phone or turn it off
if this happens.
Fixed Mast Antenna
The fixed mast antenna will go
through most car washes as long as
it is securely attached. If the
antenna becomes slightly bent,
straighten it out by hand. If it is
badly bent, replace it.
Occasionally check that the antenna
is tight at the base. If tightening is
required, protect the paint from
damage.
Multi-Band Antenna
The multi-band antenna is on the
roof of the vehicle. The antenna is
used for OnStar, the SiriusXM
Satellite Radio Service System, and
GPS (Global Positioning System),
if the vehicle has these features.
Keep the antenna clear of
obstructions for clear reception.
If the vehicle has a sunroof, and it is
open, reception can also be
affected.
Page 192 of 494
GMC Sierra/Sierra Denali Owner Manual (GMNA-Localizing-U.S./Canada/
Mexico-9955992) - 2017 - crc - 5/3/16
Infotainment System 191
Items on the roof of the vehicle can
interfere with the performance of the
radio system and OnStar (if
equipped). Make sure the
multi-band antenna is not
obstructed.Audio Players
CD Player
If the vehicle is equipped with a CD
player, it can be used for CD and
MP3 audio.
With the vehicle on, insert a disc
into the slot, label side up. Press the
MEDIA button to select CD as a
source.
The system is capable of
playing most:
.Audio CDs
. CD-R
. CD-RW
. MP3 or unprotected WMA
formats
When playing any compatible
recordable disc, the sound quality
can be reduced due to disc quality,
the method of recording, the quality
of the music that has been
recorded, or the way the disc has
been handled. There can be increased skipping,
difficulty in finding tracks, and/or
difficulty in loading and ejecting.
If these problems occur, check the
disc for damage or try a known
good disc.
To avoid damage to the CD player:
.
Do not use scratched or
damaged discs.
. Do not apply labels to discs. The
labels could get caught in the
player.
. Insert only one disc at a time.
. Keep the loading slot free of
foreign materials, liquids, and
debris.
. Use a marking pen to label the
top of the disc.
Loading and Ejecting Discs
To load a disc:
1. Turn the vehicle on.
2. Insert a disc into the slot, label side up. The player pulls it in
the rest of the way. If the disc
Page 244 of 494
GMC Sierra/Sierra Denali Owner Manual (GMNA-Localizing-U.S./Canada/
Mexico-9955992) - 2017 - crc - 5/3/16
Driving and Operating 243
Loading the Vehicle for
Off-Road Driving
{Warning
.Unsecured cargo on the
load floor can be tossed
about when driving over
rough terrain. You or your
passengers can be struck
by flying objects. Secure the
cargo properly.
. Keep cargo in the cargo
area as far forward and as
low as possible. The
heaviest things should be
on the floor, forward of the
rear axle.
. Heavy loads on the roof
raise the vehicle's center of
gravity, making it more likely
to roll over. You can be
seriously or fatally injured if
the vehicle rolls over. Put
heavy loads inside the
cargo area, not on the roof. For more information about loading
the vehicle, see
Vehicle Load Limits
0 250 andTires 0383.
Environmental Concerns
.
Always use established trails,
roads, and areas that have been
set aside for public off-road
recreational driving and obey all
posted regulations.
. Do not damage shrubs, flowers,
trees, or grasses or disturb
wildlife.
. Do not park over things that
burn. See Parking over Things
That Burn 0266.
Driving on Hills
Driving safely on hills requires good
judgment and an understanding of
what the vehicle can and cannot do.
{Warning
Many hills are simply too steep
for any vehicle. Driving up hills
can cause the vehicle to stall.
Driving down hills can cause loss
(Continued)
Warning (Continued)
of control. Driving across hills can
cause a rollover. You could be
injured or killed. Do not drive on
steep hills.
Before driving on a hill, assess the
steepness, traction, and
obstructions. If the terrain ahead
cannot be seen, get out of the
vehicle and walk the hill before
driving further.
When driving on hills:
. Use a low gear and keep a firm
grip on the steering wheel.
. Maintain a slow speed.
. When possible, drive straight up
or down the hill.
. Slow down when approaching
the top of the hill.
. Use headlamps even during the
day to make the vehicle more
visible.
Page 263 of 494
GMC Sierra/Sierra Denali Owner Manual (GMNA-Localizing-U.S./Canada/
Mexico-9955992) - 2017 - crc - 5/3/16
262 Driving and Operating
To control the fast idle:
.To enable the Fast Idle System,
press and release the cruise
control on/off button and ensure
that the switch indicator light
is lit.
. Press and release the cruise
control SET- button. Engine
speed will be held at
approximately 1200 rpm.
One of the following actions will turn
off the fast idle:
. Pressing the brake.
. Selecting the cruise control
cancel button.
. Releasing the parking brake.
. Moving the transmission shift
lever out of P (Park) or
N (Neutral).
. Selecting the cruise control on/
off button when it was
previously on.
. Pressing the cruise control SET-
button a second time. .
Pressing the accelerator more
than one-quarter of the
way down.
. Turning the ignition switch to the
LOCK/OFF position.
Retained Accessory
Power (RAP)
The following vehicle accessories
can be used for up to 10 minutes
after the engine is turned off:
.Audio System
. Power Windows
. OnStar System (if equipped)
. Sunroof (if equipped)
These features work when the key
is in ON/RUN or ACC/
ACCESSORY. Once the key is
turned from ON/RUN to LOCK/OFF,
the windows and sunroof continue
to work up to 10 minutes or until any
door is opened. The radio continues
to work for up to 10 minutes or until
the driver door is opened. Accessory Power Outlets (APOs)
The vehicle may have Accessory
Power Outlets (APOs) in several
locations. See
Power Outlets0117.
The APOs in the console or center
seat position are powered by
Retained Accessory Power (RAP).
They will continue to work for up to
10 minutes after the key is turned
from ON/RUN to LOCK/OFF, or until
the driver door is opened.
The APOs on the center stack come
from the factory powered directly
from the vehicle battery, and supply
accessory power at all times,
regardless of ignition key position.
If electronic items are left plugged
into these APOs for long periods of
time with the vehicle off, the vehicle
battery could be drained. The
vehicle may not start if the battery is
allowed to drain for an extended
period of time.
Engine Coolant Heater
The engine heater can provide
easier starting and better fuel
economy during engine warm-up in
Page 264 of 494
GMC Sierra/Sierra Denali Owner Manual (GMNA-Localizing-U.S./Canada/
Mexico-9955992) - 2017 - crc - 5/3/16
Driving and Operating 263
cold weather conditions at or below
−18 °C (0 °F). Vehicles with an
engine heater should be plugged in
at least four hours before starting.
An internal thermostat in the
plug-end of the cord may exist,
which will prevent engine coolant
heater operation at temperatures
above−18 °C (0 °F).
If the vehicle has a diesel engine,
see the Duramax diesel
supplement.
To Use the Engine Coolant
Heater
1. Turn off the engine.
2. Open the hood and unwrap the electrical cord. The cord is
secured to the driver side
fender with a clip, next to the
engine compartment fuse
block. Carefully remove the
wire tie that bundles the
electrical plug. Do not cut the
electrical cord. Check the heater cord for
damage. If it is damaged, do
not use it. See your dealer for
a replacement. Inspect the
cord for damage yearly.
3. Plug the cord into a normal, grounded 110-volt AC outlet.
{Warning
Improper use of the heater cord
or an extension cord can damage
the cord and may result in
overheating and fire.
. Plug the cord into a
three-prong electrical utility
receptacle that is protected
by a ground fault detection
function. An ungrounded
outlet could cause an
electric shock.
. Use a weatherproof,
heavy-duty, 15 amp-rated
extension cord if needed.
Failure to use the
recommended extension
cord in good operating
(Continued)
Warning (Continued)
condition, or using a
damaged heater or
extension cord, could make
it overheat and cause a fire,
property damage, electric
shock, and injury.
. Do not operate the vehicle
with the heater cord
permanently attached to the
vehicle. Possible heater
cord and thermostat
damage could occur.
. While in use, do not let the
heater cord touch vehicle
parts or sharp edges. Never
close the hood on the
heater cord.
. Before starting the vehicle,
unplug the cord, reattach
the cover to the plug, and
securely fasten the cord.
Keep the cord away from
any moving parts.