Page 126 of 524
3-24
Convenient features of your vehicle
Programming HomeLink®
Please note the following:
When programming a garage dooropener, it is advised to park the
vehicle outside of the garage.
It is recommended that a new bat- tery be placed in the hand-held
transmitter of the device being pro-
grammed to HomeLink
®for quicker
training and accurate transmission
of the radio-frequency signal.
Some vehicles may require the ignition switch to be placed in the
ACC (or "Accessories") position for
programming and/or operation of
HomeLink
®.
In the event that there are still pro- gramming difficulties or questions
after following the programming
steps listed below, contact
HomeLink
®at: www.homelink.com,
www.youtube.com/HomeLinkGentex
or by calling 1-800-355-3515.
Programming
To train most devices, follow these
instructions:
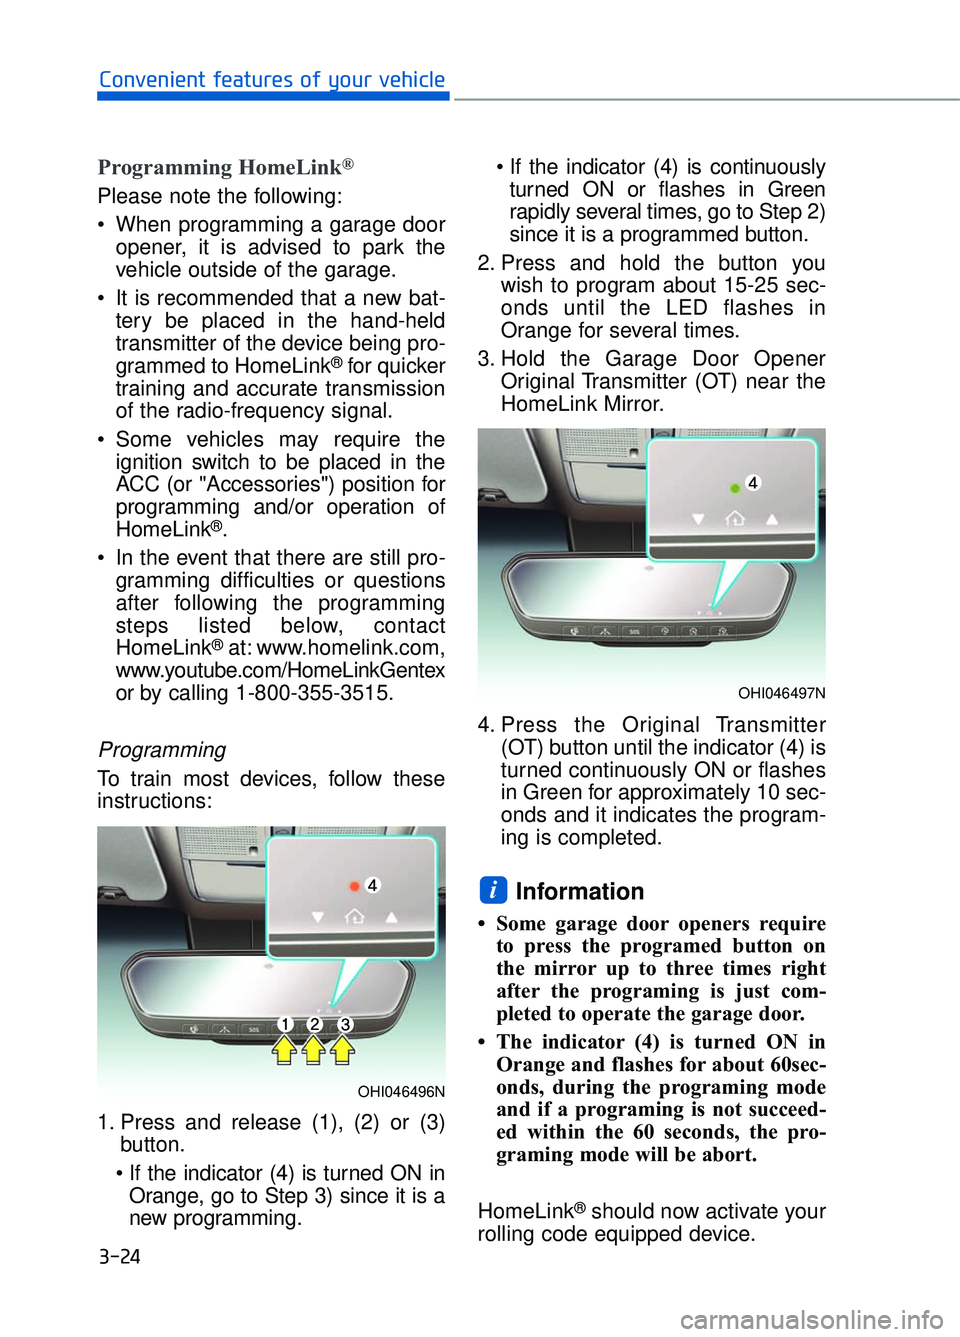
1. Press and release (1), (2) or (3) button.
Orange, go to Step 3) since it is a
new programming.
turned ON or flashes in Green
rapidly several times, go to Step 2)
since it is a programmed button.
2. Press and hold the button you wish to program about 15-25 sec-
onds until the LED flashes in
Orange for several times.
3. Hold the Garage Door Opener Original Transmitter (OT) near the
HomeLink Mirror.
4. Press the Original Transmitter (OT) button until the indicator (4) is
turned continuously ON or flashes
in Green for approximately 10 sec-
onds and it indicates the program-
ing is completed.
Information
• Some garage door openers requireto press the programed button on
the mirror up to three times right
after the programing is just com-
pleted to operate the garage door.
• The indicator (4) is turned ON in Orange and flashes for about 60sec-
onds, during the programing mode
and if a programing is not succeed-
ed within the 60 seconds, the pro-
graming mode will be abort.
HomeLink
®should now activate your
rolling code equipped device.
i
OHI046496N
OHI046497N
Page 134 of 524
4. Press the Original Transmitter (OT)button until the indicator (4) is
turned continuously ON or flashes
in Green for approximately 10 sec-
onds and it indicates the program-
ing is completed.
Information
• Some garage door openers requireto press the programed button on
the mirror up to three times right
after the programing is just com-
pleted to operate the garage door.
• The indicator (4) is turned ON in Orange and flashes for about 60sec
during the programing mode and if
a programing is not succeeded with-
in the 60 seconds, the programing
mode will be abort.
Programming HomeLink®
Please note the following:
When programming a garage dooropener, it is advised to park the
vehicle outside of the garage.
It is recommended that a new bat- tery be placed in the hand-held
transmitter of the device being pro-
grammed to HomeLink
®for quicker
training and accurate transmission
of the radio-frequency signal.
Some vehicles may require the ignition switch to be placed in the
ACC (or "Accessories") position for
programming and/or operation of
HomeLink
®.
In the event that there are still pro- gramming difficulties or questions
after following the programming
steps listed below, contact
HomeLink
®at: www.homelink.com,
www.youtube.com/HomeLinkGentex
or by calling 1-800-355-3515.
i
3-32
Convenient features of your vehicle
Before programming HomeLink
®
to a garage door opener or gate
operator, make sure people and
objects are out of the way of the
device to prevent potential harm
or damage. Do not use the
HomeLink
®with any garage door
opener that lacks the safety stop
and reverse features required by
U.S. federal safety standards (this
includes any garage door opener
model manufactured before April
1, 1982). A garage door that can-
not detect an object - signaling
the door to stop and reverse -
does not meet current U.S. feder-
al safety standards. Using a
garage door opener without
these features increases the risk
of serious injury or death.
WARNING
Page 156 of 524
S
SM
M A
AR
RT
T
T
T R
R U
U N
NK
K
(
( I
IF
F
E
E Q
Q U
UI
IP
P P
PE
ED
D )
)
3-54
Convenient features of your vehicle
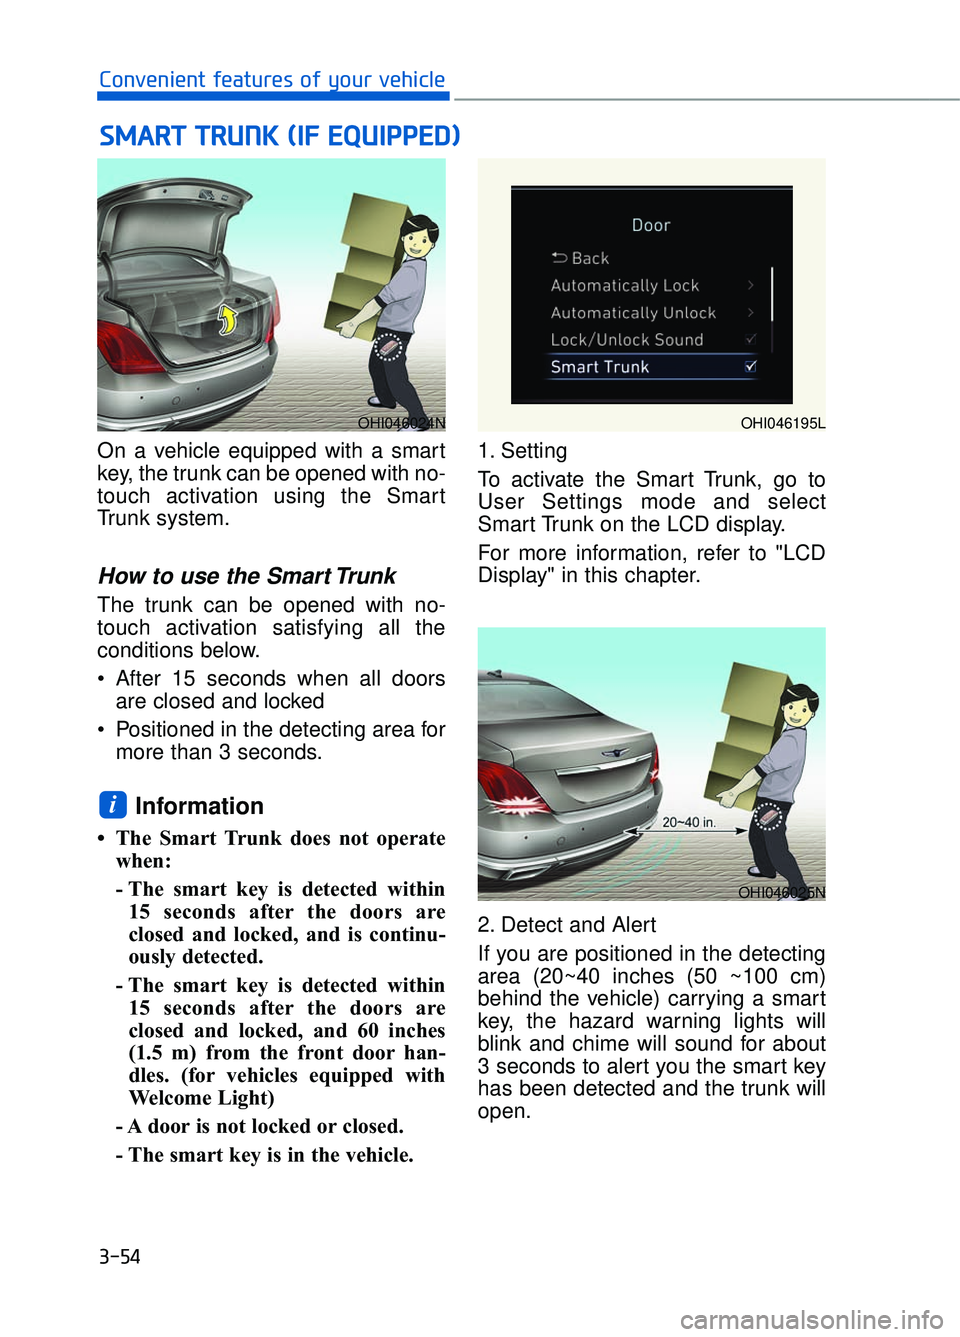
On a vehicle equipped with a smart
key, the trunk can be opened with no-
touch activation using the Smart
Trunk system.
How to use the Smart Trunk
The trunk can be opened with no-
touch activation satisfying all the
conditions below.
After 15 seconds when all doors are closed and locked
Positioned in the detecting area for more than 3 seconds.
Information
• The Smart Trunk does not operatewhen:
- The smart key is detected within15 seconds after the doors are
closed and locked, and is continu-
ously detected.
- The smart key is detected within 15 seconds after the doors are
closed and locked, and 60 inches
(1.5 m) from the front door han-
dles. (for vehicles equipped with
Welcome Light)
- A door is not locked or closed.
- The smart key is in the vehicle. 1. Setting
To activate the Smart Trunk, go to
User Settings mode and select
Smart Trunk on the LCD display.
For more information, refer to "LCD
Display" in this chapter.
2. Detect and Alert
If you are positioned in the detecting
area (20~40 inches (50 ~100 cm)
behind the vehicle) carrying a smart
key, the hazard warning lights will
blink and chime will sound for about
3 seconds to alert you the smart key
has been detected and the trunk will
open.
i
OHI046024N
OHI046025N
OHI046195L
Page 175 of 524
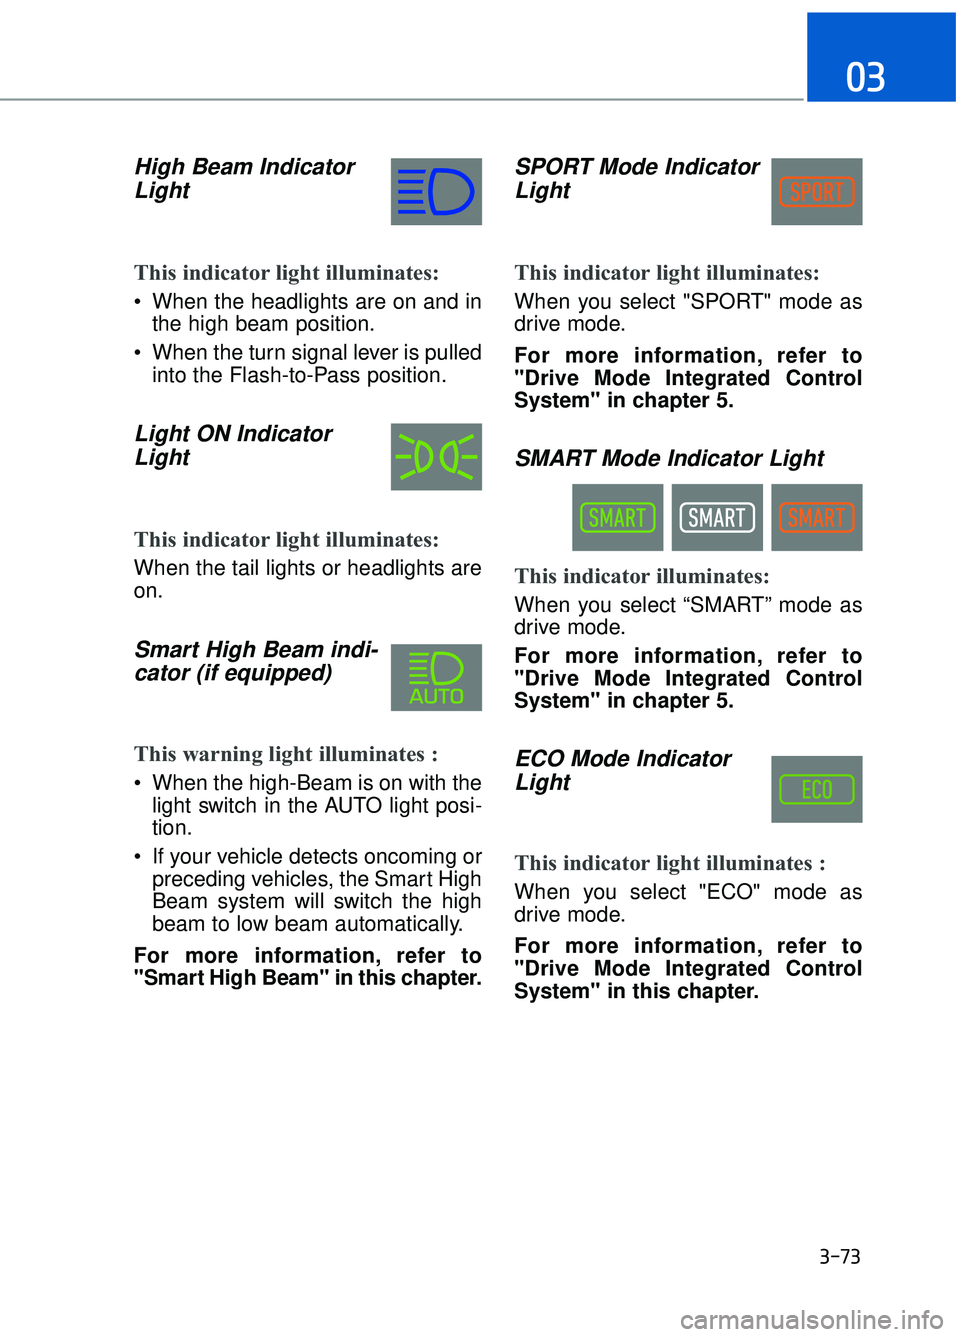
High Beam IndicatorLight
This indicator light illuminates:
When the headlights are on and in
the high beam position.
When the turn signal lever is pulled into the Flash-to-Pass position.
Light ON IndicatorLight
This indicator light illuminates:
When the tail lights or headlights are
on.
Smart High Beam indi-cator (if equipped)
This warning light illuminates :
When the high-Beam is on with the
light switch in the AUTO light posi-
tion.
If your vehicle detects oncoming or preceding vehicles, the Smart High
Beam system will switch the high
beam to low beam automatically.
For more information, refer to
"Smart High Beam" in this chapter.
SPORT Mode Indicator Light
This indicator light illuminates:
When you select "SPORT" mode as
drive mode.
For more information, refer to
"Drive Mode Integrated Control
System" in chapter 5.
SMART Mode Indicator Light
This indicator illuminates:
When you select “SMART” mode as
drive mode.
For more information, refer to
"Drive Mode Integrated Control
System" in chapter 5.
ECO Mode IndicatorLight
This indicator light illuminates :
When you select "ECO" mode as
drive mode.
For more information, refer to
"Drive Mode Integrated Control
System" in this chapter.
3-73
03
Page 189 of 524
LCD Modes
3-87
03
Modes SymbolExplanation
Trip Computer
This mode displays driving information like the trip-
meter, fuel economy, etc.
For more information, refer to "Trip Computer" in
this chapter.
Tu r n B y Tu r n(TBT)
(if equipped)
This mode displays the state of the navigation.
Assist
Control (SCC) and Lane Departure Warning
System (LDWS)/Lane Keeping Assist System
(LKAS).
For more information, refer to "Smart Cruise
Control (SCC)" and "Lane Departure Warning
System (LDWS)/Lane Keeping Assist System
(LKAS)" in chapter 5.
Attention Alert and Tire Pressure Monitoring
System (TPMS).
For more information, refer to "Driver Attention
Alert (DAA)" in chapter 5 and "Tire Pressure
Monitoring System (TPMS)" in chapter 6.
User SettingsIn this mode, you can change settings of the
doors, lamps, etc.
WarningThis mode displays warning messages related to
the Blind Spot Detection system, etc.
The information provided differs according to the items applied to your
vehicle.
Page 190 of 524
Edit settings after shifting to P
This warning message appears if
you try to adjust the User Settings
while driving.
Quick guide help
Press and hold the OK button in the
User Settings mode, the explanation
about the selected item is displayed.
Trip computer mode
The trip computer mode displays
information related to vehicle driving
parameters including range, fuel
economy, trip meter information and
vehicle speed.
For more information, refer to
"Trip Computer" in this chapter.
Turn By Turn (TBT) mode
This mode displays the state of the
navigation.
3-88
Convenient features of your vehicle
OHI046154LOHI046156N
OHI046157N
Page 191 of 524
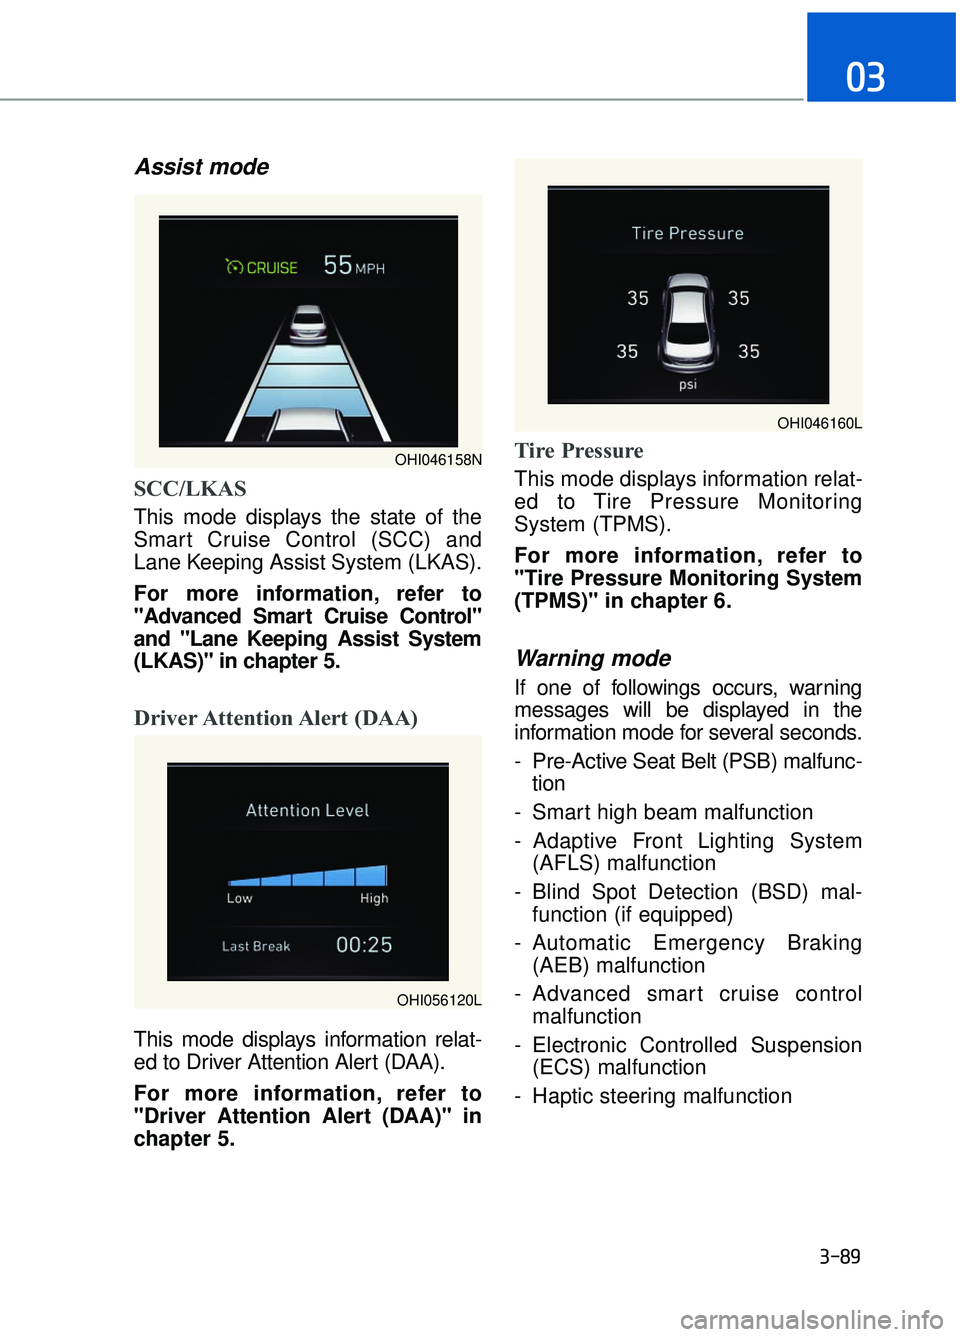
Assist mode
SCC/LKAS
This mode displays the state of the
Smart Cruise Control (SCC) and
Lane Keeping Assist System (LKAS).
For more information, refer to
"Advanced Smart Cruise Control"
and "Lane Keeping Assist System
(LKAS)" in chapter 5.
Driver Attention Alert (DAA)
This mode displays information relat-
ed to Driver Attention Alert (DAA).
For more information, refer to
"Driver Attention Alert (DAA)" in
chapter 5.
Tire Pressure
This mode displays information relat-
ed to Tire Pressure Monitoring
System (TPMS).
For more information, refer to
"Tire Pressure Monitoring System
(TPMS)" in chapter 6.
Warning mode
If one of followings occurs, warning
messages will be displayed in the
information mode for several seconds.
- Pre-Active Seat Belt (PSB) malfunc-tion
- Smart high beam malfunction
- Adaptive Front Lighting System (AFLS) malfunction
- Blind Spot Detection (BSD) mal- function (if equipped)
- Automatic Emergency Braking (AEB) malfunction
- Advanced smart cruise control malfunction
- Electronic Controlled Suspension (ECS) malfunction
- Haptic steering malfunction
3-89
03
OHI046158N
OHI046160L
OHI056120L
Page 196 of 524
7. Service Interval
To activate or deactivate the service
interval function.
To adjust the interval by mileage and
period.
To reset the service interval function.8. Other Features
- Off: The average fuel economy will
not reset automatically whenever
refueling.
- After Ignition: The average fuel economy will reset automatically
whenever it has passed 4 hours
after turning OFF the engine.
- After Refueling: The average fuel economy will reset automatically
when refueling.
For more information, refer to
"Trip Computer" in this chapter.
To select the fuel economy unit.
(km/L, L/100)
To select the temperature unit. (°C,°F)
To select the tire pressure unit.
(psi, kPa, bar)
9. Reset
You can reset the menus in the User
Settings mode. All menus in the User
Settings mode are initialized, except
language and service interval.
3-94
Convenient features of your vehicle
OHI046168LOHI046169L