2017 FORD POLICE INTERCEPTOR SEDAN air filter
[x] Cancel search: air filterPage 183 of 358
If you tow a trailer with your vehicle, the
engine may temporarily reach a higher
temperature during severe operating
conditions, for example ascending a long
or steep grade in high ambient
temperatures.
At this time, you may notice the coolant
temperature gauge moves toward the red
zone and a message may appear in the
information display.
You may notice a reduction in vehicle
speed caused by reduced engine power in
order to manage the engine coolant
temperature. Your vehicle may enter this
mode if certain high-temperature and
high-load conditions take place. The
amount of speed reduction depends on
vehicle loading, grade and ambient
temperature. If this occurs, there is no need
to pull off the road. You can continue to
drive your vehicle.
The air conditioning may automatically
turn on and off during severe operating
conditions to protect the engine from
overheating. When the coolant
temperature decreases to the normal
operating temperature, the air conditioning
turns on.
If the coolant temperature gauge moves
fully into the red zone, or if the coolant
temperature warning or service engine
soon messages appear in your information
display, do the following:
1. Pull off the road as soon as safely
possible and shift the transmission into
park (P).
2. Leave the engine running until the coolant temperature gauge needle
returns to the normal position. After
several minutes, if the temperature
does not drop, follow the remaining
steps.
3. Switch the engine off and wait for it to
cool. Check the coolant level. 4. If the coolant level is at or below the
minimum mark, add prediluted coolant
immediately.
5. If the coolant level is normal, restart the engine and continue.
AUTOMATIC TRANSMISSION
FLUID CHECK - 2.0L
ECOBOOST™
6F35 Transmission
The automatic transmission does not have
a transmission fluid dipstick.
The automatic transmission does not
consume fluid. If the transmission is not
working correctly, for example, the
transmission slips, shifts slowly or there
are signs of fluid leakage, have the system
checked by an authorized dealer.
Change the automatic transmission fluid
and filter at the correct service interval.
Do not use supplemental automatic
transmission fluid additives because they
are unnecessary and could lead to
transmission damage that may not be
covered by the vehicle Warranty.
AUTOMATIC TRANSMISSION
FLUID CHECK - 3.5L DURATEC/
3.5L ECOBOOST™/3.7L
6F50/6F55 Transmission (If Equipped) WARNING
The dipstick and surrounding
components are hot. Use gloves
when moving components and
checking the transmission fluid level.
Failure to follow this warning could result
in serious personal injury. 180
Taurus (CPH) Police, Canada/United States of America, enUSA, First Printing Maintenance
Page 184 of 358
Note:
Automatic transmission fluid
expands when warmed. To obtain an
accurate fluid check, drive your vehicle until
you warm it up, approximately 20 mi
(30 km). If you operate your vehicle for an
extended period at high speeds, in city traffic
during hot weather or pulling a trailer, switch
your vehicle off until it reaches normal
operating temperatures to allow the fluid
to cool before checking. Depending on
vehicle use, cooling times could take up to
30 minutes or longer.
Refer to your scheduled maintenance
information for scheduled intervals for fluid
checks and changes. Your transmission
does not consume fluid. However, you
should check the fluid level if the
transmission is not working properly. For
example, if the transmission slips or shifts
slowly or if you notice some sign of a fluid
leak.
1. Drive your vehicle
20 mi (30 km) or
until it reaches normal operating
temperature.
2. Park your vehicle on a level surface and
engage the parking brake.
3. With the parking brake engaged and your foot on the brake pedal, start the
engine and move the gearshift lever
through all of the gear ranges. Allow a
minimum of 10 seconds for each gear
to engage.
4. Put the gearshift lever in park (P) and leave the engine running.
Note: For vehicles with the EcoBoost
engine, move the air filter assembly aside
to access the transmission dipstick. See
Moving the Air Filter Assembly for more
information.
5. Remove the dipstick and wipe it clean with a dry, lint free clean rag. If
necessary, refer to the Under hood
overview in this chapter for the location
of the dipstick. 6. Install the dipstick making sure you
fully seat it in the filler tube by turning
it to the locked position.
7. Remove the dipstick and inspect the fluid level. The fluid should be in the
designated areas for normal operating
temperature.
Moving the Air Filter Assembly
(Accessing the Dipstick) WARNING
Do not start the engine with the air
filter removed. This can cause
damage not covered by the vehicle
Warranty and can result in serious injury. 1. Switch the engine off.
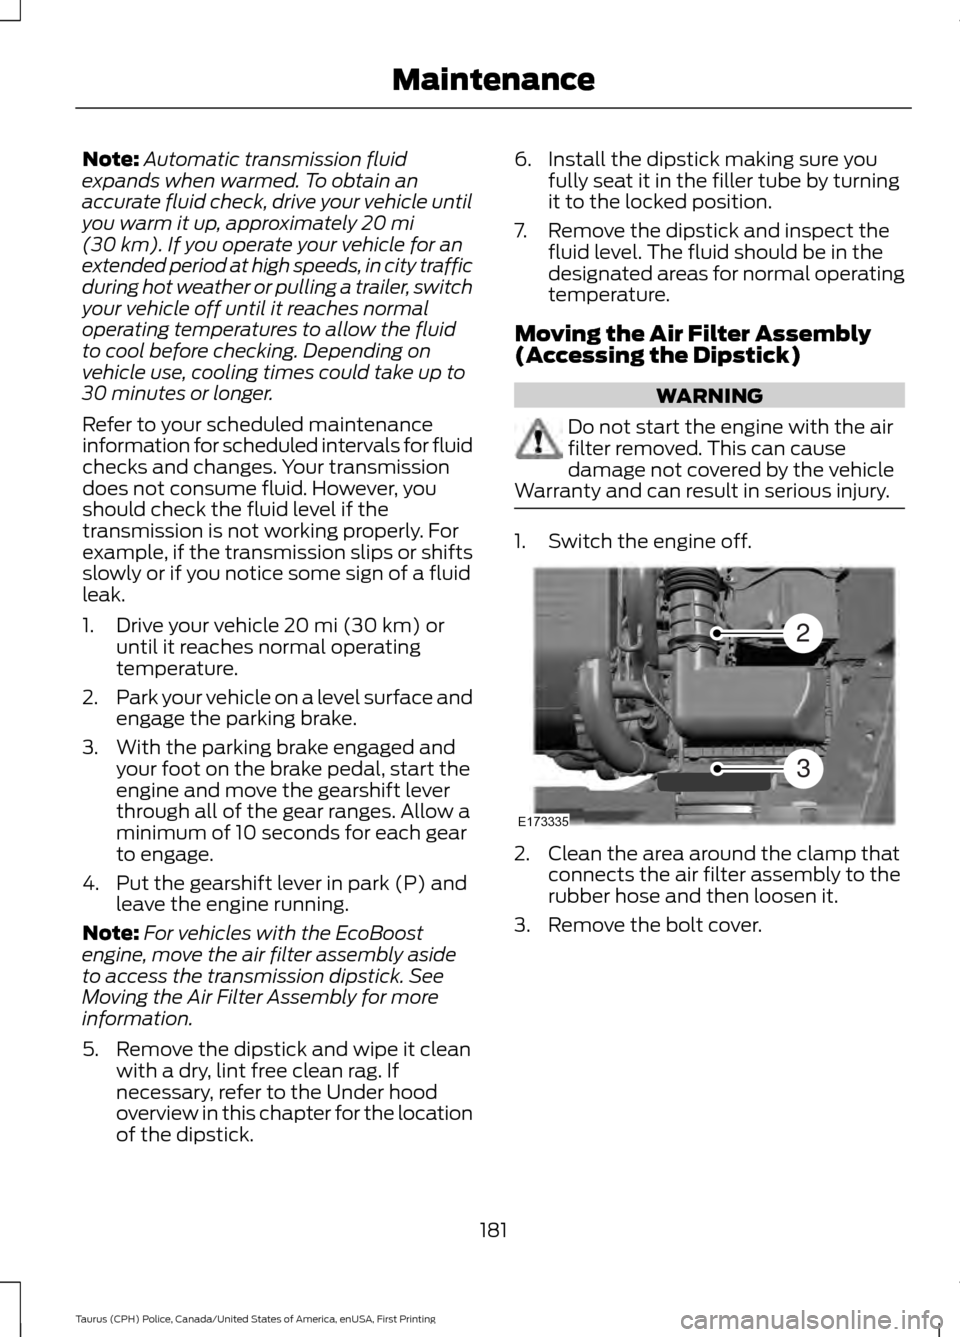
2. Clean the area around the clamp that
connects the air filter assembly to the
rubber hose and then loosen it.
3. Remove the bolt cover.
181
Taurus (CPH) Police, Canada/United States of America, enUSA, First Printing MaintenanceE173335
2
3
Page 185 of 358

4. Remove two bolts that attach the air
filter assembly to the front of the
vehicle.
5. Remove the harness retaining clip by pulling up.
6. Do not disconnect the sensor. 7. Pull the air filter assembly up to
disconnect it from the seated
grommets located under the air filter
assembly.
8. Rotate the air filter assembly 90 degrees counterclockwise. Make sure
the rubber hose is still connected to the
air filter assembly.
9. Tighten the clamp.
You can now access the transmission fluid
level indicator.
Checking the fluid level
Check the transmission fluid at the normal
operating temperatures between
88°C+5°C (190°F+10°F) on a level
surface. Drive your vehicle until you warm
it up to the normal operating temperature
after approximately 20 mi (30 km).
Correct fluid level Target the transmission fluid level within
the marked area at the normal operating
temperature between 88°C+5°C
(190°F+10°F).
182
Taurus (CPH) Police, Canada/United States of America, enUSA, First Printing MaintenanceE173334
654 E173400 E235672
Page 186 of 358

High fluid level
If the fluid level is above the MIN range of
the dipstick, remove fluid to reach the MIN
level.
Note:
Fluid level above the MIN level may
cause shift or engagement concerns or
possible damage. An overheating condition
can cause high fluid levels. If you operate
your vehicle for an extended period at high
speeds, in city traffic during hot weather or
pulling a trailer, you should switch your
vehicle off until your vehicle reaches normal
operating temperatures. Depending on
vehicle use, cooling times could take up to
30 minutes or longer.
Adjusting Automatic Transmission
Fluid Levels
Low fluid level Overfilled fluid level
Note:
An overfill condition of transmission
fluid may cause shift or engagement
concerns or possible damage.
Before adding any fluid, make sure the
correct type is used. The type of fluid used
is normally indicated on the dipstick and
in the Technical Specifications section in
this chapter.
Do not use supplemental transmission
fluid additives, treatments or cleaning
agents. The use of these materials may
affect transmission operation and result
in damage to internal transmission
components. Reinstall the air filter
assembly. After you check the fluid level
and adjust as necessary, do the following:
Reinstalling The Air Filter
Assembly
1. Switch the engine off.
2. Replace the air filter assembly back into the grommets by pushing down
on the air filter assembly.
3. Tighten the clamp holding the air filter
assembly to the rubber hose.
4. Install and tighten the two bolts that attach the air filter assembly to the
front of the vehicle.
5. Install the bolt cover.
6. Reinstall the harness retaining clip into
the front of the air filter assembly.
183
Taurus (CPH) Police, Canada/United States of America, enUSA, First Printing MaintenanceE240047 E240048 E240049
Page 195 of 358
CHANGING THE ENGINE AIR
FILTER
WARNING
Do not start the engine with the air
cleaner removed. This can cause
damage not covered by the vehicle
Warranty and can result in serious injury. When changing the air filter element, use
only the air filter element listed. See
Capacities and Specifications (page
224).
For vehicles with EcoBoost engines, when
servicing the air cleaner, it is important that
no foreign material enters the air induction
system. The engine and turbocharger are
susceptible to damage from even small
particles.
Change the air filter element at the correct
interval. See
Scheduled Maintenance
(page 301).
Note: Failure to use the correct air filter
element may result in severe engine
damage. Resulting component damage
may not be covered by the vehicle Warranty.
To replace the air filter element do the
following:
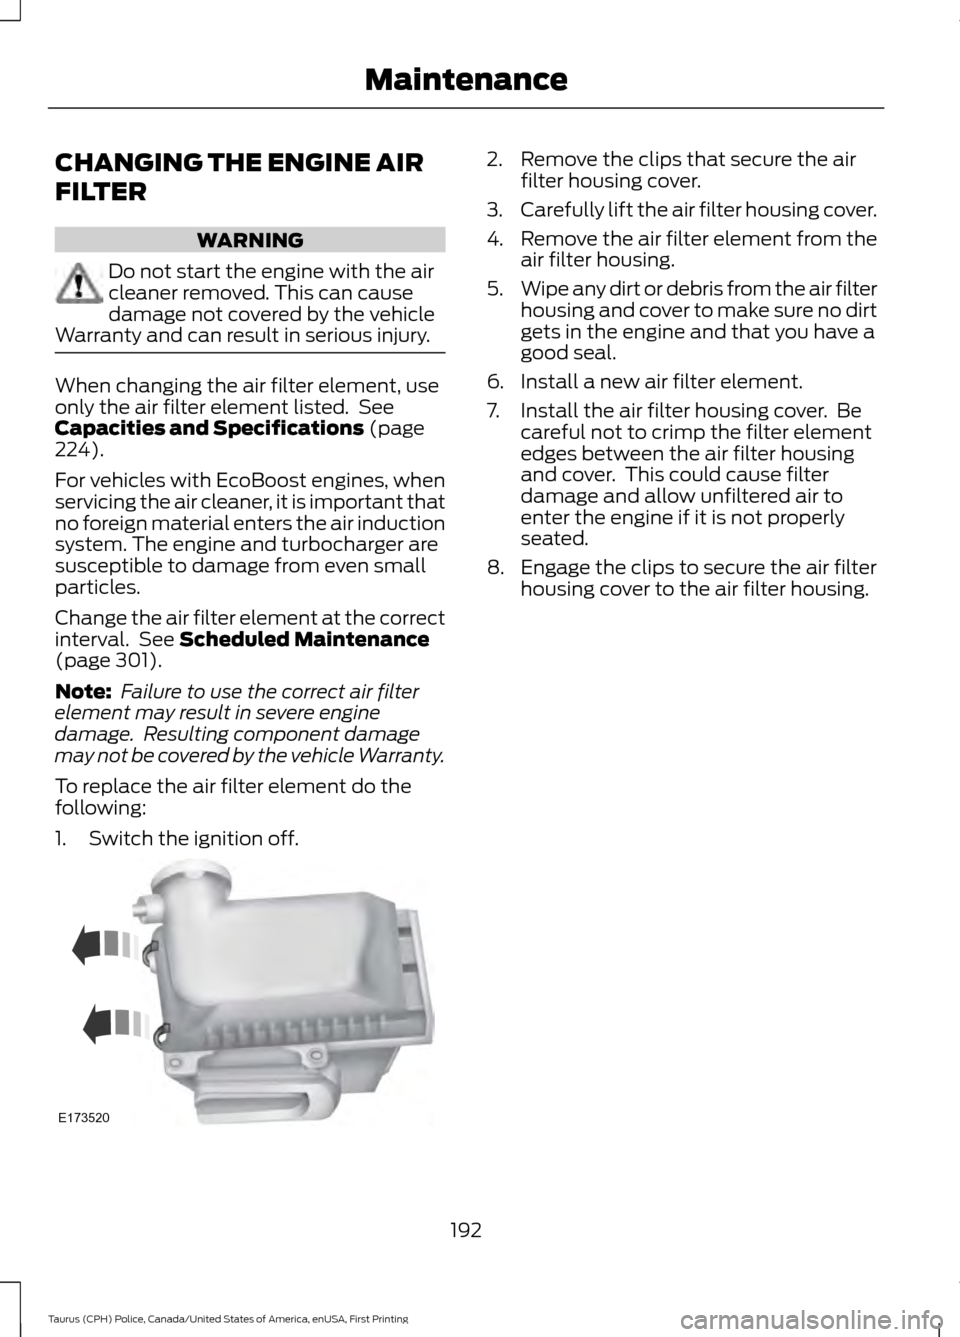
1. Switch the ignition off. 2. Remove the clips that secure the air
filter housing cover.
3. Carefully lift the air filter housing cover.
4. Remove the air filter element from the
air filter housing.
5. Wipe any dirt or debris from the air filter
housing and cover to make sure no dirt
gets in the engine and that you have a
good seal.
6. Install a new air filter element.
7. Install the air filter housing cover. Be careful not to crimp the filter element
edges between the air filter housing
and cover. This could cause filter
damage and allow unfiltered air to
enter the engine if it is not properly
seated.
8. Engage the clips to secure the air filter housing cover to the air filter housing.
192
Taurus (CPH) Police, Canada/United States of America, enUSA, First Printing MaintenanceE173520
Page 198 of 358
•
Use a quality wax that does not contain
abrasives.
• Follow the manufacturer ’s instructions
to apply and remove the wax.
• Apply a small amount of wax in a
back-and-forth motion, not in circles.
• Do not allow wax to come in contact
with any non-body (low-gloss black)
colored trim. The wax will discolor or
stain the parts over time.
•Roof racks.
• Bumpers.
• Grained door handles.
• Side moldings.
• Mirror housings.
• Windshield cowl area.
• Do not apply wax to glass areas.
• After waxing, your car's paint should
feel smooth, and be free of streaks and
smudges.
CLEANING THE ENGINE
Engines are more efficient when they are
clean because grease and dirt buildup keep
the engine warmer than normal.
When washing:
• Take care when using a power washer
to clean the engine. The high-pressure
fluid could penetrate the sealed parts
and cause damage.
• Do not spray a hot engine with cold
water to avoid cracking the engine
block or other engine components.
• Spray Motorcraft Engine Shampoo and
Degreaser on all parts that require
cleaning and pressure rinse clean. In
Canada, use Motorcraft Engine
Shampoo.
• Never wash or rinse the engine while it
is hot or running; water in the running
engine may cause internal damage. •
Never wash or rinse any ignition coil,
spark plug wire or spark plug well, or
the area in and around these locations.
• Cover the battery, power distribution
box, and air filter assembly to prevent
water damage when cleaning the
engine.
CLEANING THE WINDOWS AND
WIPER BLADES
Car wash chemicals and environmental
fallout can result in windshield and wiper
blade contamination. Dirty windshield and
wipers will result in poor windshield wiper
operation. Keep the windshield and wiper
blades clean to maintain windshield wiper
performance.
To clean the windshield and wiper blades:
• Clean the windshield with a
non-abrasive glass cleaner. When
cleaning the interior of the windshield,
avoid getting any glass cleaner on the
instrument panel or door panels. Wipe
any glass cleaner off these surfaces
immediately.
• For windshields contaminated with
tree sap, chemicals, wax or bugs, clean
the entire windshield using steel wool
(no greater than 0000 grade) in a
circular motion and rinse with water.
• Clean the wiper blades with isopropyl
rubbing alcohol or windshield washer
concentrate.
Note: Do not use razor blades or other
sharp objects to clean or remove decals
from the inside of the heated rear window.
The vehicle warranty does not cover
damage caused to the heated rear window
grid lines.
195
Taurus (CPH) Police, Canada/United States of America, enUSA, First Printing Vehicle Care
Page 229 of 358
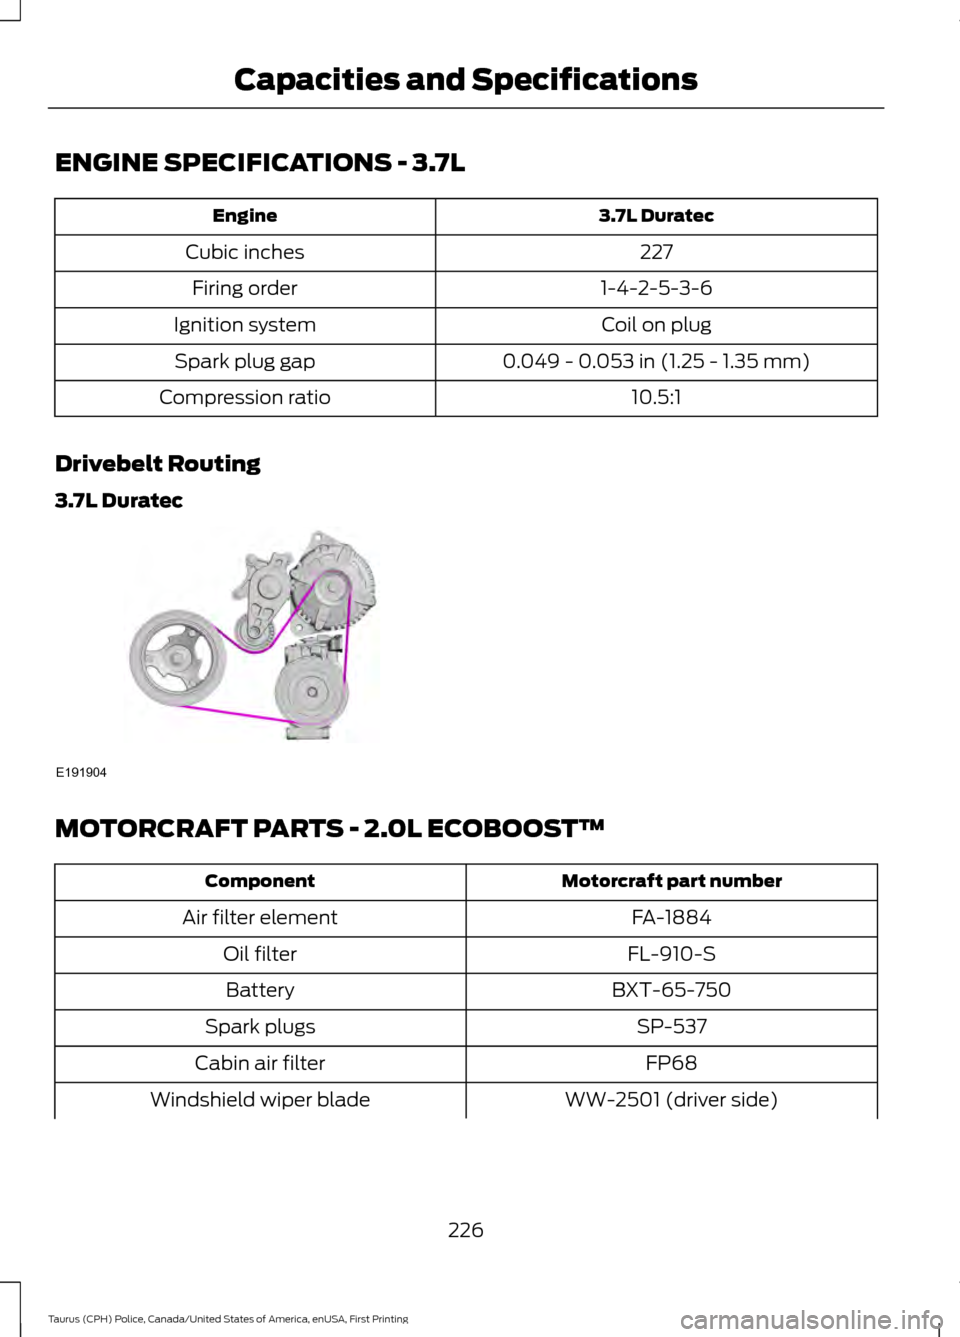
ENGINE SPECIFICATIONS - 3.7L
3.7L Duratec
Engine
227
Cubic inches
1-4-2-5-3-6
Firing order
Coil on plug
Ignition system
0.049 - 0.053 in (1.25 - 1.35 mm)
Spark plug gap
10.5:1
Compression ratio
Drivebelt Routing
3.7L Duratec MOTORCRAFT PARTS - 2.0L ECOBOOST™
Motorcraft part number
Component
FA-1884
Air filter element
FL-910-S
Oil filter
BXT-65-750
Battery
SP-537
Spark plugs
FP68
Cabin air filter
WW-2501 (driver side)
Windshield wiper blade
226
Taurus (CPH) Police, Canada/United States of America, enUSA, First Printing Capacities and SpecificationsE191904
Page 231 of 358

MOTORCRAFT PARTS - 3.5L DURATEC
Part Number
Component
FA-1884
Air filter element
FL-500-S
Oil filter
BXT-65-750
Battery
SP-534
Spark plugs
FP-68
Cabin air filter
WW-2501 (driver side)
Windshield wiper blade
WW-2043 (passenger side)
We recommend Motorcraft replacement parts available at your Ford dealer or at
fordparts.com for scheduled maintenance. These parts meet or exceed Ford Motor
Company ’s specifications and are engineered for your vehicle. Use of other parts may
impact vehicle performance, emissions and durability. Your warranty may be void for any
damage related to use of other parts.
If a Motorcraft oil filter is not available, use an oil filter that meets industry performance
specification SAE/USCAR-36.
For spark plug replacement, contact an authorized dealer. Replace the spark plugs at the
appropriate intervals. See Normal Scheduled Maintenance (page 304).
228
Taurus (CPH) Police, Canada/United States of America, enUSA, First Printing Capacities and Specifications