2017 FORD F150 Garage door
[x] Cancel search: Garage doorPage 5 of 599
Anti-Theft Alarm............................................76
Power Running Boards
Using Power Running Boards....................78
Steering Wheel
Adjusting the Steering Wheel...................80
Audio Control
...................................................81
Voice Control
...................................................82
Cruise Control..................................................82
Information Display Control
.......................83
Pedals
Adjusting the Pedals....................................84
Wipers and Washers
Windshield Wipers........................................85
Autowipers.......................................................85
Windshield Washers.....................................86
Lighting
Lighting Control
..............................................87
Autolamps........................................................87
Instrument Lighting Dimmer.....................88
Daytime Running Lamps
............................89
Automatic High Beam Control.................89
Front Fog Lamps.............................................91
Direction Indicators
........................................91
Spot Lamps
.......................................................91
Interior Lamps
.................................................92
Ambient Lighting
...........................................94
Windows and Mirrors
Power Windows
.............................................95
Exterior Mirrors
................................................96
Interior Mirror
...................................................99
Sliding Windows..........................................100
Sun Visors
.......................................................100
Moonroof........................................................100 Instrument Cluster
Gauges
..............................................................
102
Warning Lamps and Indicators...............105
Audible Warnings and Indicators...........108
Information Displays
General Information.....................................110
Information Messages
................................126
Climate Control
Manual Climate Control..............................141
Automatic Climate Control
.......................143
Hints on Controlling the Interior Climate.........................................................144
Heated Windows and Mirrors
...................147
Cabin Air Filter
................................................147
Remote Start.................................................148
Seats
Sitting in the Correct Position..................149
Head Restraints
............................................149
Manual Seats
..................................................151
Power Seats
....................................................152
Memory Function
.........................................154
Rear Seats.......................................................156
Heated Seats
.................................................156
Climate Controlled Seats...........................157
Front Seat Armrest......................................159
Rear Seat Armrest........................................159
Universal Garage Door Opener
Universal Garage Door Opener...............160
Auxiliary Power Points
Auxiliary Power Points................................164
Storage Compartments
Center Console
..............................................166
2
F-150 (TFC) Canada/United States of America, enUSA, First Printing Table of Contents
Page 163 of 599
HomeLink Wireless Control
System
WARNINGS
Make sure that the garage door and
security device are free from
obstruction when you are
programming. Do not program the system
with the vehicle in the garage. Do not use the system with any
garage door opener that does not
have the safety stop and reverse
feature as required by U.S. Federal Safety
Standards (this includes any garage door
opener manufactured before April 1, 1982).
A garage door opener which cannot detect
an object, signaling the door to stop and
reverse, does not meet current federal
safety standards. Using a garage door
opener without these features increases
the risk of serious injury or death. Note:
Make sure you keep the original
remote control transmitter for use in other
vehicles as well as for future system
programming.
Note: We recommend that upon the sale
or lease termination of your vehicle, you
erase the programmed function buttons for
security reasons. See Erasing the Function
Button Codes later in this section.
Note: You can program a maximum of
three devices. To change or replace any of
the three devices after it has been initially
programmed, you must first erase the
current settings. See Erasing the Function
Button Codes
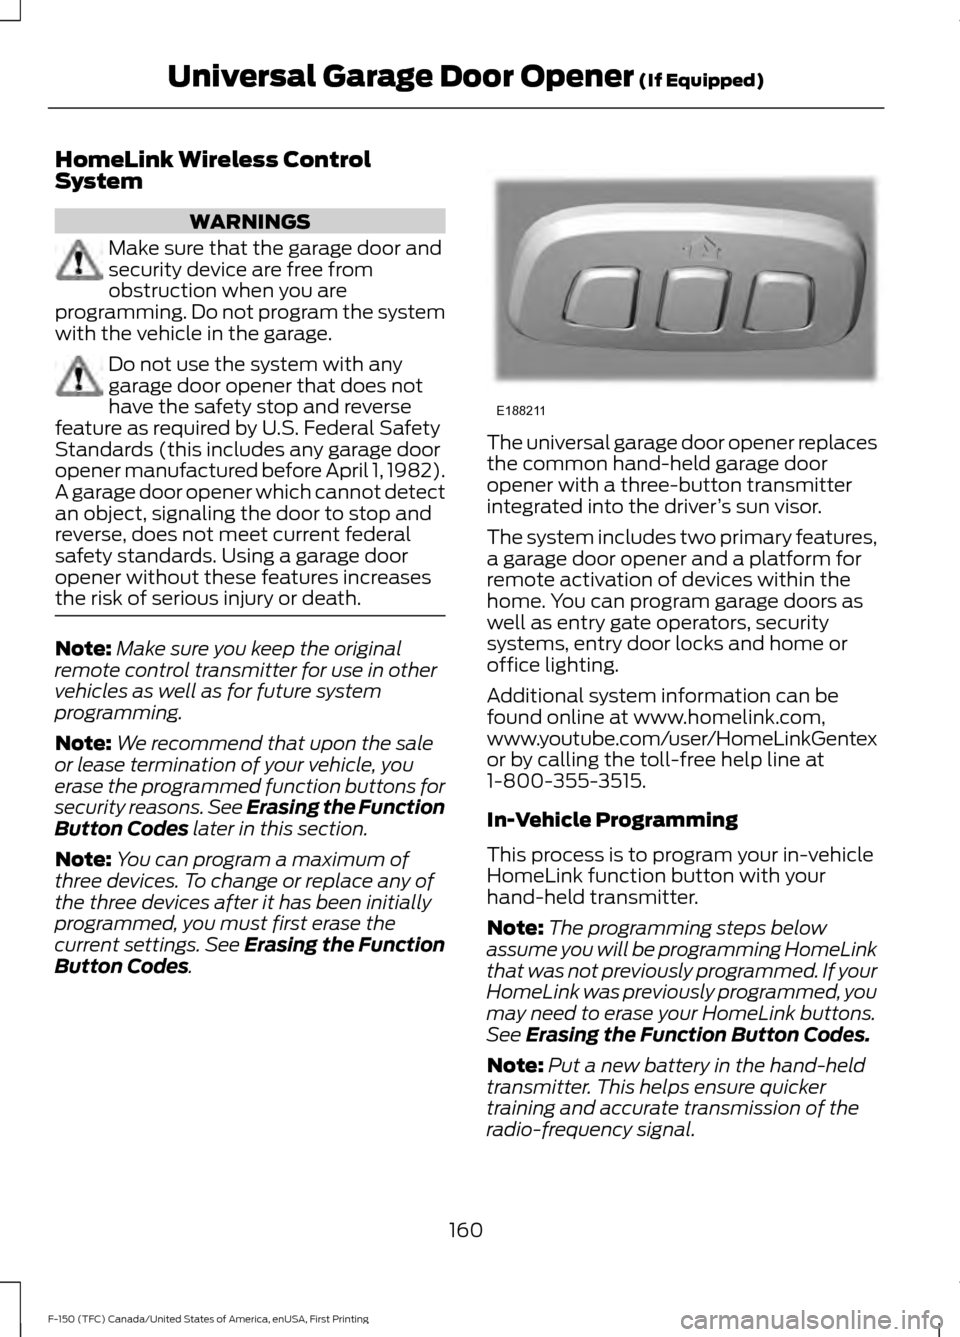
. The universal garage door opener replaces
the common hand-held garage door
opener with a three-button transmitter
integrated into the driver
’s sun visor.
The system includes two primary features,
a garage door opener and a platform for
remote activation of devices within the
home. You can program garage doors as
well as entry gate operators, security
systems, entry door locks and home or
office lighting.
Additional system information can be
found online at www.homelink.com,
www.youtube.com/user/HomeLinkGentex
or by calling the toll-free help line at
1-800-355-3515.
In-Vehicle Programming
This process is to program your in-vehicle
HomeLink function button with your
hand-held transmitter.
Note: The programming steps below
assume you will be programming HomeLink
that was not previously programmed. If your
HomeLink was previously programmed, you
may need to erase your HomeLink buttons.
See
Erasing the Function Button Codes.
Note: Put a new battery in the hand-held
transmitter. This helps ensure quicker
training and accurate transmission of the
radio-frequency signal.
160
F-150 (TFC) Canada/United States of America, enUSA, First Printing Universal Garage Door Opener
(If Equipped)E188211
Page 164 of 599
1.
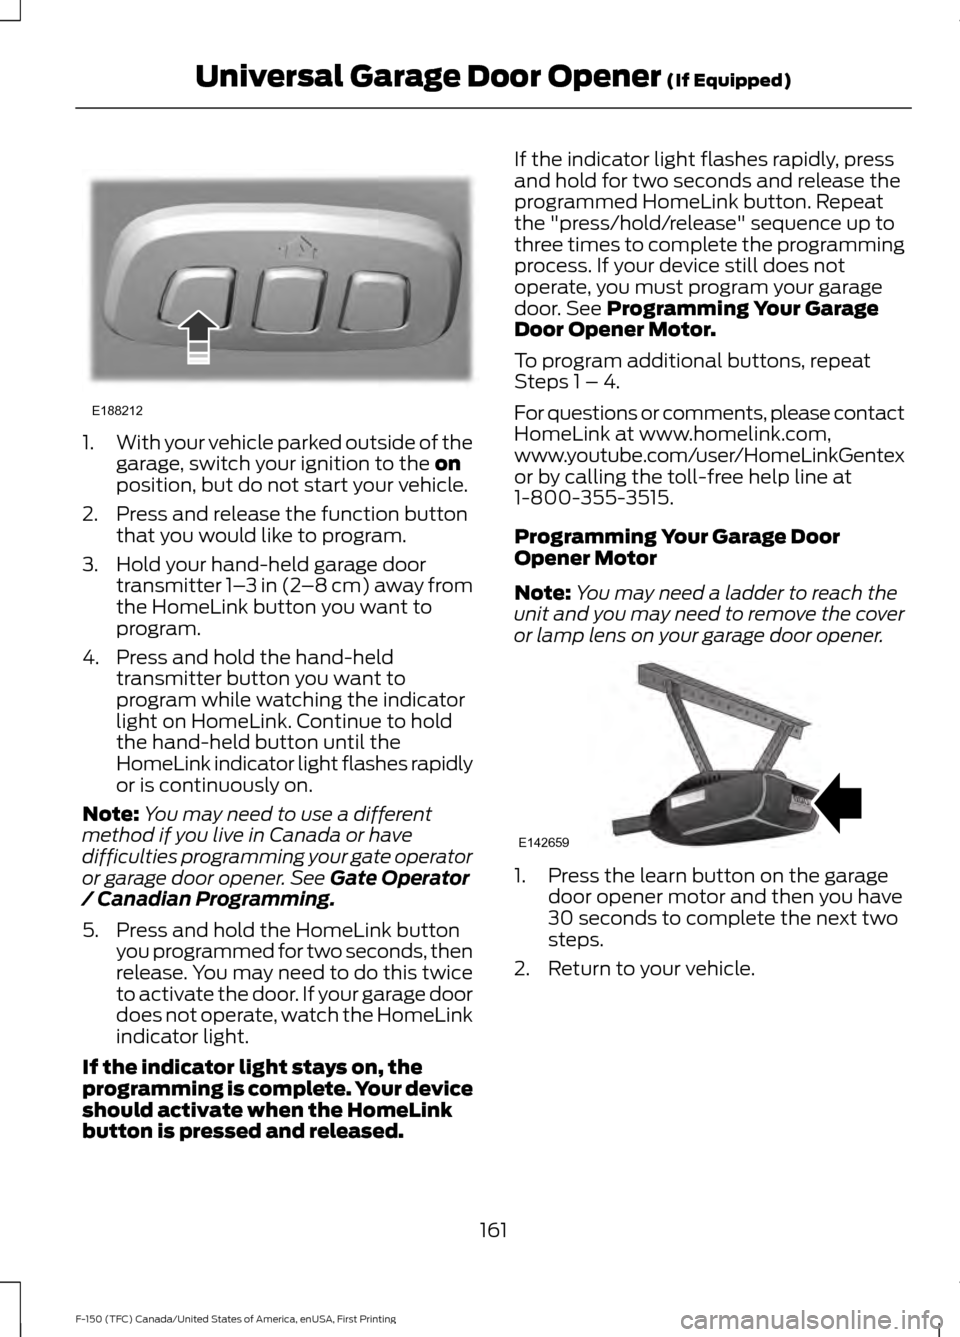
With your vehicle parked outside of the
garage, switch your ignition to the on
position, but do not start your vehicle.
2. Press and release the function button that you would like to program.
3. Hold your hand-held garage door transmitter 1– 3 in (2–8 cm) away from
the HomeLink button you want to
program.
4. Press and hold the hand-held transmitter button you want to
program while watching the indicator
light on HomeLink. Continue to hold
the hand-held button until the
HomeLink indicator light flashes rapidly
or is continuously on.
Note: You may need to use a different
method if you live in Canada or have
difficulties programming your gate operator
or garage door opener. See
Gate Operator
/ Canadian Programming.
5. Press and hold the HomeLink button you programmed for two seconds, then
release. You may need to do this twice
to activate the door. If your garage door
does not operate, watch the HomeLink
indicator light.
If the indicator light stays on, the
programming is complete. Your device
should activate when the HomeLink
button is pressed and released. If the indicator light flashes rapidly, press
and hold for two seconds and release the
programmed HomeLink button. Repeat
the "press/hold/release" sequence up to
three times to complete the programming
process. If your device still does not
operate, you must program your garage
door. See
Programming Your Garage
Door Opener Motor.
To program additional buttons, repeat
Steps 1 – 4.
For questions or comments, please contact
HomeLink at www.homelink.com,
www.youtube.com/user/HomeLinkGentex
or by calling the toll-free help line at
1-800-355-3515.
Programming Your Garage Door
Opener Motor
Note: You may need a ladder to reach the
unit and you may need to remove the cover
or lamp lens on your garage door opener. 1. Press the learn button on the garage
door opener motor and then you have
30 seconds to complete the next two
steps.
2. Return to your vehicle.
161
F-150 (TFC) Canada/United States of America, enUSA, First Printing Universal Garage Door Opener
(If Equipped)E188212 E142659
Page 165 of 599
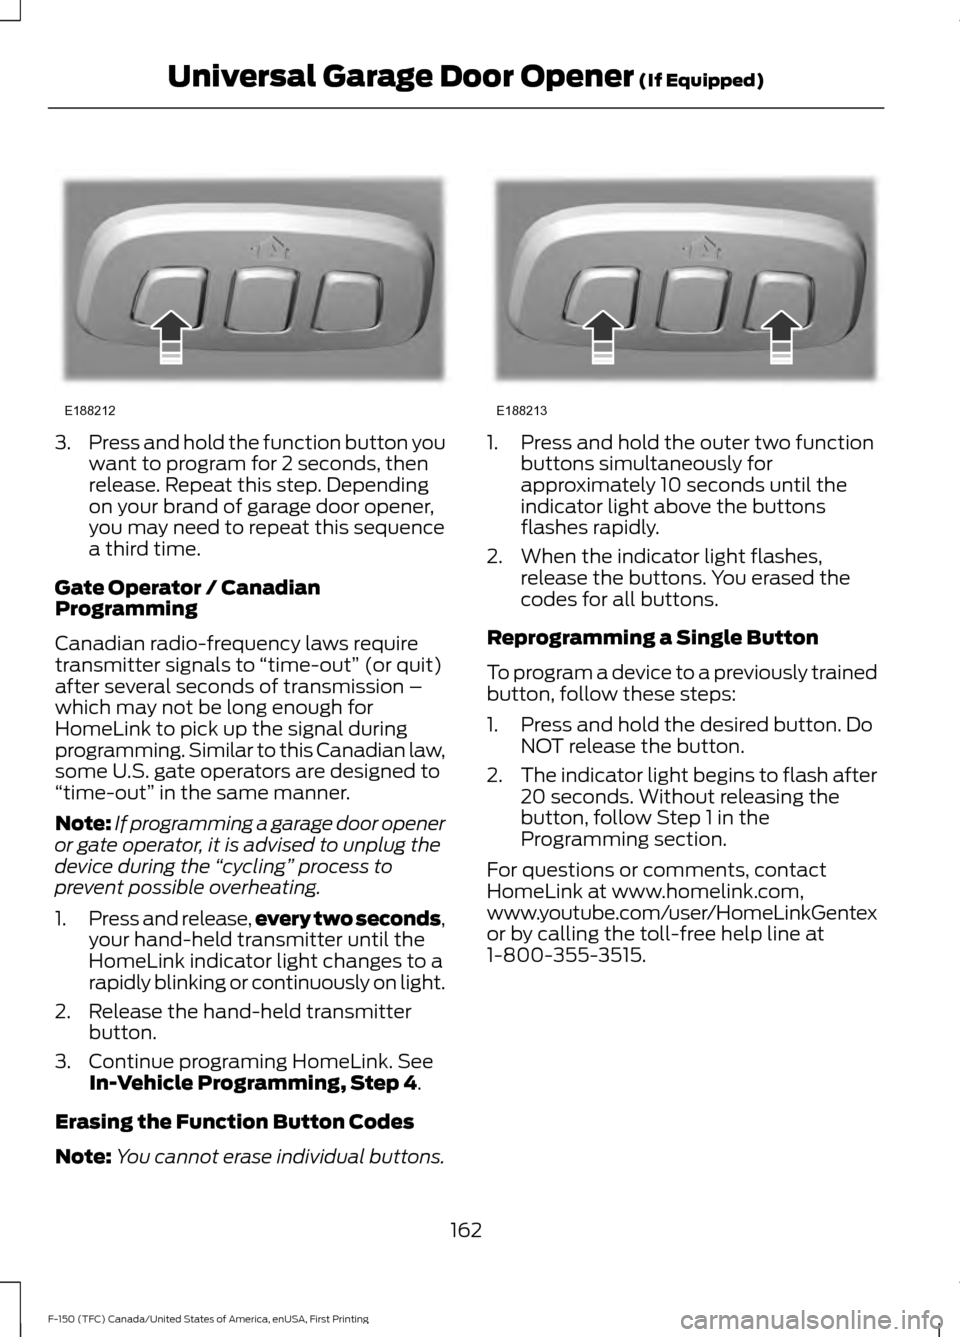
3.
Press and hold the function button you
want to program for 2 seconds, then
release. Repeat this step. Depending
on your brand of garage door opener,
you may need to repeat this sequence
a third time.
Gate Operator / Canadian
Programming
Canadian radio-frequency laws require
transmitter signals to “time-out” (or quit)
after several seconds of transmission –
which may not be long enough for
HomeLink to pick up the signal during
programming. Similar to this Canadian law,
some U.S. gate operators are designed to
“time-out” in the same manner.
Note: If programming a garage door opener
or gate operator, it is advised to unplug the
device during the “cycling” process to
prevent possible overheating.
1. Press and release, every two seconds,
your hand-held transmitter until the
HomeLink indicator light changes to a
rapidly blinking or continuously on light.
2. Release the hand-held transmitter button.
3. Continue programing HomeLink. See In-Vehicle Programming, Step 4.
Erasing the Function Button Codes
Note: You cannot erase individual buttons. 1. Press and hold the outer two function
buttons simultaneously for
approximately 10 seconds until the
indicator light above the buttons
flashes rapidly.
2. When the indicator light flashes, release the buttons. You erased the
codes for all buttons.
Reprogramming a Single Button
To program a device to a previously trained
button, follow these steps:
1. Press and hold the desired button. Do NOT release the button.
2. The indicator light begins to flash after
20 seconds. Without releasing the
button, follow Step 1 in the
Programming section.
For questions or comments, contact
HomeLink at www.homelink.com,
www.youtube.com/user/HomeLinkGentex
or by calling the toll-free help line at
1-800-355-3515.
162
F-150 (TFC) Canada/United States of America, enUSA, First Printing Universal Garage Door Opener
(If Equipped)E188212 E188213
Page 166 of 599

FCC and RSS-210 Industry Canada
Compliance
This device complies with Part 15 of the
FCC Rules and with RSS-210 of Industry
Canada. Operation is subject to the
following two conditions: (1) this device
may not cause harmful interference, and
(2) this device must accept any
interference received, including
interference that may cause undesired
operation.
Note:
Changes or modifications to your
device not expressly approved by the party
responsible for compliance can void the
user ’s authority to operate the equipment.
This equipment complies with FCC
radiation exposure limits set forth for an
uncontrolled environment. End Users must
follow the specific operating instructions
for satisfying RF exposure compliance. This
transmitter must be at least 8 in (20 cm)
from the user and must not be co-located
or operating in conjunction with any other
antenna or transmitter.
The term “IC:” before the
certification/registration number only
signifies that Industry Canada technical
specifications were met.
163
F-150 (TFC) Canada/United States of America, enUSA, First Printing Universal Garage Door Opener
(If Equipped)
Page 171 of 599

GENERAL INFORMATION
WARNINGS
Extended idling at high engine
speeds can produce very high
temperatures in the engine and
exhaust system, creating the risk of fire or
other damage. Do not park, idle or drive your vehicle
on dry grass or other dry ground
cover. The emission system heats up
the engine compartment and exhaust
system, creating the risk of fire. Do not start the engine in a closed
garage or in other enclosed areas.
Exhaust fumes can be toxic. Always
open the garage door before you start the
engine. If you smell exhaust fumes inside
your vehicle, have your vehicle
checked by an authorized dealer
immediately. Do not drive your vehicle if
you smell exhaust fumes. If you disconnect the battery, your vehicle
may exhibit some unusual driving
characteristics for approximately 5 miles
(8 kilometers) after you reconnect it. This
is because the engine management system
must realign itself with the engine. You can
disregard any unusual driving
characteristics during this period.
The powertrain control system meets all
Canadian interference-causing equipment
standard requirements regulating the
impulse electrical field or radio noise.
When you start the engine, avoid pressing
the accelerator pedal before and during
operation. Only use the accelerator pedal
when you have difficulty starting the
engine. IGNITION SWITCH (If Equipped)
A
(off) - The ignition is off.
Note: When you switch the ignition off and
leave your vehicle, do not leave your key in
the ignition. This could cause your vehicle
battery to lose charge.
B
(accessory) - Allows the electrical
accessories, such as the radio, to operate
while the engine is not running.
Note: Do not leave the ignition key in this
position for too long. This could cause your
vehicle battery to lose charge.
C
(on) - All electrical circuits are
operational and the warning lamps and
indicators illuminate.
D
(start) - Cranks the engine.
KEYLESS STARTING
(If Equipped)
Note: The keyless starting system may not
function if the key is close to metal objects
or electronic devices such as cellular
phones.
Note: A valid key must be located inside
your vehicle to switch the ignition on and
start the engine.
168
F-150 (TFC) Canada/United States of America, enUSA, First Printing Starting and Stopping the EngineC
D
B
A
E163165
Page 221 of 599
The system does not position the vehicle where I want in the space
The parking space length or position of parked objects changed after your vehicle passed.
The temperature around your vehicle changes quickly (driving from a heated garage
into the cold, or after leaving a car wash).
You didn't wait for the steering wheel to complete its rotation after a gear change. The
system performs best when the steering wheel is allowed to finish rotating before
accelerating.
REAR VIEW CAMERA (If Equipped) WARNINGS
The rear view camera system is a
reverse aid supplement device that
still requires the driver to use it in
conjunction with the interior and exterior
mirrors for maximum coverage. Objects that are close to either
corner of the bumper or under the
bumper, might not be seen on the
screen due to the limited coverage of the
camera system. Reverse your vehicle as slow as
possible, higher speeds may limit
your reaction time to stop your
vehicle. Use caution when the rear cargo door
is ajar. If the rear cargo door is ajar,
the camera will be out of position
and the video image may be incorrect. All
guidelines disappear when the rear cargo
door is ajar. Some vehicles may not come
equipped with guidelines. Use caution when turning camera
features on or off when the
transmission is not in park (P). Make
sure your vehicle is not moving. The rear view camera system provides a
video image of the area behind your
vehicle. During operation, lines appear in the
display which represent your vehicle
’s path
and proximity to objects behind your
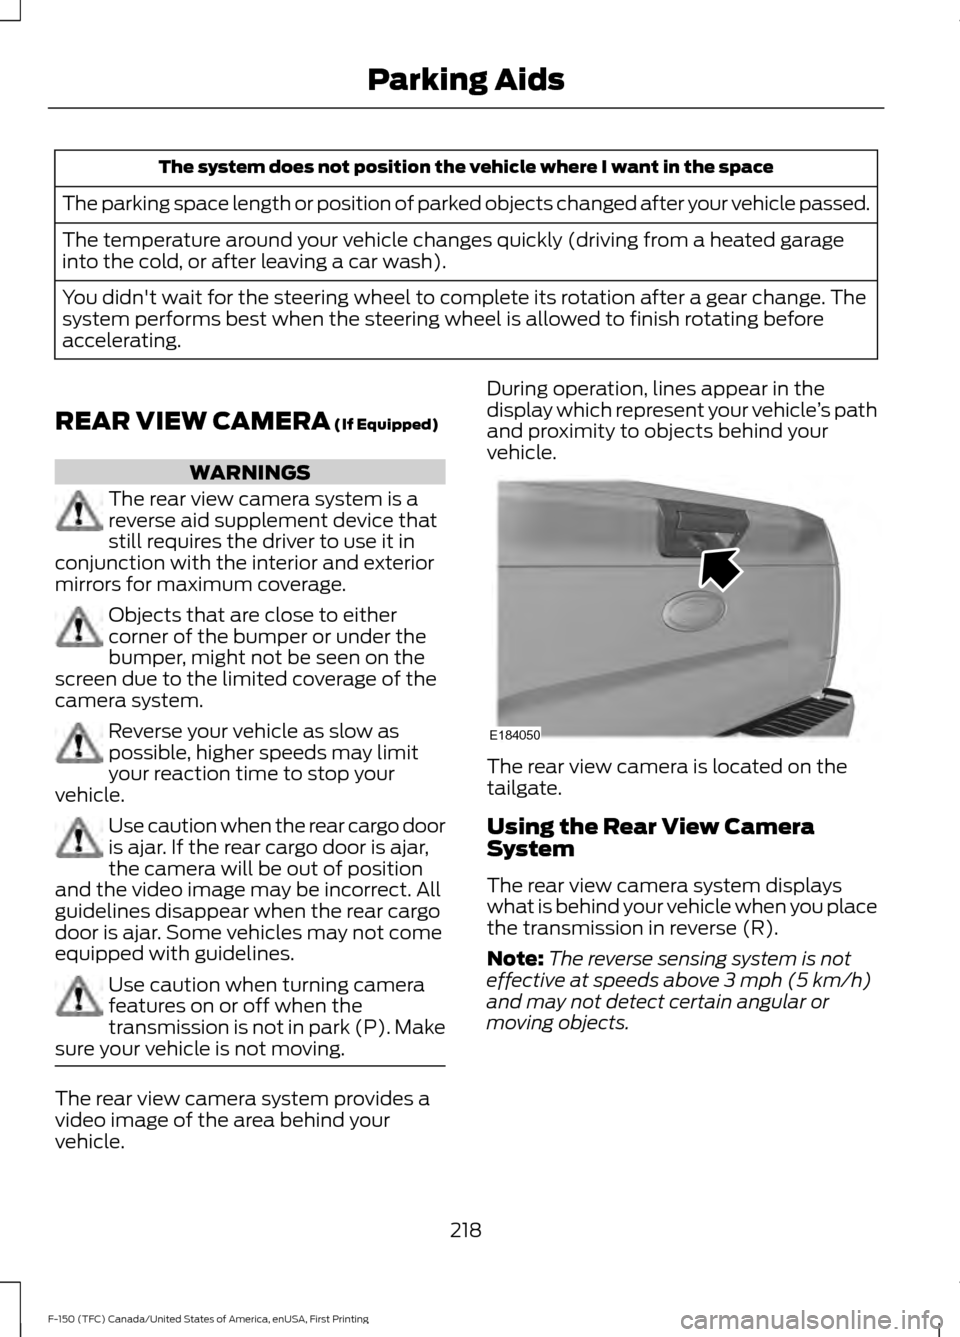
vehicle. The rear view camera is located on the
tailgate.
Using the Rear View Camera
System
The rear view camera system displays
what is behind your vehicle when you place
the transmission in reverse (R).
Note:
The reverse sensing system is not
effective at speeds above
3 mph (5 km/h)
and may not detect certain angular or
moving objects.
218
F-150 (TFC) Canada/United States of America, enUSA, First Printing Parking AidsE184050
Page 373 of 599
When Inflating Your Tires
When putting air into your tires (such as at
a gas station or in your garage), the tire
pressure monitoring system may not
respond immediately to the air added to
your tires.
It may take up to two minutes of driving
over 20 mph (32 km/h) for the light to turn
off after you have filled your tires to the
recommended inflation pressure.
How Temperature Affects Your Tire
Pressure
The tire pressure monitoring system
monitors tire pressure in each pneumatic
tire. While driving in a normal manner, a
typical passenger tire inflation pressure
may increase about 2 to 4 psi (14 to 28
kPa) from a cold start situation. If the
vehicle is stationary overnight with the
outside temperature significantly lower
than the daytime temperature, the tire
pressure may decrease about 3 psi (21
kPa) for a drop of 30°F (17°C) in ambient
temperature. This lower pressure value
may be detected by the tire pressure
monitoring system as being significantly
lower than the recommended inflation
pressure and activate the system warning
light for low tire pressure.
If the low tire pressure warning light is on,
visually check each tire to verify that no tire
is flat. If one or more tires are flat, repair as
necessary. Check the air pressure in the
road tires. If any tire is under-inflated,
carefully drive the vehicle to the nearest
location where air can be added to the
tires. Inflate all the tires to the
recommended inflation pressure.
Tire Pressure Monitoring System Reset
Procedure WARNING
To determine the required
pressure(s) for your vehicle, see the
Safety Compliance Certification
Label (on the door hinge pillar, door-latch
post or the door edge that meets the
door-latch post, next to the driver seat) or
the Tire Label on the B-Pillar or the edge
of the driver door. Note:
You need to perform the tire pressure
monitoring system reset procedure after
each tire rotation on vehicles that require
different recommended tire pressures in the
front tires as compared to the rear tires.
Overview
To provide the vehicle's load carrying
capability, some vehicles require different
recommended tire pressures in the front
tires as compared to the rear tires. The tire
pressure monitoring system equipped on
these vehicles is designed to illuminate the
low tire pressure warning light at two
different pressures; one for the front tires
and one for the rear tires.
Since tires need to be rotated to provide
consistent performance and maximum tire
life, the tire pressure monitoring system
needs to know when the tires are rotated
to determine which set of tires are on the
front and which are on the rear. With this
information, the system can detect and
properly warn of low tire pressures.
System reset tips:
370
F-150 (TFC) Canada/United States of America, enUSA, First Printing Wheels and Tires