2017 FORD F150 ECO mode
[x] Cancel search: ECO modePage 200 of 599
The transfer case supples power to all four
wheels. On four-wheel drive vehicles, the
transfer case allows you to select different
4WD modes when necessary. You can find
information on transfer case operation and
shifting procedures in this chapter. You can
find information on transfer case
maintenance in the Maintenance chapter.
You should become thoroughly familiar
with this information before you operate
your vehicle.
Four-wheel drive (when you select a 4WD
mode) uses all four wheels to power your
vehicle. This increases traction, enabling
you to drive over terrain and road
conditions that a conventional two-wheel
drive vehicle cannot.
Basic Operating Principles
•
Drive slower in strong crosswinds which
can affect the normal steering
characteristics of your vehicle.
• When driving your vehicle on surfaces
made slippery by loose sand, water,
gravel, snow or ice proceed with care.
• Do not use four-wheel drive on dry,
hard surfaced roads. Doing so will
produce excessive noise, increase tire
wear and may damage drive
components. Four-wheel drive modes
are only for consistently slippery or
loose surfaces.
If Your Vehicle leaves the Road
If your vehicle leaves the road, reduce your
vehicle speed and avoid severe braking.
When your vehicle speed decreases, ease
your vehicle back onto the road. Do not
turn the steering wheel sharply while
returning your vehicle to the road.
It may be safer to stay on the shoulder of
the road and slow down gradually before
returning to the road. You may lose control
if you do not slow down or if you turn the
steering wheel too sharply or abruptly. It may be less risky to strike small objects,
such as freeway reflectors, with minor
damage to your vehicle rather than
attempt a sudden return to the road which
could cause your vehicle to slide sideways
out of control or roll over. Remember, your
safety and the safety of others should be
your primary concern.
Emergency Maneuvers
In an unavoidable emergency situation
where a sudden sharp turn must be made,
remember to avoid over-driving your
vehicle (i.e. turn the steering wheel only as
rapidly and as far as required to avoid the
emergency). Excessive steering can result
in loss of vehicle control. Apply smooth
pressure to the accelerator pedal or brake
pedal when changes in vehicle speed are
required. Avoid abrupt steering,
acceleration and braking. This could result
in an increased risk of vehicle roll over, loss
of vehicle control and personal injury. Use
all available road surface to bring your
vehicle to a safe direction of travel.
In the event of an emergency stop, avoid
skidding the tires and do not attempt any
sharp steering wheel movements.
If your vehicle goes from one type of
surface to another (i.e. from concrete to
gravel) there will be a change in the way
your vehicle responds to a maneuver (i.e.
steering, acceleration or braking).
Sand
When driving over sand, try to keep all four
wheels on the most solid area of the trail.
Avoid reducing the tire pressures but shift
to a lower gear and drive steadily through
the terrain. Apply the accelerator slowly
and avoid excessive wheel slip.
When driving at slow speeds in deep sand
under high outside temperatures, use a low
gear when possible. Low gear operation
will maximize the engine and transmission
cooling capability.
197
F-150 (TFC) Canada/United States of America, enUSA, First Printing Four-Wheel Drive (If Equipped)
Page 204 of 599
ELECTRONIC LOCKING
DIFFERENTIAL (If Equipped)
Note: The electronic locking differential is
for off-road use only and is not for use on
dry pavement. Using the electronic locking
differential on dry pavement will result in
increased tire wear, noise and vibration.
The electronic locking differential is a
device housed in the rear axle that allows
both rear wheels to turn at the same
speed. The electronic locking differential
can provide additional traction should your
vehicle become stuck. You can activate
the differential electronically and shift it
on the fly within the differential operating
speed range. The differential is for use in
mud, rocks, sand, or any off-road condition
where you need maximum traction. It is
not for use on dry pavement.
The following conditions will affect the
electronic locking differential:
• The electronic locking differential will
not engage if your vehicle speed is
above
20 mph (32 km/h) in 4x2, 4x4
Auto, or 4x4 High modes.
• The electronic locking differential will
not engage if your vehicle speed is
above or
56 mph (90 km/h) in 4X4
Low.
• The electronic locking differential may
not engage if you press your
accelerator pedal during an
engagement attempt. A message may
display in the instrument display
guiding you to release the accelerator
pedal.
• In 4x2, 4x4 Auto, and 4x4 High modes,
the electronic locking differential will
automatically disengage at speeds
above
25 mph (41 km/h) and will
automatically reengage at speeds
below
20 mph (32 km/h). •
In 4L (4X4 low), the electronic locking
differential will automatically
disengage at speeds above
62 mph
(100 km/h) and will automatically
reengage at speeds below 56 mph
(90 km/h).
• The AdvanceTrac system has the
ability to take over control of the
electronic locking differential and
disable it during driving maneuvers
when necessary.
When you switch the system on, if you do
not meet the required conditions for
electronic locking differential activation,
the instrument cluster will display the
appropriate information guiding you
through the proper activation process.
Activating the Electronic Locking
Differential
Note: Do not use electronic locking
differential on dry, hard surfaced roads.
Doing so will produce excessive noise,
vibration and increase tire wear.
Note: If the electronic locking differential
has difficulty disengaging, release the
accelerator pedal and turn the steering
wheel in the opposite direction while rolling.
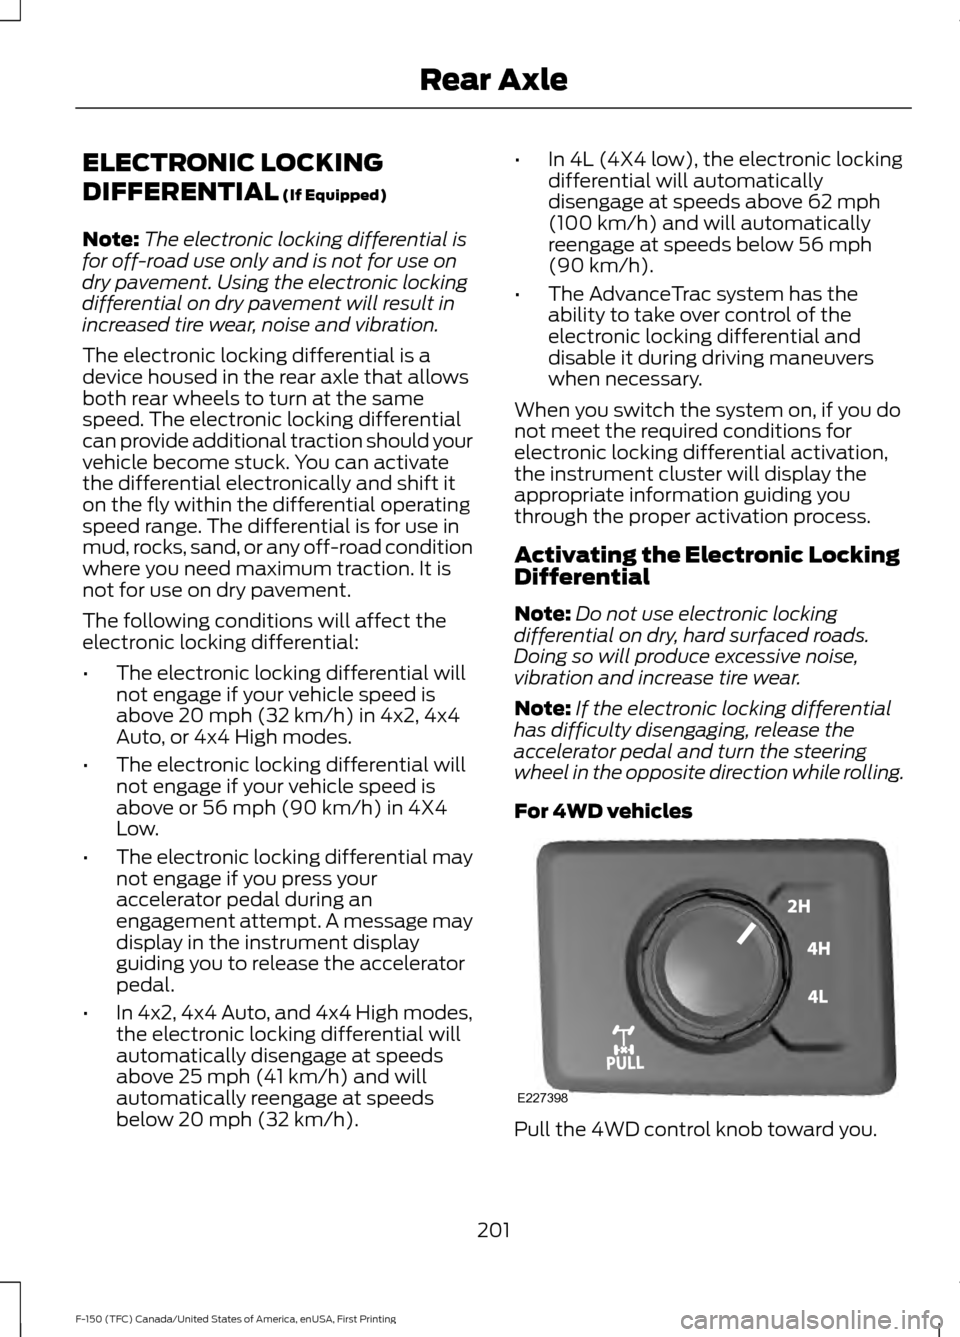
For 4WD vehicles Pull the 4WD control knob toward you.
201
F-150 (TFC) Canada/United States of America, enUSA, First Printing Rear AxleE227398
Page 214 of 599
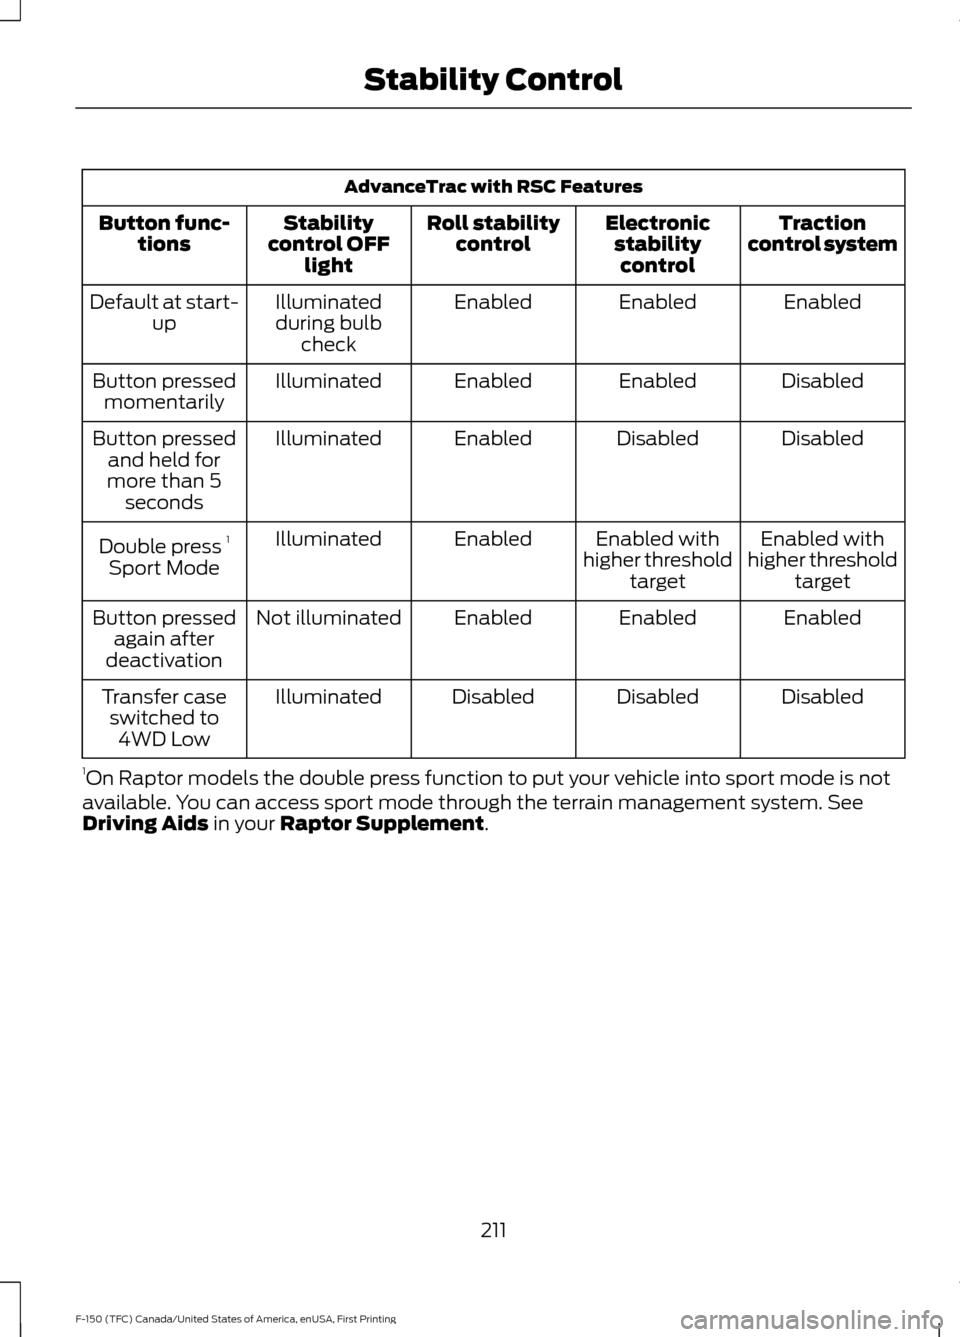
AdvanceTrac with RSC Features
Traction
control system
Electronic
stabilitycontrol
Roll stability
control
Stability
control OFF light
Button func-
tions
Enabled
Enabled
Enabled
Illuminated
during bulb check
Default at start-
up
Disabled
Enabled
Enabled
Illuminated
Button pressed
momentarily
Disabled
Disabled
Enabled
Illuminated
Button pressed
and held for
more than 5 seconds
Enabled with
higher threshold target
Enabled with
higher threshold target
Enabled
Illuminated
Double press 1
Sport Mode
Enabled
Enabled
Enabled
Not illuminated
Button pressed
again after
deactivation
Disabled
Disabled
Disabled
Illuminated
Transfer case
switched to 4WD Low
1 On Raptor models the double press function to put your vehicle into sport mode is not
available. You can access sport mode through the terrain management system. See
Driving Aids in your Raptor Supplement.
211
F-150 (TFC) Canada/United States of America, enUSA, First Printing Stability Control
Page 238 of 599
Troubleshooting
Why is the feature not available (line markings are gray) when I can see the lane markings
on the road?
Vehicle speed is outside the operational range of the feature
Sun is shining directly into the camera lens
Quick intentional lane change
Staying too close to the lane marking
Driving at high speeds in curves
Previous feature activation happened within the last one second
Ambiguous lane markings (mainly in construction zones)
Rapid transition from light to dark or vice versa
Sudden offset in lane markings
ABS or AdvanceTrac activation
Camera blockage due to dirt, grime, fog, frost or water on the windshield
Driving too close to the vehicle in front of you
Transitioning between no lane markings to lane markings or vice versa
Standing water on the road
Faint lane markings (partial yellow lane markings on concrete roads)
Lane width too narrow or too wide
Camera not calibrated after a windshield replacement
Driving on tight roads or on uneven roads
Vehicle accessories such as snow plows Why does the vehicle not come back into the middle of the lane always, as expected, in
the Aid or Aid + Alert mode?
High cross winds
Large road crown
Rough roads, grooves, shoulder drop-offs
235
F-150 (TFC) Canada/United States of America, enUSA, First Printing Driving Aids
Page 239 of 599
Why does the vehicle not come back into the middle of the lane always, as expected, in
the Aid or Aid + Alert mode?
Heavy uneven loading of the vehicle or improper tire inflation pressure
If the tires have been exchanged (including snow tires), or the suspension has been
modified
Vehicle accessories such as snow plows or trailers
BLIND SPOT INFORMATION
SYSTEM WARNING
To help avoid injuries, NEVER use the
Blind Spot Information System as a
replacement for using the interior
and exterior mirrors or looking over your
shoulder before changing lanes. The Blind
Spot Information System is not a
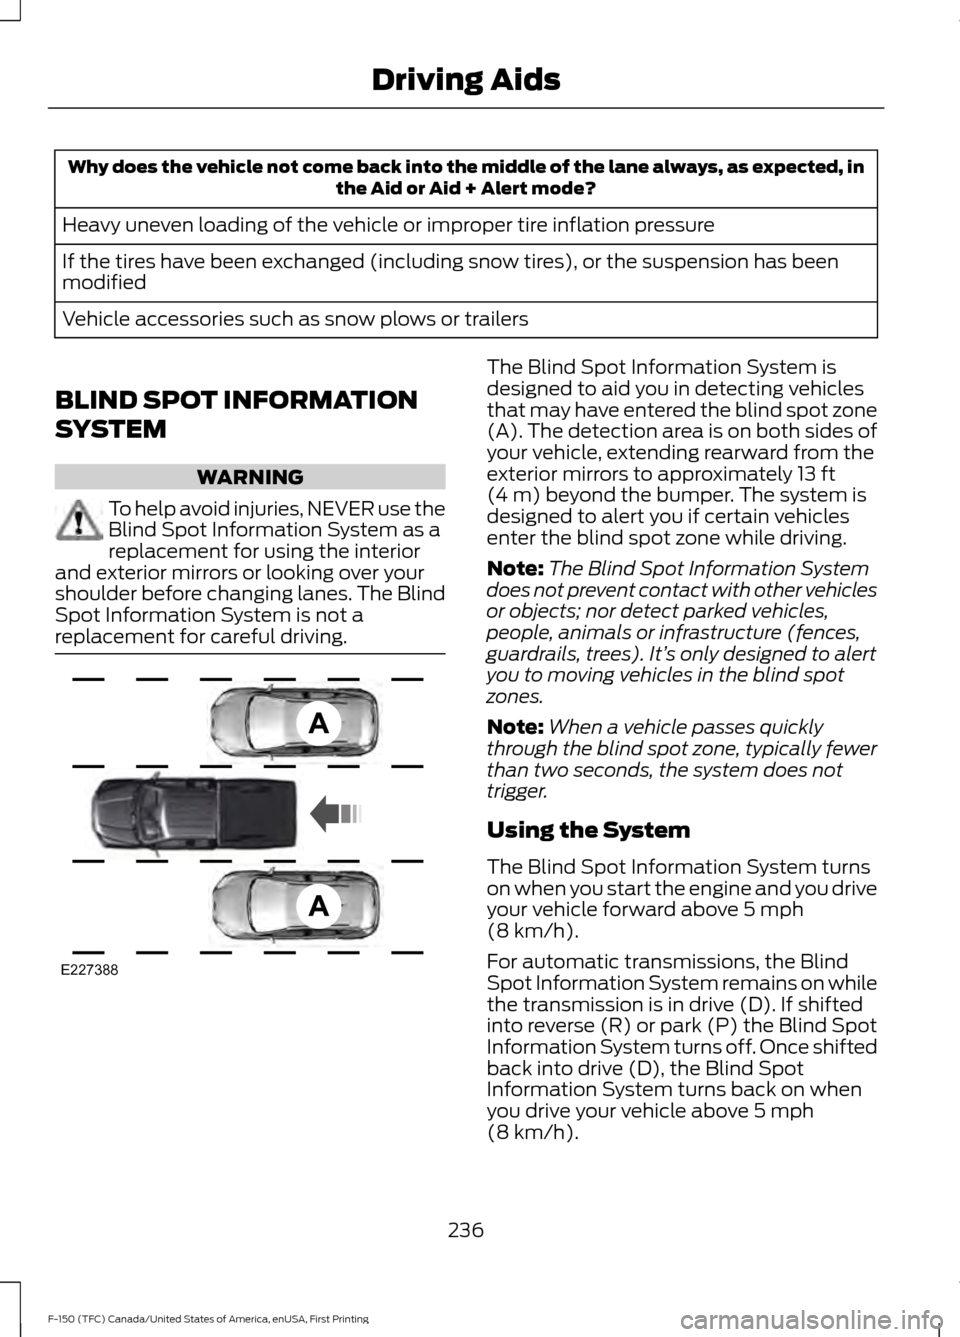
replacement for careful driving. The Blind Spot Information System is
designed to aid you in detecting vehicles
that may have entered the blind spot zone
(A). The detection area is on both sides of
your vehicle, extending rearward from the
exterior mirrors to approximately 13 ft
(4 m) beyond the bumper. The system is
designed to alert you if certain vehicles
enter the blind spot zone while driving.
Note: The Blind Spot Information System
does not prevent contact with other vehicles
or objects; nor detect parked vehicles,
people, animals or infrastructure (fences,
guardrails, trees). It’ s only designed to alert
you to moving vehicles in the blind spot
zones.
Note: When a vehicle passes quickly
through the blind spot zone, typically fewer
than two seconds, the system does not
trigger.
Using the System
The Blind Spot Information System turns
on when you start the engine and you drive
your vehicle forward above
5 mph
(8 km/h).
For automatic transmissions, the Blind
Spot Information System remains on while
the transmission is in drive (D). If shifted
into reverse (R) or park (P) the Blind Spot
Information System turns off. Once shifted
back into drive (D), the Blind Spot
Information System turns back on when
you drive your vehicle above
5 mph
(8 km/h).
236
F-150 (TFC) Canada/United States of America, enUSA, First Printing Driving AidsE227388
Page 280 of 599
Driveline – 4x4
1
MaximumGCWR 2, 3
Axle ratio
Engine
Cab – wheel-
base (inches)
17000 lb (7756kg)5, 6, 8
3.73
17100 lb (7756 kg) 5,
6, 9
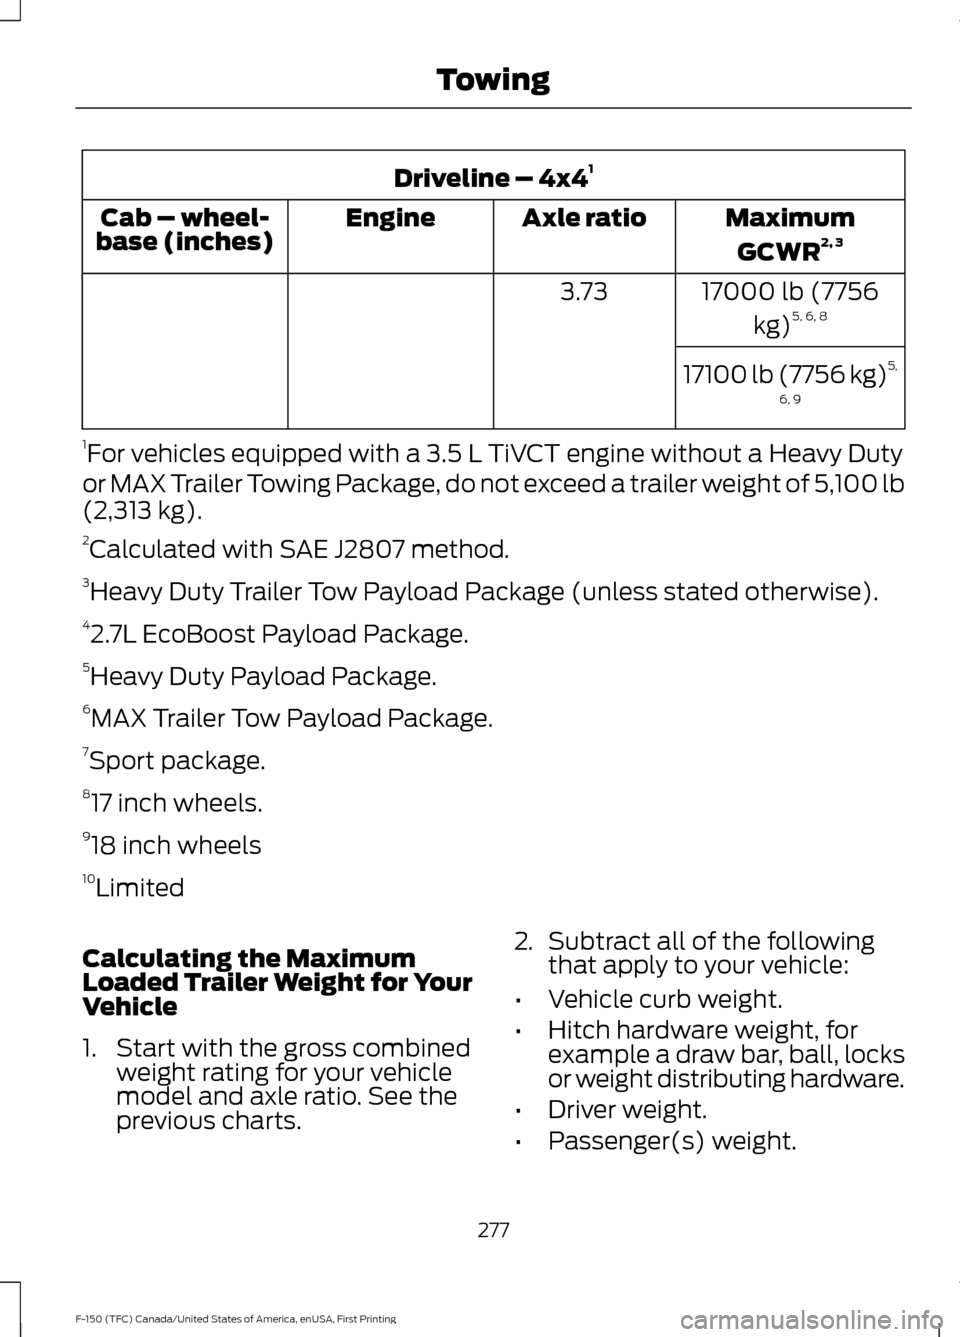
1 For vehicles equipped with a 3.5 L TiVCT engine without a Heavy Duty
or MAX Trailer Towing Package, do not exceed a trailer weight of 5,100 lb
(2,313 kg).
2 Calculated with SAE J2807 method.
3 Heavy Duty Trailer Tow Payload Package (unless stated otherwise).
4 2.7L EcoBoost Payload Package.
5 Heavy Duty Payload Package.
6 MAX Trailer Tow Payload Package.
7 Sport package.
8 17 inch wheels.
9 18 inch wheels
10 Limited
Calculating the Maximum
Loaded Trailer Weight for Your
Vehicle
1. Start with the gross combined weight rating for your vehicle
model and axle ratio. See the
previous charts. 2.
Subtract all of the following
that apply to your vehicle:
• Vehicle curb weight.
• Hitch hardware weight, for
example a draw bar, ball, locks
or weight distributing hardware.
• Driver weight.
• Passenger(s) weight.
277
F-150 (TFC) Canada/United States of America, enUSA, First Printing Towing
Page 284 of 599
The controller shows gain setting, output
bar graph, and trailer connectivity status
in the information display. They appear in
the information display as follows:
•
Trailer Brake Controller Gain (without
trailer connected): Shows the current
gain setting during a given ignition cycle
and when adjusting the gain. This also
displays if you use the manual control
lever or make gain adjustments with
no trailer connected.
• Trailer Brake Controller Gain Output:
Displays when you push your vehicle's
brake pedal, or upon use of the manual
control. Bar indicators illuminate in the
information display to indicate the
amount of power going to the trailer
brakes relative to the brake pedal or
manual control input. One bar indicates
the least amount of output; six bars
indicate maximum output.
• Trailer Connected: Displays when the
system senses a correct trailer wiring
connection (a trailer with electric trailer
brakes) during a given ignition cycle.
• Trailer Disconnected: Displays,
accompanied by a single audible time,
when the system senses a trailer
connection and then a disconnection,
either intentional or unintentional,
during a given ignition cycle. It also
displays if a truck or trailer-wiring fault
occurs causing the trailer to appear
disconnected. This message can also
display if you use the manual control
lever without a trailer connected. After
disconnecting the trailer connector,
press the brake pedal for
approximately five seconds to allow
the system to detect and update the
trailer status. B: Manual control lever: Slide the control
lever to the left to turn on the trailer's
electric brakes independent of the tow
vehicle's. See the following Procedure for
adjusting gain section for instructions on
proper use of this feature. If you use the
manual control while the brake is also
applied, the greater of the two inputs
determines the power sent to the trailer
brakes.
• Stop lamps: Using the manual control
lever illuminates both the trailer brake
lamps and your vehicle brake lamps
except the center high-mount stop
lamp, if you make the proper electrical
connection to the trailer. Pressing your
vehicle brake pedal also illuminates
both trailer and vehicle brake lamps.
Procedure for Setting Trailer Brake
Controller Mode
Select the correct option using the
information display. Choose electric for
trailers with electromagentic drum brakes
or EOH for trailers with electric over
hydraulic brake systems. See Information
Displays
(page 110).
Trailer Brake Effort Setting
The trailer brake controller allows the user
to customize how aggressively the trailer
brakes engage. The default value is "Low"
and is the recommended setting for most
trailers. If your trailer's brakes require more
initial voltage, or if you prefer more
aggressive trailer braking, then select either
the "Medium" or the "High" setting.
Procedure for Adjusting Gain
Note: Only perform this procedure in a
traffic-free environment at speeds of
approximately 20-25 mph (30-40 km/h).
281
F-150 (TFC) Canada/United States of America, enUSA, First Printing Towing
Page 288 of 599

Replace the rear axle lubricant anytime
the rear axle has been submerged in water.
Water may have contaminated the rear
axle lubricant, which is not normally
checked or changed unless a leak is
suspected or other axle repair is required.
TOWING THE VEHICLE ON
FOUR WHEELS
WARNING
If your vehicle has a steering wheel
lock make sure the ignition is in the
accessory or on position when being
towed. Emergency Towing
If your vehicle becomes inoperable
(without access to wheel dollies,
car-hauling trailer, or flatbed transport
vehicle), it can be flat-towed (all wheels
on the ground, regardless of the powertrain
and transmission configuration) under the
following conditions:
•
Your vehicle is facing forward for
towing in a forward direction.
• Place the transmission in position N. If
you cannot move the transmission into
N
, you may need to override it. See
Transmission (page 186).
• Maximum speed is 35 mph (56 km/h).
• Maximum distance is
50 mi (80 km).
Recreational Towing
Note: Put your climate control system in
recirculated air mode to prevent exhaust
fumes from entering your vehicle. See
Climate Control
(page 141).
Follow these guidelines if you have a need
for recreational towing, such as towing
your vehicle behind a motorhome. We
designed these guidelines to prevent
damage to your transmission. Two-wheel Drive Vehicles
You cannot tow a two-wheel drive vehicle
with any wheels on the ground as vehicle
or transmission damage may occur. You
must tow your vehicle with all four wheels
off the ground, such as when using a
car-hauling trailer.
Four-wheel Drive Vehicles
You can only tow a four-wheel drive
vehicle with all wheels on the ground by
placing the transfer case in its neutral
position and engaging the
four-wheel-down towing feature. Perform
the steps outlined in the following section
after positioning your vehicle behind the
tow vehicle and properly securing them
together.
Note:
Make sure you properly secure your
vehicle to the tow vehicle.
Four-wheel-down Towing
1. Put the ignition in the on position, but do not start the engine. If your vehicle
has an ignition key, turn the key to on.
If your vehicle has intelligent access,
press the engine START/STOP button
once without pressing the brake pedal.
2. Press and hold the brake pedal.
3. Rotate the four-wheel drive switch to 2H
.
4. Shift the transmission to position
N.
5. Rotate the four-wheel drive switch from
2H to 4L and back to 2H five
times within seven seconds.
Note: If completed successfully, the
information display shows NEUTRAL TOW
LEAVE IN N or NEUTRAL TOW ENABLED
LEAVE TRANSMISSION IN NEUTRAL
.
This indicates that your vehicle is safe to
tow with all wheels on the ground.
Note: If you do not see the message in the
display, you must perform the procedure
again from the beginning.
285
F-150 (TFC) Canada/United States of America, enUSA, First Printing Towing