2017 FORD EXPLORER towing
[x] Cancel search: towingPage 173 of 541
Some fuel stations, particularly those in
high altitude areas, offer fuels posted as
regular unleaded gasoline with an octane
rating below 87. We do not recommend
these fuels.
For best overall vehicle and engine
performance, premium fuel with an octane
rating of 91 or higher is recommended. The
performance gained by using premium fuel
is most noticeable in hot weather as well
as other conditions, for example when
towing a trailer. See Towing (page 238).
Do not use any fuel other than those
recommended because they could lead to
engine damage that will not be covered by
the vehicle Warranty.
Note: Use of any fuel other than those
recommended can impair the emission
control system and cause a loss of vehicle
performance.
Do not use:
• Diesel fuel.
• Fuels containing kerosene or paraffin.
• Fuels containing more than 85%
ethanol or E100 fuel.
• Fuels containing methanol.
• Fuels containing metallic-based
additives, including manganese-based
compounds.
• Fuels containing the octane booster
additive, methylcyclopentadienyl
manganese tricarbonyl (MMT).
• Leaded fuel (using leaded fuel is
prohibited by law).
The use of fuels with metallic compounds
such as methylcyclopentadienyl
manganese tricarbonyl (commonly known
as MMT), which is a manganese-based
fuel additive, will impair engine
performance and affect the emission
control system. Do not be concerned if the engine
sometimes knocks lightly. However, if the
engine knocks heavily while using fuel with
the recommended octane rating, contact
an authorized dealer to prevent any engine
damage.
Switching Between E85 and
Gasoline
We do not recommend repeatedly
alternating between E85 and gasoline. If
you switch from using E85 to gasoline, or
from gasoline to E85, add as much fuel as
possible, at least half a tank. Drive your
vehicle immediately for a minimum of 5 mi
(8 km)
to allow it to adapt to the change
in ethanol concentration. If you use E85
exclusively, we recommend that you fill
the fuel tank with regular unleaded
gasoline at each scheduled oil change.
FUEL FILLER FUNNEL
LOCATION
The fuel filler funnel is located in the spare
wheel storage tray.
RUNNING OUT OF FUEL
Running out of fuel can cause damage not
covered by the vehicle Warranty.
If your vehicle runs out of fuel:
• Add a minimum of
1.3 gal (5 L) of fuel
to restart the engine. If your vehicle is
out of fuel and on a steep slope, more
fuel may be required.
• You may need to switch the ignition
from off to on several times after
refueling to allow the fuel system to
pump the fuel from the tank to the
engine. When restarting, cranking time
takes a few seconds longer than
normal.
170
Explorer (TUB) Canada/United States of America, enUSA, Edition date: 03/2016, First Printing Fuel and Refueling
Page 182 of 541
In order to prevent the engine from running
at too low an RPM, which may cause it to
stall, SelectShift still automatically makes
some downshifts if it has determined that
you have not downshifted in time.
Although SelectShift makes some
downshifts for you, it still allows you to
downshift at any time as long as the
SelectShift determines that damage will
not be caused to the engine from
over-revving.
Note:
Engine damage may occur if you
maintain excessive engine revving without
shifting.
SelectShift does not automatically upshift,
even if the engine is approaching the RPM
limit. It must be shifted manually by
pressing the + button. Notice should be
taken of the shift indicator lamp, which
alerts you when to shift to make sure you
achieve the highest level or efficiency and
fuel economy.
Pull the + paddle on the steering wheel
to activate SelectShift.
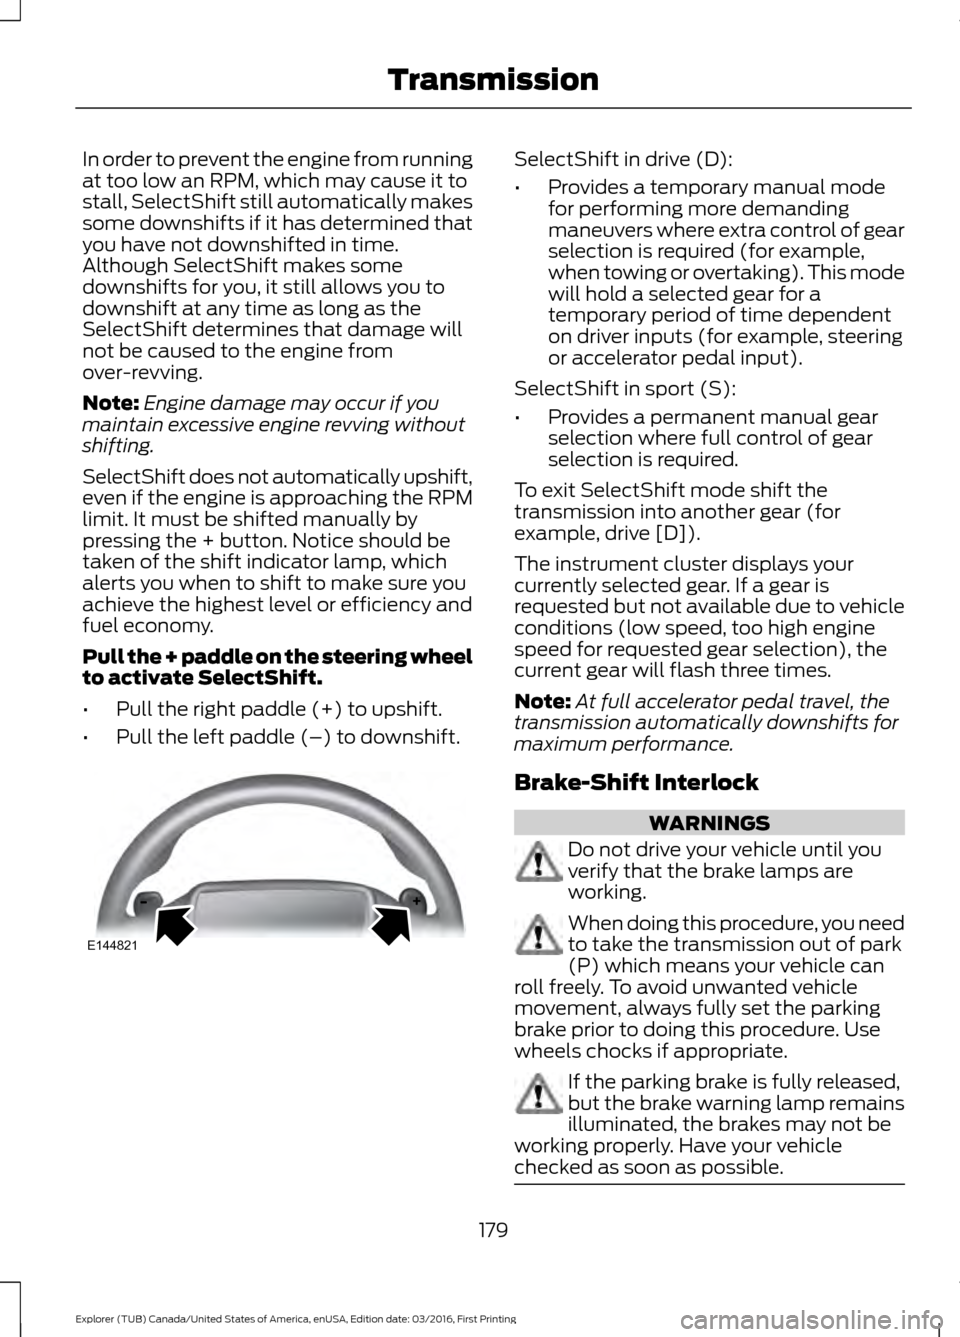
• Pull the right paddle (+) to upshift.
• Pull the left paddle (–) to downshift. SelectShift in drive (D):
•
Provides a temporary manual mode
for performing more demanding
maneuvers where extra control of gear
selection is required (for example,
when towing or overtaking). This mode
will hold a selected gear for a
temporary period of time dependent
on driver inputs (for example, steering
or accelerator pedal input).
SelectShift in sport (S):
• Provides a permanent manual gear
selection where full control of gear
selection is required.
To exit SelectShift mode shift the
transmission into another gear (for
example, drive [D]).
The instrument cluster displays your
currently selected gear. If a gear is
requested but not available due to vehicle
conditions (low speed, too high engine
speed for requested gear selection), the
current gear will flash three times.
Note: At full accelerator pedal travel, the
transmission automatically downshifts for
maximum performance.
Brake-Shift Interlock WARNINGS
Do not drive your vehicle until you
verify that the brake lamps are
working.
When doing this procedure, you need
to take the transmission out of park
(P) which means your vehicle can
roll freely. To avoid unwanted vehicle
movement, always fully set the parking
brake prior to doing this procedure. Use
wheels chocks if appropriate. If the parking brake is fully released,
but the brake warning lamp remains
illuminated, the brakes may not be
working properly. Have your vehicle
checked as soon as possible. 179
Explorer (TUB) Canada/United States of America, enUSA, Edition date: 03/2016, First Printing TransmissionE144821
Page 195 of 541
USING TERRAIN RESPONSE
The terrain management system optimizes
drivability and comfort as well as
maximizing traction while operating on
different types of terrain.
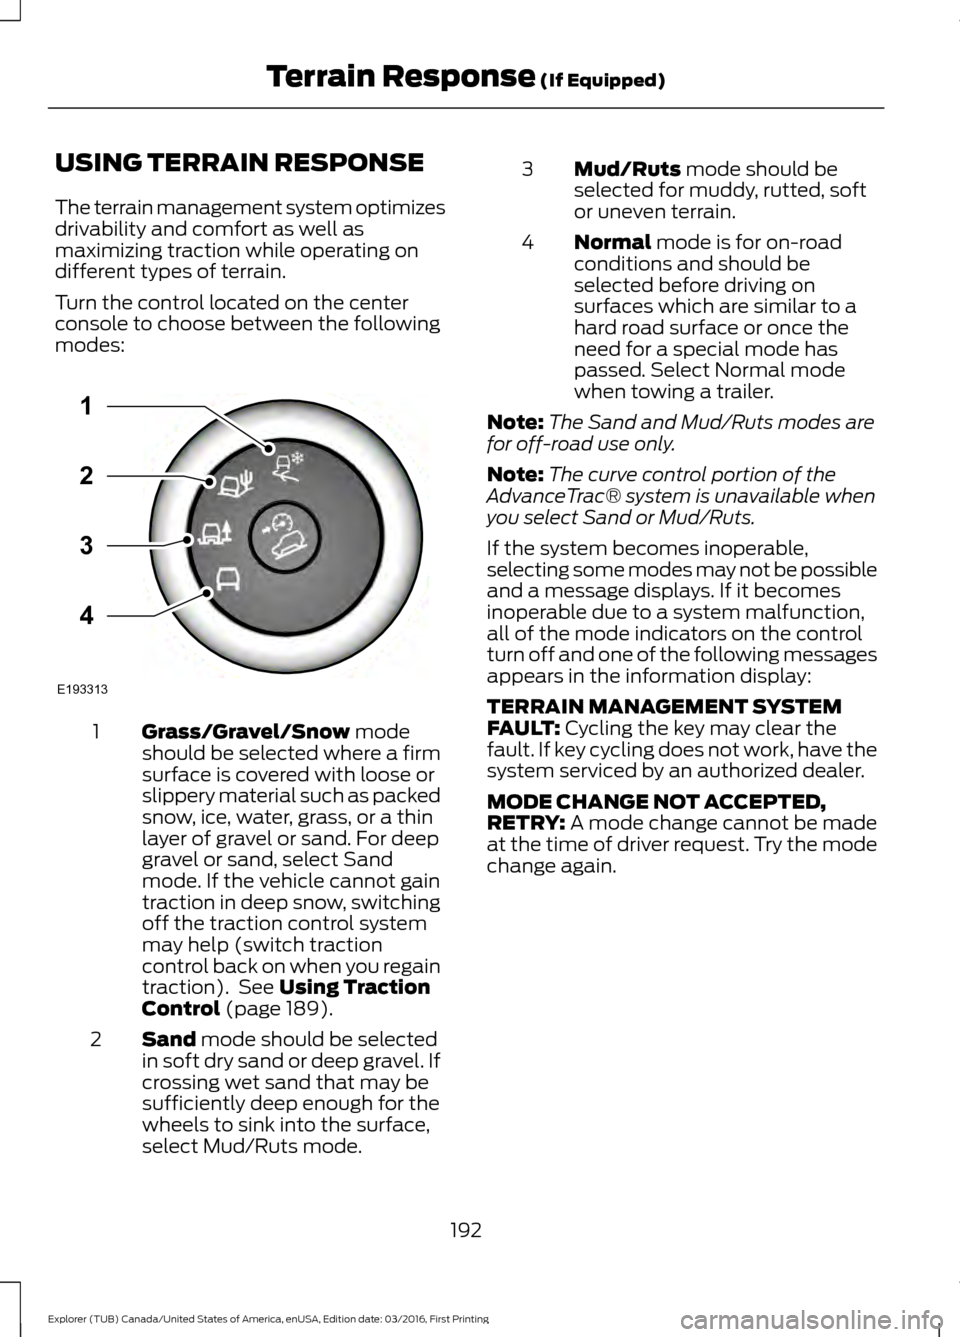
Turn the control located on the center
console to choose between the following
modes:
Grass/Gravel/Snow mode
should be selected where a firm
surface is covered with loose or
slippery material such as packed
snow, ice, water, grass, or a thin
layer of gravel or sand. For deep
1
gravel or sand, select Sand
mode. If the vehicle cannot gain
traction in deep snow, switching
off the traction control system
may help (switch traction
control back on when you regain
traction). See
Using Traction
Control (page 189).
Sand
mode should be selected
in soft dry sand or deep gravel. If
crossing wet sand that may be
sufficiently deep enough for the
wheels to sink into the surface,
select Mud/Ruts mode.
2 Mud/Ruts
mode should be
selected for muddy, rutted, soft
or uneven terrain.
3
Normal
mode is for on-road
conditions and should be
selected before driving on
surfaces which are similar to a
hard road surface or once the
need for a special mode has
passed. Select Normal mode
when towing a trailer.
4
Note: The Sand and Mud/Ruts modes are
for off-road use only.
Note: The curve control portion of the
AdvanceTrac® system is unavailable when
you select Sand or Mud/Ruts.
If the system becomes inoperable,
selecting some modes may not be possible
and a message displays. If it becomes
inoperable due to a system malfunction,
all of the mode indicators on the control
turn off and one of the following messages
appears in the information display:
TERRAIN MANAGEMENT SYSTEM
FAULT:
Cycling the key may clear the
fault. If key cycling does not work, have the
system serviced by an authorized dealer.
MODE CHANGE NOT ACCEPTED,
RETRY:
A mode change cannot be made
at the time of driver request. Try the mode
change again.
192
Explorer (TUB) Canada/United States of America, enUSA, Edition date: 03/2016, First Printing Terrain Response
(If Equipped)E193313
3
2
1
4
Page 208 of 541
WARNINGS
Reverse your vehicle as slow as
possible, higher speeds may limit
your reaction time to stop your
vehicle. Use caution when the rear cargo door
is ajar. If the rear cargo door is ajar,
the camera will be out of position
and the video image may be incorrect. All
guidelines disappear when the rear cargo
door is ajar. Some vehicles may not come
equipped with guidelines. Use caution when turning camera
features on or off when the
transmission is not in park (P). Make
sure your vehicle is not moving. The rear view camera system provides a
video image of the area behind your
vehicle.
During operation, lines appear in the
display which represent your vehicle
’s path
and proximity to objects behind your
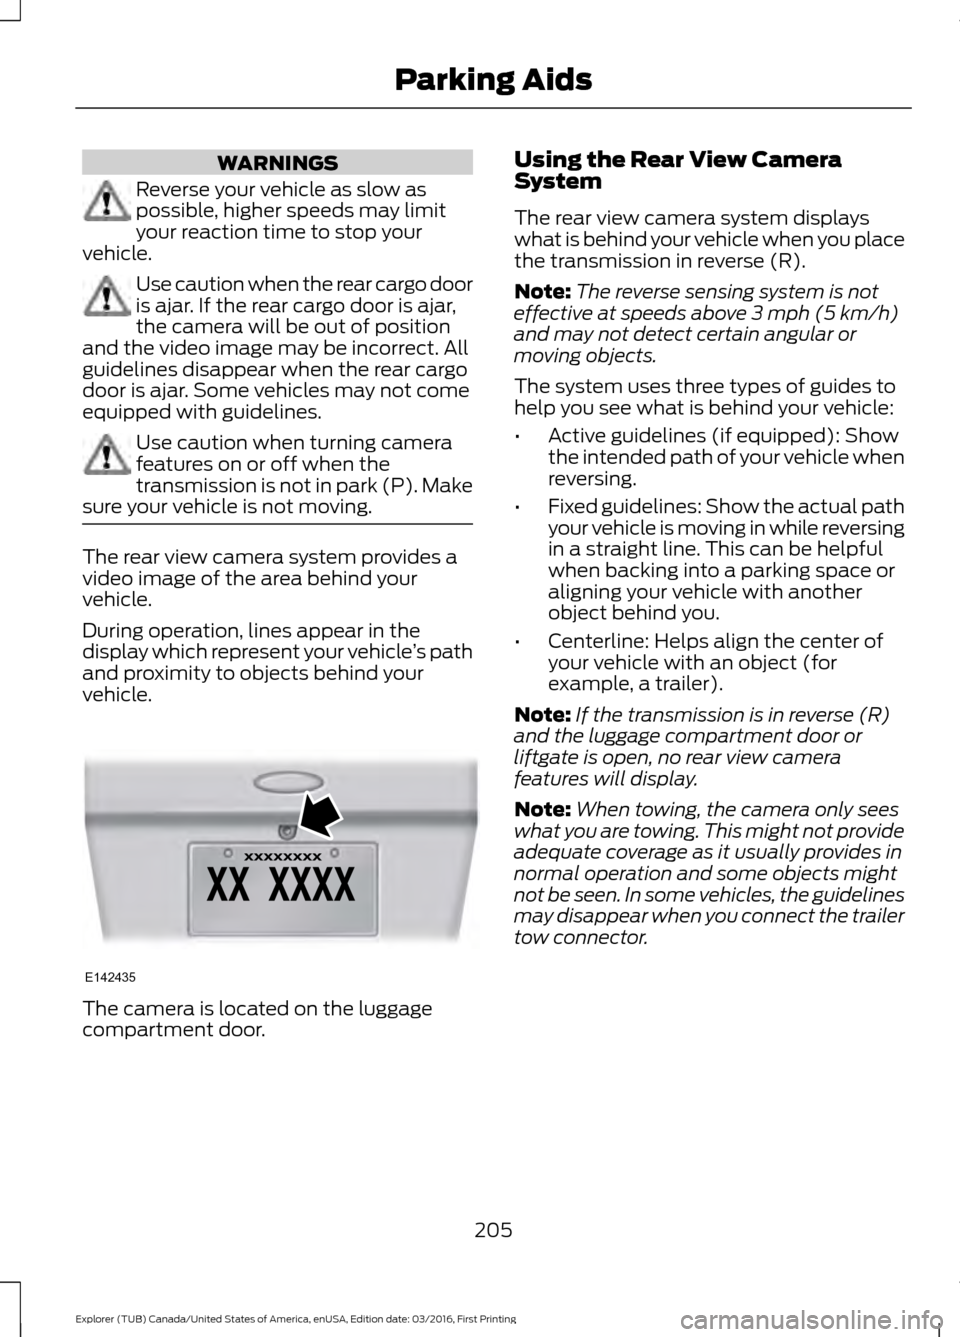
vehicle. The camera is located on the luggage
compartment door. Using the Rear View Camera
System
The rear view camera system displays
what is behind your vehicle when you place
the transmission in reverse (R).
Note:
The reverse sensing system is not
effective at speeds above 3 mph (5 km/h)
and may not detect certain angular or
moving objects.
The system uses three types of guides to
help you see what is behind your vehicle:
• Active guidelines (if equipped): Show
the intended path of your vehicle when
reversing.
• Fixed guidelines: Show the actual path
your vehicle is moving in while reversing
in a straight line. This can be helpful
when backing into a parking space or
aligning your vehicle with another
object behind you.
• Centerline: Helps align the center of
your vehicle with an object (for
example, a trailer).
Note: If the transmission is in reverse (R)
and the luggage compartment door or
liftgate is open, no rear view camera
features will display.
Note: When towing, the camera only sees
what you are towing. This might not provide
adequate coverage as it usually provides in
normal operation and some objects might
not be seen. In some vehicles, the guidelines
may disappear when you connect the trailer
tow connector.
205
Explorer (TUB) Canada/United States of America, enUSA, Edition date: 03/2016, First Printing Parking AidsE142435
Page 213 of 541
Switching Cruise Control Off
Press and release OFF when the system
is in stand by mode or switch the ignition
off.
Note: You erase the set speed when you
switch the system off.
USING ADAPTIVE CRUISE
CONTROL
(If Equipped) WARNINGS
Always pay close attention to
changing road conditions when using
adaptive cruise control. The system
does not replace attentive driving. Failing
to pay attention to the road may result in
a crash, serious injury or death. Adaptive cruise control is not a crash
warning or avoidance system.
Adaptive cruise control does not
detect stationary or slow moving
vehicles below
6 mph (10 km/h).
Adaptive cruise control does not
detect pedestrians or objects in the
road.
Adaptive cruise control does not
detect oncoming vehicles in the
same lane.
Do not use adaptive cruise control
on winding roads, in heavy traffic or
when the road surface is slippery.
This could result in loss of vehicle control,
serious injury or death. Do not use adaptive cruise control
when towing a trailer that has trailer
brakes. The auto-brake component
of the adaptive cruise control system does
not operate the trailer brakes. Using
adaptive cruise control when towing a
trailer that has trailer brakes may result in
the loss of vehicle control, which could
result in serious injury. WARNINGS
Do not use tire sizes other than those
recommended because this can
affect the normal operation of the
system. Failure to do so may result in a loss
of vehicle control, which could result in
serious injury. The system adjusts your vehicle speed to
maintain the set gap between you and the
vehicle in front of you in the same lane.
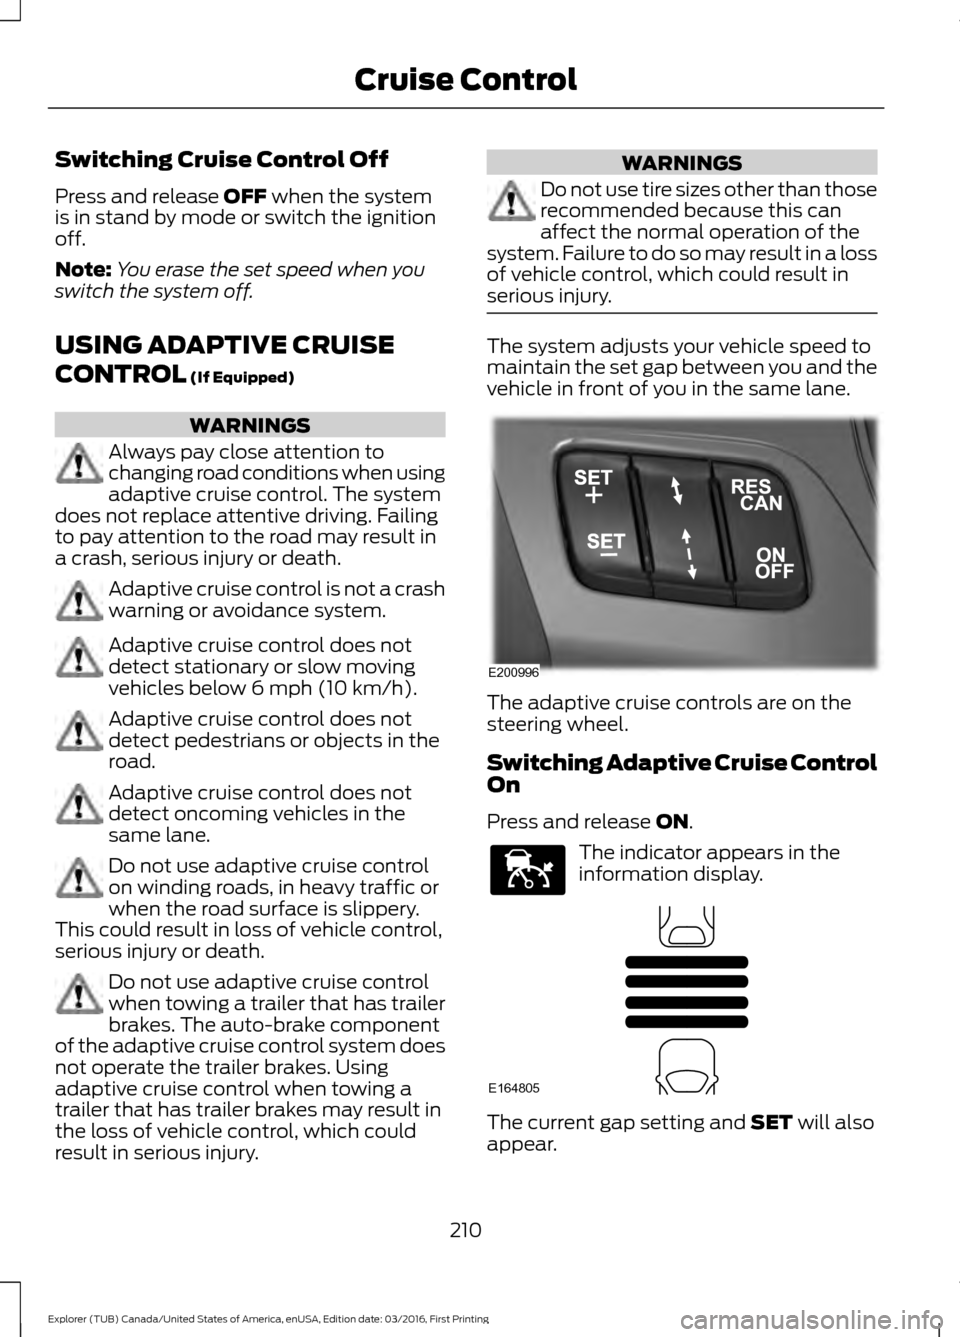
The adaptive cruise controls are on the
steering wheel.
Switching Adaptive Cruise Control
On
Press and release
ON.
The indicator appears in the
information display.
The current gap setting and
SET will also
appear.
210
Explorer (TUB) Canada/United States of America, enUSA, Edition date: 03/2016, First Printing Cruise ControlE200996 E144529 E164805
Page 225 of 541

The system uses radar sensors that are
located behind the bumper fascia on each
side of your vehicle. Any dirt, mud and
snow in front of the sensors and/or driving
in heavy rain can cause system
degradation. Also, other types of
obstructions in front of the sensor can
cause system degradation. This is referred
to as a
‘blocked ’ condition.
Note: Do not apply bumper stickers and/or
repair compound to these areas, this can
cause degraded system performance. If the system detects a degraded
performance condition, a message warning
of a blocked sensor will appear in the
information display. Also the BLIS alert
indicators will remain ON and BLIS will no
longer provide any vehicle warnings. You
can clear the information display warning
but the alert indicators will remain
illuminated.
A "blocked" condition can be cleared in
two ways:
•
After the blockage in front of the
sensors is removed or the
rainfall/snowfall rate decreases or
stops, drive for a few minutes in traffic
to allow the sensors to detect passing
vehicles.
• By cycling the ignition from ON to OFF
and then back ON.
Note: If your vehicle has a tow bar with a
factory equipped trailer tow module and it
is towing a trailer, the sensors will
automatically turn the Blind Spot
Information System off. If your vehicle has
a tow bar but no factory equipped trailer
tow module, it is recommended to turn the
Blind Spot Information System off
manually. Operating the Blind Spot
Information System with a trailer attached
will cause poor system performance.
System Errors
If the system senses a problem with the
left or right sensor, the telltale will
illuminate and a message will appear in
the information display. See Information
Messages (page 113).
222
Explorer (TUB) Canada/United States of America, enUSA, Edition date: 03/2016, First Printing Driving AidsE205199
Page 229 of 541

The following are other situations that may
limit the Cross Traffic Alert performance:
•
Adjacently parked vehicles or objects
obstructing the sensors.
• Approaching vehicles passing at
speeds greater than 37 mph
(60 km/h).
• Driving in reverse faster than
7 mph
(12 km/h).
• Backing out of an angled parking spot.
False Alerts
Note: If your vehicle has a tow bar with a
factory equipped trailer tow module and it
is towing a trailer, the sensors will
automatically turn the Cross Traffic Alert
off. If your vehicle has a tow bar but no
factory equipped trailer tow module, it is
recommended to turn the Cross Traffic Alert
off manually. Operating Cross Traffic Alert
with a trailer attached will cause poor Cross
Traffic Alert performance.
There may be certain instances when there
is a false alert by the Cross Traffic Alert
system that illuminates the alert indicator
with no vehicle in the coverage zone. Some
amount of false alerts are normal; they are
temporary and self-correct.
System Errors
If Cross Traffic Alert senses a problem with
the left or right sensor a message will
appear in the information display. See
Information Messages
(page 113).
Switching the System Off and On
You can temporarily switch Cross Traffic
Alert off in the information display. See
General Information
(page 99). When
you switch Cross Traffic Alert off, you will
not receive alerts and the information
display will display a system off message. Note:
The Cross Traffic Alert switches on
whenever the ignition is switched on and
ready to provide appropriate alerts when
the transmission is in reverse (R). Cross
Traffic Alert will not remember the last
selected on or off setting.
You can also have Cross Traffic Alert
switched off permanently at an authorized
dealer. Once switched off permanently,
the system can only be switched back on
at an authorized dealer.
STEERING
Electric Power Steering WARNINGS
The electric power steering system
has diagnostic checks that
continuously monitor the system. If
a fault is detected, a message displays in
the information display. Stop your vehicle
as soon as it is safe to do so. Switch the
ignition off. After at least 10 seconds,
switch the ignition on and watch the
information display for a steering system
warning message. If a steering system
warning message returns, have the system
checked by an authorized dealer. If the system detects an error, you
may not feel a difference in the
steering, however a serious condition
may exist. Obtain immediate service from
an authorized dealer, failure to do so may
result in loss of steering control. Your vehicle has an electric power steering
system. There is no fluid reservoir. No
maintenance is required.
If your vehicle loses electrical power while
you are driving, electric power steering
assistance is lost. The steering system still
operates and you can steer your vehicle
manually. Manually steering your vehicle
requires more effort.
226
Explorer (TUB) Canada/United States of America, enUSA, Edition date: 03/2016, First Printing Driving Aids
Page 237 of 541

Payload is the combined weight
of cargo and passengers that your
vehicle is carrying. The maximum
payload for your vehicle appears
on the Tire and Loading label. The
label is either on the B-pillar or the
edge of the driver door. Vehicles
exported outside the US and
Canada may not have a tire and
loading label. Look for
“The
combined weight of occupants
and cargo should never exceed
XXX kg OR XXX lb ” for maximum
payload. The payload listed on the
Tire and Loading Information label
is the maximum payload for your
vehicle as built by the assembly
plant. If you install any additional
equipment on your vehicle, you
must determine the new payload.
Subtract the weight of the
equipment from the payload listed
on the Tire and Loading label.
When towing, trailer tongue
weight or king pin weight is also
part of payload. WARNING
The appropriate loading
capacity of your vehicle can
be limited either by volume
capacity (how much space is
available) or by payload capacity
(how much weight the vehicle
should carry). Once you have
reached the maximum payload of
your vehicle, do not add more
cargo, even if there is space
available. Overloading or
improperly loading your vehicle
can contribute to loss of vehicle
control and vehicle rollover. GAWR (Gross Axle Weight
Rating)
GAWR is the maximum allowable
weight that a single axle (front or
rear) can carry. These numbers
are on the Safety Compliance
Certification label. The label is
located on the door hinge pillar,
door-latch post, or the door edge
that meets the door-latch post,
next to the driver seating position.
The total load on each axle must
never exceed its Gross Axle
Weight Rating.
GVWR (Gross Vehicle Weight
Rating)
GVWR is the maximum allowable
weight of the fully loaded vehicle.
This includes all options,
equipment, passengers and cargo.
It appears on the Safety
Compliance Certification label.
The label is located on the door
hinge pillar, door-latch post, or the
door edge that meets the
door-latch post, next to the driver
seating position.
The gross vehicle weight must
never exceed the Gross Vehicle
Weight Rating.
234
Explorer (TUB) Canada/United States of America, enUSA, Edition date: 03/2016, First Printing Load Carrying