2017 FIAT TIPO 5DOORS STATION WAGON instrument panel
[x] Cancel search: instrument panelPage 111 of 264
STARTING THE
ENGINE
Before starting the engine, adjust the
seat, the interior rear view mirrors, the
door mirrors and fasten the seat belt
correctly.
Never press the accelerator pedal for
starting the engine.
If necessary, messages indicating the
starting procedure can be shown on
the display.
ENGINE STARTING
PROCEDURE
106) 107) 108) 109)
37) 38) 39) 40)
Proceed as follows:
engage the parking brake and place
the gear lever in neutral;
fully depress the clutch pedal
without touching the accelerator;
only for diesel versions, bring the
ignition device to MAR, warning light
will come on in the instrument
panel and wait for the warning light to
switch off;
turn the ignition device to AVV and
release it as soon as the engine starts;
if the engine does not start within
10 seconds, bring the ignition device
back to STOP and wait for10-15 seconds before repeating the
starting procedure;
after the manoeuvre has been
repeated, if the problem persists,
contact a Fiat Dealership.
WARNING
106)Do not try to start the engine pouring
fuel or other flammable fluid inside the
throttle body air intake: this might damage
the engine and injury people nearby.
107)It is dangerous to run the engine in
enclosed areas. The engine takes in
oxygen and releases carbon dioxide,
carbon monoxide and other toxic gases.
108)The brake servo is not active until the
engine is started, so you would need to
apply much more force than usual to the
brake pedal.
109)Do not start the engine by pushing,
towing or driving downhill. These
manoeuvres may damage the catalytic
converter.
IMPORTANT
37)We recommend that during the initial
period, or during the first 1600 km, you do
not drive to full car performance (e.g.
excessive acceleration, long journeys at top
speed, sharp braking, etc.).
38)When the engine is switched off never
leave the ignition device in the MAR
position to prevent useless current
absorption from draining the battery.39)A quick burst on the accelerator before
turning off the engine serves absolutely no
practical purpose; it wastes fuel and is
especially damaging to turbocharged
engines.
40)Warning light
will flash after starting
or during prolonged cranking to indicate a
fault with the glow plug heating system. If
the engine starts, the vehicle can be used
as normal, but a Fiat Dealership must be
contacted as soon as possible.
109
Page 112 of 264
PARKING THE
VEHICLE
When parking and leaving the car,
proceed as follows:
engage a gear (1stgear if facing
uphill or reverse if facing downhill) and
leave the wheels turned;
stop the engine and engage the
handbrake;
always remove the ignition key.
Block the wheels with a wedge or a
stone if the car is parked on a steep
slope.
IMPORTANT NEVER leave the vehicle
with the gearbox in neutral.
PARKING BRAKE
110) 111)
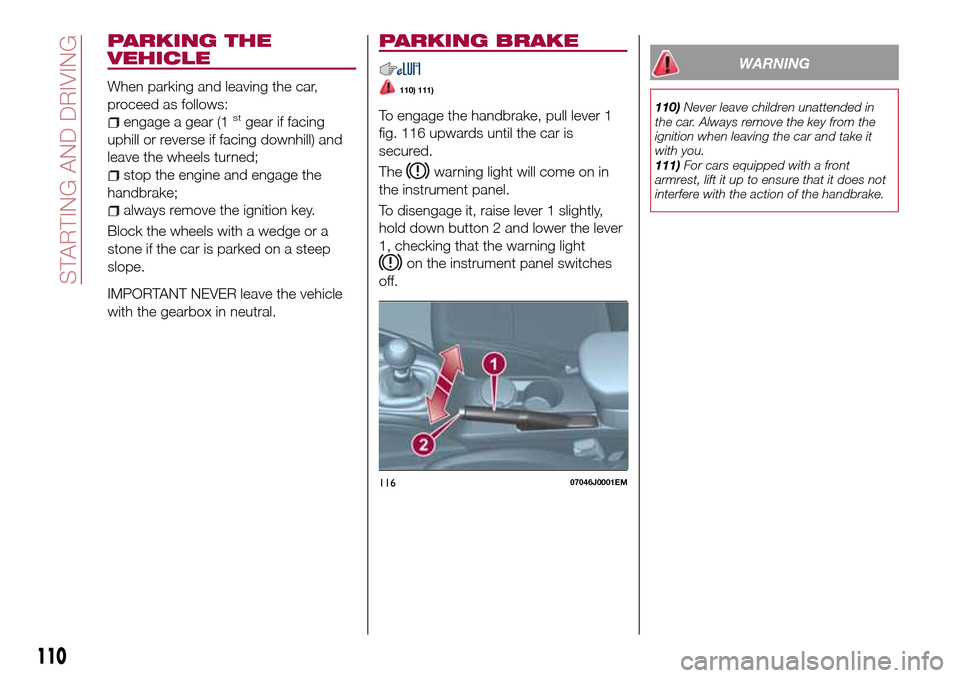
To engage the handbrake, pull lever 1
fig. 116 upwards until the car is
secured.
The
warning light will come on in
the instrument panel.
To disengage it, raise lever 1 slightly,
hold down button 2 and lower the lever
1, checking that the warning light
on the instrument panel switches
off.
WARNING
110)Never leave children unattended in
the car. Always remove the key from the
ignition when leaving the car and take it
with you.
111)For cars equipped with a front
armrest, lift it up to ensure that it does not
interfere with the action of the handbrake.
11607046J0001EM
110
STARTING AND DRIVING
Page 114 of 264
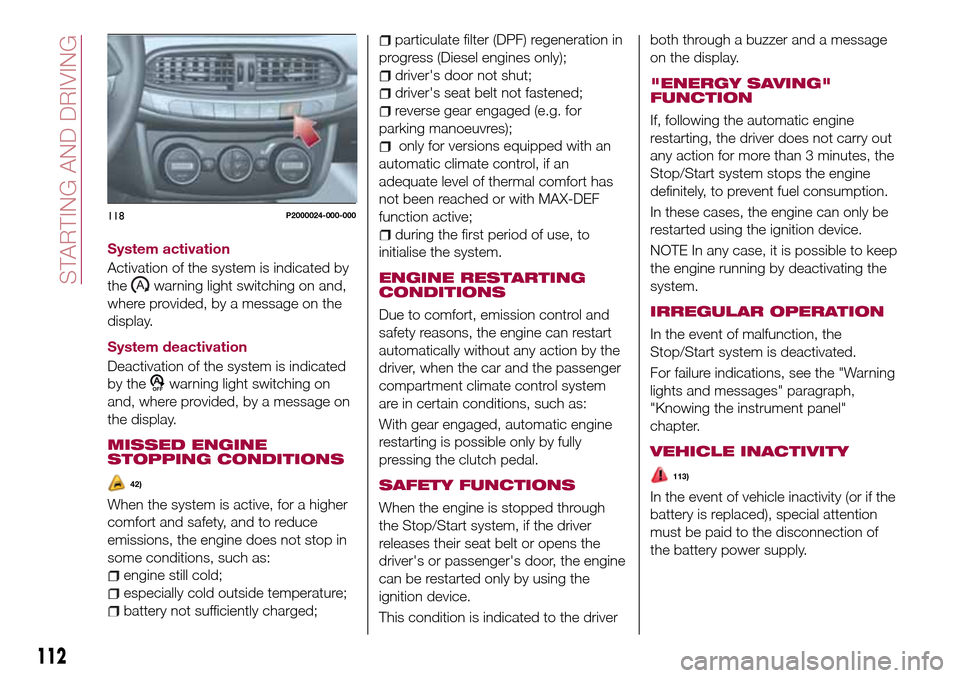
System activation
Activation of the system is indicated by
the
warning light switching on and,
where provided, by a message on the
display.
System deactivation
Deactivation of the system is indicated
by the
warning light switching on
and, where provided, by a message on
the display.
MISSED ENGINE
STOPPING CONDITIONS
42)
When the system is active, for a higher
comfort and safety, and to reduce
emissions, the engine does not stop in
some conditions, such as:
engine still cold;
especially cold outside temperature;
battery not sufficiently charged;
particulate filter (DPF) regeneration in
progress (Diesel engines only);
driver's door not shut;
driver's seat belt not fastened;
reverse gear engaged (e.g. for
parking manoeuvres);
only for versions equipped with an
automatic climate control, if an
adequate level of thermal comfort has
not been reached or with MAX-DEF
function active;
during the first period of use, to
initialise the system.
ENGINE RESTARTING
CONDITIONS
Due to comfort, emission control and
safety reasons, the engine can restart
automatically without any action by the
driver, when the car and the passenger
compartment climate control system
are in certain conditions, such as:
With gear engaged, automatic engine
restarting is possible only by fully
pressing the clutch pedal.
SAFETY FUNCTIONS
When the engine is stopped through
the Stop/Start system, if the driver
releases their seat belt or opens the
driver's or passenger's door, the engine
can be restarted only by using the
ignition device.
This condition is indicated to the driverboth through a buzzer and a message
on the display.
"ENERGY SAVING"
FUNCTION
If, following the automatic engine
restarting, the driver does not carry out
any action for more than 3 minutes, the
Stop/Start system stops the engine
definitely, to prevent fuel consumption.
In these cases, the engine can only be
restarted using the ignition device.
NOTE In any case, it is possible to keep
the engine running by deactivating the
system.
IRREGULAR OPERATION
In the event of malfunction, the
Stop/Start system is deactivated.
For failure indications, see the "Warning
lights and messages" paragraph,
"Knowing the instrument panel"
chapter.
VEHICLE INACTIVITY
113)
In the event of vehicle inactivity (or if the
battery is replaced), special attention
must be paid to the disconnection of
the battery power supply.
118P2000024-000-000
112
STARTING AND DRIVING
Page 116 of 264
DEVICE ACTIVATION/
DEACTIVATION
Device Activation: press the SET + or
SET – buttons, at a speed between
30 and 130 km/h, to set the current car
speed as the speed limit. Or, press the
RES (Resume) button to set the speed
limit to the value shown on the display. .
The device activation is indicated by the
symbol on the display.
Device deactivation: press the CANC
button. The device deactivation is
indicated by the grey
symbol on the
display.
EXCEEDING THE
PROGRAMMED SPEED
By fully depressing the accelerator
pedal, the programmed speed can be
exceeded even with the device active
(e.g. in the event of overtaking).
The device is disabled until the speed
drops below the set limit, after which it
reactivates automatically.
FLASHING OF
PROGRAMMED SPEED
The programmed speed flashes in the
following cases:
when the accelerator pedal has been
fully depressed and the vehicle has
exceeded the programmed speed;
activating the system after setting a
limit below the effective speed of the
vehicle;
when the device cannot reduce the
speed of the vehicle due to the gradient
of the road, in this case also
accompanied by an acoustic warning;
in the event of sharp acceleration.
DEACTIVATING THE
DEVICE
To deactivate the device press button 1
fig. 119.
IMPORTANT The activation of the
electronic Cruise Control will deactivate
the device.
Automatic deactivation of the
device
The device deactivates automatically in
the event of fault in the system. In this
case, contact a Fiat Dealership.
ELECTRONIC
CRUISE CONTROL
(where provided)
This is an electronically controlled
driving assistance device that allows the
desired vehicle speed to be maintained,
without having to press the accelerator
pedal. This device can be used at a
speed above 30 km/h on long stretches
of dry, straight roads with few variations
(e.g. motorways).
It is therefore not recommended to use
this device on extra-urban roads with
traffic. Do not use it in town.
ACTIVATING THE DEVICE
114) 115) 116)
To activate the device press button 1
fig. 120.
The grey symbol
on the instrument
panel switches on to signal that the
device has been activated.
114
STARTING AND DRIVING
Page 119 of 264
“Adaptive Cruise Control” mode
to hold an appropriate distance
between vehicles (a dedicated message
is shown on the instrument panel
display);
electronic “Cruise Control” mode
to hold the vehicle at a constant
preset speed.
To change the operation mode, use the
button on the steering wheel (see that
described on the following pages).
The "electronic Cruise Control" does
not vary the speed according to the
presence or not of vehicles ahead.
Always adjust the speed according to
traffic conditions.
ADAPTIVE CRUISE
CONTROL ACTIVATION/
DEACTIVATION
Activation
To activate the device, press and
release the button
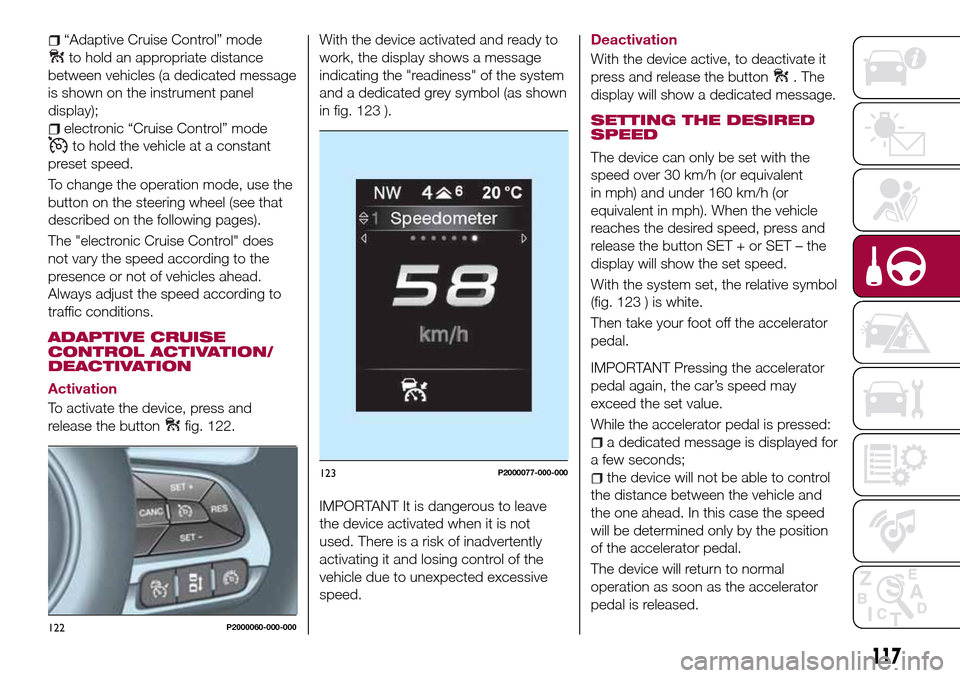
fig. 122.With the device activated and ready to
work, the display shows a message
indicating the "readiness" of the system
and a dedicated grey symbol (as shown
in fig. 123 ).
IMPORTANT It is dangerous to leave
the device activated when it is not
used. There is a risk of inadvertently
activating it and losing control of the
vehicle due to unexpected excessive
speed.
Deactivation
With the device active, to deactivate it
press and release the button
. The
display will show a dedicated message.
SETTING THE DESIRED
SPEED
The device can only be set with the
speed over 30 km/h (or equivalent
in mph) and under 160 km/h (or
equivalent in mph). When the vehicle
reaches the desired speed, press and
release the button SET + or SET – the
display will show the set speed.
With the system set, the relative symbol
(fig. 123 ) is white.
Then take your foot off the accelerator
pedal.
IMPORTANT Pressing the accelerator
pedal again, the car’s speed may
exceed the set value.
While the accelerator pedal is pressed:
a dedicated message is displayed for
a few seconds;
the device will not be able to control
the distance between the vehicle and
the one ahead. In this case the speed
will be determined only by the position
of the accelerator pedal.
The device will return to normal
operation as soon as the accelerator
pedal is released.
122P2000060-000-000
123P2000077-000-000
117
Page 125 of 264
44)The section of the bumper before the
sensor must not be covered with
adhesives, auxiliary headlights or any other
object.
45)Operation can be adversely affected by
any structural change made to the vehicle,
such as a modification to the front
geometry, tyre change, or a heavier load
than the standard load of the vehicle.
46)Incorrect repairs made on the front part
of the vehicle (e.g. bumper, chassis) may
alter the position of the radar sensor, and
adversely affect its operation. Go to a Fiat
Dealership for any operation of this type.
47)Do not tamper nor operate on the radar
sensor. In the event of a sensor failure,
contact a Fiat Dealership.
48)Do not wash with high-pressure jets in
the bumper lower area: in particular do not
operate on the system's electrical
connector.
49)Be careful in the case of repairs and
new paintings in the area around the
sensor (panel covering the sensor on the
left side of the bumper). In the event of a
frontal impact the sensor may automatically
deactivate and display a warning to indicate
that the sensor needs to be repaired. Even
without a malfunction warning, deactivate
the system operation if you think that the
position of the radar sensor has changed
(e.g. due to low-speed frontal impact as
during parking manoeuvres). In these
cases, go to a Fiat Dealership to have the
radar sensor realigned or replaced.PARKING SENSORS
(where provided)
SENSORS
123)
50) 51) 52)
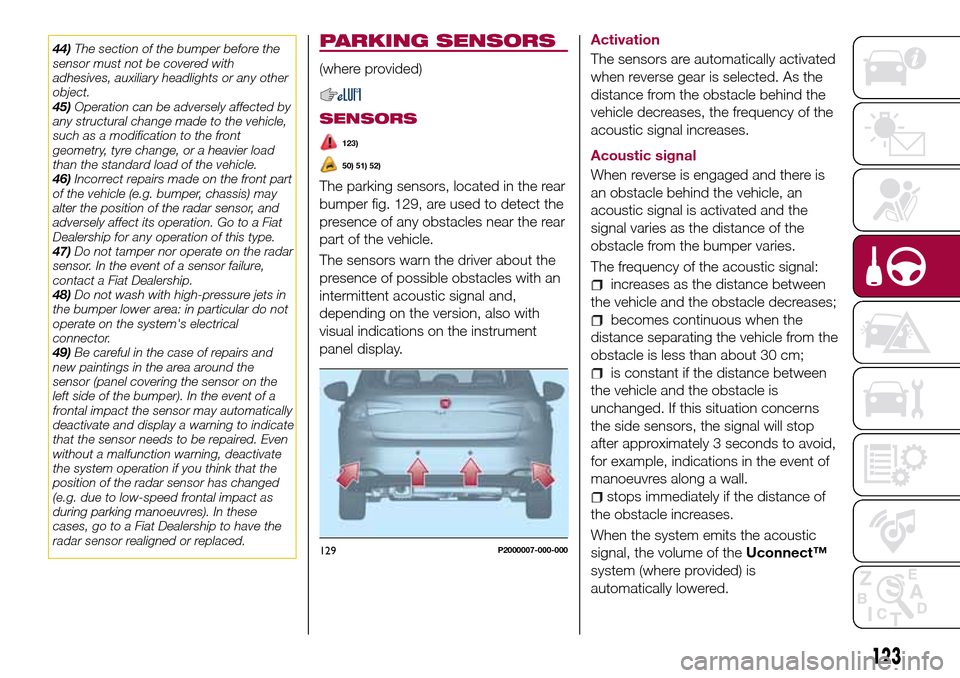
The parking sensors, located in the rear
bumper fig. 129, are used to detect the
presence of any obstacles near the rear
part of the vehicle.
The sensors warn the driver about the
presence of possible obstacles with an
intermittent acoustic signal and,
depending on the version, also with
visual indications on the instrument
panel display.Activation
The sensors are automatically activated
when reverse gear is selected. As the
distance from the obstacle behind the
vehicle decreases, the frequency of the
acoustic signal increases.
Acoustic signal
When reverse is engaged and there is
an obstacle behind the vehicle, an
acoustic signal is activated and the
signal varies as the distance of the
obstacle from the bumper varies.
The frequency of the acoustic signal:
increases as the distance between
the vehicle and the obstacle decreases;
becomes continuous when the
distance separating the vehicle from the
obstacle is less than about 30 cm;
is constant if the distance between
the vehicle and the obstacle is
unchanged. If this situation concerns
the side sensors, the signal will stop
after approximately 3 seconds to avoid,
for example, indications in the event of
manoeuvres along a wall.
stops immediately if the distance of
the obstacle increases.
When the system emits the acoustic
signal, the volume of theUconnect™
system (where provided) is
automatically lowered.
129P2000007-000-000
123
Page 126 of 264

Detection distances
If several obstacles are detected by the
sensors, only the nearest one is
considered.
Indication on display
The indications regarding the Park
Assist system are shown only if the
"Acoustic signal and display" item in the
"Settings" menu of theUconnect™ 5"
or7" HDsystem (where provided) was
previously selected (for more
information, see the description in the
dedicated chapter).
The system indicates the presence of
an obstacle by displaying a single arc in
one of the possible areas, in
accordance with the distance of the
object and the position in relation to the
vehicle. If the obstacle is detected in the
rear central area, a single arc will be
displayed as the obstacle approaches,
first constant, then flashing, in addition
to an acoustic signal.
FAULT INDICATION
Parking sensor faults, if any, will be
indicated when reverse is engaged by
the switching on of the
symbol on
the instrument panel together with the
message on the display (see
description in the "Warning lights and
messages" paragraph, "Knowing the
instrument panel" chapter).
OPERATION WITH A
TRAILER
The operation of the sensors is
automatically deactivated when the
trailer's electrical connection is inserted
in the vehicle's tow hook socket.
Sensors are reactivated on removing
the trailer's electrical connection.
IMPORTANT NOTES
When parking, take the utmost care
over obstacles that may be above or
under the sensor. Objects close to the
vehicle are not detected under certain
circumstances and could therefore
cause damage to the vehicle or be
damaged.
Some conditions may influence the
performance of the parking system:
reduced sensor sensitivity and a
reduction in the parking assistance
system performance could be due to
the presence of: ice, snow, mud, paint,
etc. on the surface of the sensor;
the sensor may detect a
non-existent obstacle ("echo
interference") due to mechanical
interference, for example when washing
the vehicle, in rain (strong wind), hail;
the signals sent by the sensor can
also be altered by the presence of
ultrasonic systems (e.g. pneumatic
brake systems of trucks or pneumatic
drills) near the vehicle;
parking assistance system
performance can also be influenced by
the position of the sensors, for example
due to a change in the ride setting
(caused by wear to the shock
absorbers, suspension), or by changing
tyres, overloading the vehicle or fitting
specific trims that require the vehicle to
be lowered;
the presence of a tow hook without
trailer, which may interfere with the
correct operation of the parking
sensors;
the presence of adhesives on the
sensors. Therefore, take care not to
place adhesives on the sensors.
WARNING
123)Parking and other potentially
dangerous manoeuvres are, however,
always the driver’s responsibility. When
performing these operations, always make
sure that there are no other people
(especially children) or animals on the route
you want to take. The parking sensors are
an aid for the driver, but the driver must
never allow their attention to lapse during
potentially dangerous manoeuvres, even
those executed at low speeds.
124
STARTING AND DRIVING
Page 134 of 264
HAZARD WARNING
LIGHTS
CONTROL
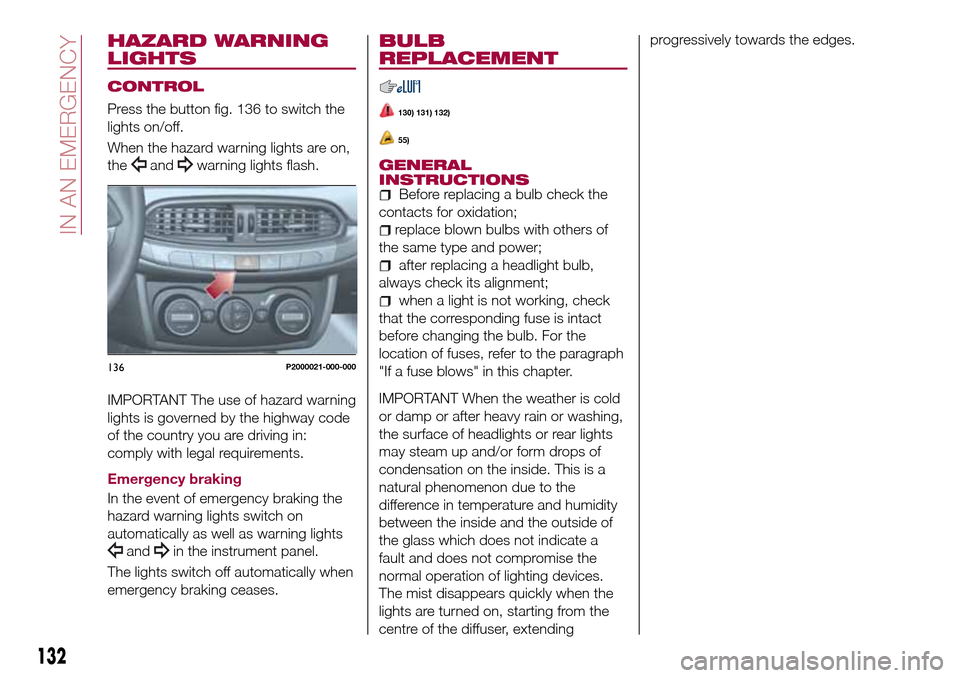
Press the button fig. 136 to switch the
lights on/off.
When the hazard warning lights are on,
the
andwarning lights flash.
IMPORTANT The use of hazard warning
lights is governed by the highway code
of the country you are driving in:
comply with legal requirements.
Emergency braking
In the event of emergency braking the
hazard warning lights switch on
automatically as well as warning lights
andin the instrument panel.
The lights switch off automatically when
emergency braking ceases.
BULB
REPLACEMENT
130) 131) 132)
55)
GENERAL
INSTRUCTIONS
Before replacing a bulb check the
contacts for oxidation;
replace blown bulbs with others of
the same type and power;
after replacing a headlight bulb,
always check its alignment;
when a light is not working, check
that the corresponding fuse is intact
before changing the bulb. For the
location of fuses, refer to the paragraph
"If a fuse blows" in this chapter.
IMPORTANT When the weather is cold
or damp or after heavy rain or washing,
the surface of headlights or rear lights
may steam up and/or form drops of
condensation on the inside. This is a
natural phenomenon due to the
difference in temperature and humidity
between the inside and the outside of
the glass which does not indicate a
fault and does not compromise the
normal operation of lighting devices.
The mist disappears quickly when the
lights are turned on, starting from the
centre of the diffuser, extendingprogressively towards the edges.
136P2000021-000-000
132
IN AN EMERGENCY