2017 FIAT DUCATO BASE CAMPER ECO mode
[x] Cancel search: ECO modePage 121 of 296

START&STOP
SYSTEM
IN BRIEF
The Start&Stop device automatically
stops the engine each time the
vehicle is stationary and all the
conditions for automatic switch-off
have been met, and starts it again
when the driver wants to move off.
This improves the efficiency of the
vehicle by reducing fuel consumption,
the emission of harmful gases and
noise pollution.
OPERATING MODE
Stopping the engine
Versions with mechanical gearbox
With the vehicle stationary, the engine
stops with the gearbox in neutral and
the clutch pedal released.
Restarting the engine
Versions with mechanical gearbox
Depress the clutch pedal to restart
the engine.MANUAL ACTIVATION
AND DEACTIVATION OF
THE SYSTEM
To activate/deactivate the system
manually, press the
button on the
dashboard control panel.
24)
118) 119)
WARNING
24)If the vehicle is equipped with manual
climate control, if you want to favour
climate comfort, the Start&Stop system
can be deactivated for continuous climate
control system operation.
WARNING
118)The vehicle should always be
evacuated after the key has been removed
or turned to the STOP position. When
refuelling, make sure that the car is
switched off with the key in the STOP
position.
119)If the battery needs to be replaced,
always contact a Fiat Dealership. The
replacement battery should be of the same
type (L6 105Ah/850A) and should have
the same characteristics.
CRUISE CONTROL
(constant speed
regulator)
(for versions/markets, where provided)
IN BRIEF
This is an electronic driving aid that
allows you to drive at a speed of
above 30 km/h on long and straight
dry roads with few driving changes
(e.g. motorways) at a preset speed
without having to press the
accelerator pedal. It is therefore not
recommended to use this device
on extra-urban roads with traffic. Do
not use the device in town.
Turning the device on
Turn the ring A fig. 110 - fig. 111 to the
ON position or
(depending on the
version).
The Cruise Control cannot be engaged
in 1st or reverse gear. It is advisable
to engage it in 4th or higher gears.
When travelling downhill with the device
engaged, the vehicle speed may
slightly exceed the stored one.
119
Page 122 of 296

When the device is turned on, the
warning light turns on together with
the corresponding message on the
instrument panel.
Storing vehicle speed
Proceed as follows:
turn the ring A fig. 110 - fig. 111 to
the ON position or
(depending
on the version) and press the
accelerator pedal to take the vehicle to
the desired speed;
move the stalk upwards (+) for at
least one second, then release it. The
vehicle speed is now stored and you
can therefore release the accelerator
pedal.
Increasing/reducing the stored
speed
Once the Cruise Control is activated,
you can increase the speed by moving
the lever upwards (+) or decrease it
by moving the lever downwards (-).
Each movement of the stalk will
correspond to a slight reduction in
speed of about 1 km/h, while keeping
the stalk held downwards will decrease
the speed continuously.
Turning the device off
The device can be switched off by the
driver in the following ways:
turning ring nut A to OFF orO
(according to the version);
by switching off the engine;
Deactivating the function
The device can be switched off by the
driver in the following ways:
turning ring nut A to OFF orO
(according to the version);
pressing the button B, both with
symbolIIand symbol CANC/RES, the
system pauses;
by switching off the engine;
by pressing the brake pedal or
operating the handbrake;
by pressing the clutch pedal;
requesting a gear shift with an
automatic transmission in sequential
mode;
with the vehicle speed below the set
limit
by pressing the accelerator pedal; in
this case the system is not actually
turned off but the acceleration request
takes priority; the Cruise Control
remains activated, without the need to
press the CANC/RES button to restore
the previous conditions once the
acceleration is over.
The device is automatically switched off
in the following cases:
if the ABS or ESC systems
intervene;
in the event of system failure.
120) 121)
SPEED LIMITER
This device allows the vehicle speed to
be limited to a value set by the driver.
The maximum speed can be set both
with vehicle stationary and in motion.
The minimum speed that can be set is
30 km/h.
110 - Versions without Speed LimiterF1A0364
111 - Versions with Speed LimiterF1A0363
120
STARTING AND DRIVING
Page 173 of 296

position the jack at the lifting support
nearest the wheel to be replaced, at
the points shown in fig. 157. For short
wheelbase versions with a retractable
footboard, the jack must be position at
the lifting point shown in fig. 159,
turned by 45° so that it does
not interfere with the retractable
platform;
warn all bystanders that the vehicle
is about to be lifted. They must stay
clear and not touch the vehicle until it is
back on the ground.
for versions equipped with
self-levelling pneumatic suspension,
before using the jack to raise the
vehicle, press the buttons A and B fig.
160 simultaneously for at least 5
seconds. The operating mode for
raising the vehicle is activated: the
LEDs on the buttons come on
constantly. To exit this mode, press
buttons A and B simultaneously for
another 5 seconds; both LEDs on the
buttons will go out and full system
operation will be restored. This mode
deactivates automatically when the
speed of approx. 5 km/h is exceeded.
151)
lift the vehicle.
After lifting the vehicle:
for all versions, access the rear right
wheel arch, operate the screw A fig.
161 on the spare wheel retaining
device, using the supplied wrench
assembled correctly with the dedicated
extension B fig. 161.
turn the tool anticlockwise fig. 162
to allow the spare wheel to descend;
continue turning anticlockwise until
the stop point, indicated by the
stiffening of the manoeuvre or a click
from the clutch present in the device;
152) 153)
after unwinding the whole cable of
the spare wheel lifting device, remove
the wheel from the vehicle;
undo the retaining knob D fig. 163
and free the wheel by sliding out the
support E.
159F1A0169
160F1A0170
161F1A0171
171
Page 213 of 296

ENGINE CODES - BODYWORK VERSION.
VersionEngine code
2.0 115 Multijet 2250A2000
2.3 150 ECOJET with dBlueF1AGL411A
2.3 130 Multijet 2F1AGL411D
2.3 130 Multijet 2 with AdBlueF1AGL411M
2.3 150 Multijet 2F1AGL411C
2.3 180 Multijet 2 PowerF1AGL411B
3.0 140 Natural PowerF1CFA401A
There is an example of a bodywork
version code below by way of
explanation with a key which is valid for
all bodywork version codes.
Example:
250AMMFADX
250MODEL
AGVW
MENGINE
MENGINE TRANSMISSION/AXLES
FBODY
AWHEELBASE
RHVERSIONGVW
A3000 kg
B3300kg
C3500 kg
D3500 kg MAXI
E3995/4005/4250/4300 kg MAXI
F2800 kg
G3650 kg
H3510 kg MAXI
L3510 kg
M4400 kg MAXIENGINE
42.3 150 ECOJET with AdBlue
52.0 115 Multijet 2
62.3 130 Multijet 2 with AdBlue
72.3 130 Multijet 2
82.3 150 Multijet 2
92.3 180 Multijet 2 Power
W140 Natural Power
TRANSMISSION
MMechanical gearbox
AAutomatic transmission
211
Page 269 of 296

Button Interaction (pressure/rotation)
Acceptance of incoming call
Answering the second incoming call and putting the active call on hold
Rejection of incoming call
Ending of call in progress
Deactivate/reactivate the microphone during a phone conversation
Activation/deactivation of the USB/iPod source Pause
Activation/deactivation of radio/AUX source Mute function
+/–Turning left wheel upwards or downwards: audio volume adjustment
Short press: volume increase/decrease in single steps
Long press: volume continuous increase/decrease until released
Turning right wheel upwards or downwards:Short press (Radio mode): selection of next/previous station
Long press (Radio mode): scan higher/lower frequencies until released
Short press (USB/iPod mode): selection of previous/next track
Long press (USB/iPod mode): fast forward/rewind until released
267
Page 271 of 296

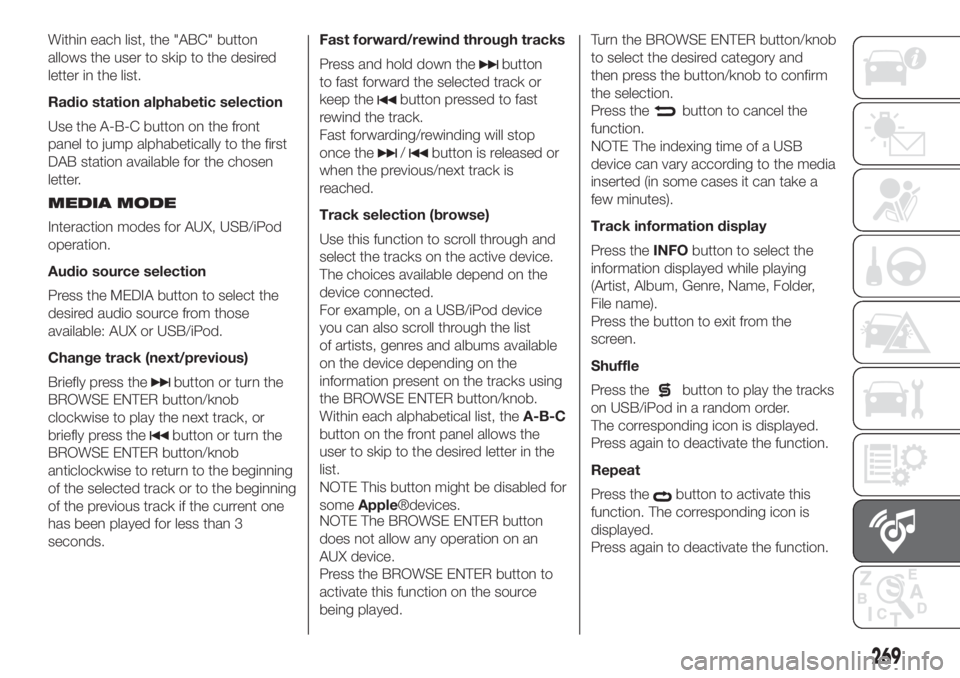
Within each list, the "ABC" button
allows the user to skip to the desired
letter in the list.
Radio station alphabetic selection
Use the A-B-C button on the front
panel to jump alphabetically to the first
DAB station available for the chosen
letter.
MEDIA MODE
Interaction modes for AUX, USB/iPod
operation.
Audio source selection
Press the MEDIA button to select the
desired audio source from those
available: AUX or USB/iPod.
Change track (next/previous)
Briefly press the
button or turn the
BROWSE ENTER button/knob
clockwise to play the next track, or
briefly press the
button or turn the
BROWSE ENTER button/knob
anticlockwise to return to the beginning
of the selected track or to the beginning
of the previous track if the current one
has been played for less than 3
seconds.Fast forward/rewind through tracks
Press and hold down the
button
to fast forward the selected track or
keep the
button pressed to fast
rewind the track.
Fast forwarding/rewinding will stop
once the
/button is released or
when the previous/next track is
reached.
Track selection (browse)
Use this function to scroll through and
select the tracks on the active device.
The choices available depend on the
device connected.
For example, on a USB/iPod device
you can also scroll through the list
of artists, genres and albums available
on the device depending on the
information present on the tracks using
the BROWSE ENTER button/knob.
Within each alphabetical list, theA-B-C
button on the front panel allows the
user to skip to the desired letter in the
list.
NOTE This button might be disabled for
someApple®devices.
NOTE The BROWSE ENTER button
does not allow any operation on an
AUX device.
Press the BROWSE ENTER button to
activate this function on the source
being played.Turn the BROWSE ENTER button/knob
to select the desired category and
then press the button/knob to confirm
the selection.
Press the
button to cancel the
function.
NOTE The indexing time of a USB
device can vary according to the media
inserted (in some cases it can take a
few minutes).
Track information display
Press theINFObutton to select the
information displayed while playing
(Artist, Album, Genre, Name, Folder,
File name).
Press the button to exit from the
screen.
Shuffle
Press the
button to play the tracks
on USB/iPod in a random order.
The corresponding icon is displayed.
Press again to deactivate the function.
Repeat
Press the
button to activate this
function. The corresponding icon is
displayed.
Press again to deactivate the function.
269
Page 278 of 296

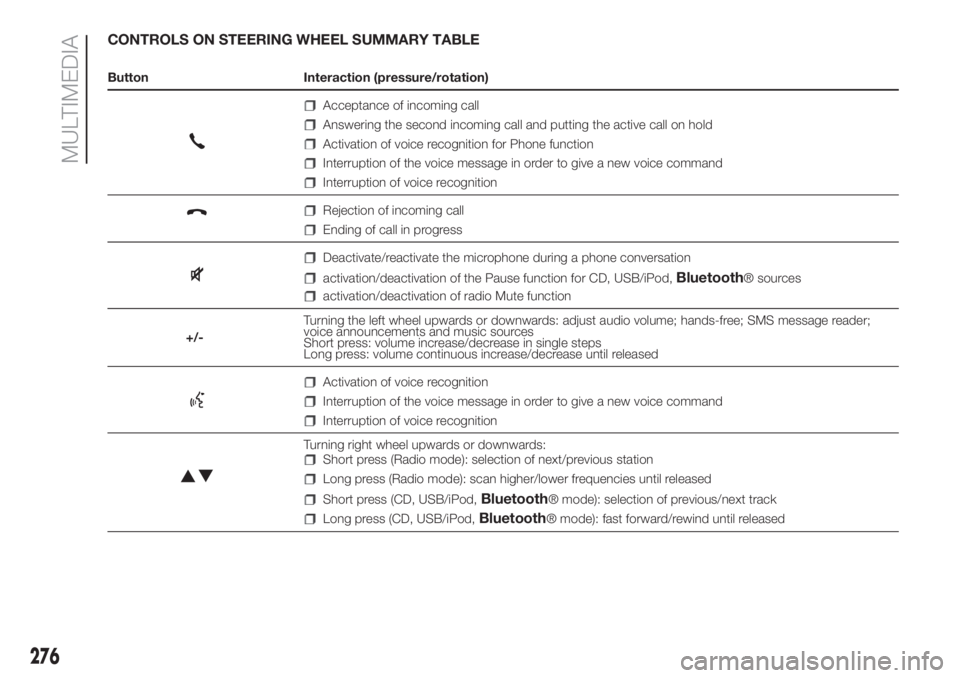
CONTROLS ON STEERING WHEEL SUMMARY TABLE
Button Interaction (pressure/rotation)
Acceptance of incoming call
Answering the second incoming call and putting the active call on hold
Activation of voice recognition for Phone function
Interruption of the voice message in order to give a new voice command
Interruption of voice recognition
Rejection of incoming call
Ending of call in progress
Deactivate/reactivate the microphone during a phone conversation
activation/deactivation of the Pause function for CD, USB/iPod,Bluetooth® sources
activation/deactivation of radio Mute function
+/-Turning the left wheel upwards or downwards: adjust audio volume; hands-free; SMS message reader;
voice announcements and music sources
Short press: volume increase/decrease in single steps
Long press: volume continuous increase/decrease until released
Activation of voice recognition
Interruption of the voice message in order to give a new voice command
Interruption of voice recognition
Turning right wheel upwards or downwards:Short press (Radio mode): selection of next/previous station
Long press (Radio mode): scan higher/lower frequencies until released
Short press (CD, USB/iPod,Bluetooth® mode): selection of previous/next track
Long press (CD, USB/iPod,Bluetooth® mode): fast forward/rewind until released
276
MULTIMEDIA
Page 279 of 296

OPERATION
SWITCHING THE SYSTEM
ON/OFF
The system is switched on/off by
pressing the button/knob.
Turn the button/knob clockwise to
increase the radio volume or
anticlockwise to decrease it.
Radio (Tuner) mode
After the desired radio station is
selected, the following information is
shown on the display:
At the top: the list of radio stations
stored (presets) is displayed; the station
currently playing is highlighted.
In the middle: display of the name of
the current radio station and the
buttons for selecting the previous or
next radio station. At the bottom:
display of the following buttons:
In the middle: display of the name of
the current radio station and the
buttons for selecting the previous or
next radio station. At the bottom:
display of the following buttons:
"Browse": list of the radio stations
available;
"AM/FM", "AM/DAB", "FM/DAB":
selection of the desired frequency band
(button reconfigurable according to
the band selected: AM,FM or DAB);
"Tune" : manual radio station tuning
(not available for DAB radios);
"Info": additional information on the
source being listened to;
"Audio": access to the "Audio
settings" screen.
Audio menu
To access the "Audio" menu, press the
button on the front panel, scroll
through the menu, then select and
press the "Audio" option on the display.
The following adjustments can be
carried out using the "Audio" menu:
"Equaliser" (for versions/markets,
where provided);
"Balance/Fade" (left/right and
front/rear audio balance adjustment);
"Volume/Speed" (excluding versions
with Hi-Fi system) speed-dependent
automatic volume adjustment;
"Loudness" (for versions/markets,
where provided);
"Auto-On Radio";
"Radio Off Delay".
To exit the "Audio" menu, press the
/Done button.
MEDIA MODE
Press the "Source" button to select the
desired audio source among those
available: CD, AUX, USB/iPod orBlu-
etooth®.Track selection (browse)
Use this function to scroll through and
select the tracks on the active device.
The selection options depend on the
device connected or the CD type
inserted.
For example, on an audio CD you can
select the track to be played, while on a
CD-ROM, a USB/iPod orBluetooth®
device you can also scroll through the
list of artists, genres and albums avail-
able depending on the information
present on the tracks.
NOTE A fewBluetooth® devices do
not offer the possibility of scrolling
tracks through all categories.
Within each list, the "ABC" button
allows the user to skip to the desired
letter in the list.
NOTE This button might be disabled for
someApple®devices.
NOTE The "Browse" button does not
allow any operation on the AUX device.
Press the "Browse" button to activate
this function on the source being
played.
Turn the BROWSE ENTER button/knob
to select the desired category and
then press the button/knob to confirm
the selection.
Press the "X" button to cancel the
function.
277