2017 FIAT 124 SPIDER parking brake
[x] Cancel search: parking brakePage 92 of 300

WARNING LIGHTS
AND MESSAGES
Warning Lights And
Messages
Note:
The warning light in the instrument
panel appears together with a
dedicated message and/or acoustic
signal when applicable. These
indications are indicative and
precautionary and as such must not be
considered as exhaustive and/or
alternative to the information contained
in the Owner’s Manual, which you are
advised to read carefully in all cases.
Always refer to the information in this
chapter in the event of a failure
indication.
Failure indications displayed are
divided into two categories: serious
and less serious failures. Serious
failures are indicated by a repeated
and prolonged warning "cycle". Less
serious failures are indicated by a
warning "cycle" with a shorter duration.
The display cycle of both categories
can be interrupted. The instrument
panel warning light will stay on until the
cause of the failure is eliminated. Vehicles With Fiat Connect 7.0
The warning contents can be verified
on the audio system.
Proceed as follows:
If the warning light is turned on,
selecticon on the home screen to
display the application screen.
Select “ Warning Guidance ”to
display the current warnings.
Select the applicable warning to view
the warning details.
For the following warning/indicator lights:
Master Warning Light
Brake System Warning Light
ABS Warning Light
Charging System Warning Light
Engine Oil Warning Light
Electric Throttle Warning Light
Cold Start Warning Light
Check Engine Warning Light
Coolant Temperature Warning Light
Automatic Transmission Warning
Light
Power Steering Malfunction Indicator
Light
Air Bag/Seat Belt Pretensioner
System Warning Light
Check Fuel Cap Warning Light
Low Fuel Warning Light
Seat Belt Warning Light
Door Ajar Warning Light
Low Washer Fluid Level Warning
Light
Tire Pressure Monitoring System
Warning Light
KEY Warning Light
LED Headlight KEY Warning Light
BSM (Blind Spot Monitoring) OFF
Indicator Light
Wrench Indicator Light
TCS/DSC Indicator Light
DSC OFF Indicator Light
Security Indicator Light
Indicator Light
Passenger Air Bag Deactivation
Warning Light
The light turns on when the ignition is
switched on for an operation check,
and turns off a few seconds later or
when the engine is started. If the light
does not turn on or remains turned on,
have the vehicle inspected at an
Authorized Dealership.
Note:
Only for “Brake System Warning Light”:
the light turns on continuously when the
parking brake is applied.
90
GETTING TO KNOW YOUR INSTRUMENT PANEL
Page 93 of 300
Red Warning Lights
Warning LightWhat It Means
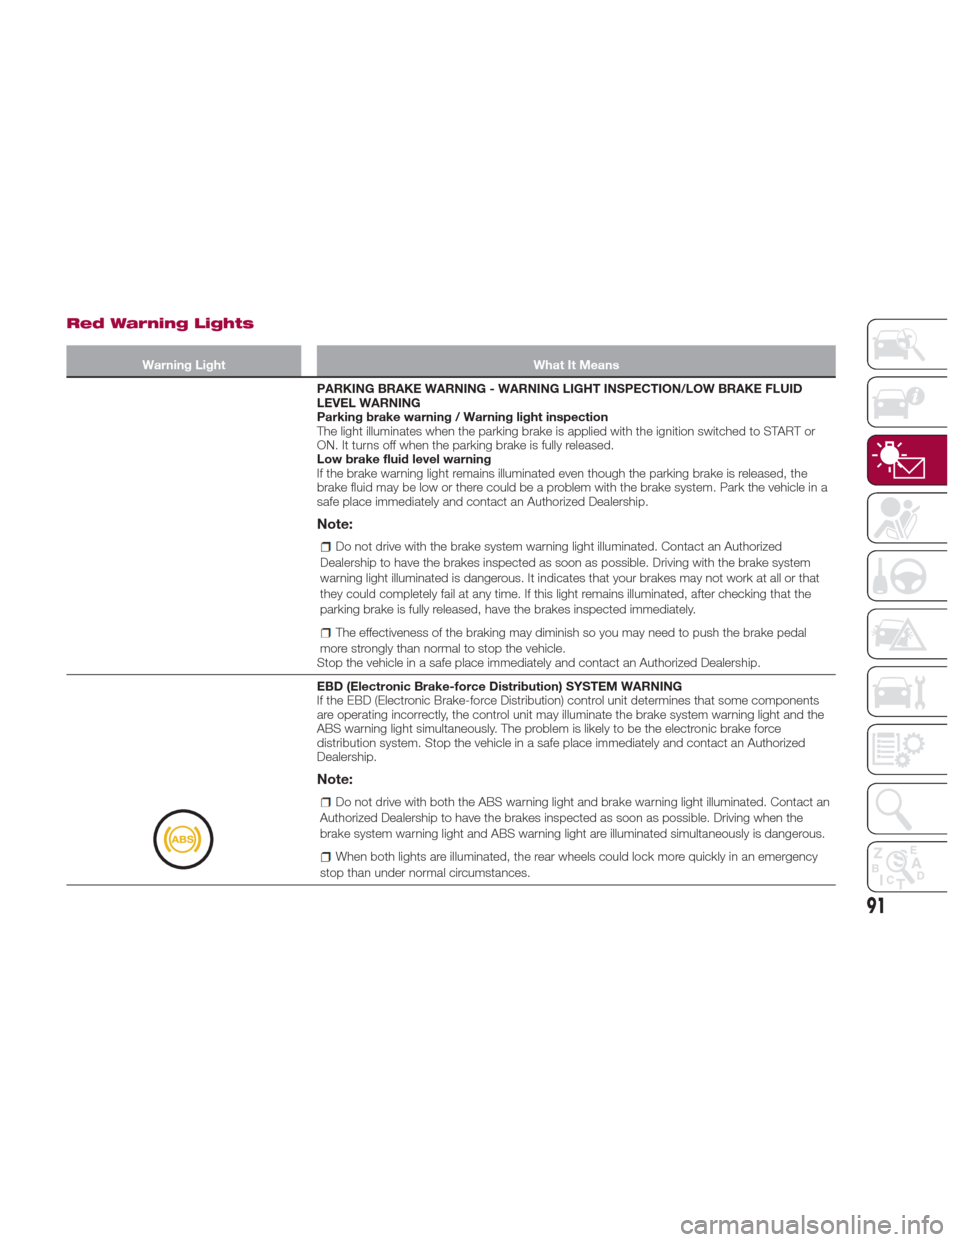
PARKING BRAKE WARNING - WARNING LIGHT INSPECTION/LOW BRAKE FLUID
LEVEL WARNING
Parking brake warning / Warning light inspection
The light illuminates when the parking brake is applied with the ignition switched to START or
ON. It turns off when the parking brake is fully released.
Low brake fluid level warning
If the brake warning light remains illuminated even though the parking brake is released, the
brake fluid may be low or there could be a problem with the brake system. Park the vehicle in a
safe place immediately and contact an Authorized Dealership.
Note:
Do not drive with the brake system warning light illuminated. Contact an Authorized
Dealership to have the brakes inspected as soon as possible. Driving with the brake system
warning light illuminated is dangerous. It indicates that your brakes may not work at all or that
they could completely fail at any time. If this light remains illuminated, after checking that the
parking brake is fully released, have the brakes inspected immediately.
The effectiveness of the braking may diminish so you may need to push the brake pedal
more strongly than normal to stop the vehicle.
Stop the vehicle in a safe place immediately and contact an Authorized Dealership.
EBD (Electronic Brake-force Distribution) SYSTEM WARNING
If the EBD (Electronic Brake-force Distribution) control unit determines that some components
are operating incorrectly, the control unit may illuminate the brake system warning light and the
ABS warning light simultaneously. The problem is likely to be the electronic brake force
distribution system. Stop the vehicle in a safe place immediately and contact an Authorized
Dealership.
Note:
Do not drive with both the ABS warning light and brake warning light illuminated. Contact an
Authorized Dealership to have the brakes inspected as soon as possible. Driving when the
brake system warning light and ABS warning light are illuminated simultaneously is dangerous.
When both lights are illuminated, the rear wheels could lock more quickly in an emergency
stop than under normal circumstances.
91
Page 122 of 300

A run-flat tire, snow tire, or tire chains
are used.
An emergency tire is used (thewarning light may flash and then
continue illuminating).
A tire is repaired using the
emergency flat tire repair kit.
The tire pressure is excessively
higher than the specified pressure, or
the tire pressure is suddenly lowered for
some reason such as a tire burst during
driving.
The vehicle speed is lower than
about 9 mph (15 km/h) (including when
the vehicle is stopped), or the drive
period is shorter than 5 minutes.
The vehicle is driven on an extremely
rough road or a slippery, icy road.
Hard steering and rapid
acceleration/deceleration are repeated
such as during aggressive driving on a
winding road.
Load on the vehicle is applied to a
tire such as by loading heavy luggage
to one side of the vehicle.
System initialization has not been
implemented with the specified tire
pressure. Tire Pressure Monitoring System
Initialization
In the following cases, system
initialization must be performed so that
the system operates normally:
A tire pressure is adjusted.
A tire rotation is performed. A tire or
wheel is replaced.
The battery is replaced or completely
discharged.
Thewarning light is illuminated.
Initialization Method
Proceed as follows:
1. Park the car in a safe place and
firmly apply the parking brake.
2. Be sure the tires are cool, then
adjust the tire pressure of all four (4)
tires to the specified pressure indicated
on the tire placard label located on the
driver's door frame (door open).
3. Place the ignition in the ON mode.
4. While the vehicle is parked, press
and hold the TPMS system set switch
and verify that the
warning light in
the instrument cluster flashes twice and
a beep sound is heard once. Note:
If the system initialization is
performed without adjusting the tire
pressure, the system cannot detect the
normal tire pressure and it may not
illuminate the
warning light even if a
tire pressure is low, or it may illuminate
the light even if the pressures are
normal.
Adjust the tire pressure on all four
tires and initialize the system when the
warning light is turned on. If the
warning light turns on for a reason
other than a flat tire, the tire pressure of
all four tires may have decreased
naturally.
The system initialization will not be
performed if the switch is pressed
while the vehicle is being driven.
05120101-12A-001TPMS Set Switch
120
SAFETY
Page 151 of 300
STARTING THE
ENGINE
Starting The Engine
Before starting the engine, adjust the
seat, the interior rear view mirrors, the
door mirrors and fasten the seat belt
correctly.
Warning!
When leaving the vehicle, always remove
the key fob from the vehicle and lock your
vehicle.
Never leave children alone in a vehicle,
or with access to an unlocked vehicle.
Allowing children to be in a vehicle
unattended is dangerous for a number of
reasons. A child or others could be
seriously or fatally injured. Children should
be warned not to touch the parking brake,
brake pedal or the transmission gear
selector.
Do not leave the key fob in or near the
vehicle, or in a location accessible to
children, and do not leave the ignition of a
vehicle equipped with Advanced Keyless
Entry in the ACC or ON/RUN mode. A child
could operate power windows, other
controls, or move the vehicle.
Do not leave children or animals inside
parked vehicles in hot weather. Interior heat
build-up may cause serious injury or death.
Never press the accelerator pedal for
starting the engine.
Models Equipped With A
Manual Transmission
Proceed as follows:
1. Engage the parking brake and place
the gear selector in NEUTRAL.
2. Place the start button in the ACC
mode.
3. Fully depress the clutch pedal
without touching the accelerator.
4. Place the start button in the ON
mode, push and release it as soon as
the engine starts. If the engine does not
start within 10 seconds, push the start
button to OFF mode and wait for
10-15 seconds before repeating the
starting procedure.
Models Equipped With
An Automatic
Transmission
Proceed as follows:
1. Engage the parking brake and place
the gear selector to P (PARK) or N
(NEUTRAL).
2. Fully depress the brake pedal
without touching the accelerator.
3. Place the start button in the ACC
mode. 4. Place the start button in the ON
mode, push and release it as soon as
the engine starts. If the engine does not
start within 10 seconds, push the start
button to OFF mode and wait for
10-15 seconds before repeating the
starting procedure.
Cold Weather Operation
Regarding Cold Start Disable
When the ambient temperature is
extremely low, the engine may not
crank even when the engine starting
procedure is performed. At this time,
the Cold Start Disable Indicator light in
the instrument cluster flashes. However,
this does not indicate a problem.
Perform the necessary procedures (see
“Warning lights And Messages”
paragraph in “Getting To Know Your
Instrument Panel” chapter).
Regarding Ice Breaker
When the ambient temperature is low,
the start of cranking may be delayed
after engine starting procedure is
performed. At this time, the Cold Start
Disable Indicator light in the instrument
cluster illumintes. However, this does
not indicate a problem.
Refer to your authorized dealer
regarding other related parts which are
to be input such as function name,
operating scenario (condition) of each
function, indicator operation, and user
operation/procedure information.
149
Page 153 of 300
Warning!
Riding the brakes can lead to brake
failure and possibly a collision. Driving with
your foot resting or riding on the brake
pedal can result in abnormally high brake
temperatures, excessive lining wear, and
possible brake damage. You would not
have your full braking capacity in an
emergency.
Driving a vehicle with the “Brake
Warning Light” on is dangerous. A
significant decrease in braking performance
or vehicle stability during braking may
occur. It will take you longer to stop the
vehicle or will make your vehicle harder to
control. You could have a collision. Have
the vehicle checked immediately.
Caution!
Wear shoes appropriate for driving in order
to avoid your shoe contacting the brake
pedal when depressing the accelerator
pedal.
Parking Brake
Note: Driving with the parking brake on
will cause excessive wear of the brake
parts.
Warning!
Never leave children alone in a vehicle,
or with access to an unlocked vehicle.
Allowing children to be in a vehicle
unattended is dangerous for a number of
reasons. A child or others could be
seriously or fatally injured. Children should
be warned not to touch the park brake,
brake pedal or the gear selector.
Do not leave the key fob in or near the
vehicle or in a location accessible to
children. A child could operate power
windows, other controls, or move the
vehicle.
Be sure the park brake is fully
disengaged before driving; failure to do so
can lead to brake failure and a collision.
Always fully apply the park brake when
leaving your vehicle, or it may roll and
cause damage or injury. Also be certain to
leave a manual transmission in REVERSE
(R) or FIRST (1st) gear. Failure to do so may
allow the vehicle to roll and cause damage
or injury.
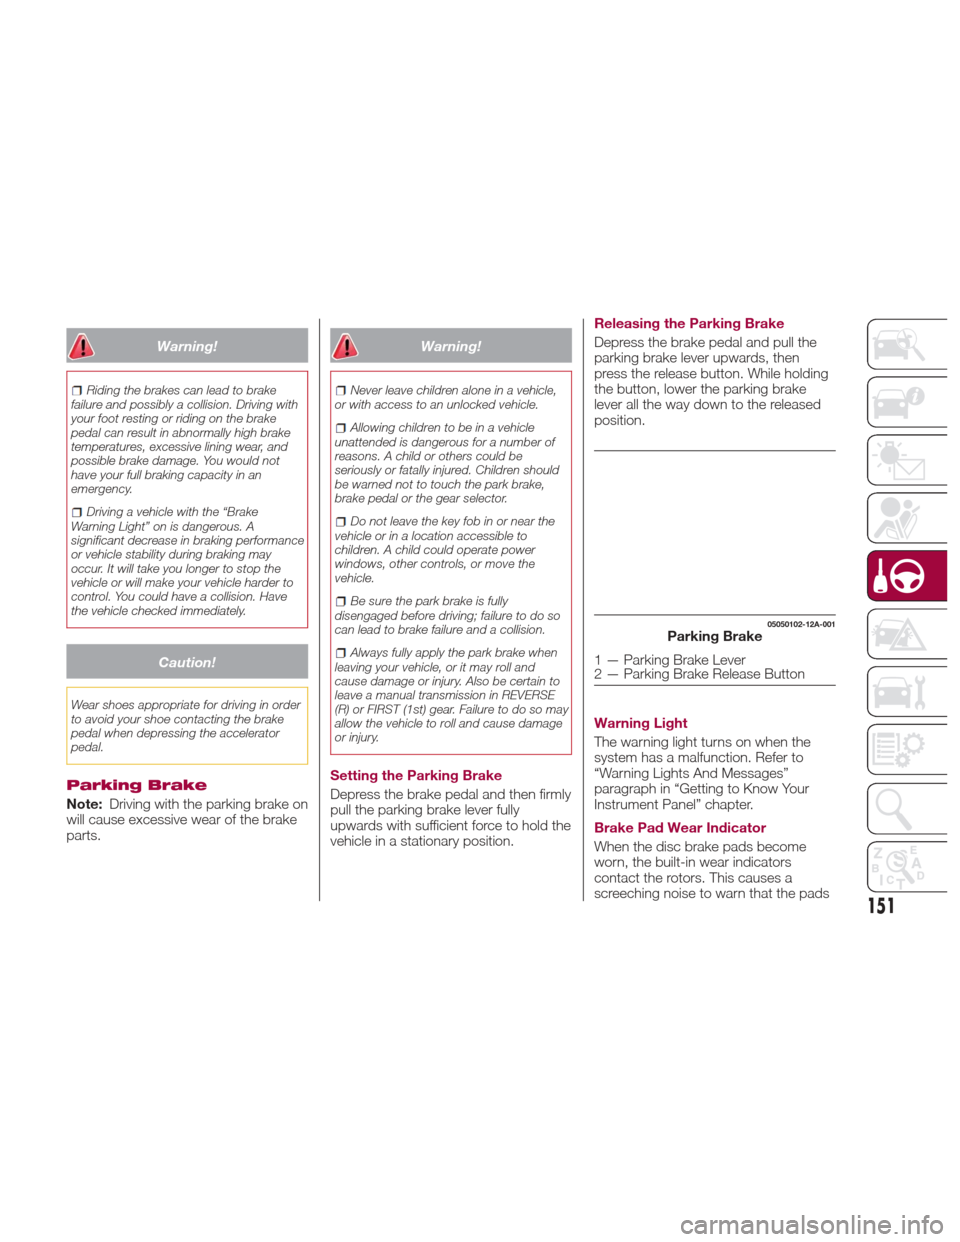
Setting the Parking Brake
Depress the brake pedal and then firmly
pull the parking brake lever fully
upwards with sufficient force to hold the
vehicle in a stationary position. Releasing the Parking Brake
Depress the brake pedal and pull the
parking brake lever upwards, then
press the release button. While holding
the button, lower the parking brake
lever all the way down to the released
position.
Warning Light
The warning light turns on when the
system has a malfunction. Refer to
“Warning Lights And Messages”
paragraph in “Getting to Know Your
Instrument Panel” chapter.
Brake Pad Wear Indicator
When the disc brake pads become
worn, the built-in wear indicators
contact the rotors. This causes a
screeching noise to warn that the pads
05050102-12A-001Parking Brake
1 — Parking Brake Lever
2 — Parking Brake Release Button
151
Page 154 of 300

should be replaced. When you hear this
noise contact your Authorized Dealer as
soon as possible.
Brake Assist
During emergency braking situations
when it is necessary to depress the
brake pedal with greater force, the
brake assist system provides braking
assistance, thus enhancing braking
performance. When the brake pedal is
depressed hard or depressed more
quickly, the brakes apply more firmly.
Note:
When the brake pedal is depressed
hard or depressed more quickly, the
pedal will feel softer but the brakes will
apply more firmly. This is a normal
effect of the brake assist operation and
does not indicate a malfunction.
When the brake pedal is depressed
hard or depressed more quickly, a
motor/pump operation noise may be
heard. This is a normal effect of the
brake assist and does not indicate a
malfunction.
The brake assist equipment does
not supersede the functionality of the
vehicle's main braking system.
MANUAL
TRANSMISSION
Manual Transmission
Warning!
You or others could be injured if you leave
the vehicle unattended without having the
park brake fully applied. The park brake
should always be applied when the driver
is not in the vehicle, especially on an
incline.
Caution!
Never drive with your foot resting on the
clutch pedal, or attempt to hold the vehicle
on a hill with the clutch pedal partially
engaged, as this will cause abnormal wear
on the clutch.
To engage the gears, press the clutch
pedal fully and put the gear selector
into the required position. The diagram
for gear engagement is shown on the
knob. Depress the clutch pedal all the way
down while shifting, then release it
slowly.
Your vehicle is equipped with a device
to prevent shifting to REVERSE (R) by
mistake. Push the gear selector
downward and shift to REVERSE (R).
A natural driving posture can be
achieved by lightly gripping the gear
selector from the side without having to
rest your elbow on the center console.
If shifting to REVERSE (R) is difficult,
shift back into neutral, release the
clutch pedal, and try again.
With Parking Sensor System
When the gear selector is shifted to the
REVERSE (R) position with the ignition
placed in the ON mode, the parking
sensor system is activated an audible
sound is heard.
05210101-12A-001Gear Selector
152
STARTING AND OPERATING
Page 157 of 300

Never leave children alone in a vehicle,
or with access to an unlocked vehicle.
Allowing children to be in a vehicle
unattended is dangerous for a number of
reasons. A child or others could be
seriously or fatally injured. Children should
be warned not to touch the park brake,
brake pedal or the transmission gear
selector.
Do not leave the key fob in or near the
vehicle (or in a location accessible to
children), and do not leave the ignition in
the ACC or ON/RUN mode. A child could
operate power windows, other controls, or
move the vehicle.
Caution!
Before moving the transmission gear
selector out of PARK, you must place the
ignition from the LOCK/OFF mode to the
ON/RUN mode, and also press the brake
pedal. Otherwise, damage to the gear
selector could result.
DO NOT race the engine when shifting
from PARK or NEUTRAL into another gear
range, as this can damage the drivetrain.
Note:
Shifting into PARK (P), NEUTRAL (N)
or REVERSE (R) while the vehicle is
moving can damage your transmission.
Shifting into a gear or reverse when
the engine is running faster than idle
can damage the transmission. REVERSE (R)
In position REVERSE (R), the vehicle
moves only backward. You must be at
a complete stop before shifting to or
from REVERSE (R), except under rare
circumstances.
With Parking Sensor system
: when
the gear selector is shifted to the
REVERSE (R) position with the ignition
placed in the ON mode, the parking
sensor system is activated and an
audible sound is heard.
NEUTRAL (N)
In NEUTRAL (N), the wheels and
transmission are not locked. The vehicle
will roll freely even on the slightest
incline unless the parking brake or
brakes are on.
Warning!
Do not coast in NEUTRAL and never turn
off the ignition to coast down a hill. These
are unsafe practices that limit your
response to changing traffic or road
conditions. You might lose control of the
vehicle and have a collision.
Note: Do not shift into NEUTRAL (N)
when driving the vehicle. Doing so can
cause transaxle damage. Apply the
parking brake or depress the brake
pedal before moving the gear selector
from NEUTRAL (N) to prevent the
vehicle from moving unexpectedly. DRIVE (D)
DRIVE (D) is the normal driving position.
From a stop, the transmission will
automatically shift through all six gears
in sequence.
MANUAL (M)
MANUAL (M) is the manual shift mode
position. Gears can be shifted up or
down by operating the gear selector.
(Refer to “Manual Shift Mode”
paragraph in this section).
Warning!
Do not downshift for additional engine
braking on a slippery surface. The drive
wheels could lose their grip and the vehicle
could skid, causing a collision or personal
injury.
Active Adaptive Shift
(AAS)
Active Adaptive Shift (AAS)
automatically controls the transmission
shift points to best suit the road
conditions and driver input. This
improves driving feel.
The transmission may switch to AAS
mode when driving up and down
slopes, cornering, driving at high
elevations, or depressing the
accelerator pedal quickly while the gear
selector is in the Drive (D) position.
155
Page 162 of 300
Setting A Desired Speed
Proceed as follows:
With Speed limiter: activate the
cruise control device by pushing the
MODE button. The cruise warning light
(amber) turns on.
Without Speed limiter : activate the
cruise control device by pushing the ON
button. The cruise warning light (amber)
turns on.
1. Accelerate to the desired speed,
which must be more than 25 mph
(40 km/h).
2. Set the cruise control by pushing the
SET/- button at the desired speed. The
cruise control is set at the moment the
SET/- button is pushed. Release the
accelerator pedal simultaneously. The
warning light (green) turns on.
Note: The cruise control speed setting
cannot be performed under the
following conditions:
Automatic transmission : the gear
selector is in the Park (P) or Neutral (N)
position.
Manual transmission : the gear
selector is in the Neutral (N) position or
when the clutch is disengaged (clutch
is depressed).
The parking brake is applied.
Vehicles with Speed limiter :the
MODE button for the adjustable speed
limiter is pushed.
Release the SET/- button at the desired
speed, otherwise the speed will
continue decreasing while the SET/-
button is pushed and held (except
when the accelerator pedal is
depressed).
Note:
Release the SET/- button at the
desired speed, otherwise the speed
will continue decreasing while the
SET/- button is pushed and held
(except when the accelerator pedal is
depressed).
On a steep grade, the vehicle may
momentarily slow down while
ascending, or speed up while
descending.
The cruise control will cancel if the
vehicle speed decreases below
16 mph (25 km/h) when climbing a
steep incline.
The cruise control may cancel at
about 9 mph (15 km/h) below the
preset speed such as when climbing a
long, steep incline.
The vehicle’s set speed is displayed in
the instrument cluster.
Increasing Speed
To increase speed using cruise
control button:
Push the RESUME/+ button and
hold it your vehicle will accelerate.
Release the button at the desired
speed.
Push the RESUME/+ button and
release it immediately to adjust the set
speed. Multiple activations will increase
the set speed according to the number
of times it is pushed.
Increasing speed with a single
RESUME/+ button operation:
Instrument Cluster Display for vehicle
speed is indicated in mph: 1 mph
Instrument Cluster Display for vehicle
speed is indicated in km/h: 1 km/h
To increase speed using
accelerator pedal:
Press the accelerator pedal to
accelerate to the desired speed.
Push the SET/- button and release it
immediately.
Note: Accelerate the vehicle to speed
up temporarily with the accelerator
pedal when the cruise control is on.
Greater speed will not interfere with or
change the set speed. Take your foot
off the accelerator to return to the set
speed.
160
STARTING AND OPERATING