2017 FIAT 124 SPIDER battery
[x] Cancel search: batteryPage 30 of 300
Double Locking System
— If Equipped
The double locking system is designed
to prevent someone who has broken
into your vehicle from opening the door
from the inside. If you have any
problems with the double locking
system, contact an Authorized
Dealership.
System Activation
Proceed as follows:
1. Close both the windows and the
convertible top.
2. Place the ignition in the OFF position
and take the key fob with you.
3. Close both doors and trunk lid.
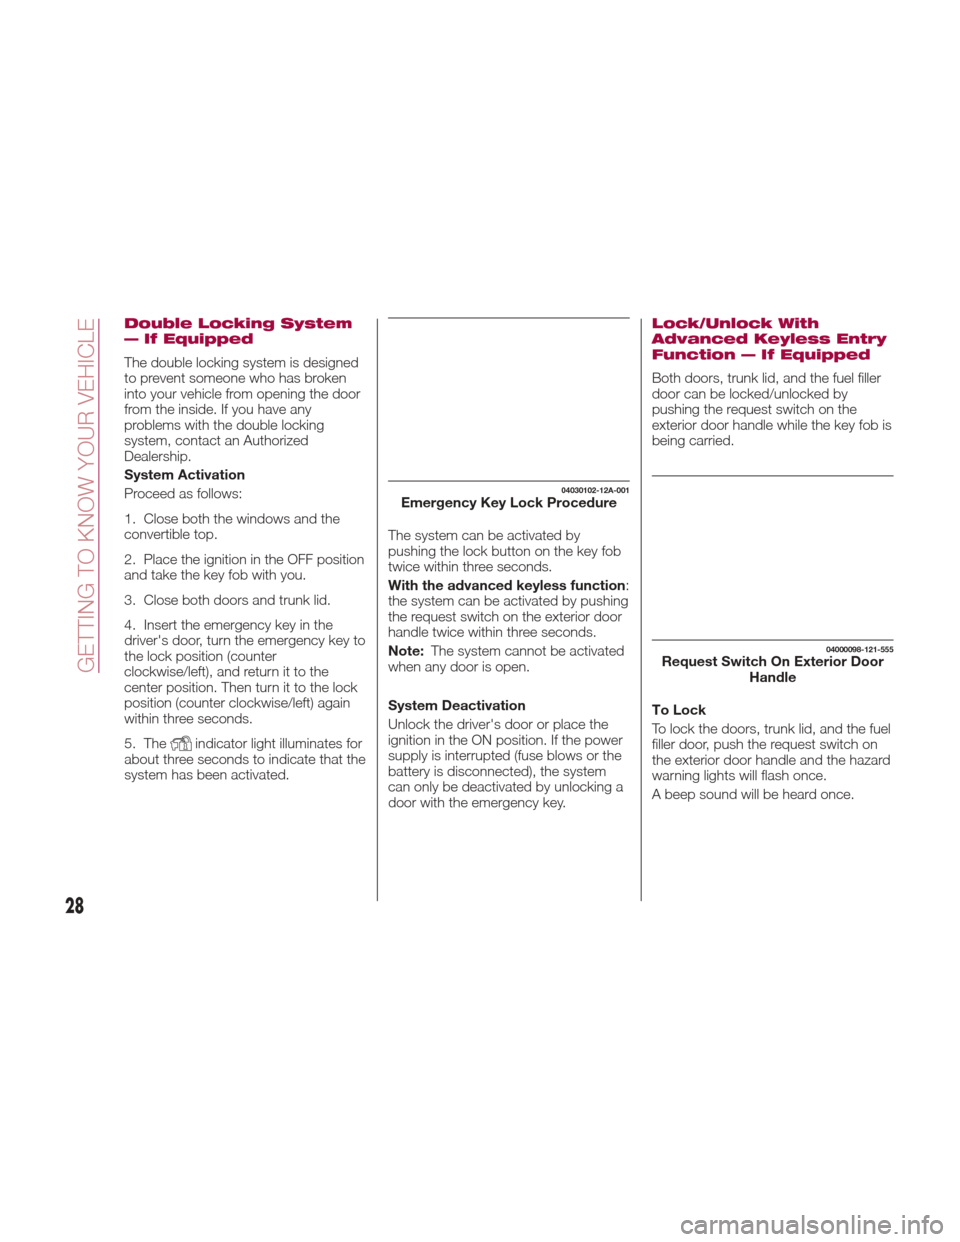
4. Insert the emergency key in the
driver's door, turn the emergency key to
the lock position (counter
clockwise/left), and return it to the
center position. Then turn it to the lock
position (counter clockwise/left) again
within three seconds.
5. The
indicator light illuminates for
about three seconds to indicate that the
system has been activated. The system can be activated by
pushing the lock button on the key fob
twice within three seconds.
With the advanced keyless function
:
the system can be activated by pushing
the request switch on the exterior door
handle twice within three seconds.
Note: The system cannot be activated
when any door is open.
System Deactivation
Unlock the driver's door or place the
ignition in the ON position. If the power
supply is interrupted (fuse blows or the
battery is disconnected), the system
can only be deactivated by unlocking a
door with the emergency key.
Lock/Unlock With
Advanced Keyless Entry
Function — If Equipped
Both doors, trunk lid, and the fuel filler
door can be locked/unlocked by
pushing the request switch on the
exterior door handle while the key fob is
being carried.
To Lock
To lock the doors, trunk lid, and the fuel
filler door, push the request switch on
the exterior door handle and the hazard
warning lights will flash once.
A beep sound will be heard once.
04030102-12A-001Emergency Key Lock Procedure
04000098-121-555Request Switch On Exterior Door Handle
28
GETTING TO KNOW YOUR VEHICLE
Page 34 of 300
Settings Changing
Settings can be changed using the
following procedure:
1. Safely park the vehicle. Both doors
must remain closed.
2. Place the ignition in the ON position.
3. Push and hold the lock side of the
driver's door-lock switch within
20 seconds of placing the ignition in the
ON position, and make sure a beep
sound is heard about eight seconds
afterwards.
4. Refer to the auto lock/unlock
function setting table, determine the
function number for the desired setting.
Push the unlock side of the driver's
door-lock switch the same number of
times as the selected function number
(example: if you select function 2, push
the unlock side of the switch only two
times).
5. Three seconds after the function
setting has been changed, a beep
sound will beep in the amount of the
selected function number (example:
Function number 3 = three beep
sounds). Automatic Transmission Vehicles
The doors cannot be locked or
unlocked while the setting
function is being performed.
The procedure can be cancelled by
pushing the lock side of the door-lock
switch.
Note:
The vehicle lock-out prevention
feature prevents you from locking
yourself out of the vehicle. Both doors,
trunk lid, and the fuel filler door will
automatically unlock if they are locked
using the power door locks with any
door open. If both the doors are closed
even though the trunk lid is open, both
the doors and the fuel filler door will
lock.
Door Unlock (Control) System
With Collision Detection — if
equipped : this system automatically
unlocks the doors, trunk lid, and the
fuel filler door in the event the vehicle is
involved in an accident to allow
passengers to get out of the vehicle
immediately and prevent being trapped
inside. While the ignition is placed in the ON position and in the event the
vehicle receives an impact strong
enough to inflate the air bags, both the
doors, the trunk lid, and fuel filler door
are automatically unlocked after about
six seconds have elapsed from the
time of the accident. The doors, trunk
lid, and the fuel filler door may not
unlock depending on how an impact is
applied, the force of the impact, and
other conditions of the accident. If
door-related systems or the battery is
malfunctioning, the doors, trunk lid,
and the fuel filler door will not unlock.
When opening a door, the power
windows open a little automatically.
When closing the door, the power
windows close automatically. This is a
function for improving the sealing of
the window, and it does not mean
there is a problem. If the vehicle battery
is disconnected for vehicle
maintenance or other reasons, the
power windows will not open or close
automatically. If the power windows do
not open or close, the automatic
open/close mechanism for the
windows must be reset.
32
GETTING TO KNOW YOUR VEHICLE
Page 35 of 300
SEATS
Manual Adjustment
Forward / Rearward
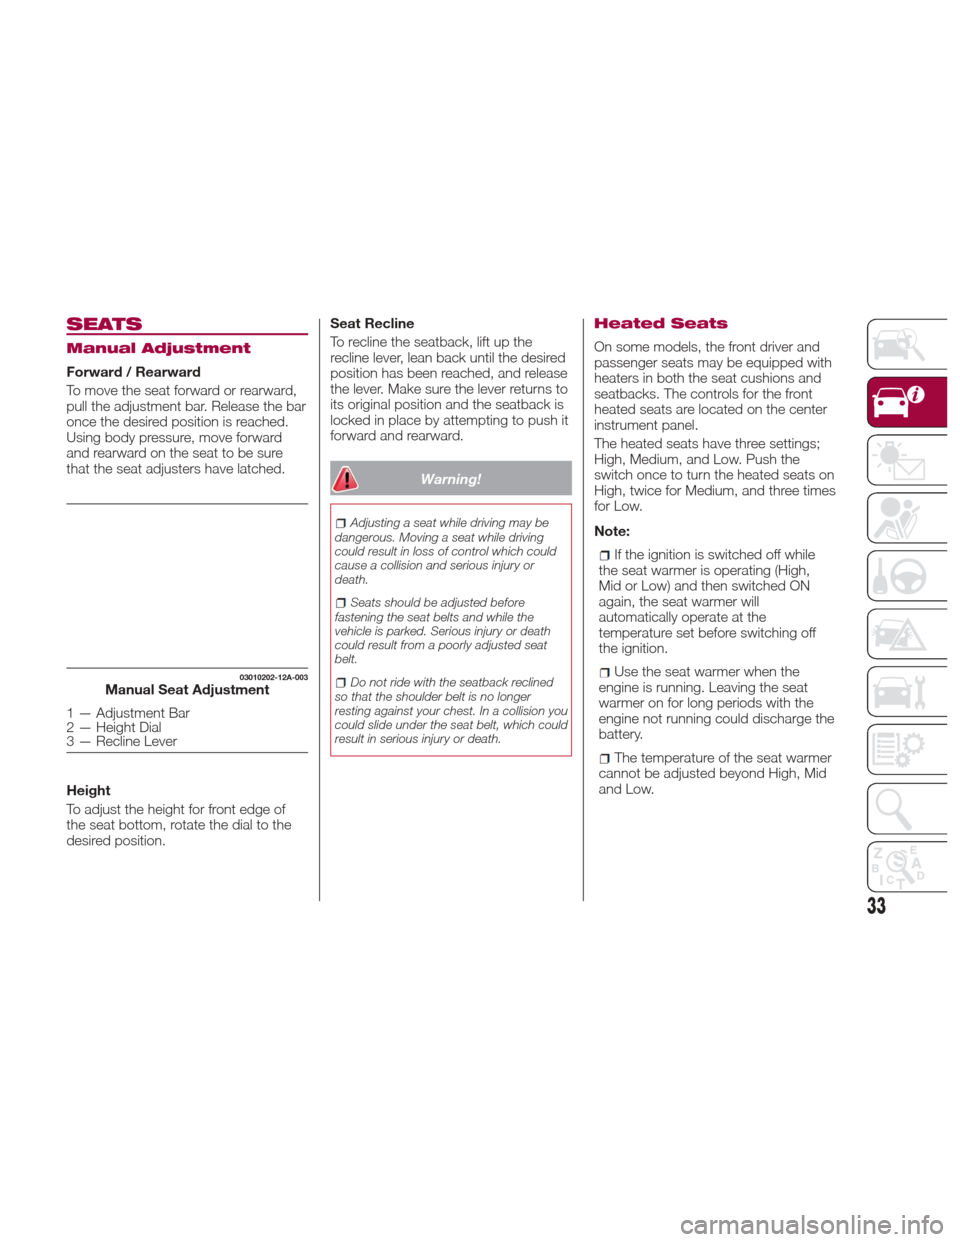
To move the seat forward or rearward,
pull the adjustment bar. Release the bar
once the desired position is reached.
Using body pressure, move forward
and rearward on the seat to be sure
that the seat adjusters have latched.
Height
To adjust the height for front edge of
the seat bottom, rotate the dial to the
desired position.Seat Recline
To recline the seatback, lift up the
recline lever, lean back until the desired
position has been reached, and release
the lever. Make sure the lever returns to
its original position and the seatback is
locked in place by attempting to push it
forward and rearward.
Warning!
Adjusting a seat while driving may be
dangerous. Moving a seat while driving
could result in loss of control which could
cause a collision and serious injury or
death.
Seats should be adjusted before
fastening the seat belts and while the
vehicle is parked. Serious injury or death
could result from a poorly adjusted seat
belt.
Do not ride with the seatback reclined
so that the shoulder belt is no longer
resting against your chest. In a collision you
could slide under the seat belt, which could
result in serious injury or death.
Heated Seats
On some models, the front driver and
passenger seats may be equipped with
heaters in both the seat cushions and
seatbacks. The controls for the front
heated seats are located on the center
instrument panel.
The heated seats have three settings;
High, Medium, and Low. Push the
switch once to turn the heated seats on
High, twice for Medium, and three times
for Low.
Note:
If the ignition is switched off while
the seat warmer is operating (High,
Mid or Low) and then switched ON
again, the seat warmer will
automatically operate at the
temperature set before switching off
the ignition.
Use the seat warmer when the
engine is running. Leaving the seat
warmer on for long periods with the
engine not running could discharge the
battery.
The temperature of the seat warmer
cannot be adjusted beyond High, Mid
and Low.
03010202-12A-003Manual Seat Adjustment
1 — Adjustment Bar
2 — Height Dial
3 — Recline Lever
33
Page 40 of 300
Power Mirrors
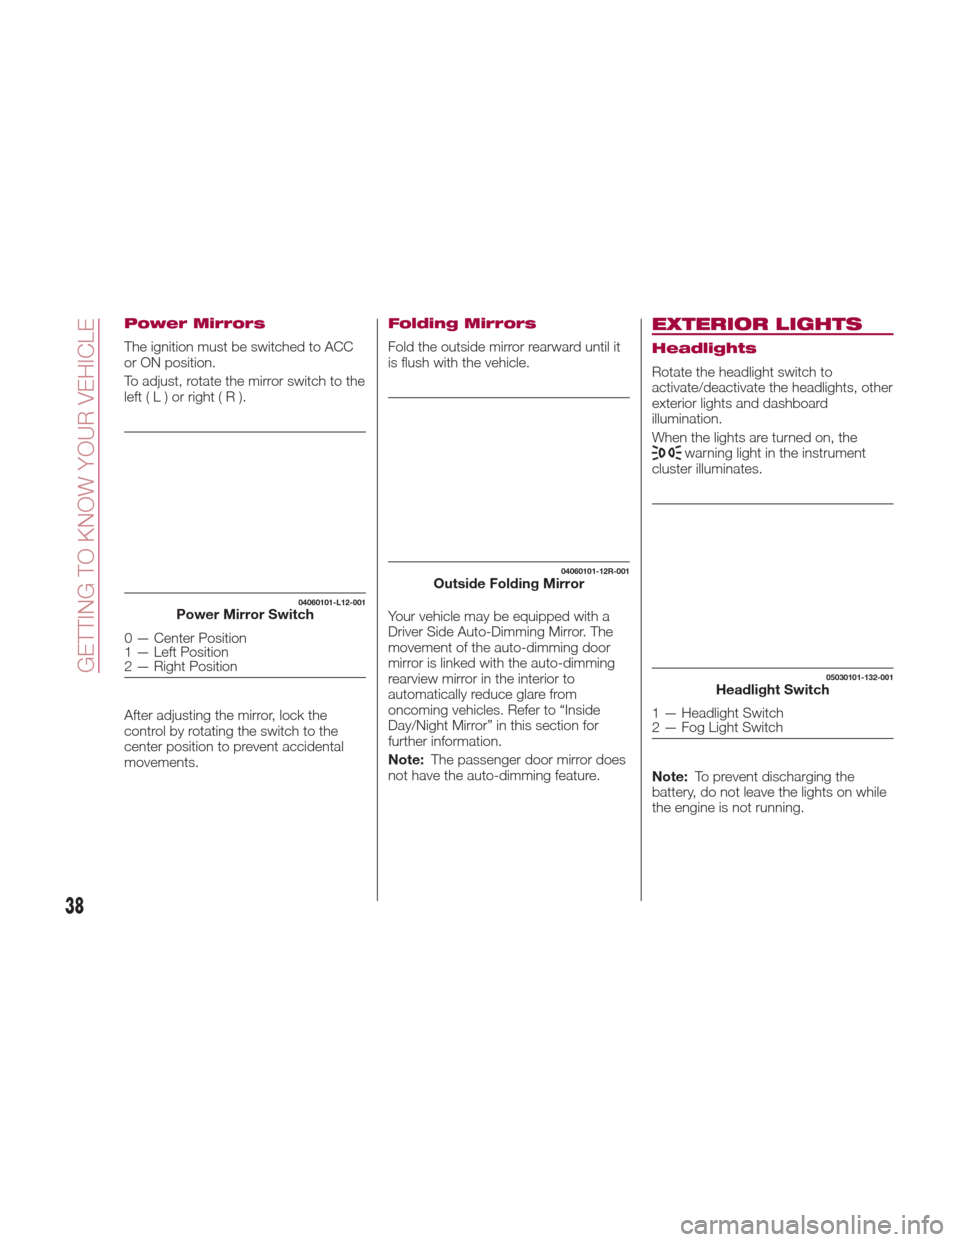
The ignition must be switched to ACC
or ON position.
To adjust, rotate the mirror switch to the
left(L)orright(R).
After adjusting the mirror, lock the
control by rotating the switch to the
center position to prevent accidental
movements.
Folding Mirrors
Fold the outside mirror rearward until it
is flush with the vehicle.
Your vehicle may be equipped with a
Driver Side Auto-Dimming Mirror. The
movement of the auto-dimming door
mirror is linked with the auto-dimming
rearview mirror in the interior to
automatically reduce glare from
oncoming vehicles. Refer to “Inside
Day/Night Mirror” in this section for
further information.
Note:The passenger door mirror does
not have the auto-dimming feature.
EXTERIOR LIGHTS
Headlights
Rotate the headlight switch to
activate/deactivate the headlights, other
exterior lights and dashboard
illumination.
When the lights are turned on, the
warning light in the instrument
cluster illuminates.
Note: To prevent discharging the
battery, do not leave the lights on while
the engine is not running.
04060101-L12-001Power Mirror Switch
0 — Center Position
1 — Left Position
2 — Right Position
04060101-12R-001Outside Folding Mirror
05030101-132-001Headlight Switch
1 — Headlight Switch
2 — Fog Light Switch
38
GETTING TO KNOW YOUR VEHICLE
Page 46 of 300

Because heavy ice and snow can jam
the wiper blades, the wiper motor is
protected from motor breakdown,
overheating and possible fire by a
circuit breaker. This mechanism will
automatically stop operation of the
blades, but only for about five minutes.
If this happens, turn off the wiper switch
and park off the road and remove the
snow and ice. After five minutes, turn
on the switch and the blades should
operate normally. If they do not resume
functioning, contact an Authorized
Dealer as soon as possible. Drive to the
side of the road and pull off the side of
the road to a safe location. Wait until
the weather clears before trying to drive
with the wipers inoperative.
Windshield Washer
Pull the lever toward you and hold it to
spray washer fluid.
With the wiper lever in theOFFor
intermittent position/ AUTOposition,
the wipers will operate continuously
until the lever is released.
Warning!
Sudden loss of visibility through the
windshield could lead to a collision. You
might not see other vehicles or other
obstacles. To avoid sudden icing of the
windshield during freezing weather, warm
the windshield with defroster before and
during windshield washer use.
If the fluid level is normal and the
washer does not work, contact an
Authorized Dealer.
With headlight washers
When the headlights are on, the
headlight washers operate
automatically once every fifth time the
windshield washer operates.
CLIMATE CONTROL
SYSTEM
Operating Tips
The air conditioning system will only
operate with the engine running.
To prevent the battery from being
discharged while the engine is off, do
not leave the fan control dial on for
extended periods of time.
To improve system efficiency, clear all
obstructions (leaves, snow and ice)
from the hood and the air inlet in the
grille.
Use the air conditioning system to
defog the windows and dehumidify the
air.
Recirculation mode should be used
when driving through tunnels, while in a
traffic jam, or when you would like to
quickly cool the interior by shutting off
the exterior vents.
Use the outside air position for
ventilation or windscreen defrosting.
If the vehicle has been parked in direct
sunlight during hot weather, open the
windows to let warm air escape, and
then run the air conditioning system.
To keep the internal parts lubricated
and the system running smoothly, run
the air conditioner about 10 minutes at
least once a month.
04110109-115-001Windshield Washer Nozzles
44
GETTING TO KNOW YOUR VEHICLE
Page 59 of 300

Opening/Closing Power Windows
Auto-Opening Power Windows
To fully open the window automatically
push the switch completely down. To
stop the window partway pull or push
the switch in the opposite direction and
then release it. The power window
cannot be fully closed while the door is
open.Power Window System Initialization
Procedure
If the battery was disconnected during
vehicle maintenance, or for other
reasons (such as a switch continues to
be operated after the window is
open/closed), the window will not fully
open automatically.
Resetting of the automatic function can
be performed using the master control
switches or each passenger door
switch.
Resetting of the automatic function can
be performed using the master control
switches or each passenger door
switch.
The power window auto function reset
procedure can be done on both door
switches. The power window auto
function will only resume on the power
window that has been reset:
1. Close the doors and the convertible
top.
2. Place the ignition in the ON position.
3. Make sure that the power window
lock switch located on the driver's door
is not depressed.4. Push the switch and fully open the
window.
5. Pull up the switch to fully close the
window and continue holding the
switch for about two seconds after the
window fully closed.
6. Repeat steps four and five for the
passenger power window while seated
in the passenger seat.
7. Make sure that the power windows
operate correctly using the door
switches.
After the system has been re-initialized,
passenger window can be fully opened
automatically using the master control
switches. If the automatic power
window operation does not operate
normally while the doors or convertible
top are opened/closed, reset it using
the above procedures.
Engine-Off Power Window
Operation
The power window can be operated for
about 40 seconds after the ignition has
been cycled from ON to the OFF
position with both doors closed. If any
door is opened, the power window will
stop operating.
04070103-L12-001Power Window Switch Function
1 — Closing — lightly pull the switch up
2 — Opening — lightly hold the switch
down
57
Page 61 of 300
after 1982. Do not use a garage door
opener without these safety features. Call
toll-free 1-800-355-3515 or, on the Internet
at HomeLink.com for safety information or
assistance.
Pre-Programming The
System
Note:It is recommended that a new
battery be placed in the hand-held
transmitter of the device being
programmed to HomeLink for quicker
training and accurate transmission of
the radio-frequency signal.
Proceed as follows:
1. Verify that there is a remote control
transmitter available for the device you
would like to program.
2. Disconnect the power to the device.
Programming The
System
Note: When programming a garage
door opener or a gate, disconnect the
power to these devices before
performing programming. Continuous
operation of the devices could damage
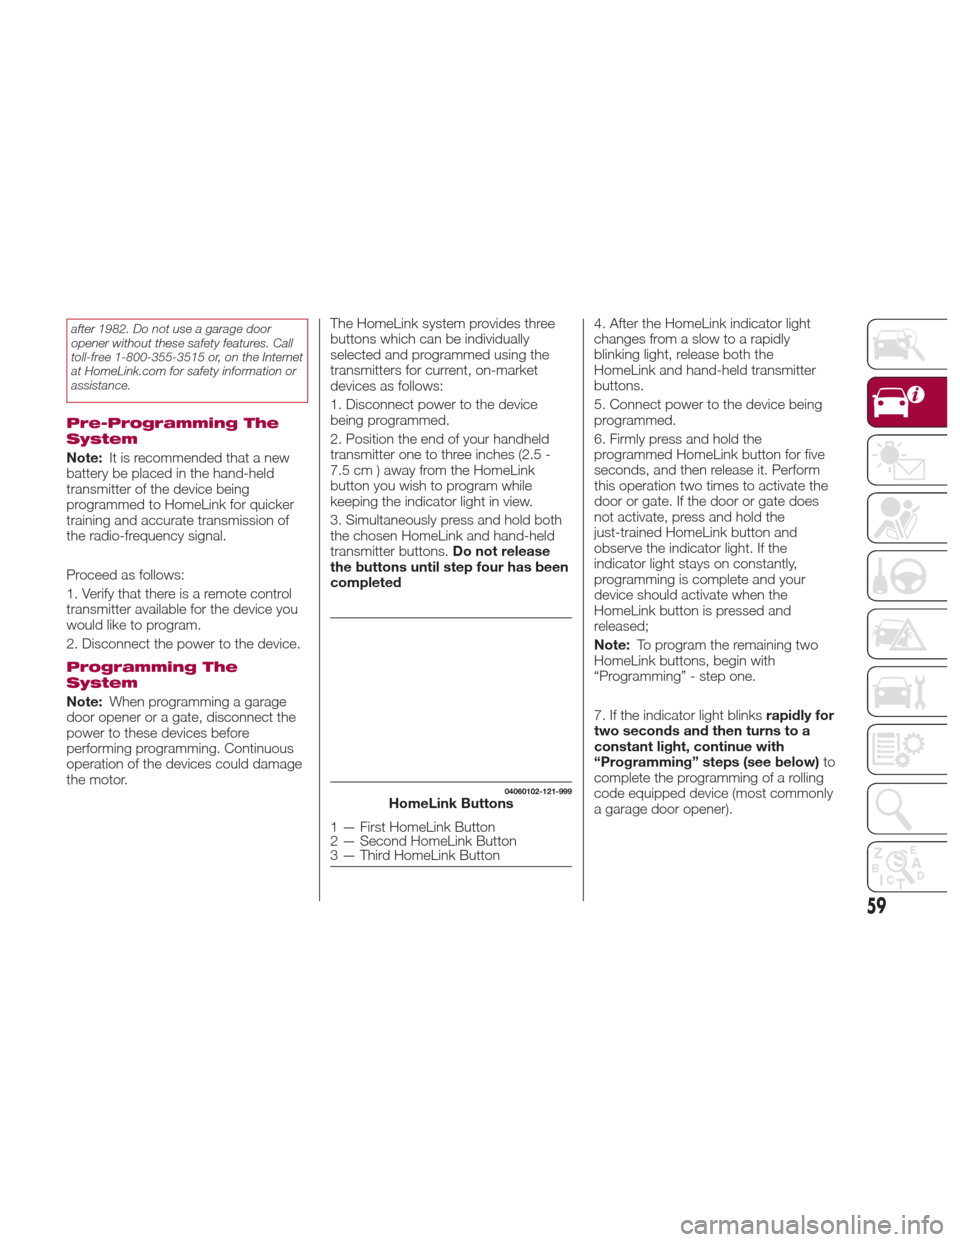
the motor. The HomeLink system provides three
buttons which can be individually
selected and programmed using the
transmitters for current, on-market
devices as follows:
1. Disconnect power to the device
being programmed.
2. Position the end of your handheld
transmitter one to three inches (2.5 -
7.5 cm ) away from the HomeLink
button you wish to program while
keeping the indicator light in view.
3. Simultaneously press and hold both
the chosen HomeLink and hand-held
transmitter buttons.
Do not release
the buttons until step four has been
completed 4. After the HomeLink indicator light
changes from a slow to a rapidly
blinking light, release both the
HomeLink and hand-held transmitter
buttons.
5. Connect power to the device being
programmed.
6. Firmly press and hold the
programmed HomeLink button for five
seconds, and then release it. Perform
this operation two times to activate the
door or gate. If the door or gate does
not activate, press and hold the
just-trained HomeLink button and
observe the indicator light. If the
indicator light stays on constantly,
programming is complete and your
device should activate when the
HomeLink button is pressed and
released;
Note:
To program the remaining two
HomeLink buttons, begin with
“Programming” - step one.
7. If the indicator light blinks rapidly for
two seconds and then turns to a
constant light, continue with
“Programming” steps (see below) to
complete the programming of a rolling
code equipped device (most commonly
a garage door opener).
04060102-121-999HomeLink Buttons
1 — First HomeLink Button
2 — Second HomeLink Button
3 — Third HomeLink Button
59
Page 65 of 300
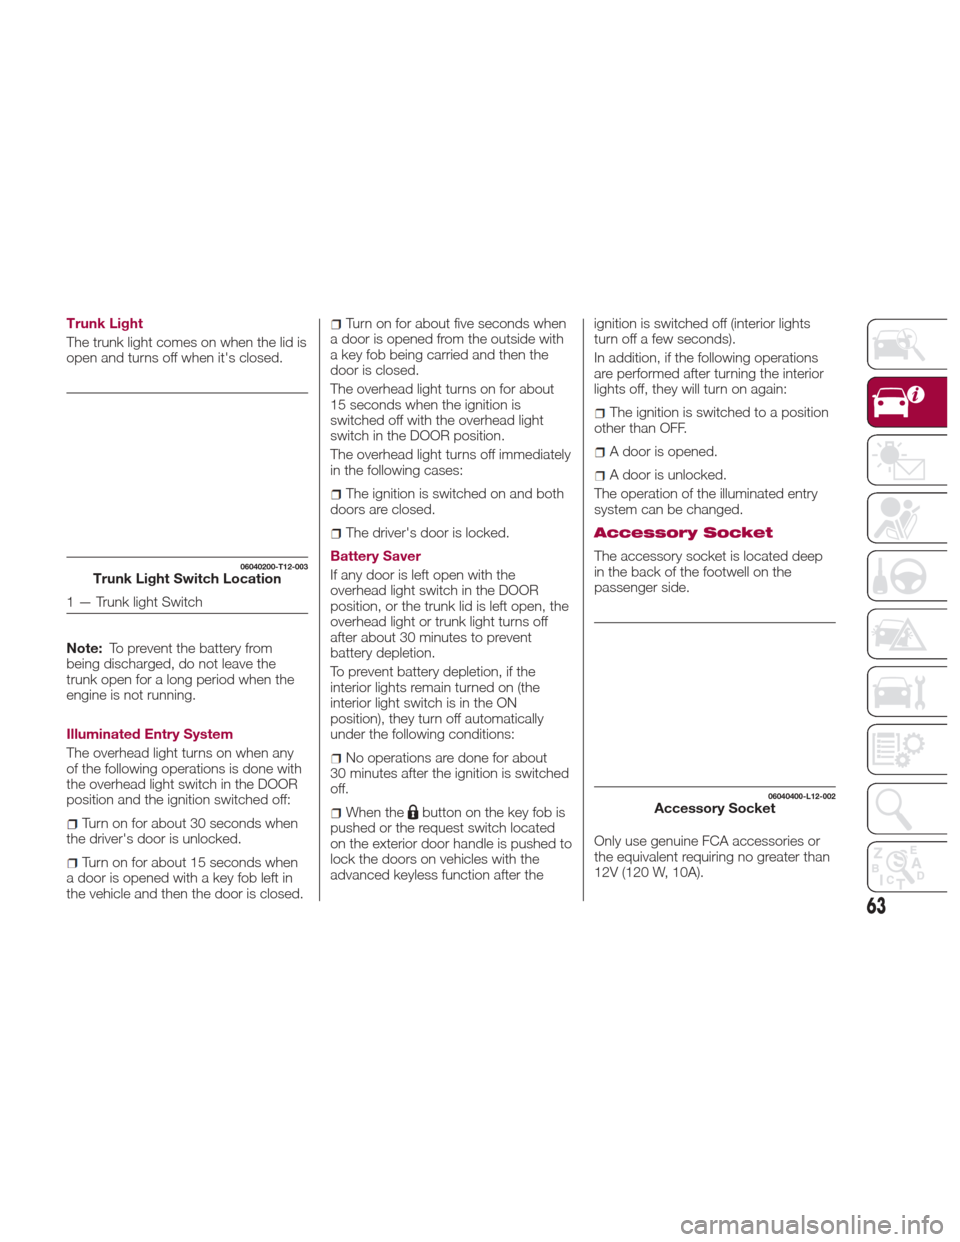
Trunk Light
The trunk light comes on when the lid is
open and turns off when it's closed.
Note:To prevent the battery from
being discharged, do not leave the
trunk open for a long period when the
engine is not running.
Illuminated Entry System
The overhead light turns on when any
of the following operations is done with
the overhead light switch in the DOOR
position and the ignition switched off:
Turn on for about 30 seconds when
the driver's door is unlocked.
Turn on for about 15 seconds when
a door is opened with a key fob left in
the vehicle and then the door is closed.
Turn on for about five seconds when
a door is opened from the outside with
a key fob being carried and then the
door is closed.
The overhead light turns on for about
15 seconds when the ignition is
switched off with the overhead light
switch in the DOOR position.
The overhead light turns off immediately
in the following cases:
The ignition is switched on and both
doors are closed.
The driver's door is locked.
Battery Saver
If any door is left open with the
overhead light switch in the DOOR
position, or the trunk lid is left open, the
overhead light or trunk light turns off
after about 30 minutes to prevent
battery depletion.
To prevent battery depletion, if the
interior lights remain turned on (the
interior light switch is in the ON
position), they turn off automatically
under the following conditions:
No operations are done for about
30 minutes after the ignition is switched
off.
When thebutton on the key fob is
pushed or the request switch located
on the exterior door handle is pushed to
lock the doors on vehicles with the
advanced keyless function after the ignition is switched off (interior lights
turn off a few seconds).
In addition, if the following operations
are performed after turning the interior
lights off, they will turn on again:
The ignition is switched to a position
other than OFF.
A door is opened.
A door is unlocked.
The operation of the illuminated entry
system can be changed.
Accessory Socket
The accessory socket is located deep
in the back of the footwell on the
passenger side.
Only use genuine FCA accessories or
the equivalent requiring no greater than
12V (120 W, 10A).06040200-T12-003Trunk Light Switch Location
1 — Trunk light Switch
06040400-L12-002Accessory Socket
63