2017 DODGE GRAND CARAVAN ABS
[x] Cancel search: ABSPage 443 of 530
CAUTION!
Do not attempt to raise the vehicle by jacking on
locations other than those indicated.
Rear jack locations are between a pair of down-facing tabs
on the sill flange of the vehicle side body.
Rear Jacking Locations
Rear Jack Engaged
6
WHAT TO DO IN EMERGENCIES 441
Page 447 of 530
13. Check the compact spare tire pressure as soon aspossible. Correct the tire pressure, as required.
Securing The Compact Spare Tire
1. Assemble the winch handle extensions to form aT-handle and fit the winch T-handle over the drive nut.
Rotate the nut to the left until the winch mechanism
stops turning freely. This will allow enough slack in the
cable to allow you to pull the wheel spacer out from
under the vehicle.
WARNING!
A loose compact spare tire/cover assembly, thrown
forward in a collision or hard stop could endanger the
occupants of the vehicle. Always stow the compact
spare tire with the cover assembly in the place pro-
vided.
CAUTION!
The winch mechanism is designed for use with the
winch T-handle only. Use of an air wrench or other
power tools is not recommended and can damage the
winch. 2. Assemble the winch handle extensions to form the spare
tire hook, and pull the wheel spacer from under the
vehicle.
3. Turn the compact spare tire so that the valve stem is down, and place the tire into the compact spare tire/
cover assembly. Slide the wheel spacer through the
center of the wheel and compact spare tire/cover assem-
bly, so that the two retainer tabs snap out and engage the
compact spare tire cover on the opposite side.
WARNING!
Verify that both retainer tabs of the wheel spacer have
been properly extended through the center of the
wheel and compact spare tire/cover assembly. Failure
to properly engage both retainer tabs could result in
loss of the compact spare tire and cover assembly,
which will cause vehicle damage and may cause loss of
vehicle control and serious personal injury.
CAUTION!
The compact spare tire/cover assembly must be used
when the compact spare tire is stored. Failure to use
(Continued)
6
WHAT TO DO IN EMERGENCIES 445
Page 472 of 530

The A/C air filter is located in the fresh air inlet behind the
glove compartment. Perform the following procedure to
replace the filter:
1. Open the glove compartment and remove all contents.
2. Push in on the sides of the glove compartment andlower the door.
3. Pivot the glove compartment downward.
4. Disengage the two retaining tabs that secure the filter cover to the HVAC housing, and remove the cover. 5. Remove the A/C air filter by pulling it straight out of
the housing.
6. Install the A/C air filter with the arrow on the filter pointing toward the floor. When installing the filter
cover, make sure the retaining tabs fully engage the
cover.
CAUTION!
The cabin air filter is identified with an arrow to
indicate airflow direction through the filter. Failure to
properly install the filter will result in the need to
replace it more often.
7. Rotate the glove compartment door back into position.
Body Lubrication
Locks and all body pivot points, including such items as
seat tracks, door hinge pivot points and rollers, liftgate,
tailgate, decklid, sliding doors and hood hinges, should be
lubricated periodically with a lithium based grease, such as
MOPAR Spray White Lube to assure quiet, easy operation
and to protect against rust and wear. Prior to the applica-
tion of any lubricant, the parts concerned should be wiped
clean to remove dust and grit; after lubricating excess oil
and grease should be removed. Particular attention should
A/C Air Filter Replacement
470 MAINTAINING YOUR VEHICLE
Page 479 of 530
WARNING!
Riding the brakes can lead to brake failure and possi-
bly a collision. Driving with your foot resting or riding
on the brake pedal can result in abnormally high brake
temperatures, excessive lining wear, and possible
brake damage. You would not have your full braking
capacity in an emergency.
Master Cylinder — Brake Fluid Level Check
The fluid level in the master cylinder should be checked
when performing underhood services, or immediately if
the “Brake System Warning Light” indicates system failure.
Clean the top of the master cylinder area before removing
the cap. Add fluid to bring the level up to the top of the
“FULL” mark on the side of the master cylinder reservoir.
Overfilling of fluid is not recommended because it may
cause leaking in the system.
Add enough fluid to bring the level up to the requirements
described on the brake fluid reservoir. With disc brakes,
fluid level can be expected to fall as the brake pads wear.
However, low fluid level may be caused by a leak and a
checkup may be needed.Use only manufacturer’s recommended brake fluid. Refer
to “Fluids, Lubricants, And Genuine Parts” in “Maintain-
ing Your Vehicle” for further information.
WARNING!
•
Use only manufacturer’s recommended brake fluid.
Refer to “Fluids, Lubricants, And Genuine Parts” in
“Maintaining Your Vehicle” for further information.
Using the wrong type of brake fluid can severely
damage your brake system and/or impair its perfor-
mance. The proper type of brake fluid for your
vehicle is also identified on the original factory
installed hydraulic master cylinder reservoir.
• To avoid contamination from foreign matter or mois-
ture, use only new brake fluid or fluid that has been
in a tightly closed container. Keep the master cylin-
der reservoir cap secured at all times. Brake fluid in
a open container absorbs moisture from the air
resulting in a lower boiling point. This may cause it
to boil unexpectedly during hard or prolonged brak-
ing, resulting in sudden brake failure. This could
result in a collision.
(Continued)
7
MAINTAINING YOUR VEHICLE 477
Page 486 of 530
WARNING!
A frayed or torn belt could rip apart in a collision and
leave you with no protection. Inspect the belt system
periodically, checking for cuts, frays, or loose parts.
Damaged parts must be replaced immediately. Do not
disassemble or modify the system. Seat belt assemblies
must be replaced after a collision if they have been
damaged (i.e., bent retractor, torn webbing, etc.).
Cleaning The Instrument Panel Cupholders
Removal
Pull the flexible liner from the cupholder drawer starting at
one edge to ease removal.
Cleaning
The liner is top shelf dishwasher safe, or you may follow
the cleaning procedure below.Soak the liner in a mixture of medium hot tap water and
one teaspoon of mild liquid dish soap. Let soak for
approximately 30 minutes. After 30 minutes, pull the liner
from the water and dip it back into the water about six
times. This will loosen any remaining debris. Rinse the
liner thoroughly under warm running water. Shake the
excess water from the liner and dry the outer surfaces with
a clean soft cloth.
Installation
Place the liner into the cupholder drawer and push the
liner into place so that the retention tabs seat into the
corresponding openings in the drawer.
484 MAINTAINING YOUR VEHICLE
Page 495 of 530

CAUTION!
Do not touch the new bulb with your fingers. Oil
contamination will severely shorten bulb life. If the
bulb comes in contact with an oily surface, clean the
bulb with rubbing alcohol.
5. Connect the wiring connector to bulb and slide red lock tab forward.
Front Park/Turn Signal Lamps
1. Raise the hood to access the rear of the headlamphousing.
2. Twist the turn signal socket and remove from the headlamp housing, then pull the bulb out.
3. Push the new bulb into the socket and reinstall the socket by twisting until locked into the headlamp hous-
ing.
Fog Lamps
NOTE: Access to the fog lamp bulb is from the rear of the
fascia. On the left rear side of the fascia, remove the push
pin and lower the hinged access door on the air dam. 1. From behind the bumper fascia, or the access panel on
the air dam, squeeze the two tabs on the side of the bulb
socket and pull straight out from the fog lamp.
CAUTION!
Do not touch the new bulb with your fingers. Oil
contamination will severely shorten bulb life. If the
bulb comes in contact with an oily surface, clean the
bulb with rubbing alcohol.
2. Disconnect the wire harness from the bulb.
3. Reconnect the wiring harness to the new bulb and reinstall by inserting the new bulb straight into the fog
lamp until it locks into place.
Rear Tail, Stop, Turn Signal, Side Marker And
Backup Lamps
1. Raise the liftgate.
2. Remove the tail lamp assembly by removing the twoscrews from the inboard side. Use a fiber stick or similar
tool to gently pry the light on the outboard side to
disengage the two ball studs.
7
MAINTAINING YOUR VEHICLE 493
Page 510 of 530

to a TDD or a conventional teletypewriter (TTY) in the
United States, can communicate with the manufacturer by
dialing 1-800-380-CHRY.
Canadian residents with hearing difficulties that require
assistance can use the special needs relay service offered by
Bell Canada. For TTY teletypewriter users, dial 711 and for
Voice callers, dial 1-800-855-0511 to connect with a Bell
Relay Service operator.
Service Contract
You may have purchased a service contract for a vehicle to
help protect you from the high cost of unexpected repairs
after the manufacturer’s New Vehicle Limited Warranty
expires. The manufacturer stands behind only the manu-
facturer’s service contracts. If you purchased a manufac-
turer’s service contract, you will receive Plan Provisions
and an Owner Identification Card in the mail within three
weeks of the vehicle delivery date. If you have any
questions about the service contract, call the manufactur-
er’s Service Contract National Customer Hotline at 1-800-
521-9922 (Canadian residents, call (800) 465-2001 English /
(800) 387-9983 French).
The manufacturer will not stand behind any service con-
tract that is not the manufacturer’s service contract. It is notresponsible for any service contract other than the manu-
facturer’s service contract. If you purchased a service
contract that is not a manufacturer’s service contract, and
you require service after the manufacturer’s New Vehicle
Limited Warranty expires, please refer to the contract
documents, and contact the person listed in those docu-
ments.
We appreciate that you have made a major investment
when you purchased the vehicle. An authorized dealer has
also made a major investment in facilities, tools, and
training to assure that you are absolutely delighted with
the ownership experience. You will be pleased with their
sincere efforts to resolve any warranty issues or related
concerns.
WARNING!
Engine exhaust (internal combustion engines only),
some of its constituents, and certain vehicle compo-
nents contain, or emit, chemicals known to the State of
California to cause cancer and birth defects, or other
reproductive harm. In addition, certain fluids con-
tained in vehicles and certain products of component
wear contain, or emit, chemicals known to the State of
(Continued)
508 IF YOU NEED CONSUMER ASSISTANCE
Page 514 of 530
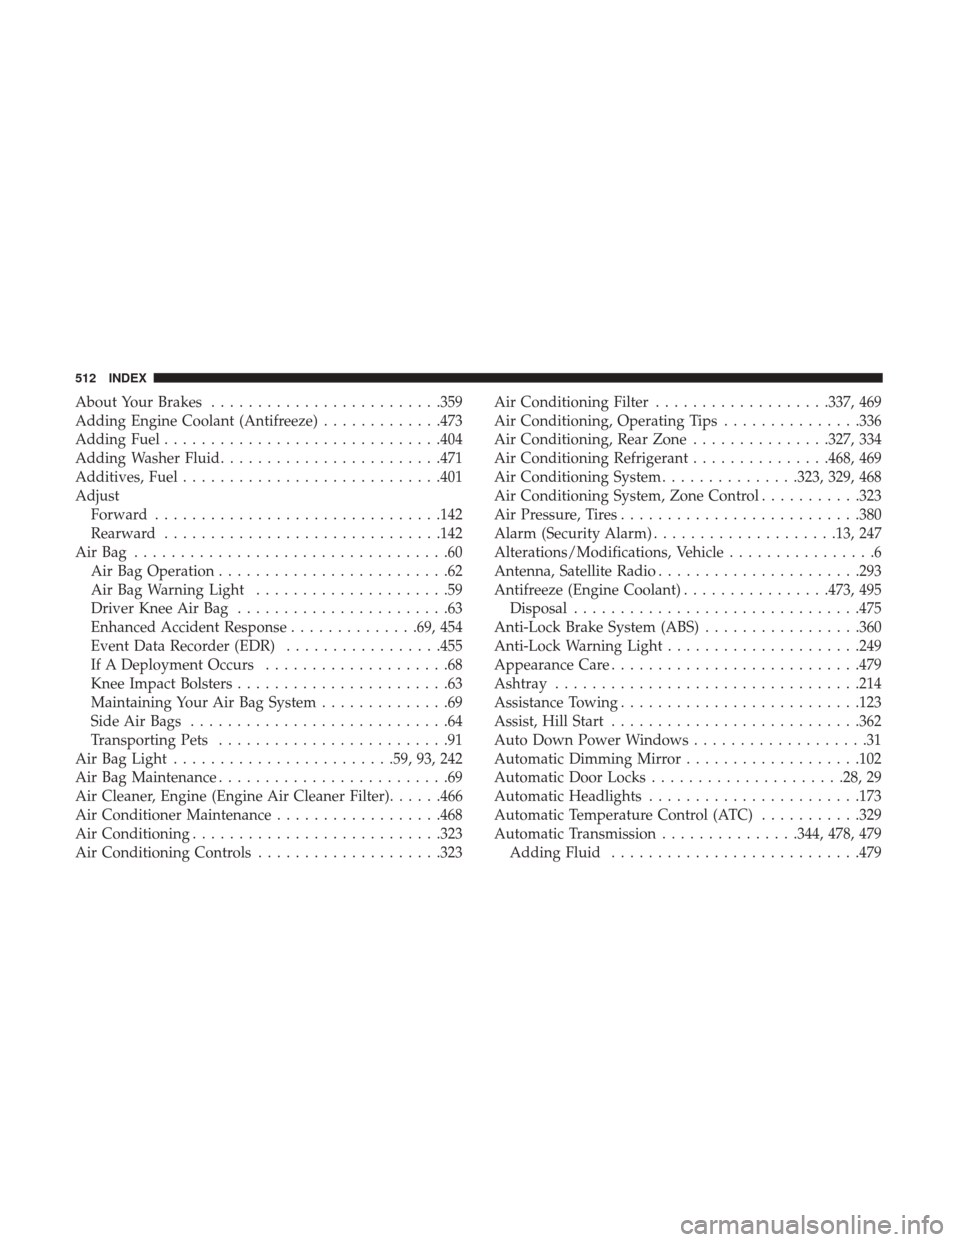
About Your Brakes........................ .359
Adding Engine Coolant (Antifreeze) .............473
Adding Fuel ............................. .404
Adding Washer Fluid ........................471
Additives, Fuel ............................401
Adjust Forward ...............................142
Rearward ............................. .142
AirBag ..................................60 Air Bag Operation .........................62
Air Bag Warning Light .....................59
Driver Knee Air Bag .......................63
Enhanced Accident Response ..............69, 454
Event Data Recorder (EDR) .................455
If A Deployment Occurs ....................68
Knee Impact Bolsters .......................63
Maintaining Your Air Bag System ..............69
Side Air Bags ............................64
Transporting Pets .........................91
Air Bag Light ........................59, 93, 242
Air Bag Maintenance .........................69
Air Cleaner, Engine (Engine Air Cleaner Filter) ......466
Air Conditioner Maintenance ..................468
Air Conditioning .......................... .323
Air Conditioning Controls ....................323 Air Conditioning Filter
...................337, 469
Air Conditioning, Operating Tips ...............336
Air Conditioning, Rear Zone ...............327, 334
Air Conditioning Refrigerant ...............468, 469
Air Conditioning System ...............323, 329, 468
Air Conditioning System, Zone Control ...........323
Air Pressure, Tires ..........................380
Alarm (Security Alarm) ....................13, 247
Alterations/Modifications, Vehicle ................6
Antenna, Satellite Radio ..................... .293
Antifreeze (Engine Coolant) ................473, 495
Disposal ...............................475
Anti-Lock Brake System (ABS) .................360
Anti-Lock Warning Light .....................249
Appearance Car
e .......................... .479
Ashtray .................................214
Assistance Towing ..........................123
Assist, Hill Start .......................... .362
Auto Down Power Windows ...................31
Automatic Dimming Mirror ...................102
Automatic Door Locks .....................28, 29
Automatic Headlights .......................173
Automatic Temperature Control (ATC) ...........329
Automatic Transmission ...............344, 478, 479
Adding Fluid .......................... .479
512 INDEX