Page 590 of 828
3. Remove the cap from the valvestem and then screw the fitting at
the end of the Sealant Hose onto the
valve stem.
4. Uncoil the Power Plug and insert the plug into the vehicle’s 12 Volt
power outlet.
NOTE: Do not remove foreign objects (e.g., screws or
nails) from the tire. Injecting Tire Service Kit Sealant Into The Deflated Tire:
1. Always start the engine beforeturning ON the Tire Service Kit.
2. Ensure the Mode Select Knob is to the Sealant Mode position.
588 IN CASE OF EMERGENCY
Page 591 of 828
3. After pushing the Power Button,the sealant (white fluid) will flow
from the Sealant Bottle through the
Sealant Hose and into the tire.
NOTE: Sealant may leak out through the puncture in the
tire.
If the sealant (white fluid) does not flow within0–10
seconds through the Sealant Hose:
1. Push the Power Button to turn Off the Tire Service Kit. Disconnect the Sealant Hose from the valve stem. Make sure the valve stem is free of debris. Reconnect
the Sealant Hose to the valve stem. Check that the
Mode Select Knob is in the Sealant Mode position and
not Air Mode. Push the Power Button to turn On the
Tire Service Kit.
2. Connect the Power Plug to a different 12 Volt power outlet in your vehicle or another vehicle, if available.
Make sure the engine is running before turning ON
the Tire Service Kit.
3. The Sealant Bottle may be empty due to previous use. Call for assistance.
7
IN CASE OF EMERGENCY 589
Page 593 of 828
If the tire inflates to the recommended pressure or is at
least 26 psi (1.8 Bar) pressure within 15 minutes:
NOTE:If the tire becomes over-inflated, push the Defla-
tion Button to reduce the tire pressure to the recom-
mended inflation pressure before continuing.
1. Push the Power Button to turn offthe Tire Service Kit. 2. Remove the speed limit label from
the Tire Service Kit and place
sticker on the steering wheel.
3. Immediately disconnect the Sealant Hose from the valve stem, reinstall the cap on the fitting at the end of
the hose, and place the Tire Service Kit in the vehicle
storage location. Proceed to “Drive Vehicle.”
7
IN CASE OF EMERGENCY 591
Page 594 of 828

Drive Vehicle:Immediately after injecting sealant
and inflating the tire, drive the vehicle
5 miles (8 km) or 10 minutes to ensure
distribution of the Tire Service Kit
Sealant within the tire. Do not exceed
50 mph (80 km/h).
WARNING!
Tire Service Kit is not a permanent flat tire repair.
Have the tire inspected and repaired or replaced after
using Tire Service Kit. Do not exceed 50 mph (80
km/h) until the tire is repaired or replaced. Failure to
follow this warning can result in injuries that are
serious or fatal to you, your passengers, and others
around you. Have the tire checked as soon as pos-
sible at an Authorized Dealer. After Driving:
Pull over to a safe location. Refer to “Whenever You Stop
To Use Tire Service Kit” in this section before continuing.
1. Uncoil the Sealant Hose and then remove the cap from
the fitting at the end of the hose.
2. Place the Tire Service Kit flat on the ground next to the deflated tire.
3. Remove the cap from the valvestem and then screw the fitting at
the end of the Sealant Hose onto the
valve stem.
592 IN CASE OF EMERGENCY
Page 596 of 828

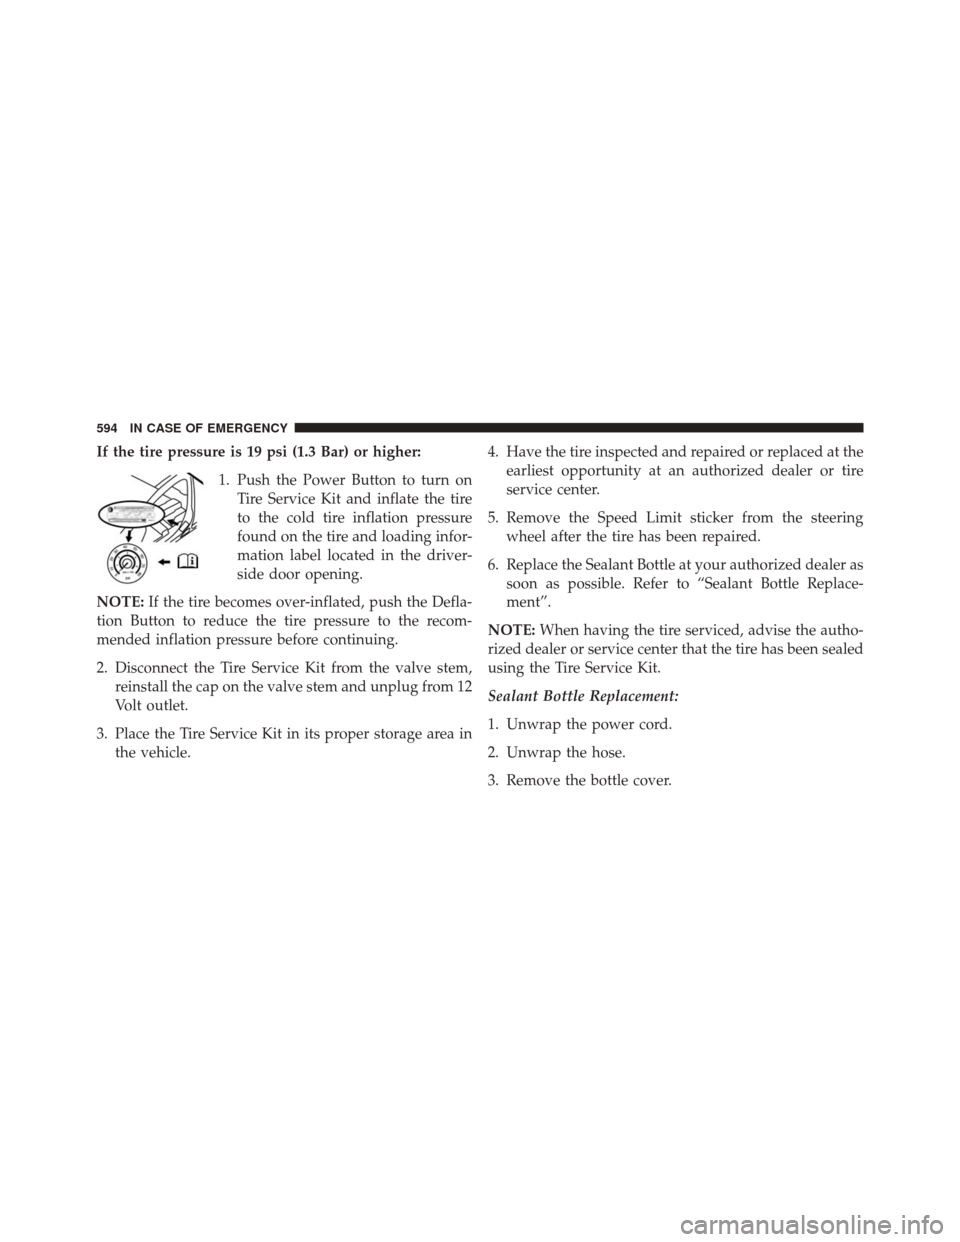
If the tire pressure is 19 psi (1.3 Bar) or higher:1. Push the Power Button to turn onTire Service Kit and inflate the tire
to the cold tire inflation pressure
found on the tire and loading infor-
mation label located in the driver-
side door opening.
NOTE: If the tire becomes over-inflated, push the Defla-
tion Button to reduce the tire pressure to the recom-
mended inflation pressure before continuing.
2. Disconnect the Tire Service Kit from the valve stem, reinstall the cap on the valve stem and unplug from 12
Volt outlet.
3. Place the Tire Service Kit in its proper storage area in the vehicle. 4. Have the tire inspected and repaired or replaced at the
earliest opportunity at an authorized dealer or tire
service center.
5. Remove the Speed Limit sticker from the steering wheel after the tire has been repaired.
6. Replace the Sealant Bottle at your authorized dealer as soon as possible. Refer to “Sealant Bottle Replace-
ment”.
NOTE: When having the tire serviced, advise the autho-
rized dealer or service center that the tire has been sealed
using the Tire Service Kit.
Sealant Bottle Replacement:
1. Unwrap the power cord.
2. Unwrap the hose.
3. Remove the bottle cover.
594 IN CASE OF EMERGENCY
Page 597 of 828

4. Rotate the bottle up beyond vertical to release.
5. Pull the bottle away from the Compressor.
NOTE:
•For sealant bottle installation follow these steps re-
verse order.
• Replacement sealant bottles are available at authorized
service centers.
JUMP-STARTING
If your vehicle has a discharged battery it can be jump-
started using a set of jumper cables and a battery in
another vehicle or by using a portable battery booster
pack. Jump-starting can be dangerous if done improperly
so please follow the procedures in this section carefully. NOTE:
When using a portable battery booster pack
follow the manufacturer ’s operating instructions and
precautions.
CAUTION!
Do not use a portable battery booster pack or any
other booster source with a system voltage greater
than 12 Volts or damage to the battery, starter motor,
alternator or electrical system may occur.
WARNING!
Do not attempt jump-starting if the battery is frozen.
It could rupture or explode and cause personal injury.
7
IN CASE OF EMERGENCY 595
Page 602 of 828

For more information on the Cap-Less Fuel System refer
to “Refuelling The Vehicle” in “Starting And Operating ”
in this manual.
IF YOUR ENGINE OVERHEATS
In any of the following situations, you can reduce the
potential for overheating by taking the appropriate ac-
tion.
•On the highways — slow down.
• In city traffic — while stopped, place the transmission
in NEUTRAL, but do not increase engine idle speed.
NOTE: There are steps that you can take to slow down
an impending overheat condition:
• If your air conditioner (A/C) is on, turn it off. The A/C
system adds heat to the engine cooling system and
turning the A/C off can help remove this heat. •
You can also turn the temperature control to maximum
heat, the mode control to floor and the blower control
to high. This allows the heater core to act as a
supplement to the radiator and aids in removing heat
from the engine cooling system.
CAUTION!
Driving with a hot cooling system could damage
your vehicle. If temperature gauge reads “H”, pull
over and stop the vehicle. Idle the vehicle with the air
conditioner turned off until the pointer drops back
into the normal range. If the pointer remains on the
“H”, turn the engine off immediately, and call for
service.
600 IN CASE OF EMERGENCY
Page 607 of 828

TOWING A DISABLED VEHICLE
This section describes procedures for towing a disabled
vehicle using a commercial towing service.
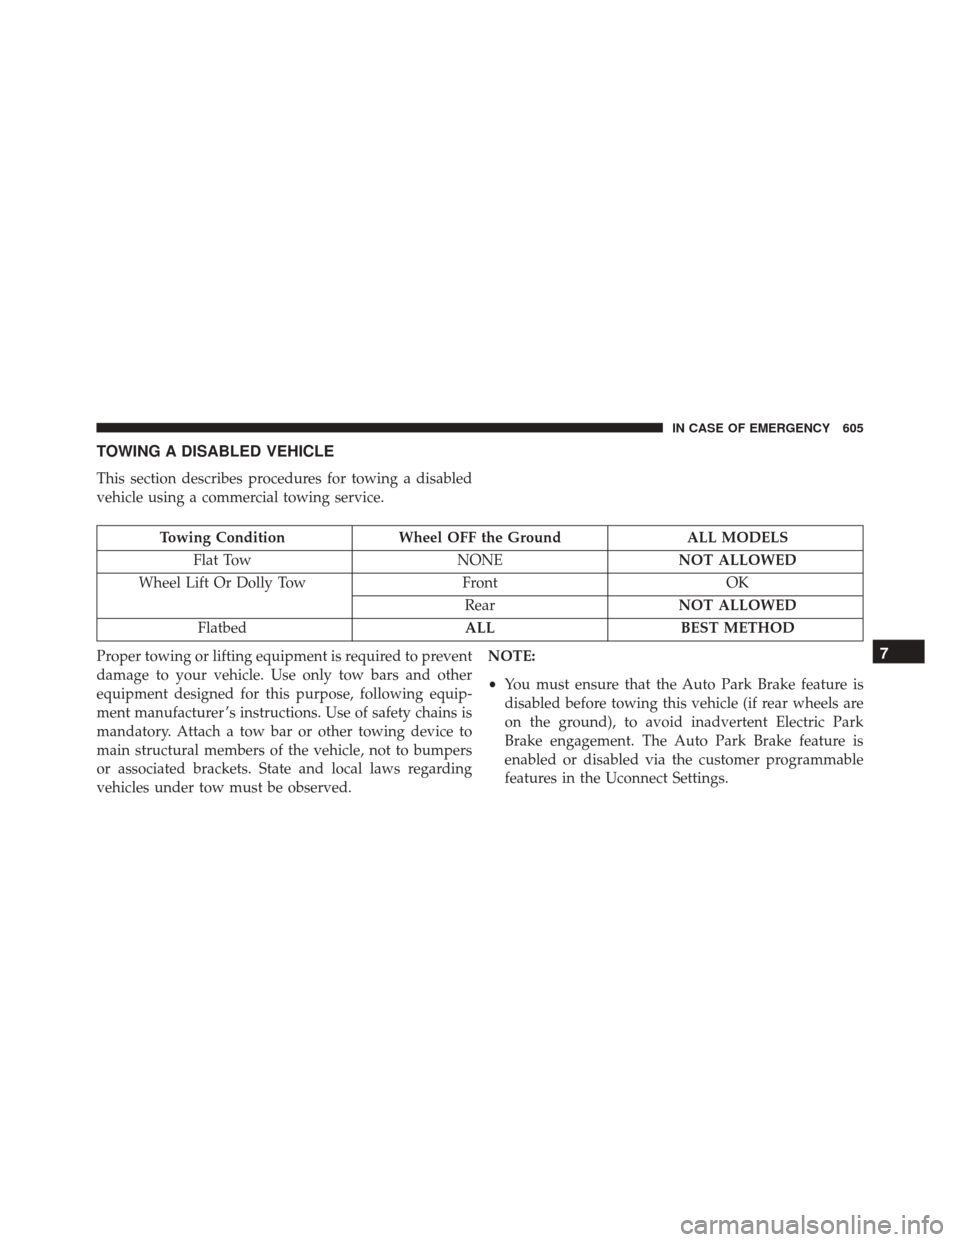
Towing ConditionWheel OFF the Ground ALL MODELS
Flat Tow NONENOT ALLOWED
Wheel Lift Or Dolly Tow FrontOK
Rear NOT ALLOWED
Flatbed ALLBEST METHOD
Proper towing or lifting equipment is required to prevent
damage to your vehicle. Use only tow bars and other
equipment designed for this purpose, following equip-
ment manufacturer ’s instructions. Use of safety chains is
mandatory. Attach a tow bar or other towing device to
main structural members of the vehicle, not to bumpers
or associated brackets. State and local laws regarding
vehicles under tow must be observed. NOTE:
•
You must ensure that the Auto Park Brake feature is
disabled before towing this vehicle (if rear wheels are
on the ground), to avoid inadvertent Electric Park
Brake engagement. The Auto Park Brake feature is
enabled or disabled via the customer programmable
features in the Uconnect Settings.
7
IN CASE OF EMERGENCY 605