2017 CHEVROLET SUBURBAN turn signal
[x] Cancel search: turn signalPage 299 of 465
Chevrolet Tahoe/Suburban Owner Manual (GMNA-Localizing-U.S./Canada/
Mexico-9955986) - 2017 - crc - 7/5/16
298 Driving and Operating
How the System Works
The LKA camera sensor is on the
windshield ahead of the rearview
mirror.
To turn LKA on and off, press
A
to the left of the steering wheel.
When on,
Ais green if LKA is
available to assist and provide LDW
alerts. It may assist by gently
turning the steering wheel and
display
Aas amber if the vehicle
approaches a detected lane marking
without using a turn signal in that
direction. It may also provide an
LDW alert by flashing
Aamber
as the lane marking is crossed.
Additionally, there will be three
beeps, or the driver seat will pulse
three times, on the right or left,
depending on the lane departure
direction.
The LKA system does not
continuously steer the vehicle.
If LKA does not detect active driver
steering, an alert and chime may be
provided. Steer the vehicle to
dismiss.
When the System Does Not
Seem to Work Properly
The system performance may be
affected by:
. Close vehicles ahead.
. Sudden lighting changes, such
as when driving through tunnels.
. Banked roads.
. Roads with poor lane markings,
such as two-lane roads.
If the LKA system is not functioning
properly when lane markings are
clearly visible, cleaning the
windshield may help.
LKA assistance and/or LDW alerts
may occur due to tar marks,
shadows, cracks in the road,
temporary or construction lane
markings, or other road
imperfections. This is normal system
operation; the vehicle does not need
service. Turn LKA off if these
conditions continue.
Fuel
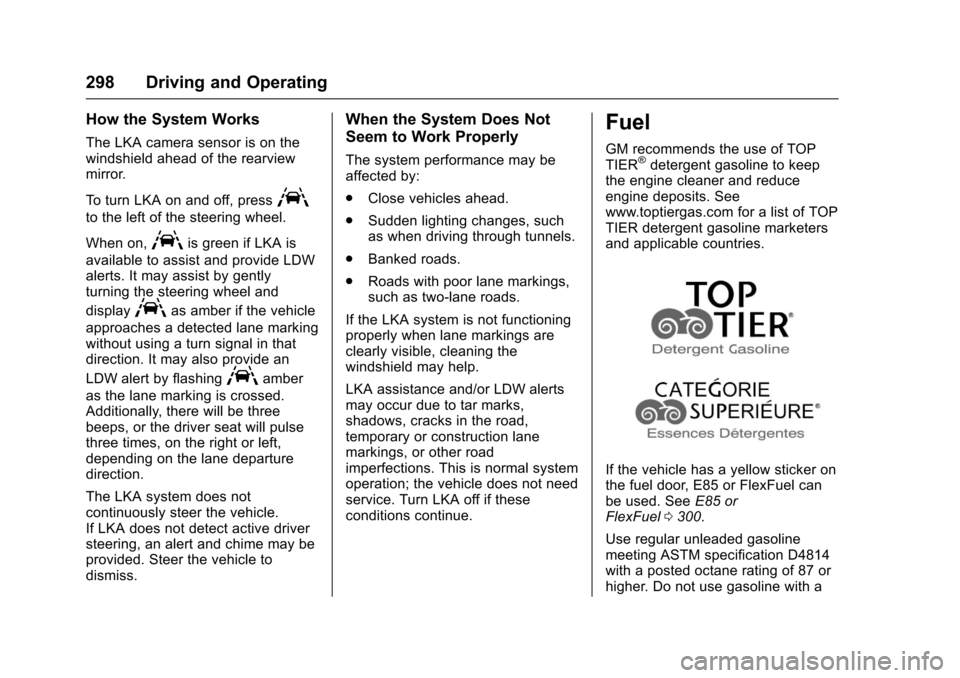
GM recommends the use of TOP
TIER®detergent gasoline to keep
the engine cleaner and reduce
engine deposits. See
www.toptiergas.com for a list of TOP
TIER detergent gasoline marketers
and applicable countries.
If the vehicle has a yellow sticker on
the fuel door, E85 or FlexFuel can
be used. See E85 or
FlexFuel 0300.
Use regular unleaded gasoline
meeting ASTM specification D4814
with a posted octane rating of 87 or
higher. Do not use gasoline with a
Page 305 of 465
Chevrolet Tahoe/Suburban Owner Manual (GMNA-Localizing-U.S./Canada/
Mexico-9955986) - 2017 - crc - 7/5/16
304 Driving and Operating
Warning (Continued)
For more information about
carbon monoxide, seeEngine
Exhaust 0261.
Towing a trailer requires a certain
amount of experience. The
combination you are driving is
longer and not as responsive as the
vehicle itself. Get acquainted with
the handling and braking of the rig
before setting out for the open road.
The structure, tires, and brakes of
the trailer must be rated to carry the
load. Inadequate trailer equipment
can cause the combination to
operate in an unexpected or unsafe
manner.
Before starting, check all trailer hitch
parts and attachments, safety
chains, electrical connectors, lamps,
tires, and mirrors. Get familiar with
the handling and braking of the rig.
If the trailer has electric brakes, start
the combination moving and then
apply the trailer brake controller by
hand to be sure the brakes work. During the trip, check occasionally
to be sure that the load is secure
and the lamps and any trailer
brakes still work.
Following Distance
Stay at least twice as far behind the
vehicle ahead as you would when
driving the vehicle without a trailer.
This can help to avoid heavy
braking and sudden turns.
Passing
More passing distance is needed
when towing a trailer. The
combination will not accelerate as
quickly and is longer so it is
necessary to go much farther
beyond the passed vehicle before
returning to the lane.
Backing Up
Hold the bottom of the steering
wheel with one hand. To move the
trailer to the left, move that hand to
the left. To move the trailer to the
right, move your hand to the right.
Always back up slowly and,
if possible, have someone
guide you.
Making Turns
Caution
Making very sharp turns while
trailering could cause the trailer to
come in contact with the vehicle.
The vehicle could be damaged.
Avoid making very sharp turns
while trailering.
When turning with a trailer, make
wider turns than normal. Do this so
the trailer will not strike soft
shoulders, curbs, road signs, trees,
or other objects. Avoid jerky or
sudden maneuvers. Signal well in
advance.
If the trailer turn signal bulbs burn
out, the arrows on the instrument
cluster will still flash for turns. It is
important to check occasionally to
be sure the trailer bulbs are still
working.
Driving on Grades
Reduce speed and shift to a lower
gear before starting down a long or
steep downgrade. If the
Page 313 of 465
Chevrolet Tahoe/Suburban Owner Manual (GMNA-Localizing-U.S./Canada/
Mexico-9955986) - 2017 - crc - 7/5/16
312 Driving and Operating
Be sure to read and follow the
instructions for the trailer brakes so
they are installed, adjusted, and
maintained properly.
Since the vehicle is equipped with
StabiliTrak, the trailer brakes cannot
tap into the vehicle's hydraulic
system.
Trailer Wiring Harness
The seven-pin trailer connector is
mounted in the bumper. This
connector can be plugged into a
seven-pin universal heavy-duty
trailer connector available through
your dealer.
Use only a round, seven-wire
connector with flat blade terminals
meeting SAE J2863 specifications
for proper electrical connectivity.
The seven-wire harness contains
the following trailer circuits:
.Yellow: Left Stop/Turn Signal
. Green/Violet: Right Stop/Turn
Signal
. Brown: Taillamps
. White: Ground .
Light Green: Back-up Lamps
. Red/Green: Battery Feed
. Dark Blue: Trailer Brake
To help charge a remote
(non-vehicle) battery, press the Tow/
Haul Mode button at the end of the
shift lever. If the trailer is too light for
Tow/Haul Mode, turn on the
headlamps to help charge the
battery.
Electric Brake Control Wiring
Provisions
These wiring provisions are
included with the vehicle as part of
the trailer wiring package. These
provisions are for an electric brake
controller.
The harness should be installed by
your dealer or a qualified service
center.
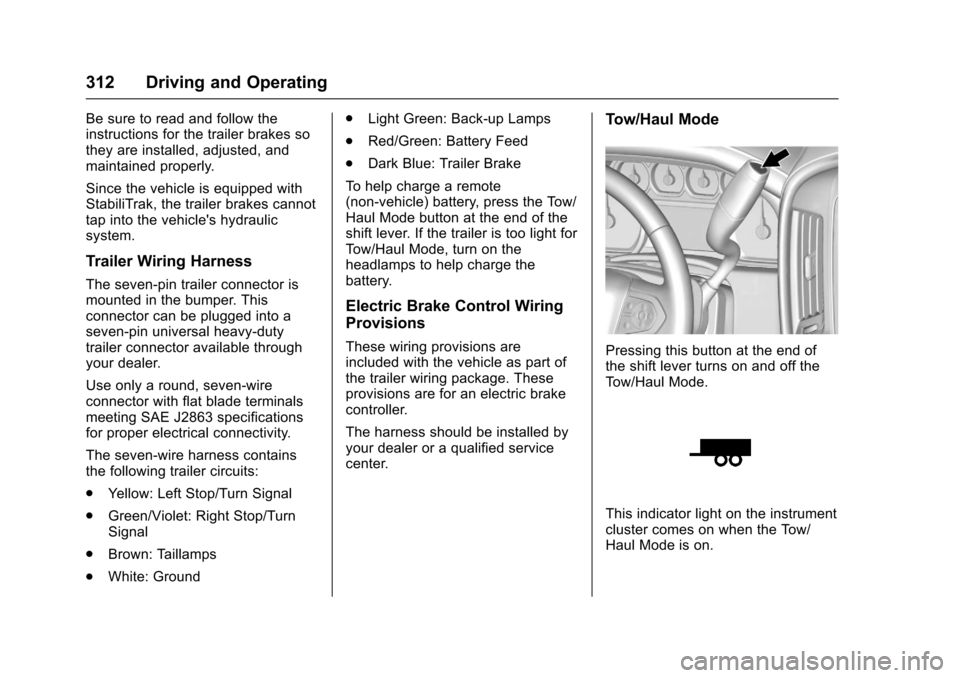
Tow/Haul Mode
Pressing this button at the end of
the shift lever turns on and off the
Tow/Haul Mode.
This indicator light on the instrument
cluster comes on when the Tow/
Haul Mode is on.
Page 320 of 465
Chevrolet Tahoe/Suburban Owner Manual (GMNA-Localizing-U.S./Canada/
Mexico-9955986) - 2017 - crc - 7/5/16
Vehicle Care 319
Vehicle Care
General Information
General Information . . . . . . . . . . 320
California Proposition65 Warning . . . . . . . . . . . . . . . . . 320
California Perchlorate Materials Requirements . . . . . 321
Accessories and Modifications . . . . . . . . . . . . . . . . 321
Vehicle Checks
Doing Your OwnService Work . . . . . . . . . . . . . . . 322
Hood . . . . . . . . . . . . . . . . . . . . . . . . . 322
Engine Compartment Overview . . . . . . . . . . . . . . . . . . . . 323
Engine Oil . . . . . . . . . . . . . . . . . . . . 325
Engine Oil Life System . . . . . . . 327
Automatic Transmission Fluid . . . . . . . . . . . . . . . . . . . . . . . . 328
Engine Air Cleaner/Filter . . . . . . 331
Cooling System . . . . . . . . . . . . . . 332
Engine Coolant . . . . . . . . . . . . . . . 333
Engine Overheating . . . . . . . . . . 336
Engine Fan . . . . . . . . . . . . . . . . . . . 337
Power Steering Fluid . . . . . . . . . 338
Washer Fluid . . . . . . . . . . . . . . . . . 338
Brakes . . . . . . . . . . . . . . . . . . . . . . . 338
Brake Fluid . . . . . . . . . . . . . . . . . . . 339 Battery - North America . . . . . . 340
Four-Wheel Drive . . . . . . . . . . . . . 341
Front Axle . . . . . . . . . . . . . . . . . . . . 341
Rear Axle . . . . . . . . . . . . . . . . . . . . 342
Noise Control System . . . . . . . . 343
Starter Switch Check . . . . . . . . . 344
Automatic Transmission Shift
Lock Control Function
Check . . . . . . . . . . . . . . . . . . . . . . . 344
Ignition Transmission Lock Check . . . . . . . . . . . . . . . . . . . . . . . 344
Park Brake and P (Park) Mechanism Check . . . . . . . . . . 345
Wiper Blade Replacement . . . . 345
Glass Replacement . . . . . . . . . . 346
Windshield Replacement . . . . . 346
Headlamp Aiming
Headlamp Aiming . . . . . . . . . . . . 347
Bulb Replacement
Bulb Replacement . . . . . . . . . . . . 347
Halogen Bulbs . . . . . . . . . . . . . . . . 347
High Intensity Discharge (HID) Lighting . . . . . . . . . . . . . . . . . . . . . 347
LED Lighting . . . . . . . . . . . . . . . . . 347
Headlamps . . . . . . . . . . . . . . . . . . . 348
Fog Lamps . . . . . . . . . . . . . . . . . . . 348
Front Turn Signal Lamps . . . . . 348 Taillamps, Turn Signal,
Stoplamps, and Back-Up
Lamps . . . . . . . . . . . . . . . . . . . . . . 349
License Plate Lamp . . . . . . . . . . 350
Replacement Bulbs . . . . . . . . . . . 351
Electrical System
Electrical System Overload . . . 351
Fuses . . . . . . . . . . . . . . . . . . . . . . . . 351
Engine Compartment Fuse Block . . . . . . . . . . . . . . . . . . . . . . . . 352
Instrument Panel Fuse Block (Left) . . . . . . . . . . . . . . . . . 356
Instrument Panel Fuse Block (Right) . . . . . . . . . . . . . . . . . . . . . . 359
Rear Compartment Fuse Block . . . . . . . . . . . . . . . . . . . . . . . . 361
Wheels and Tires
Tires . . . . . . . . . . . . . . . . . . . . . . . . . . 362
All-Season Tires . . . . . . . . . . . . . . 363
Winter Tires . . . . . . . . . . . . . . . . . . 363
Low-Profile Tires . . . . . . . . . . . . . 364
All-Terrain Tires . . . . . . . . . . . . . . . 364
Tire Sidewall Labeling . . . . . . . . 364
Tire Designations . . . . . . . . . . . . . 365
Tire Terminology and
Definitions . . . . . . . . . . . . . . . . . . 366
Tire Pressure . . . . . . . . . . . . . . . . . 369
Tire Pressure for High-Speed
Operation . . . . . . . . . . . . . . . . . . . 370
Page 349 of 465
Chevrolet Tahoe/Suburban Owner Manual (GMNA-Localizing-U.S./Canada/
Mexico-9955986) - 2017 - crc - 7/5/16
348 Vehicle Care
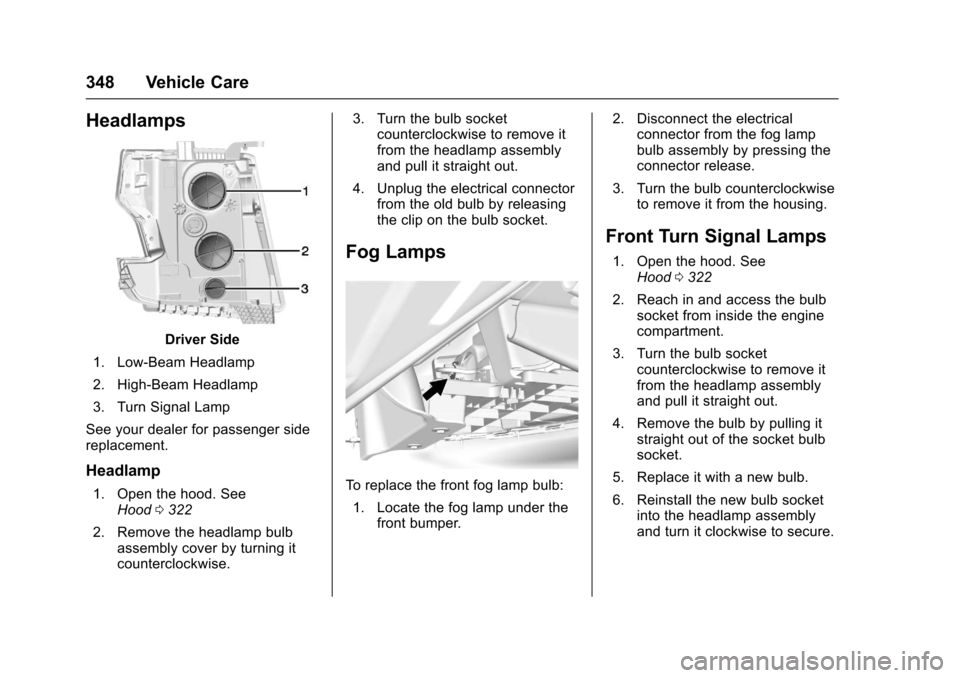
Headlamps
Driver Side
1. Low-Beam Headlamp
2. High-Beam Headlamp
3. Turn Signal Lamp
See your dealer for passenger side
replacement.
Headlamp
1. Open the hood. See Hood 0322
2. Remove the headlamp bulb assembly cover by turning it
counterclockwise. 3. Turn the bulb socket
counterclockwise to remove it
from the headlamp assembly
and pull it straight out.
4. Unplug the electrical connector from the old bulb by releasing
the clip on the bulb socket.
Fog Lamps
To replace the front fog lamp bulb:
1. Locate the fog lamp under the front bumper. 2. Disconnect the electrical
connector from the fog lamp
bulb assembly by pressing the
connector release.
3. Turn the bulb counterclockwise to remove it from the housing.
Front Turn Signal Lamps
1. Open the hood. See
Hood 0322
2. Reach in and access the bulb socket from inside the engine
compartment.
3. Turn the bulb socket counterclockwise to remove it
from the headlamp assembly
and pull it straight out.
4. Remove the bulb by pulling it straight out of the socket bulb
socket.
5. Replace it with a new bulb.
6. Reinstall the new bulb socket into the headlamp assembly
and turn it clockwise to secure.
Page 350 of 465
Chevrolet Tahoe/Suburban Owner Manual (GMNA-Localizing-U.S./Canada/
Mexico-9955986) - 2017 - crc - 7/5/16
Vehicle Care 349
Taillamps, Turn Signal,
Stoplamps, and Back-Up
Lamps
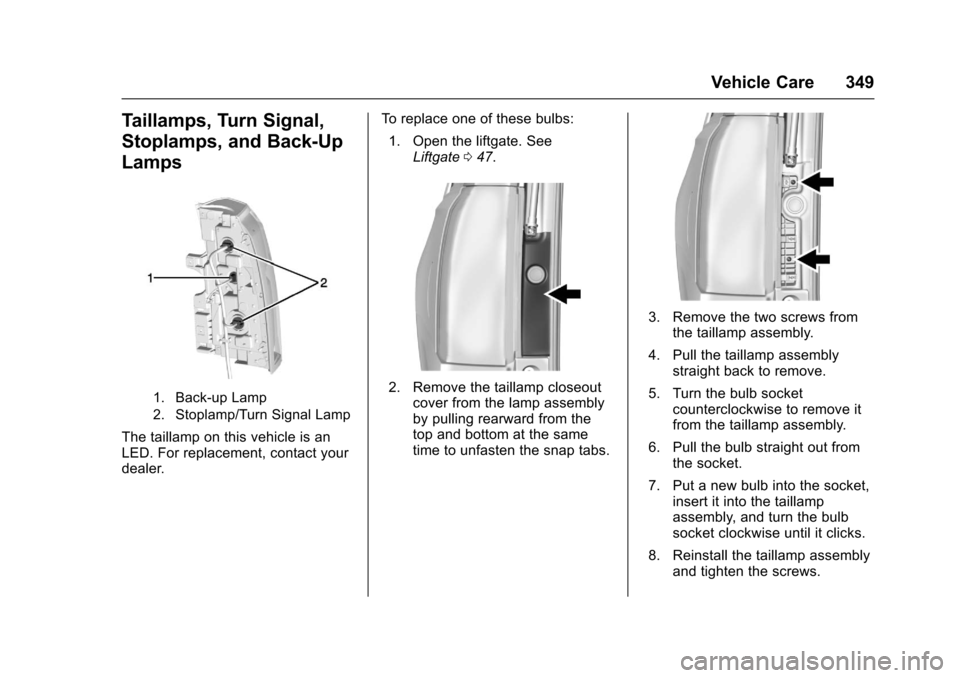
1. Back-up Lamp
2. Stoplamp/Turn Signal Lamp
The taillamp on this vehicle is an
LED. For replacement, contact your
dealer.To replace one of these bulbs:
1. Open the liftgate. See Liftgate 047.
2. Remove the taillamp closeout
cover from the lamp assembly
by pulling rearward from the
top and bottom at the same
time to unfasten the snap tabs.
3. Remove the two screws fromthe taillamp assembly.
4. Pull the taillamp assembly straight back to remove.
5. Turn the bulb socket counterclockwise to remove it
from the taillamp assembly.
6. Pull the bulb straight out from the socket.
7. Put a new bulb into the socket, insert it into the taillamp
assembly, and turn the bulb
socket clockwise until it clicks.
8. Reinstall the taillamp assembly and tighten the screws.
Page 352 of 465
Chevrolet Tahoe/Suburban Owner Manual (GMNA-Localizing-U.S./Canada/
Mexico-9955986) - 2017 - crc - 7/5/16
Vehicle Care 351
Replacement Bulbs
Exterior Lamp BulbNumber
Back-up Lamp 921
Fog Lamp PSX26W
Front Turn
Signal Lamp WY21W
High-Beam
Headlamp (Base
and Uplevel) 9005 LL
Low-Beam
Headlamp (Base) H11 LL
License
Plate Lamp W5W
Stoplamp/Turn
Signal Lamp 7440 LL and
WY21W
For replacement bulbs not listed
here, contact your dealer.
Electrical System
Electrical System
Overload
The vehicle has fuses to protect
against an electrical system
overload. Fuses also protect power
devices in the vehicle.
Replace a bad fuse with a new one
of the identical size and rating.
If there is a problem on the road and
a fuse needs to be replaced, there
are some spare fuses and a fuse
puller in the left instrument panel
fuse block. The same amperage
fuse can also be borrowed. Choose
some feature of the vehicle that is
not needed to use and replace it as
soon as possible.
Headlamp Wiring
An electrical overload may cause
the lamps to go on and off, or in
some cases to remain off. Have the
headlamp wiring checked right away
if the lamps go on and off or
remain off.
Windshield Wipers
If the wiper motor overheats due to
heavy snow or ice, the windshield
wipers will stop until the motor cools
and will then restart.
Although the circuit is protected
from electrical overload, overload
due to heavy snow or ice may
cause wiper linkage damage.
Always clear ice and heavy snow
from the windshield before using the
windshield wipers.
If the overload is caused by an
electrical problem and not snow or
ice, be sure to get it fixed.
Fuses
The wiring circuits in the vehicle are
protected from short circuits by
fuses. This greatly reduces the
chance of fires caused by electrical
problems.
Look at the silver-colored band
inside the fuse. If the band is broken
or melted, replace the fuse. Be sure
you replace a bad fuse with a new
one of the identical size and rating.
Page 355 of 465
Chevrolet Tahoe/Suburban Owner Manual (GMNA-Localizing-U.S./Canada/
Mexico-9955986) - 2017 - crc - 7/5/16
354 Vehicle Care
ItemUsage
5 Suspension leveling
compressor
6 4WD transfer case electronic control
7 –
8 –
9 –
10 Electric parking brake
11 –
12 –
13 Interior BEC LT2
14 Rear BEC 1
15 –
16 –
17 Driver motorized safety belt
18 –
19 –
20 – Item
Usage
21 ALC exhaust solenoid
23 Integrated chassis control module
24 Real time dampening
25 Fuel pump power module
26 –/Battery regulated
voltage control
27 –
28 Upfitter 2
29 Upfitter 2 relay
30 Wiper
31 TIM
32 –
33 –
34 Reverse lamps
35 ABS valve
36 Trailer brakes
37 Upfitter 3 relay
38 – Item
Usage
39 Right trailer stoplamp/Turn
signal lamp
40 Left trailer stoplamp/turn
signal lamp
41 Trailer parking lamps
42 Right parking lamps
43 Left parking lamps
44 Upfitter 3
45 Automatic level control/Run/Crank
46 –
47 Upfitter 4
48 Upfitter 4 relay
49 Reverse lamps
50 –
51 Parking lamp relay
52 –
53 –