2017 CHEVROLET SUBURBAN change wheel
[x] Cancel search: change wheelPage 282 of 465
Chevrolet Tahoe/Suburban Owner Manual (GMNA-Localizing-U.S./Canada/
Mexico-9955986) - 2017 - crc - 7/5/16
Driving and Operating 281
If a vehicle is detected in your path,
ACC can speed up the vehicle or
apply limited, moderate braking to
maintain the selected following gap.
To disengage ACC, apply the brake.
If the Traction Control System (TCS)
or electronic stability control system
activates while ACC is engaged,
ACC may automatically disengage.
SeeTraction Control/Electronic
Stability Control 0274. When road
conditions allow ACC to be safely
used, the ACC can be turned
back on.
ACC will not engage if the TCS or
electronic stability control system is
disabled.
{Warning
ACC has limited braking ability
and may not have time to slow
the vehicle down enough to avoid
a collision with another vehicle
you are following. This can occur
when vehicles suddenly slow or
stop ahead, or enter your lane.
Also see “Alerting the Driver” in
(Continued)
Warning (Continued)
this section. Complete attention is
always required while driving and
you should be ready to take
action and apply the brakes. See
Defensive Driving 0236.
{Warning
ACC will not detect or brake for
children, pedestrians, animals,
or other objects.
Do not use ACC when:
. On winding and hilly roads
or when the sensors are
blocked by snow, ice, or dirt.
The system may not detect
a vehicle ahead. Keep the
entire front of the vehicle
clean.
(Continued)
Warning (Continued)
.Visibility is low, such as in
fog, rain, or snow
conditions. ACC
performance is limited under
these conditions.
. On slippery roads where
fast changes in tire traction
can cause excessive
wheel slip.
Page 284 of 465
Chevrolet Tahoe/Suburban Owner Manual (GMNA-Localizing-U.S./Canada/
Mexico-9955986) - 2017 - crc - 7/5/16
Driving and Operating 283
Increasing Speed While ACC is at
a Set Speed
Do one of the following:
.Use the accelerator to get to the
higher speed. Press SET– .
Release the control and the
accelerator pedal. The vehicle
will now cruise at the higher
speed.
When the accelerator pedal is
pressed, ACC will not brake
because it is overridden.
A warning message will appear
on the Driver Information Center
(DIC). See Cruise Control
Messages 0167.
. Press and hold +RES until the
desired set speed appears on
the display, then release it.
. To increase vehicle speed in
small increments, briefly press
+RES. For each press, the
vehicle goes to the next 1 km/h
(1 mph) faster mark on the
speedometer.
. To increase speed in larger
increments, press and briefly
hold +RES. For each press, the vehicle speed goes to next
5 km/h (5 mph) faster mark on
the speedometer.
When it is determined that there is
no vehicle ahead or the vehicle
ahead is beyond the selected
following gap, then the vehicle
speed will increase to the set speed.
Reducing Speed While ACC is at a
Set Speed
Do one of the following:
. Use the brake to get to the
desired lower speed. Press
SET– and release the
accelerator pedal. The vehicle
will now cruise at the lower
speed.
. Press and hold SET– until the
desired lower speed is reached,
then release it.
. To decrease the vehicle speed in
small increments, briefly press
SET−. For each press, the
vehicle speed goes to the next
1 km/h (1 mph) slower mark on
the speedometer. .
To decrease speed in larger
increments, press and briefly
hold SET−. For each press, the
vehicle speed goes to the next
5 km/h (5 mph) slower mark on
the speedometer.
Selecting the Follow Distance Gap
When a slower moving vehicle is
detected ahead within the selected
following gap, ACC will adjust the
vehicle's speed and attempt to
maintain the follow distance gap
selected.
Press
3on the steering wheel to
adjust the following gap. When
pressed, the current gap setting
displays briefly on the instrument
cluster. Subsequent presses cycle
the
3button through three
settings: Far, Medium, or Near. The
gap setting will be maintained until it
is changed.
Since each gap setting corresponds
to a following time (Far, Medium,
or Near), the following distance will
vary based on vehicle speed. The
faster the vehicle speed, the further
back your vehicle will follow a
Page 291 of 465

Chevrolet Tahoe/Suburban Owner Manual (GMNA-Localizing-U.S./Canada/
Mexico-9955986) - 2017 - crc - 7/5/16
290 Driving and Operating
When an object is first detected in
the rear, one beep will be heard
from the rear, or both sides of the
Safety Alert Seat will pulse two
times. When an object is very close
(<0.6 m (2 ft) in the vehicle rear,
or <0.3 m (1 ft) in the vehicle front),
a continuous beep will sound from
the front or rear depending on
object location, or both sides of the
Safety Alert Seat will pulse five
times. Beeps for FPA are higher
pitched than for RPA.
Rear Cross Traffic Alert (RCTA)
If equipped, when the vehicle is
shifted into R (Reverse), RCTA
displays a red warning triangle with
a left or right pointing arrow on the
RVC screen to warn of traffic
coming from the left or right. This
system detects objects coming from
up to 20 m (65 ft) from the left or
right side of the vehicle. When an
object is detected, either three
beeps sound from the left or right or
three Safety Alert Seat pulses occur
on the left or right side, depending
on the direction of the detected
vehicle.Use caution while backing up when
towing a trailer, as the RCTA
detection zones that extend out
from the back of the vehicle do not
move further back when a trailer is
towed.
Turning the Features On or Off
TheXbutton to the left of the
steering wheel is used to turn on or
off the Front and Rear Parking
Assist. The indicator light in the
button comes on when the features
are on and turns off when the
features have been disabled.
Front and Rear Parking Assist can
be turned off, on, or on with towbar
through vehicle personalization. See
“Parking Assist” underVehicle
Personalization 0178. If the parking
assist is turned off through vehicle
personalization, the parking assist
button will be disabled. To turn the parking assist on again, select On in
the vehicle personalization menu.
The On with Towbar setting allows
for the parking assist to work
properly with a small item attached
to the trailer hitch. Turn off parking
assist when towing a trailer.
To turn the rear parking assist
symbols, guidance lines, or Rear
Cross Traffic Alert on or off, see
“Rear Camera”
underVehicle
Personalization 0178
Assistance Systems for
Driving
If equipped, when driving the
vehicle in a forward gear, Forward
Collision Alert (FCA), Lane
Departure Warning (LDW), Lane
Keep Assist (LKA), Side Blind Zone
Alert (SBZA), Lane Change Alert
(LCA), and/or Forward Automatic
Braking (FAB) can help to avoid a
crash or reduce crash damage.
Page 293 of 465
Chevrolet Tahoe/Suburban Owner Manual (GMNA-Localizing-U.S./Canada/
Mexico-9955986) - 2017 - crc - 7/5/16
292 Driving and Operating
Warning (Continued)
or ice, or if the windshield is
damaged. It may also not detect a
vehicle on winding or hilly roads,
or in conditions that can limit
visibility such as fog, rain,
or snow, or if the headlamps or
windshield are not cleaned or in
proper condition. Keep the
windshield, headlamps, and FCA
sensors clean and in good repair.
Collision Alert
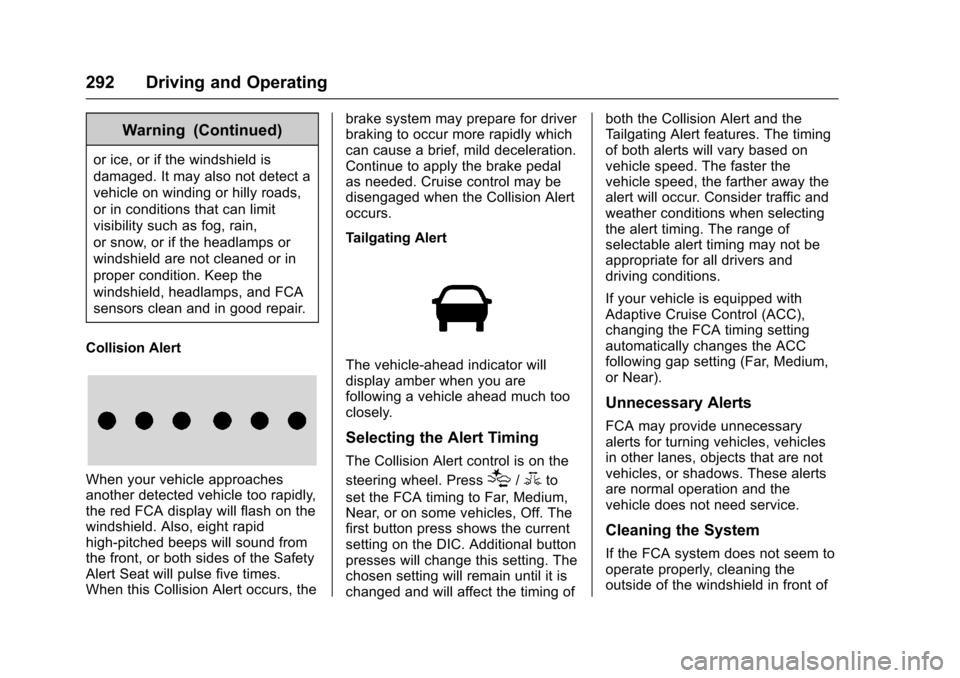
When your vehicle approaches
another detected vehicle too rapidly,
the red FCA display will flash on the
windshield. Also, eight rapid
high-pitched beeps will sound from
the front, or both sides of the Safety
Alert Seat will pulse five times.
When this Collision Alert occurs, the brake system may prepare for driver
braking to occur more rapidly which
can cause a brief, mild deceleration.
Continue to apply the brake pedal
as needed. Cruise control may be
disengaged when the Collision Alert
occurs.
Tailgating Alert
The vehicle-ahead indicator will
display amber when you are
following a vehicle ahead much too
closely.
Selecting the Alert Timing
The Collision Alert control is on the
steering wheel. Press
[/3to
set the FCA timing to Far, Medium,
Near, or on some vehicles, Off. The
first button press shows the current
setting on the DIC. Additional button
presses will change this setting. The
chosen setting will remain until it is
changed and will affect the timing of both the Collision Alert and the
Tailgating Alert features. The timing
of both alerts will vary based on
vehicle speed. The faster the
vehicle speed, the farther away the
alert will occur. Consider traffic and
weather conditions when selecting
the alert timing. The range of
selectable alert timing may not be
appropriate for all drivers and
driving conditions.
If your vehicle is equipped with
Adaptive Cruise Control (ACC),
changing the FCA timing setting
automatically changes the ACC
following gap setting (Far, Medium,
or Near).
Unnecessary Alerts
FCA may provide unnecessary
alerts for turning vehicles, vehicles
in other lanes, objects that are not
vehicles, or shadows. These alerts
are normal operation and the
vehicle does not need service.
Cleaning the System
If the FCA system does not seem to
operate properly, cleaning the
outside of the windshield in front of
Page 299 of 465
Chevrolet Tahoe/Suburban Owner Manual (GMNA-Localizing-U.S./Canada/
Mexico-9955986) - 2017 - crc - 7/5/16
298 Driving and Operating
How the System Works
The LKA camera sensor is on the
windshield ahead of the rearview
mirror.
To turn LKA on and off, press
A
to the left of the steering wheel.
When on,
Ais green if LKA is
available to assist and provide LDW
alerts. It may assist by gently
turning the steering wheel and
display
Aas amber if the vehicle
approaches a detected lane marking
without using a turn signal in that
direction. It may also provide an
LDW alert by flashing
Aamber
as the lane marking is crossed.
Additionally, there will be three
beeps, or the driver seat will pulse
three times, on the right or left,
depending on the lane departure
direction.
The LKA system does not
continuously steer the vehicle.
If LKA does not detect active driver
steering, an alert and chime may be
provided. Steer the vehicle to
dismiss.
When the System Does Not
Seem to Work Properly
The system performance may be
affected by:
. Close vehicles ahead.
. Sudden lighting changes, such
as when driving through tunnels.
. Banked roads.
. Roads with poor lane markings,
such as two-lane roads.
If the LKA system is not functioning
properly when lane markings are
clearly visible, cleaning the
windshield may help.
LKA assistance and/or LDW alerts
may occur due to tar marks,
shadows, cracks in the road,
temporary or construction lane
markings, or other road
imperfections. This is normal system
operation; the vehicle does not need
service. Turn LKA off if these
conditions continue.
Fuel
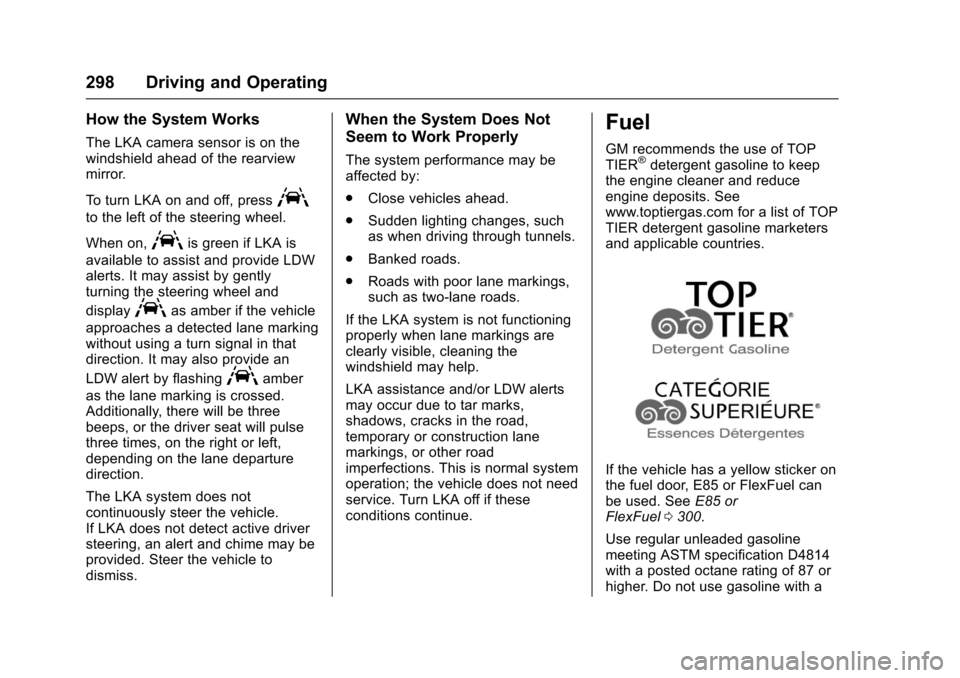
GM recommends the use of TOP
TIER®detergent gasoline to keep
the engine cleaner and reduce
engine deposits. See
www.toptiergas.com for a list of TOP
TIER detergent gasoline marketers
and applicable countries.
If the vehicle has a yellow sticker on
the fuel door, E85 or FlexFuel can
be used. See E85 or
FlexFuel 0300.
Use regular unleaded gasoline
meeting ASTM specification D4814
with a posted octane rating of 87 or
higher. Do not use gasoline with a
Page 317 of 465
Chevrolet Tahoe/Suburban Owner Manual (GMNA-Localizing-U.S./Canada/
Mexico-9955986) - 2017 - crc - 7/5/16
316 Driving and Operating
Adjusting Trailer Gain at
speeds lower than 32 to
40 km/h (20 to 25 mph) may
result in an incorrect gain
setting.
2. Adjust the Trailer Gain, using the Trailer Gain adjustment
buttons, to just below the point
of trailer wheel lock-up,
indicated by trailer wheel
squeal or tire smoke when a
trailer wheel locks.
Trailer wheel lock-up may not
occur if towing a heavily loaded
trailer. In this case, adjust the
Trailer Gain to the highest
allowable setting for the towing
condition.
3. Readjust Trailer Gain any time vehicle loading, trailer loading,
or road surface conditions
change or if trailer wheel
lock-up is noticed at any time
while towing. Other ITBC-Related DIC Messages
In addition to displaying TRAILER
GAIN and OUTPUT through the
DIC, trailer connection and ITBC
system status are displayed on
the DIC.
TRAILER CONNECTED: This
message will briefly display when a
trailer with electric brakes is first
connected to the vehicle. This
message will automatically turn off
in about 10 seconds. This message
can be acknowledged before it
automatically turns off.
CHECK TRAILER WIRING: This
message will display if:
.
The ITBC system first
determines connection to a
trailer with electric brakes and
then the trailer harness becomes
disconnected from the vehicle.
If the disconnect occurs while
the vehicle is stationary, this
message will automatically turn
off in about 30 seconds. This
message will also turn off if it is
acknowledged or if the trailer
harness is reconnected. If the disconnect occurs while
the vehicle is moving, this
message will continue until the
ignition is turned off. This
message will also turn off if it is
acknowledged or if the trailer
harness is reconnected.
. There is an electrical fault in the
wiring to the trailer brakes. This
message will continue as long
as there is an electrical fault in
the trailer wiring. This message
will also turn off if it is
acknowledged.
To determine if the electrical fault is
on the vehicle side or trailer side of
the trailer wiring harness
connection: 1. Disconnect the trailer wiring harness from the vehicle.
2. Turn the ignition off.
3. Wait 10 seconds, then turn the ignition back to RUN.
4. If the CHECK TRAILER WIRING message reappears,
the electrical fault is on the
vehicle side.
Page 340 of 465
Chevrolet Tahoe/Suburban Owner Manual (GMNA-Localizing-U.S./Canada/
Mexico-9955986) - 2017 - crc - 7/5/16
Vehicle Care 339
{Warning
The brake wear warning sound
means that soon the brakes will
not work well. That could lead to
a crash. When the brake wear
warning sound is heard, have the
vehicle serviced.
Caution
Continuing to drive with worn-out
brake pads could result in costly
brake repair.
Some driving conditions or climates
can cause a brake squeal when the
brakes are first applied or lightly
applied. This does not mean
something is wrong with the brakes.
Properly torqued wheel nuts are
necessary to help prevent brake
pulsation. When tires are rotated,
inspect brake pads for wear and
evenly tighten wheel nuts in the proper sequence to torque
specifications. See
Capacities and
Specifications 0426.
Brake pads should be replaced as
complete sets.
Brake Pedal Travel
See your dealer if the brake pedal
does not return to normal height,
or if there is a rapid increase in
pedal travel. This could be a sign
that brake service may be required.
Replacing Brake System Parts
Always replace brake system parts
with new, approved replacement
parts. If this is not done, the brakes
may not work properly. The braking
performance expected can change
in many other ways if the wrong
replacement brake parts are
installed or if parts are improperly
installed.
Brake Fluid
The brake master cylinder reservoir
is filled with GM approved DOT 3
brake fluid as indicated on the
reservoir cap. See Engine
Compartment Overview 0323 for
the location of the reservoir.
Checking Brake Fluid
With the vehicle in P (Park) on a
level surface, the brake fluid level
should be between the minimum
and maximum marks on the brake
fluid reservoir.
There are only two reasons why the
brake fluid level in the reservoir may
go down:
. Normal brake lining wear. When
new linings are installed, the
fluid level goes back up.
Page 342 of 465

Chevrolet Tahoe/Suburban Owner Manual (GMNA-Localizing-U.S./Canada/
Mexico-9955986) - 2017 - crc - 7/5/16
Vehicle Care 341
Warning (Continued)
reproductive harm. Batteries also
contain other chemicals known to
the State of California to cause
cancer.WASH HANDS AFTER
HANDLING.
See California Proposition
65 Warning 0320.
Vehicle Storage
{Warning
Batteries have acid that can burn
you and gas that can explode.
You can be badly hurt if you are
not careful. See Jump Starting -
North America 0393 for tips on
working around a battery without
getting hurt.
Infrequent Usage: Remove the
black, negative (−) cable from the
battery to keep the battery from
running down. Extended Storage: Remove the
black, negative (−) cable from the
battery or use a battery trickle
charger.
Four-Wheel Drive
Transfer Case
When to Check Lubricant
Refer to
Maintenance Schedule
0 412 to determine when to check
the lubricant.
How to Check Lubricant
Automatic Transfer Case
1. Fill Plug 2. Drain Plug
To get an accurate reading, the
vehicle should be on a level
surface.
If the level is below the bottom of
the fill plug (1) hole, located on the
transfer case, some lubricant will
need to be added. Add enough
lubricant to raise the level to the
bottom of the fill plug (1) hole. Use
care not to overtighten the plug.
When to Change Lubricant
Refer to
Maintenance Schedule
0 412 to determine how often to
change the lubricant.
What to Use
Refer to Recommended Fluids and
Lubricants 0421 to determine what
kind of lubricant to use.
Front Axle
When to Check and Change
Lubricant
It is not necessary to regularly
check front axle fluid unless a leak
is suspected, or an unusual noise is