2017 CHEVROLET SUBURBAN ECO mode
[x] Cancel search: ECO modePage 117 of 465
Chevrolet Tahoe/Suburban Owner Manual (GMNA-Localizing-U.S./Canada/
Mexico-9955986) - 2017 - crc - 7/5/16
116 Seats and Restraints
Caution (Continued)
Do not fold the rear seatback
when the seat is occupied. Do not
fold the empty rear seat with a
safety belt buckled. This could
damage the safety belt or the
seat. Unbuckle and return the
safety belt to its stowed position,
before folding the seat.
The vehicle may be equipped with a
front center airbag in the inboard
side of the driver seat. Even with a
front center airbag, a child restraint
can be installed in any second row
seating position.
If you need to secure more than one
child restraint in the rear seat, see
Where to Put the Restraint 0110.
This system is designed to make
installation of child restraints easier.
When using lower anchors, do not
use the vehicle's safety belts.
Instead use the vehicle's anchors
and child restraint attachments to secure the restraints. Some
restraints also use another vehicle
anchor to secure a top tether.
1. Attach and tighten the lower attachments to the lower
anchors. If the child restraint
does not have lower
attachments or the desired
seating position does not have
lower anchors, secure the child
restraint with the the safety
belts and top tether when
recommended by the child
restraint manufacturer. Refer to
your child restraint
manufacturer instructions and
the instructions in this manual.
For the third row outboard
seating positions, if the head
restraint interferes with the
proper installation of the child
restraint, then the head
restraint may be removed. See
“Head Restraint Removal and
Reinstallation under Lower
Anchors and Tethers for
Children (LATCH
System) 0111. 1.1. Find the lower anchors
for the desired seating
position.
1.2. Put the child restraint on the seat.
1.3. Attach and tighten the lower attachments on the
child restraint to the lower
anchors.
2. If the child restraint manufacturer recommends that
the top tether be attached,
attach and tighten the top
tether to the top tether anchor.
Refer to the child restraint
instructions and the following
steps:
2.1. Find the top tether anchor.
For models with a third
row seat, move the flipper
panel rearward to access
the top tether anchors.
2.2. Route, attach, and tighten the top tether according
to your child restraint
instructions and the
following instructions:
Page 149 of 465
Chevrolet Tahoe/Suburban Owner Manual (GMNA-Localizing-U.S./Canada/
Mexico-9955986) - 2017 - crc - 7/5/16
148 Instruments and Controls
English
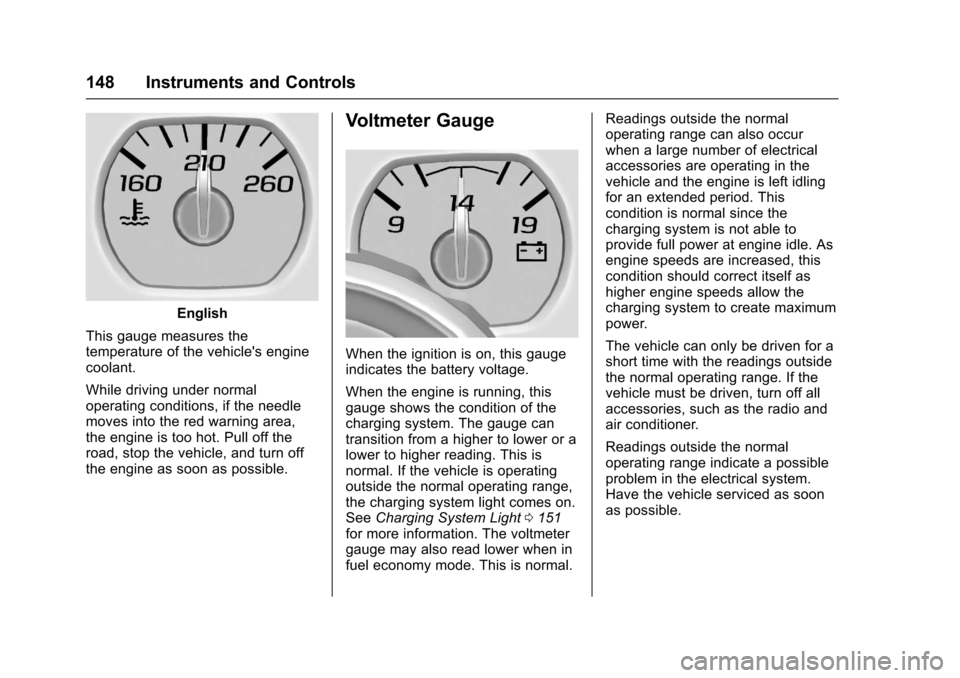
This gauge measures the
temperature of the vehicle's engine
coolant.
While driving under normal
operating conditions, if the needle
moves into the red warning area,
the engine is too hot. Pull off the
road, stop the vehicle, and turn off
the engine as soon as possible.
Voltmeter Gauge
When the ignition is on, this gauge
indicates the battery voltage.
When the engine is running, this
gauge shows the condition of the
charging system. The gauge can
transition from a higher to lower or a
lower to higher reading. This is
normal. If the vehicle is operating
outside the normal operating range,
the charging system light comes on.
See Charging System Light 0151
for more information. The voltmeter
gauge may also read lower when in
fuel economy mode. This is normal. Readings outside the normal
operating range can also occur
when a large number of electrical
accessories are operating in the
vehicle and the engine is left idling
for an extended period. This
condition is normal since the
charging system is not able to
provide full power at engine idle. As
engine speeds are increased, this
condition should correct itself as
higher engine speeds allow the
charging system to create maximum
power.
The vehicle can only be driven for a
short time with the readings outside
the normal operating range. If the
vehicle must be driven, turn off all
accessories, such as the radio and
air conditioner.
Readings outside the normal
operating range indicate a possible
problem in the electrical system.
Have the vehicle serviced as soon
as possible.
Page 152 of 465
Chevrolet Tahoe/Suburban Owner Manual (GMNA-Localizing-U.S./Canada/
Mexico-9955986) - 2017 - crc - 7/5/16
Instruments and Controls 151
Warning (Continued)
with the airbag system. To help
avoid injury to yourself or others,
have the vehicle serviced right
away. SeeAirbag Readiness
Light 0149 for more information,
including important safety
information.
Charging System Light
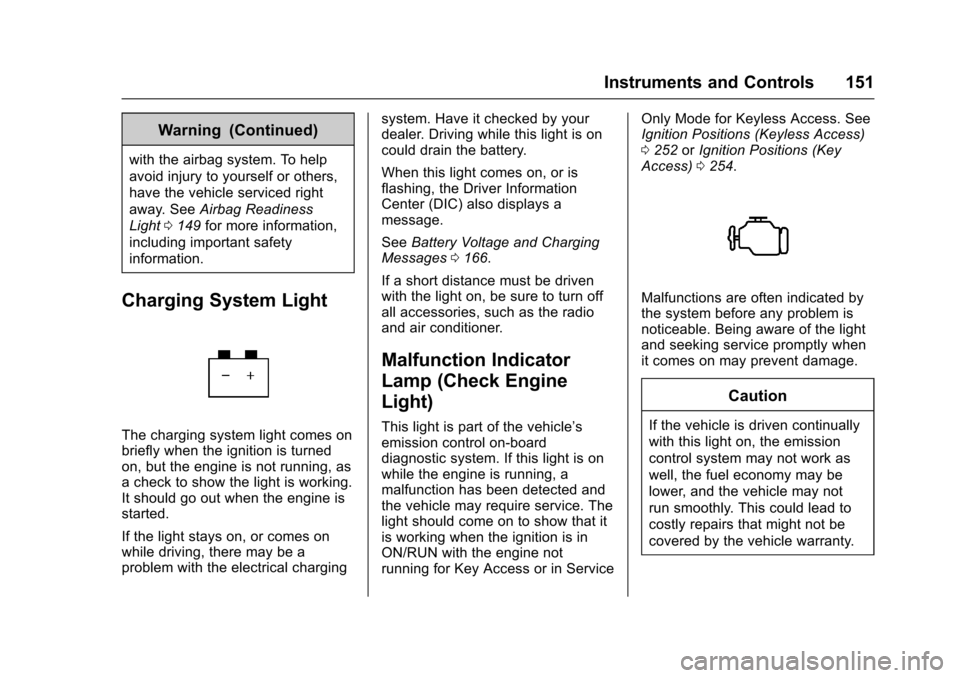
The charging system light comes on
briefly when the ignition is turned
on, but the engine is not running, as
a check to show the light is working.
It should go out when the engine is
started.
If the light stays on, or comes on
while driving, there may be a
problem with the electrical charging system. Have it checked by your
dealer. Driving while this light is on
could drain the battery.
When this light comes on, or is
flashing, the Driver Information
Center (DIC) also displays a
message.
See
Battery Voltage and Charging
Messages 0166.
If a short distance must be driven
with the light on, be sure to turn off
all accessories, such as the radio
and air conditioner.
Malfunction Indicator
Lamp (Check Engine
Light)
This light is part of the vehicle’s
emission control on-board
diagnostic system. If this light is on
while the engine is running, a
malfunction has been detected and
the vehicle may require service. The
light should come on to show that it
is working when the ignition is in
ON/RUN with the engine not
running for Key Access or in Service Only Mode for Keyless Access. See
Ignition Positions (Keyless Access)
0
252 orIgnition Positions (Key
Access) 0254.
Malfunctions are often indicated by
the system before any problem is
noticeable. Being aware of the light
and seeking service promptly when
it comes on may prevent damage.
Caution
If the vehicle is driven continually
with this light on, the emission
control system may not work as
well, the fuel economy may be
lower, and the vehicle may not
run smoothly. This could lead to
costly repairs that might not be
covered by the vehicle warranty.
Page 170 of 465
Chevrolet Tahoe/Suburban Owner Manual (GMNA-Localizing-U.S./Canada/
Mexico-9955986) - 2017 - crc - 7/5/16
Instruments and Controls 169
ENGINE OVERHEATED IDLE
ENGINE
This message displays when the
engine coolant temperature is too
hot. Stop and allow the vehicle to
idle until it cools down. SeeEngine
Coolant Temperature Gauge 0147.
When towing, use Tow/Haul Mode
to prevent damage to the engine or
transmission. See Tow/Haul
Mode 0266.
ENGINE OVERHEATED STOP
ENGINE
This message displays and a chime
may sound if the engine cooling
system reaches unsafe
temperatures for operation. Stop
and turn off the vehicle as soon as it
is safe to do so to avoid severe
damage. This message clears when
the engine has cooled to a safe
operating temperature.
Engine Oil Messages
CHANGE ENGINE OIL SOON
This message displays when the
engine oil needs to be changed.
When you change the engine oil, be
sure to reset the CHANGE ENGINE
OIL SOON message. See Engine
Oil Life System 0327 for
information on how to reset the
message. See Engine Oil0325 and
Maintenance Schedule 0412.
ENGINE OIL LOW ADD OIL
On some vehicles, this message
displays when the engine oil level
may be too low. Check the oil level
before filling to the recommended
level. If the oil is not low and this
message remains on, take the
vehicle to your dealer for service.
See Engine Oil 0325.
ENGINE OIL HOT IDLE
ENGINE
This message displays when the
engine oil becomes hotter than the
normal operating temperature. Stop and allow the vehicle to idle until it
cools down. See
Engine Coolant
Temperature Gauge 0147.
OIL PRESSURE LOW STOP
ENGINE
This message displays if low oil
pressure levels occur. Stop the
vehicle as soon as safely possible
and do not operate it until the cause
of the low oil pressure has been
corrected. Check the oil as soon as
possible and have the vehicle
serviced by your dealer. See Engine
Oil 0325.
Engine Power Messages
ENGINE POWER IS REDUCED
This message displays and a chime
may sound when the cooling system
temperature gets too hot and the
engine further enters the engine
coolant protection mode. See
Engine Overheating 0336 for more
information.
This message also displays when
the vehicle's engine power is
reduced. Reduced engine power
can affect the vehicle's ability to
Page 179 of 465

Chevrolet Tahoe/Suburban Owner Manual (GMNA-Localizing-U.S./Canada/
Mexico-9955986) - 2017 - crc - 7/5/16
178 Instruments and Controls
Vehicle
Personalization
Use the audio system controls to
access the personalization menus
for customizing vehicle features.
The following are all possible
personalization features. Depending
on the vehicle, some may not be
available.
Base Radio Audio System
Controls
MENU :Press the center of the
knob to enter menus and select
menu items. Turn the knob to scroll
through the menus.
oBACK : Press to return to the
previous menu or exit.
Uplevel Radio Audio System
Controls
1. Press the desired feature to display a list of available
options.
2. Press to select the desired feature setting. 3. Press
oBACK on the
faceplate or touch the
0screen
button to return to the previous
menu or exit.
Turn the vehicle to ON/RUN to
access the Settings menu, then
select SETTINGS from the Home
Page on the infotainment display.
Personalization Menus
The following list of menu items may
be available:
. Time and Date
. Language (Language)
. Rear Seat Reminder
. Teen Driver
. Valet Mode
. Radio
. Vehicle
. Bluetooth
. Apple CarPlay
. Android Auto
. Voice
. Display .
Rear Camera
. Return to Factory Settings
. Software Information
Detailed information for each menu
follows.
Time and Date
Manually set the time and date. See
Clock 0135.
Language (Language)
Select Language, then select from
the available language(s).
The selected language will display
on the system, and voice
recognition will reflect the selected
language.
Rear Seat Reminder
This allows for a chime and a
message “Look in Rear Seat” when
the rear door has been opened
before or during operation of the
vehicle.
Select Off or On.
Page 187 of 465
Chevrolet Tahoe/Suburban Owner Manual (GMNA-Localizing-U.S./Canada/
Mexico-9955986) - 2017 - crc - 7/5/16
186 Instruments and Controls
instructions refer to a garage door
opener, but can be used for other
devices.
Do not use the Universal Remote
system with any garage door opener
that does not have the stop and
reverse feature. This includes any
garage door opener model
manufactured before April 1, 1982.
Read the instructions completely
before programming the Universal
Remote system. It may help to have
another person assist with the
programming process.
Keep the original hand-held
transmitter for use in other vehicles
as well as for future programming.
Erase the programming when
vehicle ownership is terminated.
See“Erasing Universal Remote
System Buttons” later in this
section.
To program a garage door opener,
park outside directly in line with and
facing the garage door opener
receiver. Clear all people and
objects near the garage door. Make sure the hand-held transmitter
has a new battery for quick and
accurate transmission of the
radio-frequency signal.
Programming the Universal
Remote System
For questions or help programming
the Universal Remote system, call
1-800-355-3515 or see
www.homelink.com.
Programming involves
time-sensitive actions, and may time
out causing the procedure to be
repeated.
To program up to three devices:
1. Hold the end of the hand-held transmitter about 3 to 8 cm (1
to 3 in) away from the
Universal Remote system
buttons with the indicator light
in view. The hand-held
transmitter was supplied by the
manufacturer of the garage
door opener receiver.
2. At the same time, press and hold both the hand-held
transmitter button and one of
the three Universal Remote system buttons to be used to
operate the garage door. Do
not release either button until
the indicator light goes from a
slow to a rapid flashing light.
Then release both buttons.
Some garage door openers
may require substitution of
Step 2 with the procedure
under
“Radio Signals for
Canada and Some Gate
Operators” later in this section.
3. Press and hold the newly programmed Universal Remote
system button for five seconds
while watching the indicator
light and garage door
activation.
.If the indicator light stays on
continuously or the garage
door moves when the
button is pressed, then
programming is complete.
There is no need to
complete Steps 4–6.
. If the indicator light does
not come on or the garage
door does not move, a
second button press may
Page 194 of 465
Chevrolet Tahoe/Suburban Owner Manual (GMNA-Localizing-U.S./Canada/
Mexico-9955986) - 2017 - crc - 7/5/16
Lighting 193
Lights On with Wipers
If the windshield wipers are
activated in daylight with the engine
on, and the exterior lamp control is
in AUTO, the headlamps, parking
lamps, and other exterior lamps
come on. The transition time for the
lamps coming on varies based on
wiper speed. When the wipers are
not operating, these lamps turn off.
Move the exterior lamp control to
O
or;to disable this feature.
Hazard Warning Flashers
|:Press this button to make the
front and rear turn signal lamps
flash on and off. Press again to turn
the flashers off.
When the hazard warning flashers
are on, the vehicle's turn signals will
not work.
Turn and Lane-Change
Signals
An arrow on the instrument cluster
flashes in the direction of the turn or
lane change.
Move the turn signal lever all the
way up or down to signal a turn.
Raise or lower the lever for less
than one second until the arrow
starts to flash to signal a lane change. This causes the turn
signals to automatically flash three
times. It will flash six times if Tow/
Haul Mode is active. Holding the
turn signal lever for more than
one second will cause the turn
signals to flash until the lever is
released.
The lever returns to its starting
position whenever it is released.
If after signaling a turn or a lane
change the arrows flash rapidly or
do not come on, a signal bulb could
be burned out.
Replace any burned out bulbs. If a
bulb is not burned out, check the
fuse. See
Fuses0351.
Turn Signal On Chime
If the turn signal is left on for more
than 1.2 km (0.75 mi), a chime
sounds at each flash of the turn
signal. The message TURN
SIGNAL ON will also appear in the
Driver Information Center (DIC). To
turn the chime and message off,
move the turn signal lever to the off
position.
Page 215 of 465
Chevrolet Tahoe/Suburban Owner Manual (GMNA-Localizing-U.S./Canada/
Mexico-9955986) - 2017 - crc - 7/5/16
214 Infotainment System
Phone
Bluetooth (Overview)
Instructions for using the cell phone
may differ between infotainment
systems. The base radio and base
radio with connectivity instructions
are included in this manual. See the
infotainment manual for instructions
on the uplevel radios.
Bluetooth-capable systems can
interact with many cell phones,
allowing:
.Placement and receipt of calls in
a hands-free mode.
. Sharing of the cell phone’s
address book or contact list with
the vehicle.
To minimize driver distraction,
before driving, and with the vehicle
parked:
. Become familiar with the
features of the cell phone.
Organize the phone book and
contact lists clearly and delete duplicate or rarely used entries.
If possible, program speed dial
or other shortcuts.
. Review the controls and
operation of the infotainment
system.
. Pair cell phone(s) to the vehicle.
The system may not work with
all cell phones. See “Pairing”in
this section.
. If the cell phone has voice
dialing capability, learn to use
that feature to access the
address book or contact list. See
“Voice Pass-Thru” in this
section.
. See “Storing and Deleting Phone
Numbers” in this section.
{Warning
When using a cell phone, it can
be distracting to look too long or
too often at the screen of the
phone or the infotainment system.
Taking your eyes off the road too
(Continued)
Warning (Continued)
long or too often could cause a
crash resulting in injury or death.
Focus your attention on driving.
Vehicles with a Bluetooth system
can use a Bluetooth-capable cell
phone with a Hands-Free Profile to
make and receive phone calls. The
infotainment system and voice
recognition are used to control the
system. The system can be used
while in ON/RUN or ACC/
ACCESSORY. The range of the
Bluetooth system can be up to 9.1 m
(30 ft). Not all phones support all
functions and not all phones work
with the Bluetooth system. See
www.gm.com/bluetooth for more
information about compatible
phones.
Bluetooth Controls
Use the buttons on the instrument
panel, faceplate, and the steering
wheel to operate the Bluetooth
system.