Page 234 of 342

Chevrolet Sonic Owner Manual (GMNA-Localizing-U.S./Canada-10122660) -2017 - crc - 5/13/16
Vehicle Care 233
Brake Fluid
The brake/clutch master cylinderreservoir is filled with GM approvedDOT 3 brake fluid as indicated onthe reservoir cap. SeeEngineCompartment Overview0217forthe location of the reservoir.
Checking Brake Fluid
Place the vehicle in P (Park) orNeutral with the parking brakeapplied if equipped with a manualtransmission. On a level surface,the brake fluid level should bebetween the minimum andmaximum marks on the brake fluidreservoir.
There are only two reasons why thebrake fluid level in the reservoir maygo down:
.Normal brake lining wear. Whennew linings are installed, thefluid level goes back up.
.Afluidleakinthebrake/clutchhydraulic system. Have thebrake/clutch hydraulic systemfixed. With a leak, the brakes willnot work well.
Always clean the brake fluidreservoir cap and the area aroundthe cap before removing it.
Do not top off the brake/clutch fluid.Adding fluid does not correct a leak.If fluid is added when the linings areworn, there will be too much fluidwhen new brake linings areinstalled. Add or remove fluid, asnecessary, only when work is doneon the brake/clutch hydraulicsystem.
{Warning
If too much brake fluid is added, it
can spill on the engine and burn,
if the engine is hot enough. You
or others could be burned, and
(Continued)
Warning (Continued)
the vehicle could be damaged.
Add brake fluid only when work is
done on the brake/clutch
hydraulic system.
When the brake/clutch fluid falls to alow level, the brake warning lightcomes on. SeeBrake SystemWarning Light011 4.
Brake fluid absorbs water over timewhich degrades the effectiveness ofthe brake fluid. Replace brake fluidat the specified intervals to preventincreased stopping distance. SeeMaintenance Schedule0290.
What to Add
Use only GM approved DOT 3brake fluid from a clean, sealedcontainer. SeeRecommendedFluids and Lubricants0300.
Page 237 of 342

Chevrolet Sonic Owner Manual (GMNA-Localizing-U.S./Canada-10122660) -2017 - crc - 5/13/16
236 Vehicle Care
Park Brake and P (Park)
Mechanism Check
{Warning
When you are doing this check,
the vehicle could begin to move.
Yo u o r o t h e r s c o u l d b e i n j u r e d
and property could be damaged.
Make sure there is room in front
of the vehicle in case it begins to
roll. Be ready to apply the regular
brake at once should the vehicle
begin to move.
Park on a fairly steep hill, with thevehicle facing downhill. Keepingyour foot on the regular brake, setthe parking brake.
.To c h e c k t h e p a r k i n g b r a k e ' sholding ability: With the enginerunning and the transmission inN(Neutral), slowly remove footpressure from the regular brakepedal. Do this until the vehicle isheld by the parking brake only.
.To c h e c k t h e P ( P a r k )mechanism's holding ability:With the engine running, shift toP(Park). Then release theparking brake followed by theregular brake.
Contact your dealer if service isrequired.
Wiper Blade Replacement
Front Wiper Blade
Replacement
Windshield wiper blades should beinspected for wear or cracking. SeetheMaintenance Schedule0290formore information.
Replacement blades come indifferent types and are removed indifferent ways. For properwindshield wiper blade length andtype, seeMaintenanceReplacement Parts0301.
Caution
Allowing the wiper arm to touch
the windshield when no wiper
blade is installed could damage
the windshield. Any damage that
occurs would not be covered by
the vehicle warranty. Do not allow
the wiper arm to touch the
windshield.
To r e p l a c e t h e w i n d s h i e l d w i p e rblade:
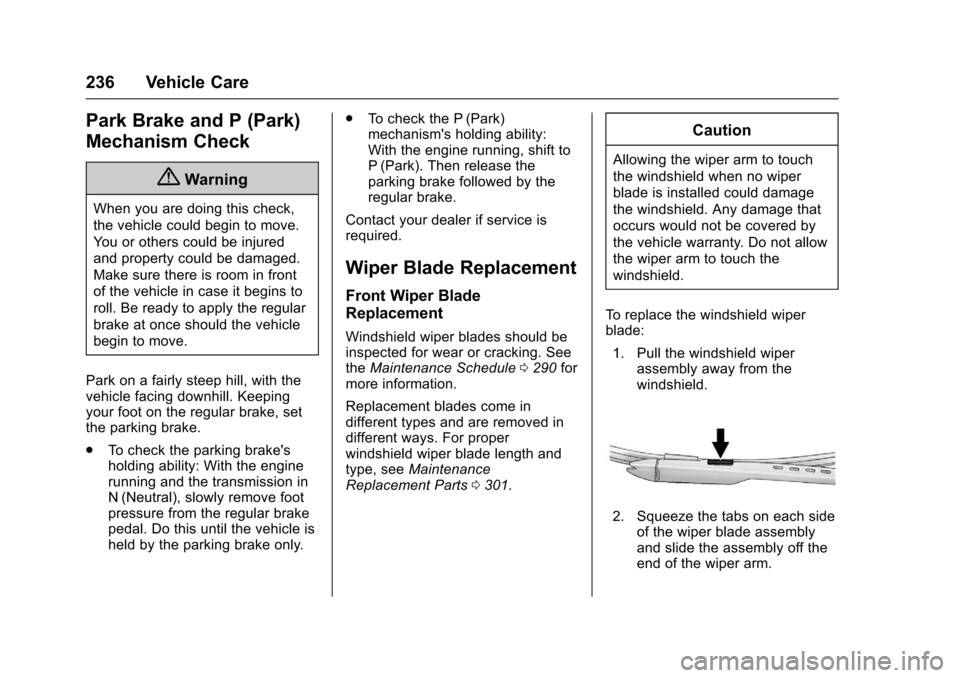
1. Pull the windshield wiperassembly away from thewindshield.
2. Squeeze the tabs on each sideof the wiper blade assemblyand slide the assembly off theend of the wiper arm.
Page 238 of 342
Chevrolet Sonic Owner Manual (GMNA-Localizing-U.S./Canada-10122660) -2017 - crc - 5/13/16
Vehicle Care 237
3. Install the new blade onto thearm and make sure the tabsare fully set in the lockedposition.
4. Repeat the steps for the otherwiper.
Rear Wiper Blade Replacement
1. Pull the wiper arm a shortdistance away from theglass (1).
2. Pull the blade out fromthe arm (2).
It may require extra effort toremove the old blade.
3. Once the blade pin disengagesfrom the wiper arm, remove thewiper blade by sliding the pinout of the guide hole.
4. Reverse the steps to install thenew blade.
Headlamp Aiming
Headlamp aim has been preset andshould need no further adjustment.
If the vehicle is damaged in a crash,the headlamp aim may be affected.If adjustment to the headlamps isnecessary, see your dealer.
Page 244 of 342
Chevrolet Sonic Owner Manual (GMNA-Localizing-U.S./Canada-10122660) -2017 - crc - 5/13/16
Vehicle Care 243
Engine Compartment
Fuse Block
1.8L Engines
The engine compartment fuse blockis on the driver side of the vehicle,near the battery.
Caution
Spilling liquid on any electrical
component on the vehicle may
damage it. Always keep the
covers on any electrical
component.
To a c c e s s t h e f u s e s , p r e s s t h e c l i p stogether, and lift the cover. Toreinstall the cover, push the coveruntil it is secure.
The vehicle may not be equippedwith all of the fuses, relays, andfeatures shown.
Mini Fuses Usage
1ABSvalve
2Sunroof
4* Rear fog lamp
5OSRVM/Powerwindow switch
6Automaticoccupantsensing/ROS
7Passiveentry/Passive start
8RVC
10–/IBS
11 R e a r w i n d o wdefogger
12 ESCL
13*–/SAI valve
14 OSRVM HTD
15 Front heated seats
16 Fuel system controlmodule 1
Page 245 of 342
Chevrolet Sonic Owner Manual (GMNA-Localizing-U.S./Canada-10122660) -2017 - crc - 5/13/16
244 Vehicle Care
Mini Fuses Usage
17 Canister vent
18 Washer
19* Fuel pump
20 Engine controlmodule 5
21 Fuel system controlmodule 2/Leveling
22 TCM 1/ DC DCconverter
24 Engine controlmodule 1
25 Coil
26 Engine controlmodule 4
27 Engine controlmodule 3
28 Engine controlmodule 2
29 Injector/Ignition coil
30 ECM
31 A/C clutch
32 TCM
Mini Fuses Usage
33 Horn
34 Front fog lamps
35 Left high-beamheadlamp
36 Right high-beamheadlamp
*=Ifequipped
J-CaseFusesUsage
1Frontwipers
2ABSpump
3Blower
4Run/CrankIEC
6CoolingfanK4
7CoolingfanK5
8* SAI pump
9EVP
10 Start
*=Ifequipped
Relays Usage
RLY 1 Front wiper control
RLY 2* Rear fog lamp
RLY 3 Front wiper speed
RLY 4 Rear defogger
RLY 5 Run/Crank
RLY 6*–/SAI valve
RLY 8* Fuel pump
RLY 9* SAI pump
RLY 10 Cooling fan K3
RLY 11 P/T
RLY 12 Start
RLY 13 A/C clutch
RLY 14 High-beamheadlamps
RLY 15 Cooling fan K1
*=Ifequipped
Page 246 of 342
Chevrolet Sonic Owner Manual (GMNA-Localizing-U.S./Canada-10122660) -2017 - crc - 5/13/16
Vehicle Care 245
1.4L Engine
The vehicle may not be equippedwith all of the fuses, relays, andfeatures shown.
Mini Fuses Usage
1ABSvalve
2Sunroof
4* Rear fog lamp
5OSRVM/Powerwindow switch
6Automaticoccupantsensing/ROS
7Passiveentry/Passive start
8RVC
9Rearwiper
10–/IBS
11 R e a r w i n d o wdefogger
12 ESCL
14 OSRVM HTD
15 Front heated seats
16 Fuel system controlmodule 1
17 Canister vent
18 Washer
Mini Fuses Usage
20 Engine controlmodule 5
21 Fuel system controlmodule 2/Leveling
22 TCM 1/ DC DCconverter
24 Engine controlmodule 1
25 Coil
26 Engine controlmodule 4
27 Engine controlmodule 3
28 Engine controlmodule 2
29 Injector/Ignition coil
30 ECM
31 A/C clutch
32 TCM
33 Horn
34 Front fog lamps
35 Left high-beamheadlamp
Page 247 of 342
Chevrolet Sonic Owner Manual (GMNA-Localizing-U.S./Canada-10122660) -2017 - crc - 5/13/16
246 Vehicle Care
Mini Fuses Usage
36 Right high-beamheadlamp
*=Ifequipped
J-CaseFusesUsage
1Frontwipers
2ABSpump
3Blower
4Run/CrankIEC
5Powerseat
6CoolingfanK4
7CoolingfanK5
9EVP
10 Start
*=Ifequipped
Relays Usage
RLY 1 Front wiper control
RLY 2* Rear fog lamp
RLY 3 Front wiper speed
RLY 4 Rear defogger
Relays Usage
RLY 5 Run/Crank
RLY 9 Cooling fan K2
RLY 10 Cooling fan K3
RLY 11 P/T
RLY 12 Start
RLY 13 A/C clutch
RLY 14 High-beamheadlamps
RLY 15 Cooling fan K1
*=Ifequipped
Instrument Panel Fuse
Block
The instrument panel fuse block ison the underside of the driver sideinstrument panel.
Page 275 of 342

Chevrolet Sonic Owner Manual (GMNA-Localizing-U.S./Canada-10122660) -2017 - crc - 5/13/16
274 Vehicle Care
Compact Spare Tire
{Warning
Driving with more than one
compact spare tire at a time could
result in loss of braking and
handling. This could lead to a
crash and you or others could be
injured. Use only one compact
spare tire at a time.
If this vehicle has a compact sparetire, it was fully inflated when new;however, it can lose air over time.Check the inflation pressureregularly. It should be 420 kPa(60 psi).
Stop as soon as possible and checkthat the spare tire is correctlyinflated after being installed on thevehicle. The compact spare tire isdesigned for temporary use only.The vehicle will perform differentlywith the spare tire installed and it isrecommended that the vehiclespeed be limited to 80 km/h(50 mph). To conserve the tread ofthe spare tire, have the standard tire
repaired or replaced as soon asconvenient and return the spare tireto the storage area.
When using a compact spare tire,the AWD (if equipped), ABS, andTraction Control systems mayengage until the spare tire isrecognized by the vehicle,especially on slippery roads. Adjustdriving to reduce possiblewheel slip.
Caution
When the compact spare is
installed, do not take the vehicle
through an automatic car wash
with guide rails. The compact
spare can get caught on the rails
which can damage the tire, wheel,
and other parts of the vehicle.
Do not use the compact spare onother vehicles.
Do not mix the compact spare tire orwheel with other wheels or tires.They will not fit. Keep the spare tireand its wheel together.
Caution
Tire chains will not fit the compact
spare. Using them can damage
the vehicle and the chains. Do not
use tire chains on the compact
spare.