2017 CHEVROLET ORLANDO check engine
[x] Cancel search: check enginePage 242 of 372
Black plate (14,1)Chevrolet Orlando Owner Manual - 2013 - CRC - 6/5/12
10-14 Vehicle Care
The following explains the cooling
system and how to check and add
coolant when it is low. If there is a
problem with engine overheating,
seeEngine Overheating on
page 10‑17.
What to Use
{WARNING
Adding only plain water or some
other liquid to the cooling system
can be dangerous. Plain water
and other liquids, can boil before
the proper coolant mixture will.
The coolant warning system is set
for the proper coolant mixture.
With plain water or the wrong
mixture, the engine could get too
hot but you would not get the
overheat warning. The engine
could catch fire and you or
others could be burned. Use a
50/50 mixture of clean, drinkable
water and DEX-COOL coolant. Use a 50/50 mixture of clean,
drinkable water and DEX-COOL
coolant. If using this mixture,
nothing else needs to be added.
This mixture:
.Gives freezing protection down
to
−37°C (−34°F), outside
temperature.
.Gives boiling protection up to
129°C (265°F), engine
temperature.
.Protects against rust and
corrosion.
.Will not damage aluminum parts.
.Helps keep the proper engine
temperature.
Notice: If an improper coolant
mixture is used, the engine could
overheat and be badly damaged.
The repair cost would not be
covered by the vehicle warranty.
Too much water in the mixture
can freeze and crack the engine,
radiator, heater core, and other
parts. Never dispose of engine coolant by
putting it in the trash, pouring it on
the ground, or into sewers, streams,
or bodies of water. Have the coolant
changed by an authorized service
center, familiar with legal
requirements regarding used
coolant disposal. This will help
protect the environment and your
health.
Checking Coolant
The vehicle must be on a level
surface when checking the coolant
level.
Check to see if coolant is visible in
the coolant surge tank. If the coolant
inside the coolant surge tank is
boiling, do not do anything else until
it cools down. If coolant is visible
but the coolant level is not at or
above the COLD FILL line, add a
50/50 mixture of clean, drinkable
water and DEX-COOL coolant at the
coolant surge tank, but be sure the
cooling system is cool before this is
done. See
Cooling System on
page 10‑13.
Page 243 of 372
Black plate (15,1)Chevrolet Orlando Owner Manual - 2013 - CRC - 6/5/12
Vehicle Care 10-15
The coolant surge tank is in the
engine compartment on the driver
side of the vehicle. SeeEngine
Compartment Overview on
page 10‑6.
How to Add Coolant to the
Coolant Surge Tank
Notice: This vehicle has a
specific coolant fill procedure.
Failure to follow this procedure
could cause the engine to
overheat and be severely
damaged.
If you have not found a problem
yet, check to see if coolant is visible
in the coolant surge tank. If coolant
is visible but the coolant level is
not at the COLD FILL line, add a
50/50 mixture of clean, drinkable
water and DEX-COOL coolant at the
coolant surge tank, but be sure the
cooling system, including the
coolant surge tank pressure cap, is
cool before you do it. See Engine
Overheating on page 10‑17.
{WARNING
Steam and scalding liquids from a
hot cooling system can blow out
and burn you badly. They are
under pressure, and if you turn
the coolant surge tank pressure
cap —even a little —they can
come out at high speed. Never
turn the cap when the cooling
system, including the coolant
surge tank pressure cap, is hot.
Wait for the cooling system and
coolant surge tank pressure cap
to cool if you ever have to turn
the pressure cap.
{WARNING
Adding only plain water or some
other liquid to the cooling system
can be dangerous. Plain water
and other liquids, can boil before
the proper coolant mixture will.
(Continued)
WARNING (Continued)
The coolant warning system is set
for the proper coolant mixture.
With plain water or the wrong
mixture, the engine could get too
hot but you would not get the
overheat warning. The engine
could catch fire and you or others
could be burned. Use a 50/
50 mixture of clean, drinkable
water and DEX-COOL coolant.
{WARNING
You can be burned if you spill
coolant on hot engine parts.
Coolant contains ethylene glycol
and it will burn if the engine parts
are hot enough. Do not spill
coolant on a hot engine.
Page 244 of 372
Black plate (16,1)Chevrolet Orlando Owner Manual - 2013 - CRC - 6/5/12
10-16 Vehicle Care
Notice:In cold weather, water
can freeze and crack the engine,
radiator, heater core and other
parts. Use the recommended
coolant and the proper coolant
mixture.
1. Remove the coolant surge tank pressure cap when the cooling
system, including the coolant
surge tank pressure cap and
upper radiator hose, is no
longer hot.
Turn the pressure cap slowly
counterclockwise about
one-quarter of a turn. If you hear
a hiss, wait for that to stop. This
will allow any pressure still left to
be vented out the
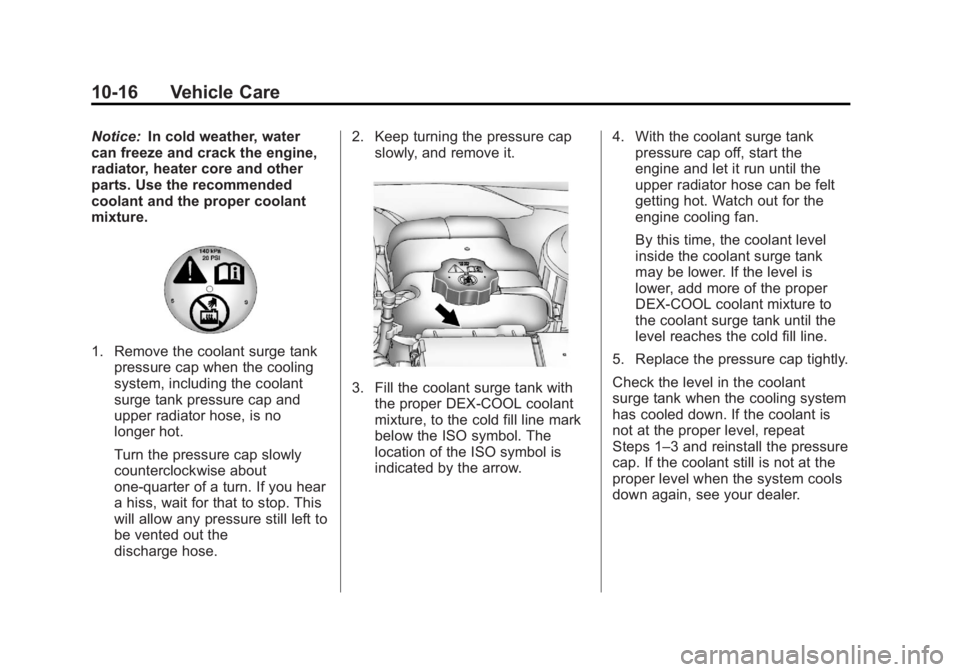
discharge hose. 2. Keep turning the pressure cap
slowly, and remove it.
3. Fill the coolant surge tank withthe proper DEX-COOL coolant
mixture, to the cold fill line mark
below the ISO symbol. The
location of the ISO symbol is
indicated by the arrow. 4. With the coolant surge tank
pressure cap off, start the
engine and let it run until the
upper radiator hose can be felt
getting hot. Watch out for the
engine cooling fan.
By this time, the coolant level
inside the coolant surge tank
may be lower. If the level is
lower, add more of the proper
DEX-COOL coolant mixture to
the coolant surge tank until the
level reaches the cold fill line.
5. Replace the pressure cap tightly.
Check the level in the coolant
surge tank when the cooling system
has cooled down. If the coolant is
not at the proper level, repeat
Steps 1–3 and reinstall the pressure
cap. If the coolant still is not at the
proper level when the system cools
down again, see your dealer.
Page 245 of 372
Black plate (17,1)Chevrolet Orlando Owner Manual - 2013 - CRC - 6/5/12
Vehicle Care 10-17
Engine Overheating
The vehicle has an engine coolant
temperature gauge to warn of
engine overheating. SeeEngine
Coolant Temperature Gauge on
page 5‑10.
The decision may be made not
to lift the hood when this warning
appears, but instead get service
help right away. See Roadside
Assistance Program on page 13‑5.
If the decision to lift the hood is
made, make sure the vehicle is
parked on a level surface.
Then check to see if the engine
cooling fan is running. If the engine
is overheating, the fan should be
running. If they are not, do not
continue to run the engine and have
the vehicle serviced.
Notice: Engine damage from
running the engine without
coolant is not covered by the
warranty.
If Steam is Coming from the
Engine Compartment
{WARNING
Steam from an overheated engine
can burn you badly, even if you
just open the hood. Stay away
from the engine if you see or hear
steam coming from it. Just turn it
off and get everyone away from
the vehicle until it cools down.
Wait until there is no sign of
steam or coolant before you open
the hood.
If you keep driving when the
engine is overheated, the liquids
in it can catch fire. You or others
could be badly burned. Stop the
engine if it overheats, and get out
of the vehicle until the engine
is cool.
If No Steam is Coming from
the Engine Compartment
If the engine coolant temperature
gauge is in the overheat zone but
no steam can be seen or heard, the
problem may not be too serious.
Sometimes the engine can get a
little too hot when the vehicle:
.Climbs a long hill on a hot day.
.Stops after high-speed driving.
.Idles for long periods in traffic.
.Tows a trailer.
If the engine coolant temperature
gauge is in the overheat zone with
no sign of steam:
1. Turn the air conditioning off.
2. Turn the heater on to the highest temperature and to the highest
fan speed. Open the windows as
necessary.
Page 248 of 372
Black plate (20,1)Chevrolet Orlando Owner Manual - 2013 - CRC - 6/5/12
10-20 Vehicle Care
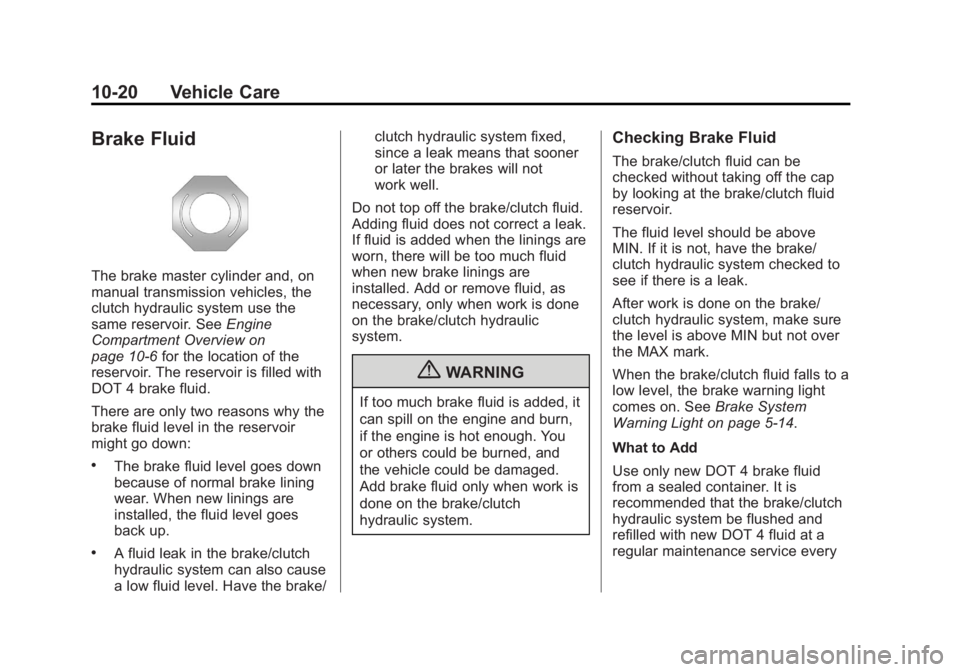
Brake Fluid
The brake master cylinder and, on
manual transmission vehicles, the
clutch hydraulic system use the
same reservoir. SeeEngine
Compartment Overview on
page 10‑6 for the location of the
reservoir. The reservoir is filled with
DOT 4 brake fluid.
There are only two reasons why the
brake fluid level in the reservoir
might go down:
.The brake fluid level goes down
because of normal brake lining
wear. When new linings are
installed, the fluid level goes
back up.
.A fluid leak in the brake/clutch
hydraulic system can also cause
a low fluid level. Have the brake/ clutch hydraulic system fixed,
since a leak means that sooner
or later the brakes will not
work well.
Do not top off the brake/clutch fluid.
Adding fluid does not correct a leak.
If fluid is added when the linings are
worn, there will be too much fluid
when new brake linings are
installed. Add or remove fluid, as
necessary, only when work is done
on the brake/clutch hydraulic
system.
{WARNING
If too much brake fluid is added, it
can spill on the engine and burn,
if the engine is hot enough. You
or others could be burned, and
the vehicle could be damaged.
Add brake fluid only when work is
done on the brake/clutch
hydraulic system.
Checking Brake Fluid
The brake/clutch fluid can be
checked without taking off the cap
by looking at the brake/clutch fluid
reservoir.
The fluid level should be above
MIN. If it is not, have the brake/
clutch hydraulic system checked to
see if there is a leak.
After work is done on the brake/
clutch hydraulic system, make sure
the level is above MIN but not over
the MAX mark.
When the brake/clutch fluid falls to a
low level, the brake warning light
comes on. See Brake System
Warning Light on page 5‑14.
What to Add
Use only new DOT 4 brake fluid
from a sealed container. It is
recommended that the brake/clutch
hydraulic system be flushed and
refilled with new DOT 4 fluid at a
regular maintenance service every
Page 250 of 372
Black plate (22,1)Chevrolet Orlando Owner Manual - 2013 - CRC - 6/5/12
10-22 Vehicle Care
Starter Switch Check
{WARNING
When you are doing this
inspection, the vehicle could
move suddenly. If the vehicle
moves, you or others could be
injured.
1. Before starting this check, be sure there is enough room
around the vehicle.
2. Firmly apply both the parking brake and the regular brake.
See Parking Brake on
page 9‑27.
Do not use the accelerator
pedal, and be ready to turn off
the engine immediately if it
starts. 3. For automatic transmission
vehicles, try to start the engine
in each gear. The vehicle should
start only in P (Park) or
N (Neutral). If the vehicle starts
in any other position, contact
your dealer for service.
For manual transmission
vehicles, put the shift lever in
Neutral, push the clutch pedal
down halfway, and try to start
the engine. The vehicle should
start only when the clutch pedal
is pushed down all the way to
the floor. If the vehicle starts
when the clutch pedal is not
pushed all the way down,
contact your dealer for service.
Automatic Transmission
Shift Lock Control
Function Check
{WARNING
When you are doing this
inspection, the vehicle could
move suddenly. If the vehicle
moves, you or others could be
injured.
1. Before starting this check, be sure there is enough room
around the vehicle. It should be
parked on a level surface.
2. Firmly apply the parking brake. See Parking Brake on
page 9‑27.
Be ready to apply the regular
brake immediately if the vehicle
begins to move.
Page 251 of 372
Black plate (23,1)Chevrolet Orlando Owner Manual - 2013 - CRC - 6/5/12
Vehicle Care 10-23
3. With the engine off, turn theignition on, but do not start the
engine. Without applying the
regular brake, try to move the
shift lever out of P (Park) with
normal effort. If the shift lever
moves out of P (Park), contact
your dealer for service.
Ignition Transmission
Lock Check
While parked, and with the parking
brake set, try to turn the ignition to
LOCK/OFF in each shift lever
position.
.For automatic transmission
vehicles, the ignition should turn
to LOCK/OFF only when the
shift lever is in P (Park). The
ignition key should come out
only in LOCK/OFF.
.For manual transmission
vehicles, the ignition key should
come out only in LOCK/OFF.
Contact your dealer if service is
required.
Park Brake and P (Park)
Mechanism Check
{WARNING
When you are doing this check,
the vehicle could begin to move.
You or others could be injured
and property could be damaged.
Make sure there is room in front
of the vehicle in case it begins to
roll. Be ready to apply the regular
brake at once should the vehicle
begin to move.
Park on a fairly steep hill, with the
vehicle facing downhill. Keeping
your foot on the regular brake, set
the parking brake.
.To check the parking brake's
holding ability: With the engine
running and the transmission in
N (Neutral), slowly remove foot
pressure from the regular brake
pedal. Do this until the vehicle is
held by the parking brake only.
.To check the P (Park)
mechanism's holding ability:
With the engine running, shift to
P (Park). Then release the
parking brake followed by the
regular brake.
Contact your dealer if service is
required.
Wiper Blade Replacement
Front Wiper Blade
Replacement
Windshield wiper blades should be
inspected for wear or cracking. See
Maintenance Schedule on
page 11‑2.
Replacement blades come in
different types and are removed
in different ways. For proper
windshield wiper blade length
and type, see Maintenance
Replacement Parts on page 11‑13.
Page 259 of 372

Black plate (31,1)Chevrolet Orlando Owner Manual - 2013 - CRC - 6/5/12
Vehicle Care 10-31
Headlamp Wiring
An electrical overload may cause
the lamps to go on and off, or in
some cases to remain off. Have the
headlamp wiring checked right away
if the lamps go on and off or
remain off.
Windshield Wipers
If the wiper motor overheats due to
heavy snow or ice, the windshield
wipers will stop until the motor cools
and will then restart.
Although the circuit is protected
from electrical overload, overload
due to heavy snow or ice may
cause wiper linkage damage.
Always clear ice and heavy snow
from the windshield before using the
windshield wipers.
If the overload is caused by an
electrical problem and not snow or
ice, be sure to get it fixed.
Fuses and Circuit
Breakers
The wiring circuits in the vehicle are
protected from short circuits by a
combination of fuses and circuit
breakers. This greatly reduces the
chance of damage caused by
electrical problems.
To check a fuse, look at the
silver-colored band inside the fuse.
If the band is broken or melted,
replace the fuse. Be sure to replace
a bad fuse with a new one of the
identical size and rating.
Fuses of the same amperage can
be temporarily borrowed from
another fuse location, if a fuse goes
out. Replace the fuse as soon as
possible.
To identify and check fuses, circuit
breakers, and relays, seeEngine
Compartment Fuse Block on
page 10‑31 andInstrument Panel
Fuse Block on page 10‑34.
Engine Compartment
Fuse Block
To remove the fuse block cover,
squeeze the clips and lift it up.
Notice: Spilling liquid on any
electrical component on the
vehicle may damage it. Always
keep the covers on any electrical
component.