2017 CHEVROLET ORLANDO battery
[x] Cancel search: batteryPage 195 of 372
Black plate (15,1)Chevrolet Orlando Owner Manual - 2013 - CRC - 6/5/12
Driving and Operating 9-15
Do not turn the engine off when the
vehicle is moving. This will cause a
loss of power assist in the brake
and steering systems and disable
the airbags.
If the vehicle must be shut off in an
emergency:
1. Brake using a firm and steadypressure. Do not pump the
brakes repeatedly. This may
deplete power assist, requiring
increased brake pedal force.
2. Shift the vehicle to neutral. This can be done while the vehicle is
moving. After shifting to neutral,
firmly apply the brakes and steer
the vehicle to a safe location.
3. Come to a complete stop. Shift to P (Park) with an automatic
transmission, or Neutral with a
manual transmission. Turn the
ignition to LOCK/OFF.
4. Set the parking brake. See Parking Brake on page 9‑27.{WARNING
Turning off the vehicle while
moving may cause loss of power
assist in the brake and steering
systems and disable the airbags.
While driving, only shut the
vehicle off in an emergency.
If the vehicle cannot be pulled over,
and must be shut off while driving,
turn the ignition to ACC/
ACCESSORY.
2 (ACC/ACCESSORY): This
position provides power to some of
the electrical accessories. It unlocks
the steering wheel. To move the key
from ACC/ACCESSORY to LOCK/
OFF, the shift lever must be in
P (Park).
3 (ON/RUN): The ignition switch
stays in this position when the
engine is running. This position can
be used to operate the electrical
accessories, as well as to display
some warning and indicator lights. This position can also be used for
service and diagnostics, and to
verify the proper operation of the
malfunction indicator lamp as may
be required for emission inspection
purposes.
The battery could be drained if the
key is left in the ACC/ACCESSORY
or ON/RUN position with the engine
off. The vehicle might not restart if
the battery is allowed to drain for an
extended period of time.
4 (START):
This position starts the
engine. When the engine starts,
release the key. The ignition switch
will return to ON/RUN for normal
driving.
A warning tone sounds when the
driver door is opened and the key is
in the ignition. If the key becomes
difficult to turn, see Keys on
page 2‑1.
Page 196 of 372
Black plate (16,1)Chevrolet Orlando Owner Manual - 2013 - CRC - 6/5/12
9-16 Driving and Operating
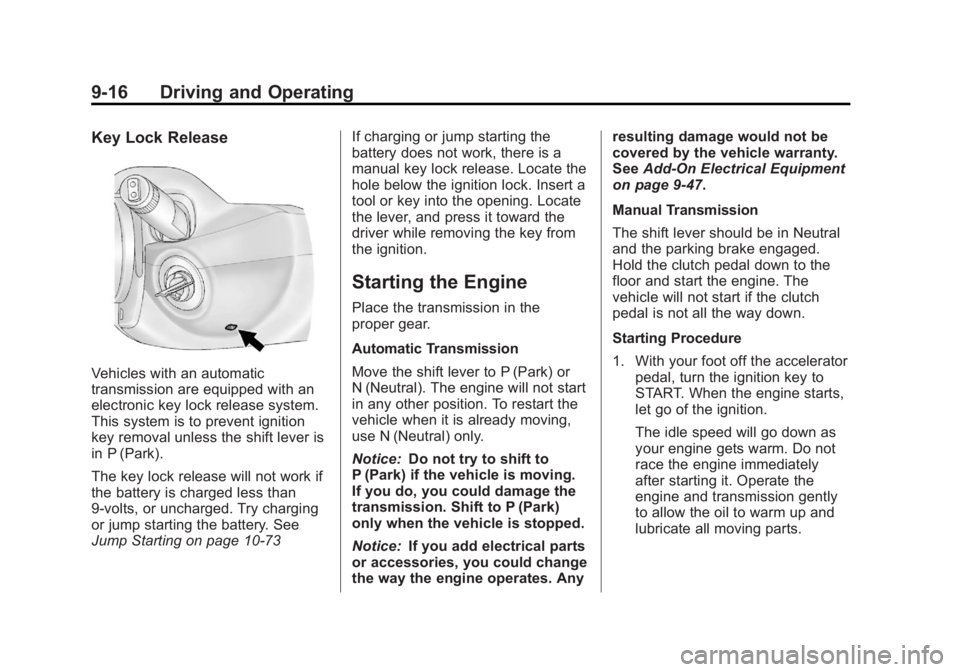
Key Lock Release
Vehicles with an automatic
transmission are equipped with an
electronic key lock release system.
This system is to prevent ignition
key removal unless the shift lever is
in P (Park).
The key lock release will not work if
the battery is charged less than
9-volts, or uncharged. Try charging
or jump starting the battery. See
Jump Starting on page 10‑73If charging or jump starting the
battery does not work, there is a
manual key lock release. Locate the
hole below the ignition lock. Insert a
tool or key into the opening. Locate
the lever, and press it toward the
driver while removing the key from
the ignition.
Starting the Engine
Place the transmission in the
proper gear.
Automatic Transmission
Move the shift lever to P (Park) or
N (Neutral). The engine will not start
in any other position. To restart the
vehicle when it is already moving,
use N (Neutral) only.
Notice:
Do not try to shift to
P (Park) if the vehicle is moving.
If you do, you could damage the
transmission. Shift to P (Park)
only when the vehicle is stopped.
Notice: If you add electrical parts
or accessories, you could change
the way the engine operates. Any resulting damage would not be
covered by the vehicle warranty.
See
Add-On Electrical Equipment
on page 9‑47.
Manual Transmission
The shift lever should be in Neutral
and the parking brake engaged.
Hold the clutch pedal down to the
floor and start the engine. The
vehicle will not start if the clutch
pedal is not all the way down.
Starting Procedure
1. With your foot off the accelerator pedal, turn the ignition key to
START. When the engine starts,
let go of the ignition.
The idle speed will go down as
your engine gets warm. Do not
race the engine immediately
after starting it. Operate the
engine and transmission gently
to allow the oil to warm up and
lubricate all moving parts.
Page 197 of 372

Black plate (17,1)Chevrolet Orlando Owner Manual - 2013 - CRC - 6/5/12
Driving and Operating 9-17
The vehicle has a
Computer-Controlled Cranking
System. This feature assists in
starting the engine and protects
components. If the ignition key is
turned to the START position,
and then released when the
engine begins cranking, the
engine will continue cranking for
a few seconds or until the
vehicle starts. If the engine does
not start and the key is held in
START for many seconds,
cranking will be stopped after
15 seconds to prevent cranking
motor damage. To prevent gear
damage, this system also
prevents cranking if the engine
is already running. Engine
cranking can be stopped by
turning the ignition switch to
ACC/ACCESSORY or
LOCK/OFF.Notice:
Cranking the engine for
long periods of time, by returning
the key to the START position
immediately after cranking has
ended, can overheat and damage
the cranking motor, and drain the
battery. Wait at least 15 seconds
between each try, to let the
cranking motor cool down.
2. If the engine does not start after
five to 10 seconds, especially in
very cold weather (below −18°C
or 0°F), it could be flooded with
too much gasoline. Try pushing
the accelerator pedal all the way
to the floor and holding it there
as you hold the key in START
for up to a maximum of
15 seconds. Wait at least
15 seconds between each try, to
allow the cranking motor to cool
down. When the engine starts,
let go of the key or button, and
the accelerator. If the vehicle
starts briefly but then stops
again, do the same thing. This
clears the extra gasoline from
the engine. Do not race the engine immediately after starting
it. Operate the engine and
transmission gently until the oil
warms up and lubricates all
moving parts.
Engine Heater
The engine heater can help in cold
weather conditions at or below
−18°C (0°F) for easier starting and
better fuel economy during engine
warm-up. Plug in the heater at least
four hours before starting the
vehicle. An internal thermostat in
the plug-end of the cord will prevent
engine heater operation at
temperatures above
−18°C (0°F).
To Use The Engine Heater
1. Turn off the engine.
2. Open the hood and unwrap the
electrical cord stored near the air
cleaner.
3. Plug it into a normal, grounded 110-volt AC outlet.
Page 227 of 372
Black plate (47,1)Chevrolet Orlando Owner Manual - 2013 - CRC - 6/5/12
Driving and Operating 9-47
Trailer Brakes
Does the trailer have its own
brakes? Be sure to read and follow
the instructions for the trailer brakes
so they are installed, adjusted, and
maintained properly.
Because the vehicle has antilock
brakes, do not tap into the vehicle's
brake system. If this is done, both
brake systems will not work well,
or at all.
Conversions and
Add-Ons
Add-On Electrical
Equipment
Notice:Some electrical
equipment can damage the
vehicle or cause components to
not work and would not be
covered by the warranty. Always
check with your dealer before
adding electrical equipment. Add-on equipment can drain the
vehicle's 12-volt battery, even if the
vehicle is not operating.
The vehicle has an airbag system.
Before attempting to add anything
electrical to the vehicle, see
Servicing the Airbag-Equipped
Vehicle on page 3‑30
andAdding
Equipment to the Airbag-Equipped
Vehicle on page 3‑30.
Page 229 of 372
Black plate (1,1)Chevrolet Orlando Owner Manual - 2013 - CRC - 6/5/12
Vehicle Care 10-1
Vehicle Care
General Information
General Information . . . . . . . . . . 10-2
California Proposition65 Warning . . . . . . . . . . . . . . . . . 10-3
California Perchlorate Materials Requirements . . . . 10-3
Accessories and Modifications . . . . . . . . . . . . . . . 10-3
Vehicle Checks
Doing Your OwnService Work . . . . . . . . . . . . . . . 10-4
Hood . . . . . . . . . . . . . . . . . . . . . . . . 10-4
Engine Compartment Overview . . . . . . . . . . . . . . . . . . . 10-6
Engine Oil . . . . . . . . . . . . . . . . . . . 10-7
Engine Oil Life System . . . . . . 10-9
Automatic Transmission Fluid . . . . . . . . . . . . . . . . . . . . . . 10-10
Manual Transmission Fluid . . . . . . . . . . . . . . . . . . . . . . 10-11
Hydraulic Clutch . . . . . . . . . . . . 10-11
Engine Air Cleaner/Filter . . . . 10-11
Cooling System . . . . . . . . . . . . 10-13
Engine Coolant . . . . . . . . . . . . . 10-13
Engine Overheating . . . . . . . . 10-17 Washer Fluid . . . . . . . . . . . . . . . 10-18
Brakes . . . . . . . . . . . . . . . . . . . . . 10-19
Brake Fluid . . . . . . . . . . . . . . . . . 10-20
Battery . . . . . . . . . . . . . . . . . . . . . 10-21
Starter Switch Check . . . . . . . 10-22
Automatic Transmission Shift
Lock Control Function
Check . . . . . . . . . . . . . . . . . . . . . 10-22
Ignition Transmission Lock Check . . . . . . . . . . . . . . . . . . . . . 10-23
Park Brake and P (Park) Mechanism Check . . . . . . . . 10-23
Wiper Blade Replacement . . . . . . . . . . . . . . 10-23
Headlamp Aiming
Headlamp Aiming . . . . . . . . . . 10-25
Bulb Replacement
Bulb Replacement . . . . . . . . . . 10-25
Halogen Bulbs . . . . . . . . . . . . . . 10-25
Headlamps, Front TurnSignal, Sidemarker, and
Parking Lamps . . . . . . . . . . . . 10-25
Fog Lamps . . . . . . . . . . . . . . . . . 10-27
Taillamps, Turn Signal, Sidemarker, and
Stoplamps . . . . . . . . . . . . . . . . 10-27 Back-Up Lamps . . . . . . . . . . . . 10-29
License Plate Lamp . . . . . . . . 10-29
Replacement Bulbs . . . . . . . . . 10-30
Electrical System
Electrical System
Overload . . . . . . . . . . . . . . . . . . 10-30
Fuses and Circuit Breakers . . . . . . . . . . . . . . . . . . 10-31
Engine Compartment Fuse Block . . . . . . . . . . . . . . . . . . . . . 10-31
Instrument Panel Fuse Block . . . . . . . . . . . . . . . . . . . . . 10-34
Wheels and Tires
Tires . . . . . . . . . . . . . . . . . . . . . . . . 10-37
All-Season Tires . . . . . . . . . . . . 10-37
Winter Tires . . . . . . . . . . . . . . . . 10-38
Summer Tires . . . . . . . . . . . . . . 10-38
Tire Sidewall Labeling . . . . . . 10-38
Tire Designations . . . . . . . . . . . 10-40
Tire Terminology andDefinitions . . . . . . . . . . . . . . . . 10-40
Tire Pressure . . . . . . . . . . . . . . . 10-43
Tire Pressure Monitor System . . . . . . . . . . . . . . . . . . . 10-44
Tire Pressure Monitor Operation . . . . . . . . . . . . . . . . . 10-45
Tire Inspection . . . . . . . . . . . . . . 10-48
Page 235 of 372
Black plate (7,1)Chevrolet Orlando Owner Manual - 2013 - CRC - 6/5/12
Vehicle Care 10-7
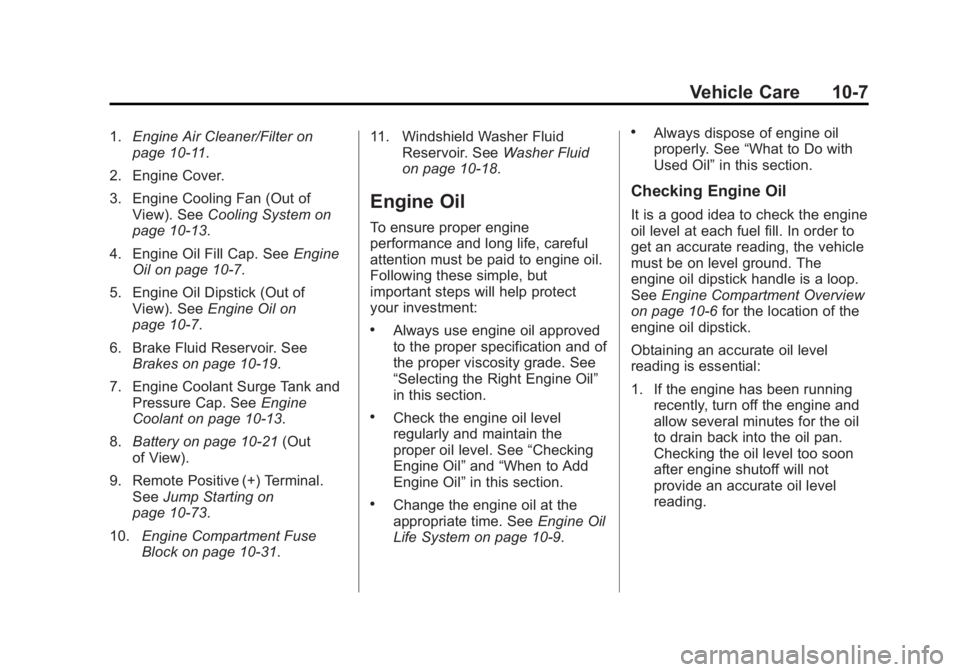
1.Engine Air Cleaner/Filter on
page 10‑11.
2. Engine Cover.
3. Engine Cooling Fan (Out of View). See Cooling System on
page 10‑13.
4. Engine Oil Fill Cap. See Engine
Oil on page 10‑7.
5. Engine Oil Dipstick (Out of View). See Engine Oil on
page 10‑7.
6. Brake Fluid Reservoir. See Brakes on page 10‑19.
7. Engine Coolant Surge Tank and Pressure Cap. See Engine
Coolant on page 10‑13.
8. Battery on page 10‑21 (Out
of View).
9. Remote Positive (+) Terminal. See Jump Starting on
page 10‑73.
10. Engine Compartment Fuse
Block on page 10‑31. 11. Windshield Washer Fluid
Reservoir. See Washer Fluid
on page 10‑18.
Engine Oil
To ensure proper engine
performance and long life, careful
attention must be paid to engine oil.
Following these simple, but
important steps will help protect
your investment:
.Always use engine oil approved
to the proper specification and of
the proper viscosity grade. See
“Selecting the Right Engine Oil”
in this section.
.Check the engine oil level
regularly and maintain the
proper oil level. See “Checking
Engine Oil” and“When to Add
Engine Oil” in this section.
.Change the engine oil at the
appropriate time. See Engine Oil
Life System on page 10‑9.
.Always dispose of engine oil
properly. See “What to Do with
Used Oil” in this section.
Checking Engine Oil
It is a good idea to check the engine
oil level at each fuel fill. In order to
get an accurate reading, the vehicle
must be on level ground. The
engine oil dipstick handle is a loop.
SeeEngine Compartment Overview
on page 10‑6 for the location of the
engine oil dipstick.
Obtaining an accurate oil level
reading is essential:
1. If the engine has been running recently, turn off the engine and
allow several minutes for the oil
to drain back into the oil pan.
Checking the oil level too soon
after engine shutoff will not
provide an accurate oil level
reading.
Page 249 of 372
Black plate (21,1)Chevrolet Orlando Owner Manual - 2013 - CRC - 6/5/12
Vehicle Care 10-21
two years. SeeRecommended
Fluids and Lubricants on
page 11‑12.
Always clean the brake/clutch fluid
reservoir cap and the area around
the cap before removing it. This
helps keep dirt from entering the
reservoir.
{WARNING
With the wrong kind of fluid in the
brake/clutch hydraulic system, the
brakes might not work well. This
could cause a crash. Always use
the proper brake/clutch fluid.
Notice
.Using the wrong fluid can
badly damage brake/clutch
hydraulic system parts. For
example, just a few drops of
mineral-based oil, such as
engine oil, in the brake
hydraulic system can
damage brake hydraulic
system parts so badly that they will have to be replaced.
Do not let someone put in
the wrong kind of fluid.
.If brake fluid is spilled on the
vehicle's painted surfaces,
the paint finish can be
damaged. Be careful not to
spill brake fluid on the
vehicle. If you do, wash it off
immediately.
Battery
Refer to the replacement number
shown on the original battery label
when a new battery is needed. See
Engine Compartment Overview on
page 10‑6
for battery location.
{WARNING
Battery posts, terminals, and
related accessories contain lead
and lead compounds, chemicals
known to the State of California to
cause cancer and reproductive
harm. Wash hands after handling.
Vehicle Storage
{WARNING
Batteries have acid that can burn
you and gas that can explode.
You can be badly hurt if you are
not careful. See Jump Starting on
page 10‑73 for tips on working
around a battery without
getting hurt.
Infrequent Usage: Remove the
black, negative (−) cable from the
battery to keep the battery from
running down.
Extended Storage: Remove the
black, negative (−) cable from the
battery or use a battery trickle
charger.
Page 254 of 372
Black plate (26,1)Chevrolet Orlando Owner Manual - 2013 - CRC - 6/5/12
10-26 Vehicle Care
2. Remove the connectorretaining tab (1).
3. Disconnect the wiring harness connector from the bulb (3) by
pressing the connector
release (2) and pulling
straight back.
4. Remove the bulb (3) from the headlamp assembly by turning
counterclockwise and pulling
straight back.
5. Install the new bulb in the headlamp assembly by turning
clockwise.
6. Install the wiring harness connector to the bulb. Be sure
the connector release (2) locks
into place.
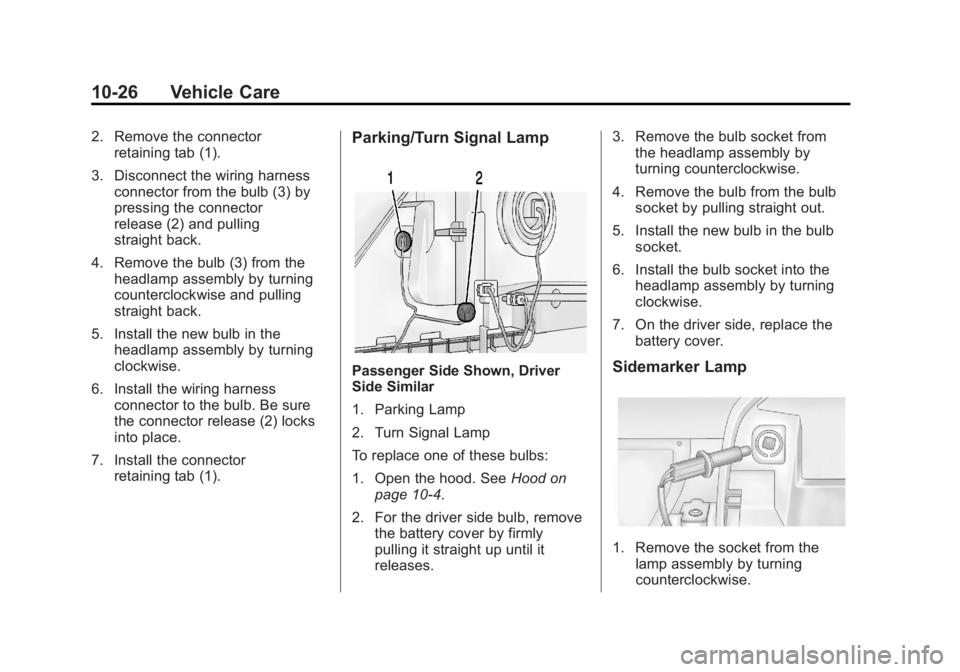
7. Install the connector retaining tab (1).Parking/Turn Signal Lamp
Passenger Side Shown, Driver
Side Similar
1. Parking Lamp
2. Turn Signal Lamp
To replace one of these bulbs:
1. Open the hood. See Hood on
page 10‑4.
2. For the driver side bulb, remove the battery cover by firmly
pulling it straight up until it
releases. 3. Remove the bulb socket from
the headlamp assembly by
turning counterclockwise.
4. Remove the bulb from the bulb socket by pulling straight out.
5. Install the new bulb in the bulb socket.
6. Install the bulb socket into the headlamp assembly by turning
clockwise.
7. On the driver side, replace the battery cover.Sidemarker Lamp
1. Remove the socket from thelamp assembly by turning
counterclockwise.