2017 CHEVROLET MALIBU stop start
[x] Cancel search: stop startPage 317 of 419
Chevrolet Malibu Owner Manual (GMNA-Localizing-U.S./Canada/Mexico-10122664) - 2017 - crc - 5/23/16
316 Vehicle Care
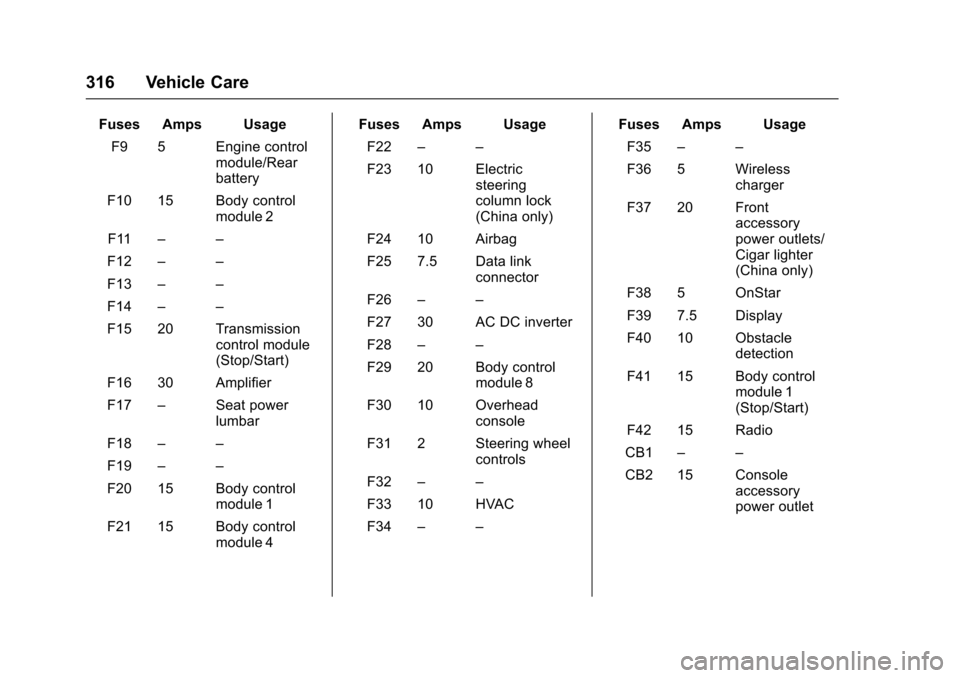
Fuses Amps Usage
F9 5 Engine controlmodule/Rearbattery
F10 15 Body controlmodule 2
F11––
F12––
F13––
F14––
F15 20 Transmissioncontrol module(Stop/Start)
F16 30 Amplifier
F17–Seat powerlumbar
F18––
F19––
F20 15 Body controlmodule 1
F21 15 Body controlmodule 4
Fuses Amps Usage
F22––
F23 10 Electricsteeringcolumn lock(China only)
F24 10 Airbag
F25 7.5 Data linkconnector
F26––
F27 30 AC DC inverter
F28––
F29 20 Body controlmodule 8
F30 10 Overheadconsole
F31 2 Steering wheelcontrols
F32––
F33 10 HVAC
F34––
Fuses Amps Usage
F35––
F36 5 Wirelesscharger
F37 20 Frontaccessorypower outlets/Cigar lighter(China only)
F38 5 OnStar
F39 7.5 Display
F40 10 Obstacledetection
F41 15 Body controlmodule 1(Stop/Start)
F42 15 Radio
CB1––
CB2 15 Consoleaccessorypower outlet
Page 328 of 419
Chevrolet Malibu Owner Manual (GMNA-Localizing-U.S./Canada/Mexico-10122664) - 2017 - crc - 5/23/16
Vehicle Care 327
Tire Pressure Monitor
System
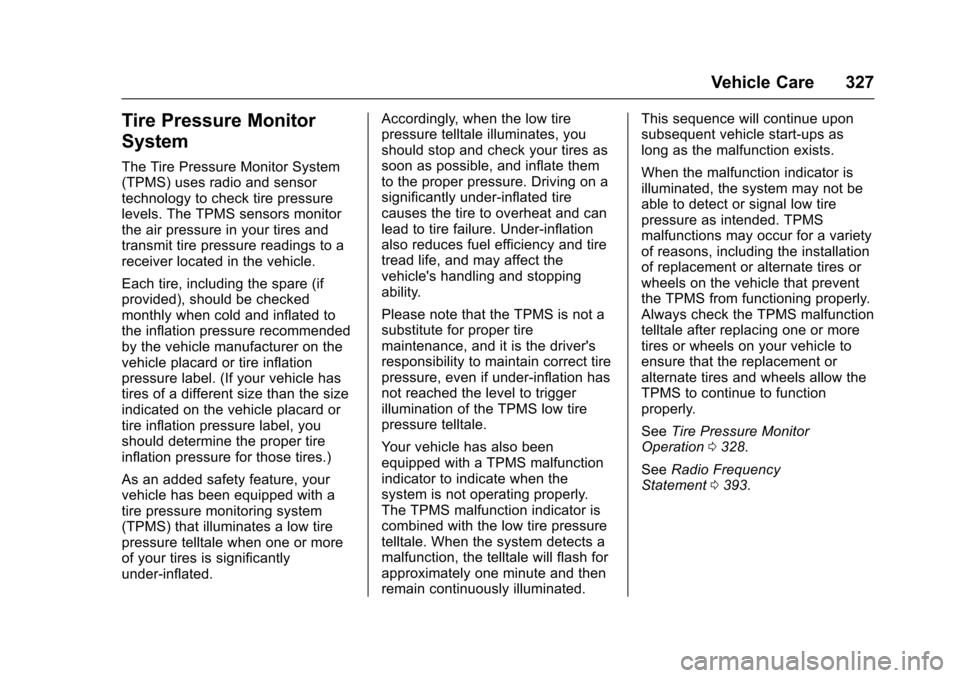
The Tire Pressure Monitor System(TPMS) uses radio and sensortechnology to check tire pressurelevels. The TPMS sensors monitorthe air pressure in your tires andtransmit tire pressure readings to areceiver located in the vehicle.
Each tire, including the spare (ifprovided), should be checkedmonthly when cold and inflated tothe inflation pressure recommendedby the vehicle manufacturer on thevehicle placard or tire inflationpressure label. (If your vehicle hastires of a different size than the sizeindicated on the vehicle placard ortire inflation pressure label, youshould determine the proper tireinflation pressure for those tires.)
As an added safety feature, yourvehicle has been equipped with atire pressure monitoring system(TPMS) that illuminates a low tirepressure telltale when one or moreof your tires is significantlyunder-inflated.
Accordingly, when the low tirepressure telltale illuminates, youshould stop and check your tires assoon as possible, and inflate themto the proper pressure. Driving on asignificantly under-inflated tirecauses the tire to overheat and canlead to tire failure. Under-inflationalso reduces fuel efficiency and tiretread life, and may affect thevehicle's handling and stoppingability.
Please note that the TPMS is not asubstitute for proper tiremaintenance, and it is the driver'sresponsibility to maintain correct tirepressure, even if under-inflation hasnot reached the level to triggerillumination of the TPMS low tirepressure telltale.
Yo u r v e h i c l e h a s a l s o b e e nequipped with a TPMS malfunctionindicator to indicate when thesystem is not operating properly.The TPMS malfunction indicator iscombined with the low tire pressuretelltale. When the system detects amalfunction, the telltale will flash forapproximately one minute and thenremain continuously illuminated.
This sequence will continue uponsubsequent vehicle start-ups aslong as the malfunction exists.
When the malfunction indicator isilluminated, the system may not beable to detect or signal low tirepressure as intended. TPMSmalfunctions may occur for a varietyof reasons, including the installationof replacement or alternate tires orwheels on the vehicle that preventthe TPMS from functioning properly.Always check the TPMS malfunctiontelltale after replacing one or moretires or wheels on your vehicle toensure that the replacement oralternate tires and wheels allow theTPMS to continue to functionproperly.
SeeTire Pressure MonitorOperation0328.
SeeRadio FrequencyStatement0393.
Page 329 of 419
Chevrolet Malibu Owner Manual (GMNA-Localizing-U.S./Canada/Mexico-10122664) - 2017 - crc - 5/23/16
328 Vehicle Care
Tire Pressure Monitor
Operation
This vehicle may have a TirePressure Monitor System (TPMS).The TPMS is designed to warn thedriver when a low tire pressurecondition exists. TPMS sensors aremounted onto each tire and wheelassembly, excluding the spare tireand wheel assembly. The TPMSsensors monitor the air pressure inthe tires and transmits the tirepressure readings to a receiverlocated in the vehicle.
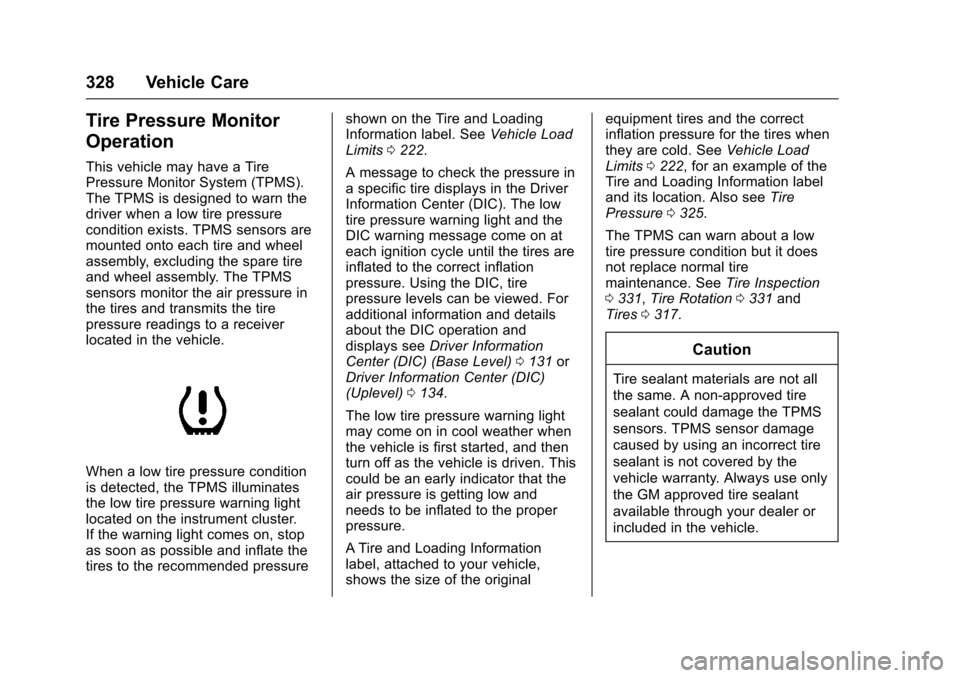
When a low tire pressure conditionis detected, the TPMS illuminatesthe low tire pressure warning lightlocated on the instrument cluster.If the warning light comes on, stopas soon as possible and inflate thetires to the recommended pressure
shown on the Tire and LoadingInformation label. SeeVehicle LoadLimits0222.
AmessagetocheckthepressureinaspecifictiredisplaysintheDriverInformation Center (DIC). The lowtire pressure warning light and theDIC warning message come on ateach ignition cycle until the tires areinflated to the correct inflationpressure. Using the DIC, tirepressure levels can be viewed. Foradditional information and detailsabout the DIC operation anddisplays seeDriver InformationCenter (DIC) (Base Level)0131orDriver Information Center (DIC)(Uplevel)0134.
The low tire pressure warning lightmay come on in cool weather whenthe vehicle is first started, and thenturn off as the vehicle is driven. Thiscould be an early indicator that theair pressure is getting low andneeds to be inflated to the properpressure.
ATire and Loading Informationlabel, attached to your vehicle,shows the size of the original
equipment tires and the correctinflation pressure for the tires whenthey are cold. SeeVehicle LoadLimits0222,foranexampleoftheTire and Loading Information labeland its location. Also seeTirePressure0325.
The TPMS can warn about a lowtire pressure condition but it doesnot replace normal tiremaintenance. SeeTire Inspection0331,Tire Rotation0331andTires0317.
Caution
Tire sealant materials are not all
the same. A non-approved tire
sealant could damage the TPMS
sensors. TPMS sensor damage
caused by using an incorrect tire
sealant is not covered by the
vehicle warranty. Always use only
the GM approved tire sealant
available through your dealer or
included in the vehicle.
Page 331 of 419
Chevrolet Malibu Owner Manual (GMNA-Localizing-U.S./Canada/Mexico-10122664) - 2017 - crc - 5/23/16
330 Vehicle Care
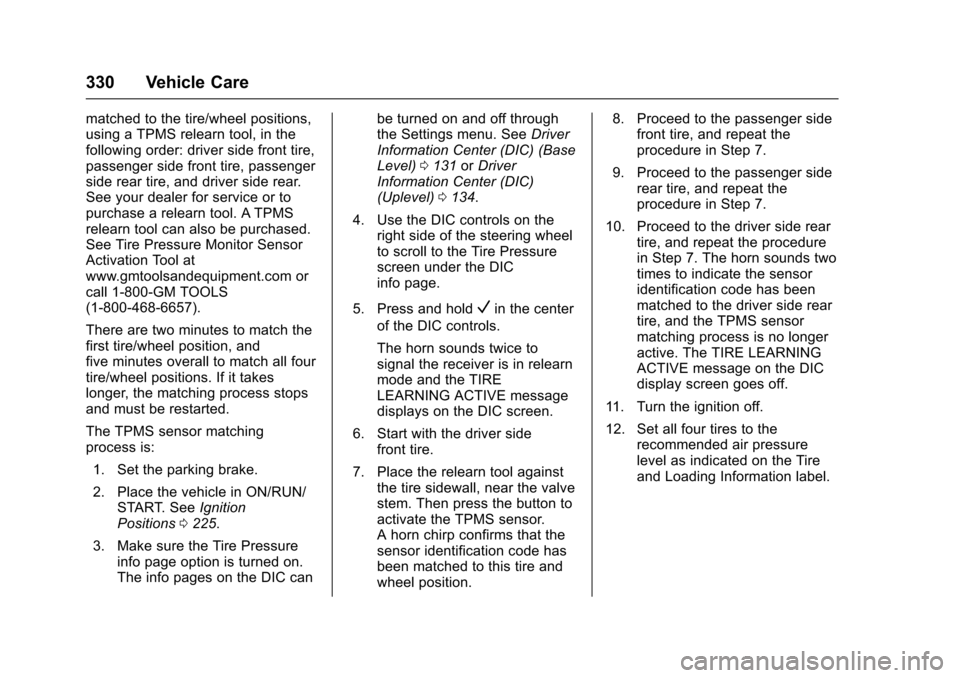
matched to the tire/wheel positions,using a TPMS relearn tool, in thefollowing order: driver side front tire,passenger side front tire, passengerside rear tire, and driver side rear.See your dealer for service or topurchase a relearn tool. A TPMSrelearn tool can also be purchased.See Tire Pressure Monitor SensorActivation Tool atwww.gmtoolsandequipment.com orcall 1-800-GM TOOLS(1-800-468-6657).
There are two minutes to match thefirst tire/wheel position, andfive minutes overall to match all fourtire/wheel positions. If it takeslonger, the matching process stopsand must be restarted.
The TPMS sensor matchingprocess is:
1. Set the parking brake.
2. Place the vehicle in ON/RUN/START. SeeIgnitionPositions0225.
3. Make sure the Tire Pressureinfo page option is turned on.The info pages on the DIC can
be turned on and off throughthe Settings menu. SeeDriverInformation Center (DIC) (BaseLevel)0131orDriverInformation Center (DIC)(Uplevel)0134.
4. Use the DIC controls on theright side of the steering wheelto scroll to the Tire Pressurescreen under the DICinfo page.
5. Press and holdVin the center
of the DIC controls.
The horn sounds twice tosignal the receiver is in relearnmode and the TIRELEARNING ACTIVE messagedisplays on the DIC screen.
6. Start with the driver sidefront tire.
7. Place the relearn tool againstthe tire sidewall, near the valvestem. Then press the button toactivate the TPMS sensor.Ahornchirpconfirmsthatthesensor identification code hasbeen matched to this tire andwheel position.
8. Proceed to the passenger sidefront tire, and repeat theprocedure in Step 7.
9. Proceed to the passenger siderear tire, and repeat theprocedure in Step 7.
10. Proceed to the driver side reartire, and repeat the procedurein Step 7. The horn sounds twotimes to indicate the sensoridentification code has beenmatched to the driver side reartire, and the TPMS sensormatching process is no longeractive. The TIRE LEARNINGACTIVE message on the DICdisplay screen goes off.
11 . Tu r n t h e i g n i t i o n o f f .
12. Set all four tires to therecommended air pressurelevel as indicated on the Tireand Loading Information label.
Page 357 of 419
Chevrolet Malibu Owner Manual (GMNA-Localizing-U.S./Canada/Mexico-10122664) - 2017 - crc - 5/23/16
356 Vehicle Care
Recreational Vehicle
Towing
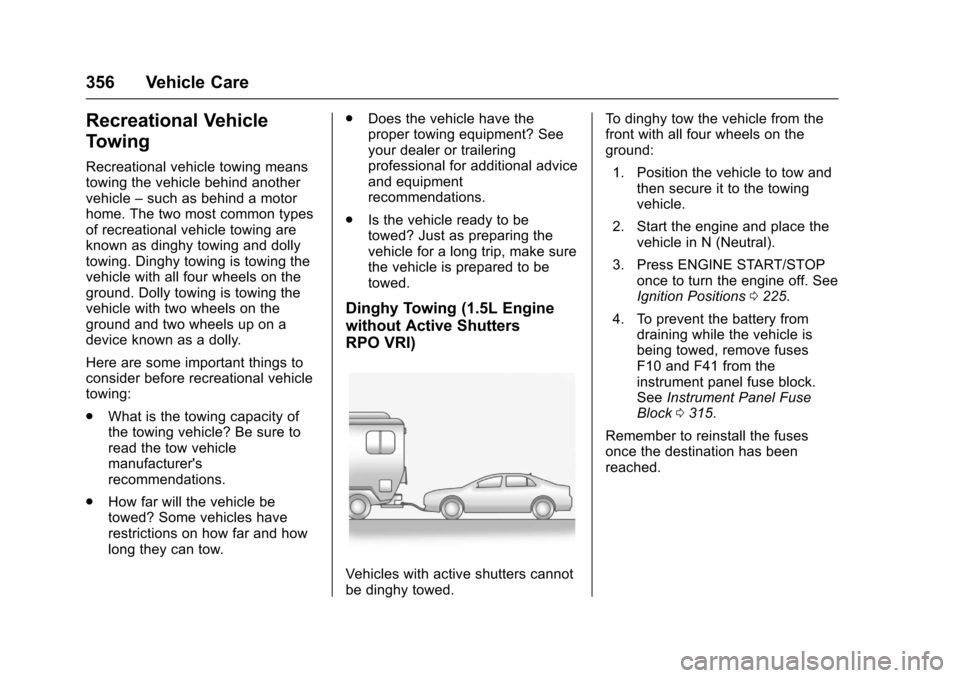
Recreational vehicle towing meanstowing the vehicle behind anothervehicle–such as behind a motorhome. The two most common typesof recreational vehicle towing areknown as dinghy towing and dollytowing. Dinghy towing is towing thevehicle with all four wheels on theground. Dolly towing is towing thevehicle with two wheels on theground and two wheels up on adevice known as a dolly.
Here are some important things toconsider before recreational vehicletowing:
.What is the towing capacity ofthe towing vehicle? Be sure toread the tow vehiclemanufacturer'srecommendations.
.How far will the vehicle betowed? Some vehicles haverestrictions on how far and howlong they can tow.
.Does the vehicle have theproper towing equipment? Seeyour dealer or traileringprofessional for additional adviceand equipmentrecommendations.
.Is the vehicle ready to betowed? Just as preparing thevehicle for a long trip, make surethe vehicle is prepared to betowed.
Dinghy Towing (1.5L Engine
without Active Shutters
RPO VRI)
Vehicles with active shutters cannotbe dinghy towed.
To d i n g h y t o w t h e v e h i c l e f r o m t h efront with all four wheels on theground:
1. Position the vehicle to tow andthen secure it to the towingvehicle.
2. Start the engine and place thevehicle in N (Neutral).
3. Press ENGINE START/STOPonce to turn the engine off. SeeIgnition Positions0225.
4. To prevent the battery fromdraining while the vehicle isbeing towed, remove fusesF10 and F41 from theinstrument panel fuse block.SeeInstrument Panel FuseBlock0315.
Remember to reinstall the fusesonce the destination has beenreached.
Page 376 of 419
Chevrolet Malibu Owner Manual (GMNA-Localizing-U.S./Canada/Mexico-10122664) - 2017 - crc - 5/23/16
Service and Maintenance 375
.To a v o i d b r e a k - d o w n o r f a i l u r e t ostart the vehicle, maintain abattery with full cranking power.
.Trained dealer technicians havethe diagnostic equipment to testthe battery and ensure that theconnections and cables arecorrosion-free.
Belts
.Belts may need replacing if theysqueak or show signs ofcracking or splitting.
.Trained dealer technicians haveaccess to tools and equipmentto inspect the belts andrecommend adjustment orreplacement when necessary.
Brakes
Brakes stop the vehicle and arecrucial to safe driving.
.Signs of brake wear may includechirping, grinding, or squealingnoises, or difficulty stopping.
.Trained dealer technicians haveaccess to tools and equipmentto inspect the brakes andrecommend quality partsengineered for the vehicle.
Fluids
Proper fluid levels and approvedfluids protect the vehicle’ssystemsand components. SeeRecommended Fluids andLubricants0377for GM approvedfluids.
.Engine oil and windshieldwasher fluid levels should bechecked at every fuel fill.
.Instrument cluster lights maycome on to indicate that fluidsmay be low and need to befilled.
Hoses
Hoses transport fluids and shouldbe regularly inspected to ensurethat there are no cracks or leaks.With a multi-point inspection, yourdealer can inspect the hoses andadvise if replacement is needed.
Lamps
Properly working headlamps,taillamps, and brake lamps areimportant to see and be seen onthe road.
.Signs that the headlamps needattention include dimming, failureto light, cracking, or damage.The brake lamps need to bechecked periodically to ensurethat they light when braking.
.With a multi-point inspection,your dealer can check the lampsand note any concerns.
Shocks and Struts
Shocks and struts help aid in controlfor a smoother ride.
.Signs of wear may includesteering wheel vibration, bounce/sway while braking, longerstopping distance, or uneventire wear.
.As part of the multi-pointinspection, trained dealertechnicians can visually inspectthe shocks and struts for signs
Page 401 of 419
Chevrolet Malibu Owner Manual (GMNA-Localizing-U.S./Canada/Mexico-10122664) - 2017 - crc - 5/23/16
400 OnStar
from each other and use acombination of letters, numbers,and symbols to increase thesecurity.
.Change the default name of theSSID (Service Set Identifier).This is your network’snamethatis visible to other wirelessdevices. Choose a unique nameand avoid family names orvehicle descriptions.
OnStar Wi-Fi®Hotspot (IfEquipped)
The vehicle may have a built-inWi-Fi hotspot that provides accessto the Internet and web content at4G LTE speed. Up to seven mobiledevices can be connected. A dataplan is required. Use the in-vehiclecontrols only when it is safe todo so.
1. To retrieve Wi-Fi hotspot
information, press=,waitfor
the prompt, then say“Wi-Fisettings.”On some vehicles,touch Wi-Fi Settings on thescreen.
2. The Wi-Fi settings will displaythe Wi-Fi hotspot name (SSID),password, and on somevehicles, the connection type(no Internet connection, 3G,4G, 4G LTE), and signal quality(poor, good, excellent).
3. To change the SSID or
password, pressQor call
1-888-4ONSTAR to connectwith an Advisor.
After initial set-up, your vehicle’sWi-Fi hotspot will connectautomatically to your mobiledevices. Manage data usage byturning Wi-Fi on or off on yourmobile device, using theRemoteLink mobile app, or bycontacting an OnStar Advisor.
OnStar RemoteLink®Mobile App(If Equipped)
Download the OnStar RemoteLinkmobile app to select Apple®iOS,Android™,BlackBerry®,or Windows®mobile devices.OnStar Subscribers can access thefollowing services from a mobiledevice:
.Remotely start/stop the vehicle,if factory-equipped.
.Lock/unlock doors, if equippedwith automatic locks.
.Activate the horn and lamps.
.Check the vehicle’sfuellevel,oillife, or tire pressure,if factory-equipped with the TirePressure Monitor System.
.Send directions to the vehicle.
.Locate the vehicle on a map(U.S. market only).
.Turn the vehicle's Wi-Fi hotspoton/off, manage settings, andmonitor data consumption,if equipped.
For OnStar RemoteLink informationand compatibility, seewww.onstar.com (U.S.) orwww.onstar.ca (Canada).
Remote Services
Contact an OnStar Advisor tounlock the doors or sound the hornand flash the lamps.
Page 417 of 419

Chevrolet Malibu Owner Manual (GMNA-Localizing-U.S./Canada/Mexico-10122664) - 2017 - crc - 5/23/16
416 Index
Seats (cont'd)
Power Adjustment, Front . . . . . . . 57
Rear . . . . . . . . . . . . . . . . . . . . . . . . . . . . 62
Reclining Seatbacks . . . . . . . . . . . . 57
Securing Child Restraints . . . . 96, 98
Security
Light . . . . . . . . . . . . . . . . . . . . . . . . . . 129
Messages . . . . . . . . . . . . . . . . . . . . 145
OnStar®...................... 398
Vehicle . . . . . . . . . . . . . . . . . . . . . . . . . 46
Vehicle Alarm . . . . . . . . . . . . . . . . . . . 46
Service . . . . . . . . . . . . . . . . . . . . . . . . . 213
Accessories and
Modifications . . . . . . . . . . . . . . . . 280
Climate Control System . . . . . . . 205
Doing Your Own Work . . . . . . . . 280
Engine Soon Light . . . . . . . . . . . . 122
Maintenance Records . . . . . . . . 379
Maintenance, General
Information . . . . . . . . . . . . . . . . . . 368
Parts Identification Label . . . . . 380
Publications Ordering
Information . . . . . . . . . . . . . . . . . . 392
Scheduling Appointments . . . . . 389
Vehicle Messages . . . . . . . . . . . . 145
Service Electric Parking
Brake Light . . . . . . . . . . . . . . . . . . . . 125
Services
Special Application . . . . . . . . . . . 374
Servicing the Airbag . . . . . . . . . . . . . 81
Shift Lock Control Function
Check, Automatic
Transmission . . . . . . . . . . . . . . . . . . 303
Shifting
Into Park . . . . . . . . . . . . . . . . . . . . . . 230
Out of Park . . . . . . . . . . . . . . . . . . . 231
Side Blind Zone Alert (SBZA) . . . 263
Signals, Turn and
Lane-Change . . . . . . . . . . . . . . . . . 167
Spare Tire
Compact . . . . . . . . . . . . . . . . . . . . . . 351
Special Application Services . . . . 374
Specifications and
Capacities . . . . . . . . . . . . . . . . . . . . . 381
Speedometer . . . . . . . . . . . . . . . . . . . 117
StabiliTrak
OFF Light . . . . . . . . . . . . . . . . . . . . . 127
Start Assist, Hill . . . . . . . . . . . . . . . . . 240
Start Vehicle, Remote . . . . . . . . . . . 38
Starter Switch Check . . . . . . . . . . . 303
Starting the Engine . . . . . . . . . . . . . 227
Starting the Vehicle
Messages . . . . . . . . . . . . . . . . . . . . . 146
Steering . . . . . . . . . . . . . . . . . . . . . . . . 217
Heated Wheel . . . . . . . . . . . . . . . . 105
Steering (cont'd)
Wheel Adjustment . . . . . . . . . . . . 104
Wheel Controls . . . . . . . . . . . . . . . 104
Steering System Messages . . . . . 145
Stoplamps and Back-up Lamps
Bulb Replacement . . . . . . . 307, 308
Storage Areas
Center Console . . . . . . . . . . . . . . . 102
Convenience Net . . . . . . . . . . . . . 102
Glove Box . . . . . . . . . . . . . . . . . . . . 101
Umbrella . . . . . . . . . . . . . . . . . . . . . . 102
Storage Compartments . . . . . . . . . 101
Storing the Tire Sealant and
Compressor Kit . . . . . . . . . . . . . . . 346
Stuck Vehicle . . . . . . . . . . . . . . . . . . . 221
Summer Tires . . . . . . . . . . . . . . . . . . 319
Sun Visors . . . . . . . . . . . . . . . . . . . . . . . 52
Sunroof . . . . . . . . . . . . . . . . . . . . . . . . . . 52
Symbols . . . . . . . . . . . . . . . . . . . . . . . . . . 3
System
Forward Collision
Alert (FCA) . . . . . . . . . . . . . . . . . . 258
Infotainment . . . . . . . . . . . . . 171, 396
Systems
Driver Assistance . . . . . . . . . . . . . 252