2017 CHEVROLET IMPALA trunk release
[x] Cancel search: trunk releasePage 8 of 378

Chevrolet Impala Owner Manual (GMNA-Localizing-U.S./Canada-9921197) -
2017 - crc - 3/30/16
In Brief 7
1.Instrument Panel Illumination
Control 0152.
2. Air Vents 0189.
3. Trunk Release. See Trunk 041.
Parking Assist Button. See
Assistance Systems for
Parking or Backing 0229 (If
Equipped).
Lane Departure Warning
(LDW) Button. See Lane
Departure Warning
(LDW) 0237.
4. Turn Signal Lever. See Turn
and Lane-Change
Signals 0152.
5. Instrument Cluster 0113.
Driver Information Center
(DIC) 0128.
6. Windshield Wiper/
Washer 0107.
7. Hazard Warning
Flashers 0151.
8. Light Sensor. See Automatic
Headlamp System 0151. 9. Storage Area with USB Port
Inside (If Equipped). See
Instrument Panel Storage
0100 andUSB Port 0165.
10. Infotainment 0156.
11. Climate Control
Systems 0182.
Dual Automatic Climate Control
System 0185.
12. Storage Area with Accessory Power Outlet Inside. See
Center Console Storage 0101
and Power Outlets 0109.
13. Heated and Ventilated Front
Seats 060 (If Equipped).
14. Traction Control/Electronic
Stability Control 0218.
15. Shift Lever. See Automatic
Transmission 0212.
16. Ignition Positions (Keyless
Access) 0204 orIgnition
Positions (Key Access) 0202.
17. Steering Wheel Controls 0106.
Driver Information Center
Buttons. See Driver Information
Center (DIC) 0128. 18.
Steering Wheel Controls 0106
(Out of View).
19. Horn 0106.
20. Steering Wheel
Adjustment 0105.
21. Cruise Control 0219 (If
Equipped).
Adaptive Cruise Control 0221
(If Equipped).
Heated Steering Wheel 0106
(If Equipped).
Forward Collision Alert (FCA)
System 0231 (If Equipped).
22. Instrument Panel Storage
0100 (If Equipped).
Fuse Cover. See Instrument
Panel Fuse Block 0281.
23. Hood Release. See Hood 0252.
24. Data Link Connector (Out of View). See Malfunction
Indicator Lamp (Check Engine
Light) 0120.
25. Electric Parking Brake 0215.
Page 9 of 378

Chevrolet Impala Owner Manual (GMNA-Localizing-U.S./Canada-9921197) -
2017 - crc - 3/30/16
8 In Brief
Initial Drive
Information
This section provides a brief
overview about some of the
important features that may or may
not be on your specific vehicle.
For more detailed information, refer
to each of the features which can be
found later in this owner manual.
Stop/Start System
The vehicle may have a fuel saving
stop/start system to shut off the
engine and help conserve fuel.
When the brakes are applied and
the vehicle is at a complete stop,
the engine may turn off. When the
brake pedal is released or the
accelerator pedal is pushed, the
engine will restart. SeeStarting the
Engine 0206.
Remote Keyless Entry
(RKE) System
The Remote Keyless Entry (RKE)
transmitter may work up to 60 m
(197 ft) away from the vehicle.
RKE with Remote Start Shown,
without Similar
Press the button to extend the key.
The key can be used for all locks.
This key is also used for the
ignition, if the vehicle does not have
pushbutton start.
K: Press to unlock the driver door
or all doors.
Q: Press to lock all doors.
Lock and unlock feedback can be
personalized.
Y: Press and hold to release the
trunk.
7: Press and release one time to
initiate vehicle locator. Press and
hold for at least three seconds to
sound the panic alarm. Press again
to cancel the panic alarm.
See Keys 028 and Remote Keyless
Entry (RKE) System Operation 030.
Remote Vehicle Start
If equipped, the engine can be
started from outside of the vehicle.
Starting the Vehicle
1. Press and releaseQon the
RKE transmitter.
2. Immediately press and hold
/
for at least four seconds or until
the turn signal lamps flash.
Start the vehicle normally after
entering.
When the vehicle starts, the parking
lamps will turn on.
Remote start can be extended.
Page 11 of 378

Chevrolet Impala Owner Manual (GMNA-Localizing-U.S./Canada-9921197) -
2017 - crc - 3/30/16
10 In Brief
Trunk
To open the trunk:
.Press
|with the transmission
in (P) Park.
. Press and hold
Yon the RKE
transmitter.
. If equipped, press the touch pad
on the underside of the trunk lid
after unlocking all doors.
If equipped with Keyless Access,
the RKE transmitter must be within
1 m (3 ft) of the trunk. Press the
touch pad on the underside of the trunk and lift to open. See
Remote
Keyless Entry (RKE) System
Operation 030.
When closing the trunk, use the
pull cup.
See Trunk 041.
Windows
The power windows only operate
with the ignition in ACC/
ACCESSORY or ON/RUN/START,
or when Retained Accessory Power
(RAP) is active. See Retained
Accessory Power (RAP) 0209. Press or pull the switch to open or
close the window.
See
Power Windows 048.
Seat Adjustment
Manual Front Seats
To adjust a manual seat:
1. Pull the handle at the front of the seat.
2. Slide the seat to the desired position and release the
handle.
Page 32 of 378

Chevrolet Impala Owner Manual (GMNA-Localizing-U.S./Canada-9921197) -
2017 - crc - 3/30/16
Keys, Doors, and Windows 31
If Unlocked Door Anti-Lockout is
enabled through vehicle
personalization and the driver door
is open when
Qis pressed, all
doors lock and the driver door will
immediately unlock. See Vehicle
Personalization 0139.
If the passenger door is open when
Qis pressed, all doors lock.
Pressing
Qmay also arm the alarm
system. See Vehicle Alarm
System 043.
K:Press to unlock the driver door
or all doors. See Vehicle
Personalization 0139.
The turn signal indicators may flash
to indicate unlocking. See Vehicle
Personalization 0139.
Pressing
Kwill disarm the alarm
system. See Vehicle Alarm
System 043.
Y:Press and hold to release the
trunk.
7: Press and release one time to
initiate vehicle locator. The exterior
lamps flash and the horn chirps
three times. Press and hold
7for at least
three seconds to sound the panic
alarm. The horn sounds and the
turn signals flash for about
30 seconds until
7is pressed again
or the vehicle is started.
/: If equipped, pressQand
release and then immediately press
and hold
/for at least
four seconds to start the engine
from outside the vehicle using the
RKE transmitter. See Remote
Vehicle Start 036.
If equipped with a keyed ignition,
the RKE transmitter buttons will not
operate when the key is in the
ignition.
Keyless Access Operation
Some vehicles have the Keyless
Access system that lets you lock
and unlock the doors and access
the trunk without removing the RKE
transmitter from your pocket, purse,
briefcase, etc. The RKE transmitter
must be within 1 m (3 ft) of the door
being unlocked. If the vehicle has
this feature, there will be a button on
the outside door handles. Keyless Access can be
programmed to unlock all doors on
the first unlock/lock button press
from the driver door. See
Vehicle
Personalization 0139.
Keyless Unlocking/Locking from
the Driver Door
When the doors are locked and the
RKE transmitter is within 1 m (3 ft)
of the driver door handle, pressing
the lock/unlock button on the driver
door handle will unlock the driver
door. If the lock/unlock button is
pressed again within five seconds,
all passenger doors will unlock. Pull
the door handle to unlatch the door.
Page 42 of 378

Chevrolet Impala Owner Manual (GMNA-Localizing-U.S./Canada-9921197) -
2017 - crc - 3/30/16
Keys, Doors, and Windows 41
Lockout Protection Override
Lockout protection can be manually
overridden with the driver door open
by pressing and holding
Qon the
power door lock switch.
Unlocked Door Anti Lock Out
If equipped with Keyless Access,
when this feature is on and door
locking is requested with the driver
door open, all doors will lock and
only the driver door will unlock. The
driver door must be closed before
locking is requested for all doors to
remain locked. When this feature is
off, the Delayed Door Lock menu
will be available.
This feature can also be
programmed. See Vehicle
Personalization 0139.
Safety Locks
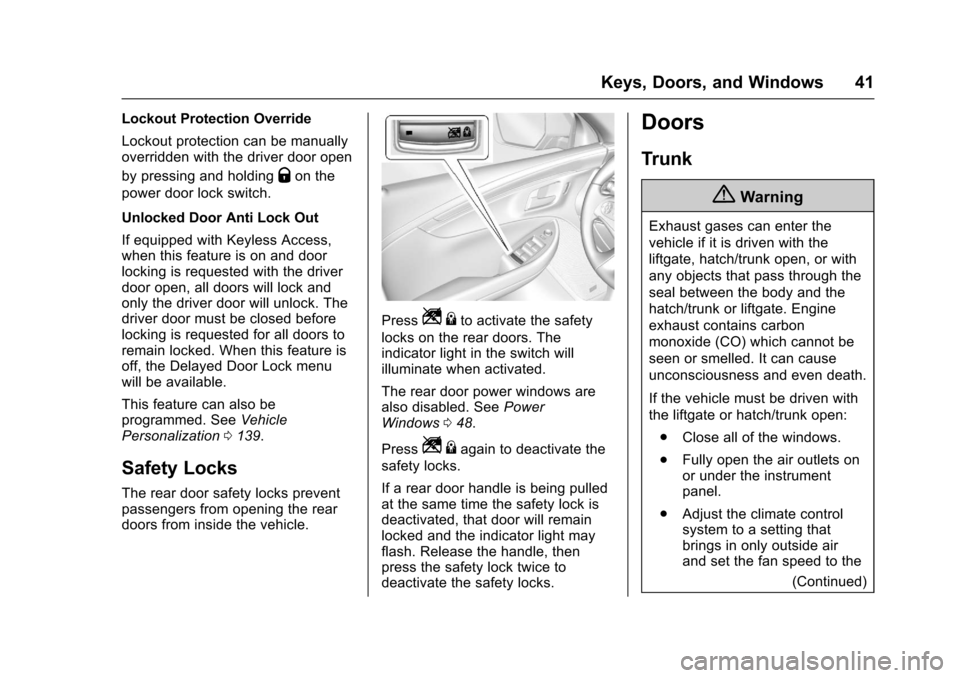
The rear door safety locks prevent
passengers from opening the rear
doors from inside the vehicle.
PressZ {to activate the safety
locks on the rear doors. The
indicator light in the switch will
illuminate when activated.
The rear door power windows are
also disabled. See Power
Windows 048.
Press
Z {again to deactivate the
safety locks.
If a rear door handle is being pulled
at the same time the safety lock is
deactivated, that door will remain
locked and the indicator light may
flash. Release the handle, then
press the safety lock twice to
deactivate the safety locks.
Doors
Trunk
{Warning
Exhaust gases can enter the
vehicle if it is driven with the
liftgate, hatch/trunk open, or with
any objects that pass through the
seal between the body and the
hatch/trunk or liftgate. Engine
exhaust contains carbon
monoxide (CO) which cannot be
seen or smelled. It can cause
unconsciousness and even death.
If the vehicle must be driven with
the liftgate or hatch/trunk open:
. Close all of the windows.
. Fully open the air outlets on
or under the instrument
panel.
. Adjust the climate control
system to a setting that
brings in only outside air
and set the fan speed to the
(Continued)
Page 43 of 378

Chevrolet Impala Owner Manual (GMNA-Localizing-U.S./Canada-9921197) -
2017 - crc - 3/30/16
42 Keys, Doors, and Windows
Warning (Continued)
highest setting. See
“Climate Control Systems”
in the Index.
. If the vehicle is equipped
with a power liftgate, disable
the power liftgate function.
For more information about
carbon monoxide, see Engine
Exhaust 0211.
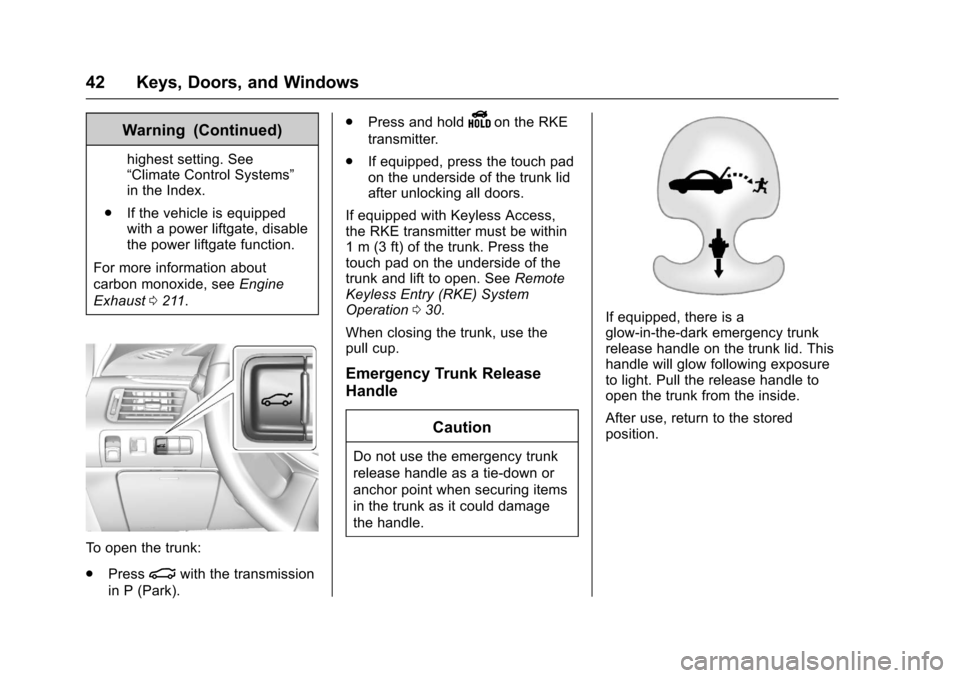
To open the trunk:
.
Press
|with the transmission
in P (Park). .
Press and hold
Yon the RKE
transmitter.
. If equipped, press the touch pad
on the underside of the trunk lid
after unlocking all doors.
If equipped with Keyless Access,
the RKE transmitter must be within
1 m (3 ft) of the trunk. Press the
touch pad on the underside of the
trunk and lift to open. See Remote
Keyless Entry (RKE) System
Operation 030.
When closing the trunk, use the
pull cup.
Emergency Trunk Release
Handle
Caution
Do not use the emergency trunk
release handle as a tie-down or
anchor point when securing items
in the trunk as it could damage
the handle.
If equipped, there is a
glow-in-the-dark emergency trunk
release handle on the trunk lid. This
handle will glow following exposure
to light. Pull the release handle to
open the trunk from the inside.
After use, return to the stored
position.
Page 277 of 378

Chevrolet Impala Owner Manual (GMNA-Localizing-U.S./Canada-9921197) -
2017 - crc - 3/30/16
276 Vehicle Care
Caution (Continued)
not remove the taillamp assembly
to replace a bulb. Use the trunk
opening to access the bulb.
To replace one of these bulbs: 1. Open the trunk. See Trunk 041.
2. Remove the push pins and pull the trunk trim away from the
taillamp assembly.
3. Remove the bulb socket from the taillamp assembly by
turning it counterclockwise.
4. Remove the bulb from the socket by turning the bulb
counterclockwise one-quarter
turn and pulling it straight out.
5. Install a new bulb into the socket.
6. Install the bulb socket into the taillamp assembly by turning it
clockwise.
7. Install the trunk trim and push pins.
License Plate Lamp
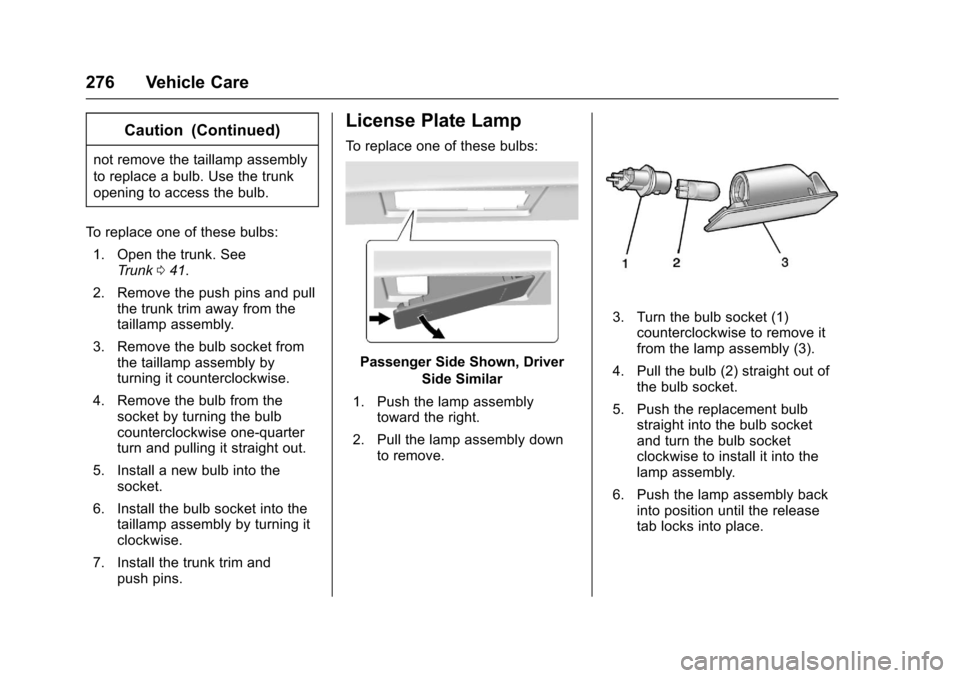
To replace one of these bulbs:
Passenger Side Shown, Driver
Side Similar
1. Push the lamp assembly toward the right.
2. Pull the lamp assembly down to remove.
3. Turn the bulb socket (1)counterclockwise to remove it
from the lamp assembly (3).
4. Pull the bulb (2) straight out of the bulb socket.
5. Push the replacement bulb straight into the bulb socket
and turn the bulb socket
clockwise to install it into the
lamp assembly.
6. Push the lamp assembly back into position until the release
tab locks into place.
Page 282 of 378

Chevrolet Impala Owner Manual (GMNA-Localizing-U.S./Canada-9921197) -
2017 - crc - 3/30/16
Vehicle Care 281
FusesUsage
55 Exterior rearview mirror
56 Front washer
60 Heated mirror
62 Obstacle detection
64 Rain sensor/Rear seat audio
66 Trunk release
67 Chassis control module
69 Battery voltage sensor
71 Memory seat
Relays Usage
1 A/C clutch
2 Starter
4 Front wiper speed
5 Front wiper control
6 Cabin/Coolant pump
7 Powertrain
8 Transmission auxiliary pump Relays
Usage
9 Cooling fan k2
10 Cooling fan k3
11 Starter
13 Cooling fan control k1
14 Low-beam HID headlamp
15 Run/Crank
17 Rear defogger
Instrument Panel Fuse
Block
The instrument panel fuse block is
in the instrument panel, on the
driver side of the vehicle.
To access the fuses on vehicles
equipped with a storage bin: 1. Push forward on the top edge of the bin to unlatch it.
2. Press in on the sides of the bin to release it from the
instrument panel.
3. Pivot the door downward, allowing it to hang from the
instrument panel.
4. To close the bin, swing it upward and push in until
closed.