2017 CHEVROLET IMPALA p button on consol
[x] Cancel search: p button on consolPage 110 of 378
Chevrolet Impala Owner Manual (GMNA-Localizing-U.S./Canada-9921197) -
2017 - crc - 3/30/16
Instruments and Controls 109
Clock (Uplevel Radio)
Setting the Time and Date
To set the time or date:1. Select Settings from the Home Page, then select Time and
Date Settings.
2. Select the desired function.
To set the time or date, press
«or
ªto change the hour, minutes,
AM, or PM.
To change the 12-24Hr setting,
press the 12-24Hr button.
To turn Auto Set on and off, press
the Auto Set screen button.
Auto Set requires an OnStar
subscription.
If Auto Set is on, the time displayed
on the clock may not update
immediately when driving into a new
time zone.
Press
qBACK to go to the last
menu and save the changes or
{to
return to the Home Page.
Power Outlets
Power Outlets 12 Volt Direct
Current
The accessory power outlets can be
used to plug in electrical equipment,
such as a cell phone or MP3 player.
There are three accessory power
outlets:
. Inside the front storage area
below the climate control
system.
. Inside the center console.
. On the rear of the center
console.
The outlet is powered when the
ignition is in ON/RUN or ACC/
ACCESSORY, or until the driver
door is opened within 10 minutes of
turning off the vehicle. See Retained
Accessory Power (RAP) 0209.
Open the protective cover to use the
accessory power outlet.
Certain electrical accessories may
not be compatible with the
accessory power outlets and could overload vehicle or adapter fuses.
If there is a problem, see your
dealer.
When adding electrical equipment,
be sure to follow the installation
instructions included with the
equipment. See
Add-On Electrical
Equipment 0247.
Caution
Hanging heavy equipment from
the power outlet can cause
damage not covered by the
vehicle warranty. The power
outlets are designed for
accessory power plugs only, such
as cell phone charge cords.
Always unplug electrical equipment
when not in use and do not plug in
equipment that exceeds the
maximum 20 amps rating.
Page 147 of 378

Chevrolet Impala Owner Manual (GMNA-Localizing-U.S./Canada-9921197) -
2017 - crc - 3/30/16
146 Instruments and Controls
Universal Remote
System
SeeRadio Frequency
Statement 0352.
Universal Remote System
Programming
If equipped, these buttons are in the
overhead console.
This system can replace up to three
remote control transmitters used to
activate devices such as garage
door openers, security systems, and
home automation devices. These instructions refer to a garage door
opener, but can be used for other
devices.
Do not use the Universal Remote
system with any garage door opener
that does not have the stop and
reverse feature. This includes any
garage door opener model
manufactured before April 1, 1982.
Read these instructions completely
before programming the Universal
Remote system. It may help to have
another person assist with the
programming process.
Keep the original hand-held
transmitter for use in other vehicles
as well as for future programming.
Erase the programming when
vehicle ownership is terminated.
See
“Erasing Universal Remote
System Buttons” later in this
section.
To program a garage door opener,
park outside directly in line with and
facing the garage door opener
receiver. Clear all people and
objects near the garage door. Make sure the hand-held transmitter
has a new battery for quick and
accurate transmission of the
radio-frequency signal.
Programming the Universal
Remote System
For questions or help programming
the Universal Remote system, call
1-800-355-3515 or see
www.homelink.com.
Programming involves
time-sensitive actions, and may time
out causing the procedure to be
repeated.
To program up to three devices:
1. Hold the end of the hand-held transmitter about 3 to 8 cm (1
to 3 in) away from the
Universal Remote system
buttons with the indicator light
in view. The hand-held
transmitter was supplied by the
manufacturer of the garage
door opener receiver.
2. At the same time, press and hold both the hand-held
transmitter button and one of
the three Universal Remote
Page 154 of 378
Chevrolet Impala Owner Manual (GMNA-Localizing-U.S./Canada-9921197) -
2017 - crc - 3/30/16
Lighting 153
Dome Lamps
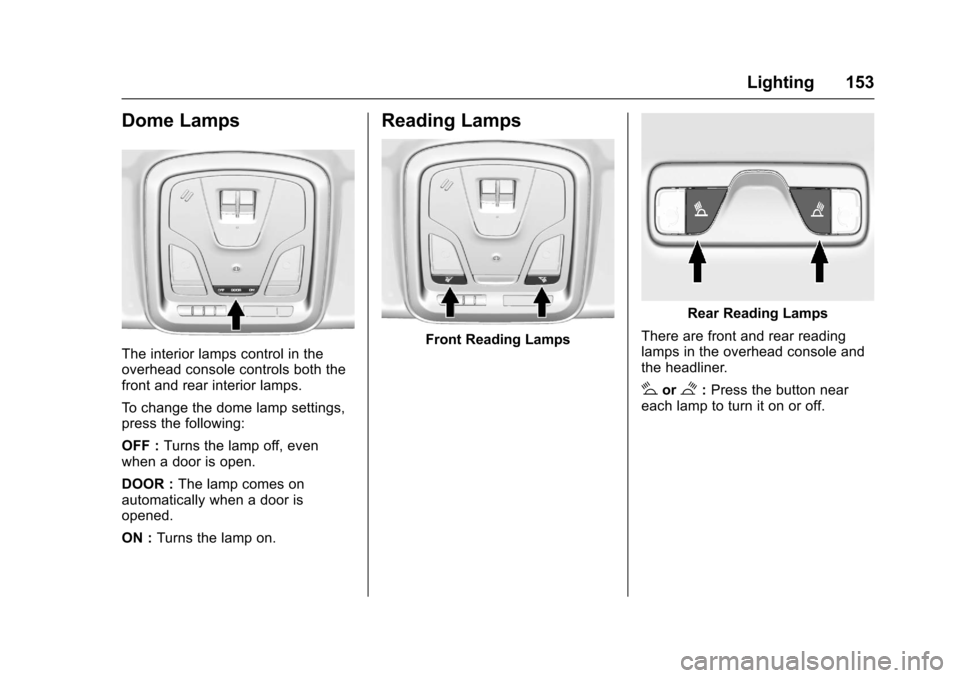
The interior lamps control in the
overhead console controls both the
front and rear interior lamps.
To change the dome lamp settings,
press the following:
OFF :Turns the lamp off, even
when a door is open.
DOOR : The lamp comes on
automatically when a door is
opened.
ON : Turns the lamp on.
Reading Lamps
Front Reading Lamps
Rear Reading Lamps
There are front and rear reading
lamps in the overhead console and
the headliner.
#or$: Press the button near
each lamp to turn it on or off.
Page 168 of 378
Chevrolet Impala Owner Manual (GMNA-Localizing-U.S./Canada-9921197) -
2017 - crc - 3/30/16
Infotainment System 167
There may be problems with
operation and function in the
following situations:
.When connecting an iPod on
which a more recent version of
the firmware is installed than is
supported by the infotainment
system.
. When connecting an iPod on
which firmware from other
providers is installed.
To connect and control an iPod: 1. Connect one end of the standard iPod USB cable to the
iPod's dock connector.
2. Connect the other end to the USB port in the center console.
3. Press the MEDIA button to select the source.
iPod music information displays on
the radio’s display and begins
playing through the vehicle’s audio
system.
The iPod battery recharges
automatically while the vehicle is on.
When the vehicle is off while an
iPod is connected using the iPod USB cable, the iPod battery stops
charging and the iPod automatically
turns off.
If the iPod is an unsupported model,
it can still be listened to in the
vehicle by connecting to the
auxiliary input jack using a standard
3.5 mm (1/8 in) stereo cable.
iPod Menu
Press the MENU knob to display the
iPod Menu and the following may
display:
Browse :
Select to display the files
or songs on the iPod. See “Browse
iPod Media” later in this section.
Tone Settings : Select to adjust
Bass, Midrange, Treble, Balance,
Fade, and EQ (Equalizer). See
“Tone Settings” underAM-FM
Radio 0162.
Auto Volume : If equipped, this
feature adjusts the volume based on
the vehicle speed. Select the level
between off, low, medium-low,
medium, medium-high, and high.
Press
qBACK to go to the
previous menu. EQ (Equalizer) Settings :
If equipped, this feature adjusts the
pre-defined EQ Modes. See
“EQ
(Equalizer) Settings” inAM-FM
Radio 0162.
DSP Modes : If equipped, this
feature adjusts the DSP Modes.
See “DSP Modes” inAM-FM
Radio 0162.
Browse iPod Media
Use the following to browse:
Playlists: 1. Turn the MENU knob to highlight and press to view the
playlists stored on the iPod.
2. Turn the MENU knob to highlight and press to select a
playlist name to view a list of
all songs in the playlist.
3. Turn the MENU knob to highlight and press to select
the song from the list to begin
playback.
Artists: 1. Turn the MENU knob to highlight and press to view the
artists stored on the iPod.
Page 169 of 378
Chevrolet Impala Owner Manual (GMNA-Localizing-U.S./Canada-9921197) -
2017 - crc - 3/30/16
168 Infotainment System
2. Turn the MENU knob tohighlight and press to select an
artist name to view a list of all
albums by the artist.
3. Turn the MENU knob to highlight and press to select
the album from the list.
4. To begin playback, select a song from the album.
Albums: 1. Turn the MENU knob to highlight and press to view the
albums stored on the iPod.
2. Turn the MENU knob to highlight and press to select an
album name to view a list of all
songs on the album.
3. Turn the MENU knob to highlight and press to select
the song from the list to begin
playback.
Genres: 1. Turn the MENU knob to highlight and press to view the
genres stored on the iPod. 2. Turn the MENU knob to
highlight and press to select a
genre name to view a list of
artists of that genre.
3. Turn the MENU knob to highlight and press to select to
view albums by that artist.
4. Turn the MENU knob to highlight and press to select an
album to view songs.
5. Turn the MENU knob to highlight and press to select
the song from the list to begin
playback.
Songs: 1. Turn the MENU knob to highlight and press to view a
list of all songs stored on
the iPod.
2. Turn the MENU knob to highlight and press to select
the song from the list to begin
playback.
Playing from an iPhone®
or iPad®
This feature supports iPhone 3G,
iPhone 3GS, iPhone 4, and iPad. Follow the same instructions as
stated earlier for using an iPod.
SD Card Reader
If equipped, the SD card reader is in
the center console. See
Center
Console Storage 0101.
1. Plug the SD card into the reader.
2. Press the MEDIA button to select the SD device.
If an SD card has already been
connected, but a different source is
currently active, press the MEDIA
screen button repeatedly to cycle
through all of the available audio
source screens, until the SD card
screen is shown.
Playing Music from the SD Card
An SD card is played the same way
a USB device is played. See USB
Port 0165.
Auxiliary Jack
The AUX jack is in the center
console. See Center Console
Storage 0101.
Page 220 of 378
Chevrolet Impala Owner Manual (GMNA-Localizing-U.S./Canada-9921197) -
2017 - crc - 3/30/16
Driving and Operating 219
2. Turn the engine off and wait15 seconds.
3. Start the engine.
Drive the vehicle. If
dcomes on
and stays on, the vehicle may need
more time to diagnose the problem.
If the condition persists, see your
dealer.
Turning the Systems Off
and On
The button for TCS and StabiliTrak
is on the center console, behind the
shift lever.
Caution
Do not repeatedly brake or
accelerate heavily when TCS is
off. The vehicle driveline could be
damaged. To turn off only TCS, press and
release
g. The Traction Off lighti
displays in the instrument cluster. To
turn TCS on again, press and
release
g. The Traction Off lighti
displayed in the instrument cluster
will turn off.
If TCS is limiting wheel spin when
g
is pressed, the system will not turn
off until the wheels stop spinning.
To turn off both TCS and StabiliTrak,
press and hold
guntil the Traction
Off light
iand StabiliTrak Off light
gcome on and stay on in the
instrument cluster. To turn TCS and
StabiliTrak on again, press and
release
g. The Traction Off lighti
and StabiliTrak Off lightgin the
instrument cluster turn off.
Adding accessories can affect the
vehicle performance. See
Accessories and
Modifications 0251.
Cruise Control
With cruise control, you can
maintain a speed of about 40 km/h
(25 mph) or more without keeping
your foot on the accelerator. Cruise
control does not work at speeds
below about 40 km/h (25 mph).
{Warning
Cruise control can be dangerous
where you cannot drive safely at
a steady speed. Do not use
cruise control on winding roads or
in heavy traffic.
Cruise control can be dangerous
on slippery roads. On such roads,
fast changes in tire traction can
cause excessive wheel slip, and
you could lose control. Do not use
cruise control on slippery roads.
If equipped with the Traction Control
System (TCS), the system may
begin to limit wheel spin while you
are using cruise control. If this
happens, the cruise control will