2017 CHEVROLET EQUINOX garage door
[x] Cancel search: garage doorPage 35 of 327
Chevrolet Equinox Owner Manual (GMNA-Localizing-U.S./Canada/Mexico-
9918169) - 2017 - CRC - 3/23/16
34 Keys, Doors, and Windows
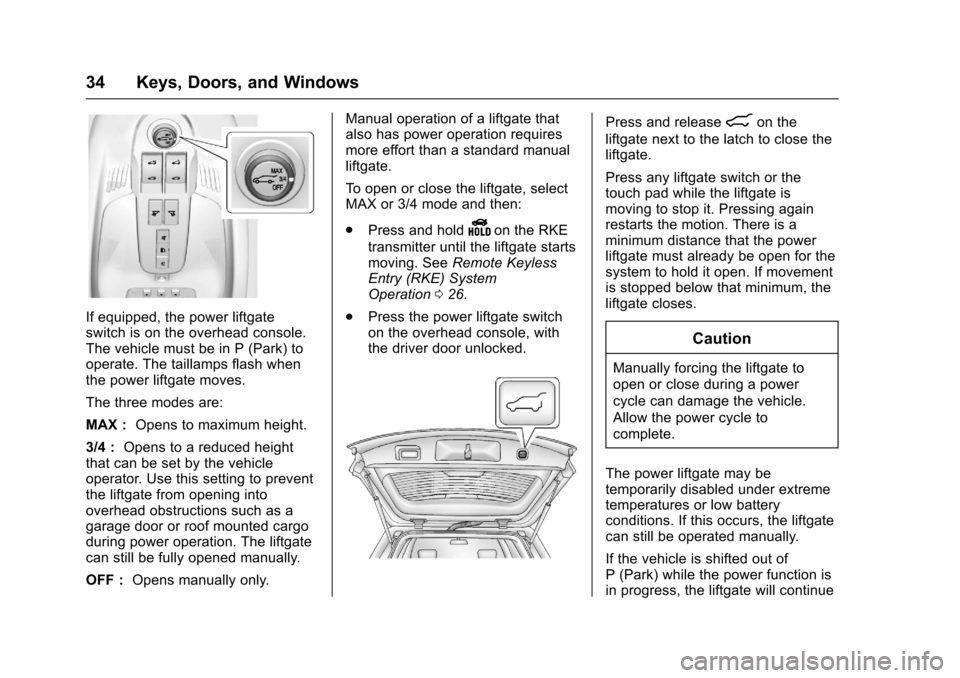
If equipped, the power liftgate
switch is on the overhead console.
The vehicle must be in P (Park) to
operate. The taillamps flash when
the power liftgate moves.
The three modes are:
MAX :Opens to maximum height.
3/4 : Opens to a reduced height
that can be set by the vehicle
operator. Use this setting to prevent
the liftgate from opening into
overhead obstructions such as a
garage door or roof mounted cargo
during power operation. The liftgate
can still be fully opened manually.
OFF : Opens manually only. Manual operation of a liftgate that
also has power operation requires
more effort than a standard manual
liftgate.
To open or close the liftgate, select
MAX or 3/4 mode and then:
.
Press and hold
Yon the RKE
transmitter until the liftgate starts
moving. See Remote Keyless
Entry (RKE) System
Operation 026.
. Press the power liftgate switch
on the overhead console, with
the driver door unlocked.
Press and release8on the
liftgate next to the latch to close the
liftgate.
Press any liftgate switch or the
touch pad while the liftgate is
moving to stop it. Pressing again
restarts the motion. There is a
minimum distance that the power
liftgate must already be open for the
system to hold it open. If movement
is stopped below that minimum, the
liftgate closes.
Caution
Manually forcing the liftgate to
open or close during a power
cycle can damage the vehicle.
Allow the power cycle to
complete.
The power liftgate may be
temporarily disabled under extreme
temperatures or low battery
conditions. If this occurs, the liftgate
can still be operated manually.
If the vehicle is shifted out of
P (Park) while the power function is
in progress, the liftgate will continue
Page 131 of 327
Chevrolet Equinox Owner Manual (GMNA-Localizing-U.S./Canada/Mexico-
9918169) - 2017 - CRC - 3/23/16
130 Instruments and Controls
Universal Remote
System
SeeRadio Frequency
Statement 0302.
Universal Remote System
Programming
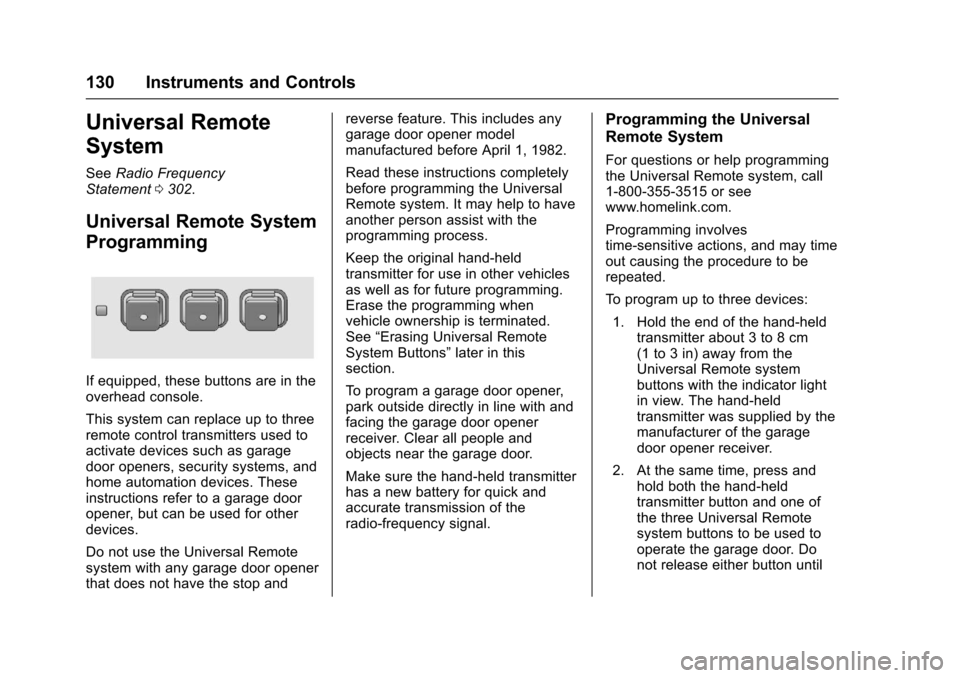
If equipped, these buttons are in the
overhead console.
This system can replace up to three
remote control transmitters used to
activate devices such as garage
door openers, security systems, and
home automation devices. These
instructions refer to a garage door
opener, but can be used for other
devices.
Do not use the Universal Remote
system with any garage door opener
that does not have the stop and reverse feature. This includes any
garage door opener model
manufactured before April 1, 1982.
Read these instructions completely
before programming the Universal
Remote system. It may help to have
another person assist with the
programming process.
Keep the original hand-held
transmitter for use in other vehicles
as well as for future programming.
Erase the programming when
vehicle ownership is terminated.
See
“Erasing Universal Remote
System Buttons” later in this
section.
To program a garage door opener,
park outside directly in line with and
facing the garage door opener
receiver. Clear all people and
objects near the garage door.
Make sure the hand-held transmitter
has a new battery for quick and
accurate transmission of the
radio-frequency signal.
Programming the Universal
Remote System
For questions or help programming
the Universal Remote system, call
1-800-355-3515 or see
www.homelink.com.
Programming involves
time-sensitive actions, and may time
out causing the procedure to be
repeated.
To program up to three devices:
1. Hold the end of the hand-held transmitter about 3 to 8 cm
(1 to 3 in) away from the
Universal Remote system
buttons with the indicator light
in view. The hand-held
transmitter was supplied by the
manufacturer of the garage
door opener receiver.
2. At the same time, press and hold both the hand-held
transmitter button and one of
the three Universal Remote
system buttons to be used to
operate the garage door. Do
not release either button until
Page 132 of 327
Chevrolet Equinox Owner Manual (GMNA-Localizing-U.S./Canada/Mexico-
9918169) - 2017 - CRC - 3/23/16
Instruments and Controls 131
the indicator light changes from
a slow to a rapid flash. Then
release both buttons.
Some garage door openers
may require substitution of
Step 2 with the procedure
under“Radio Signals for
Canada and Some Gate
Operators” later in this section.
3. Press and hold the newly programmed Universal Remote
system button for five seconds
while watching the indicator
light and garage door
activation.
.If the indicator light stays on
continuously or the garage
door moves when the
button is pressed, then
programming is complete.
There is no need to
complete Steps 4–6.
. If the indicator light does
not come on or the garage
door does not move, a
second button press may
be required. For a second
time, press and hold the
newly programmed button for five seconds. If the light
stays on or the garage door
moves, programming is
complete.
. If the indicator light blinks
rapidly for two seconds,
then changes to a solid light
and the garage door does
not move, continue with
programming Steps 4–6.
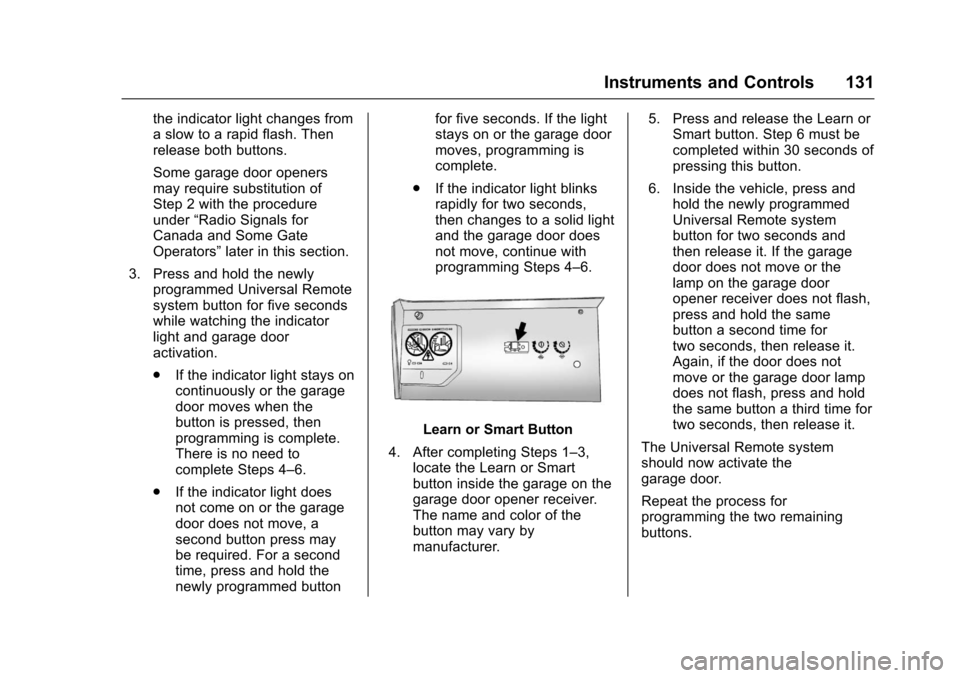
Learn or Smart Button
4. After completing Steps 1–3, locate the Learn or Smart
button inside the garage on the
garage door opener receiver.
The name and color of the
button may vary by
manufacturer. 5. Press and release the Learn or
Smart button. Step 6 must be
completed within 30 seconds of
pressing this button.
6. Inside the vehicle, press and hold the newly programmed
Universal Remote system
button for two seconds and
then release it. If the garage
door does not move or the
lamp on the garage door
opener receiver does not flash,
press and hold the same
button a second time for
two seconds, then release it.
Again, if the door does not
move or the garage door lamp
does not flash, press and hold
the same button a third time for
two seconds, then release it.
The Universal Remote system
should now activate the
garage door.
Repeat the process for
programming the two remaining
buttons.
Page 233 of 327
Chevrolet Equinox Owner Manual (GMNA-Localizing-U.S./Canada/Mexico-
9918169) - 2017 - CRC - 3/23/16
232 Vehicle Care
FusesUsage
16 Body control module 5
17 Rear auxiliary power
18 Instrument panel/ Ignition
19 Universal garage door opener
20 Body control module 6
21 –
22 Sensing/Diagnostic module/Ignition
23 Front vision camera
24 –
25 Transmission gear shift position
indicator
26 –
27 –
28 –
29 Front blower motor
30 Body control module 3 Fuses
Usage
31 Amplifier
32 Discrete logic ignition switch
33 Communications integration module
34 Body control module 2
35 Sensing/Diagnostic module battery
36 Data link connector
37 Instrument panel battery
38 Passenger sensing system module
39 –
40 Body control module 8
41 Logistic relay (if equipped)
42 Retained accessory power relayWheels and Tires
Tires
Every new GM vehicle has
high-quality tires made by a
leading tire manufacturer. See
the warranty manual for
information regarding the tire
warranty and where to get
service. For additional
information refer to the tire
manufacturer.
{Warning
.Poorly maintained and
improperly used tires are
dangerous.
.Overloading the tires can
cause overheating as a
result of too much
flexing. There could be a
blowout and a serious
crash. See Vehicle Load
Limits 0159.
(Continued)
Page 313 of 327
Chevrolet Equinox Owner Manual (GMNA-Localizing-U.S./Canada/Mexico-
9918169) - 2017 - CRC - 3/23/16
312 OnStar
to the vehicle in a crash, or wireless
phone network congestion or
jamming—may prevent service.
See Radio Frequency
Statement 0302.
Services for People with
Disabilities
Advisors provide services to help
Subscribers with physical disabilities
and medical conditions.
Press
Qto help:
. Locate a gas station with an
attendant to pump gas.
. Find a hotel, restaurant, etc.,
that meets accessibility needs.
. Provide directions to the closest
hospital or pharmacy in urgent
situations.
TTY Users
OnStar has the ability to
communicate to deaf,
hard-of-hearing, or speech-impaired
customers while in the vehicle. The
available dealer-installed TTY
system can provide in-vehicle access to all OnStar services,
except Virtual Advisor and OnStar
Turn-by-Turn Navigation.
OnStar Personal Identification
Number (PIN)
A PIN is needed to access some
OnStar services. The PIN will need
to be changed the first time when
speaking with an Advisor. To
change the OnStar PIN, contact an
OnStar Advisor by pressing
Qor
calling 1-888-4ONSTAR.
Warranty
OnStar equipment may be
warranted as part of the vehicle
warranty.
Languages
The vehicle can be programmed to
respond in multiple languages.
Press
Qand ask for an Advisor.
Advisors are available in English,
Spanish, and French. Available
languages may vary by country.
Potential Issues
OnStar cannot perform Remote
Door Unlock or Stolen Vehicle
Assistance after the vehicle has
been off continuously for 10 days
without an ignition cycle. If the
vehicle has not been started for
five days, OnStar can contact
Roadside Assistance or a locksmith
to help gain access to the vehicle.
Global Positioning
System (GPS)
. Obstruction of the GPS can
occur in a large city with tall
buildings; in parking garages;
around airports; in tunnels and
underpasses; or in an area with
very dense trees. If GPS signals
are not available, the OnStar
system should still operate to
call OnStar. However, OnStar
could have difficulty identifying
the exact location.
. In emergency situations, OnStar
can use the last stored GPS
location to send to emergency
responders.
Page 321 of 327

Chevrolet Equinox Owner Manual (GMNA-Localizing-U.S./Canada/Mexico-
9918169) - 2017 - CRC - 3/23/16
320 Index
G
Garage Door Opener . . . . . . . . . . . 130Programming . . . . . . . . . . . . . . . . . 130
Gauges Engine Coolant
Temperature . . . . . . . . . . . . . . . . 103
Fuel . . . . . . . . . . . . . . . . . . . . . . . . . . 102
Odometer . . . . . . . . . . . . . . . . . . . . . 102
Speedometer . . . . . . . . . . . . . . . . . 102
Tachometer . . . . . . . . . . . . . . . . . . . 102
Warning Lights and Indicators . . . . . . . . . . . . . . . . . . . 100
General Information Service and Maintenance . . . . . 275
Towing . . . . . . . . . . . . . . . . . . . . . . . . 193
Vehicle Care . . . . . . . . . . . . . . . . . . 201
Glove Box . . . . . . . . . . . . . . . . . . . . . . . 91
GM Mobility Reimbursement Program . . . . . . . . . . . . . . . . . . . . . . . 296
H
Halogen Bulbs . . . . . . . . . . . . . . . . . . 225
Hazard Warning Flashers . . . . . . . 135
Head Restraints . . . . . . . . . . . . . . . . . 45
Headlamps
Aiming . . . . . . . . . . . . . . . . . . . . . . . . 225
Automatic . . . . . . . . . . . . . . . . . . . . . 134
Bulb Replacement . . . . . . . . . . . . 225 Headlamps (cont'd)
Daytime Running
Lamps (DRL) . . . . . . . . . . . . . . . . 134
Flash-to-Pass . . . . . . . . . . . . . . . . . 133
High-Beam On Light . . . . . . . . . . .112
High/Low Beam Changer . . . . . 133
Lamps On Reminder . . . . . . . . . .113
Heated Front Seats . . . . . . . . . . . . . . 51
Heated Mirrors . . . . . . . . . . . . . . . . . . . 39
Heater Engine Coolant . . . . . . . . . . . . . . . 166
Heating and Air Conditioning . . . . . . . . . . . . . . 140, 142
High-Beam On Light . . . . . . . . . . . . 112
Hill and Mountain Roads . . . . . . . . 156
Hill Start Assist (HSA) . . . . . . . . . . 175
Hood . . . . . . . . . . . . . . . . . . . . . . . . . . . 203
Horn . . . . . . . . . . . . . . . . . . . . . . . . . . . . . 96
How to Wear Safety Belts
Properly . . . . . . . . . . . . . . . . . . . . . . . . 54I
Ignition Positions . . . . . . . . . . . . . . . 163
Ignition Transmission LockCheck . . . . . . . . . . . . . . . . . . . . . . . . . 223
Immobilizer . . . . . . . . . . . . . . . . . . . . . . 37
Indicator Vehicle Ahead . . . . . . . . . . . . . . . . 109 Infants and Young Children,
Restraints . . . . . . . . . . . . . . . . . . . . . . 74
Infotainment . . . . . . . . . . . . . . . . . . . . 139
Infotainment System . . . . . . . . . . . . 305
Instrument Cluster . . . . . . . . . . . . . . 101
Interior Rearview Mirrors . . . . . . . . . 40
Introduction . . . . . . . . . . . . . . . . . . . . . . . 2
J
Jump Starting - North America . . . . . . . . . . . . . . . . . . . . . . . 260
K
Key and Lock Messages . . . . . . . . 119
Keyless EntryRemote (RKE) System . . . . . . . . . 26
Keys . . . . . . . . . . . . . . . . . . . . . . . . . . . . . 24
L
Labeling, Tire Sidewall . . . . . . . . . . 234
Lamps
Daytime Running (DRL) . . . . . . 134
Dome . . . . . . . . . . . . . . . . . . . . . . . . . 136
Exterior Controls . . . . . . . . . . . . . . 133
Exterior Lighting BatterySaver . . . . . . . . . . . . . . . . . . . . . . . 138
License Plate . . . . . . . . . . . . . . . . . 226
Malfunction Indicator . . . . . . . . . 106
On Reminder . . . . . . . . . . . . . . . . . .113