2017 CHEVROLET CRUZE brake light
[x] Cancel search: brake lightPage 161 of 405

Chevrolet Cruze Owner Manual (GMNA-Localizing-U.S./Canada/Mexico-
9803785) - 2017 - CRC - 4/13/16
160 Lighting
.The vehicle's windshield is dirty,
cracked, or obstructed by
something that blocks the view
of the light sensor.
. The vehicle is loaded such that
the front end points upward,
causing the light sensor to aim
high and not detect headlamps
and taillamps.
. The vehicle is being driven on
winding or hilly roads.
The IntelliBeam system may need to
be disabled if any of the above
conditions exist.
Headlamp High/
Low-Beam Changer
3
: Push the turn signal lever
toward the instrument panel to
change the headlamps from low to
high beam.
Pull the turn signal lever toward you
and release it to return to low-beam
headlamps.
When the high-beam headlamps are
on, this indicator light on the
instrument cluster will also be on.
Flash-to-Pass
To flash the high beams, pull the
turn signal lever all the way toward
you. Then release it.
Daytime Running
Lamps (DRL)
If equipped, DRL can make it easier
for others to see the front of your
vehicle during the day. Fully
functional DRL are required on all
vehicles first sold in Canada. The
vehicle may have dedicated
Light-Emitting Diode (LED) DRL.
The DRL will come on when all of
the following conditions are met:
. The ignition is on. .
The exterior lamp control is
in AUTO.
. The light sensor determines it is
daytime.
. The parking brake is released or
the vehicle is not in P (Park).
When the DRL are on, the taillamps,
sidemarker lamps, and other lamps
will not be on.
The DRL turn off when the
headlamps are turned to
Oor the
ignition is off.
Automatic Headlamp
System
The feature only works on vehicles
with automatic light control.
When it is dark enough outside and
the exterior lamp control is in the
automatic position, the headlamps
come on automatically. See Exterior
Lamp Controls 0158.
Page 204 of 405
Chevrolet Cruze Owner Manual (GMNA-Localizing-U.S./Canada/Mexico-
9803785) - 2017 - CRC - 4/13/16
Driving and Operating 203
3. Turn the steering wheel to gostraight down the roadway.
Loss of Control
Skidding
There are three types of skids that
correspond to the vehicle's three
control systems:
.Braking Skid —wheels are not
rolling.
. Steering or Cornering Skid —
too much speed or steering in a
curve causes tires to slip and
lose cornering force.
. Acceleration Skid —too much
throttle causes the driving
wheels to spin.
Defensive drivers avoid most skids
by taking reasonable care suited to
existing conditions, and by not
overdriving those conditions. But
skids are always possible.
If the vehicle starts to slide, follow
these suggestions:
. Ease your foot off the
accelerator pedal and steer the
way you want the vehicle to go. The vehicle may straighten out.
Be ready for a second skid if it
occurs.
. Slow down and adjust your
driving according to weather
conditions. Stopping distance
can be longer and vehicle
control can be affected when
traction is reduced by water,
snow, ice, gravel, or other
material on the road. Learn to
recognize warning clues —such
as enough water, ice, or packed
snow on the road to make a
mirrored surface —and slow
down when you have any doubt.
. Try to avoid sudden steering,
acceleration, or braking,
including reducing vehicle speed
by shifting to a lower gear. Any
sudden changes could cause
the tires to slide.
Remember: Antilock brakes help
avoid only the braking skid.
Driving on Wet Roads
Rain and wet roads can reduce
vehicle traction and affect your
ability to stop and accelerate. Always drive slower in these types
of driving conditions and avoid
driving through large puddles and
deep-standing or flowing water.
{Warning
Wet brakes can cause crashes.
They might not work as well in a
quick stop and could cause
pulling to one side. You could
lose control of the vehicle.
After driving through a large
puddle of water or a car/vehicle
wash, lightly apply the brake
pedal until the brakes work
normally.
Flowing or rushing water creates
strong forces. Driving through
flowing water could cause the
vehicle to be carried away. If this
happens, you and other vehicle
occupants could drown. Do not
ignore police warnings and be
very cautious about trying to drive
through flowing water.
Page 213 of 405
Chevrolet Cruze Owner Manual (GMNA-Localizing-U.S./Canada/Mexico-
9803785) - 2017 - CRC - 4/13/16
212 Driving and Operating
warning and indicator lights. This
position can also be used for
service and diagnostics, and to
verify the proper operation of the
malfunction indicator lamp as may
be required for emission inspection
purposes. The transmission is also
unlocked in this position on
automatic transmission vehicles.
The battery could be drained if the
key is left in the ACC/ACCESSORY
or ON/RUN position with the engine
off. The vehicle might not start if the
battery is allowed to drain for an
extended period of time.
3 :START: This position starts the
engine. When the engine starts,
release the key. The ignition switch
will return to ON/RUN for normal
driving.
A warning tone sounds when the
driver door is opened if the ignition
is still in ACC/ACCESSORY and the
key is in the ignition.
If the ignition becomes difficult to
turn, see Keys031.Ignition Positions
(Keyless Access)
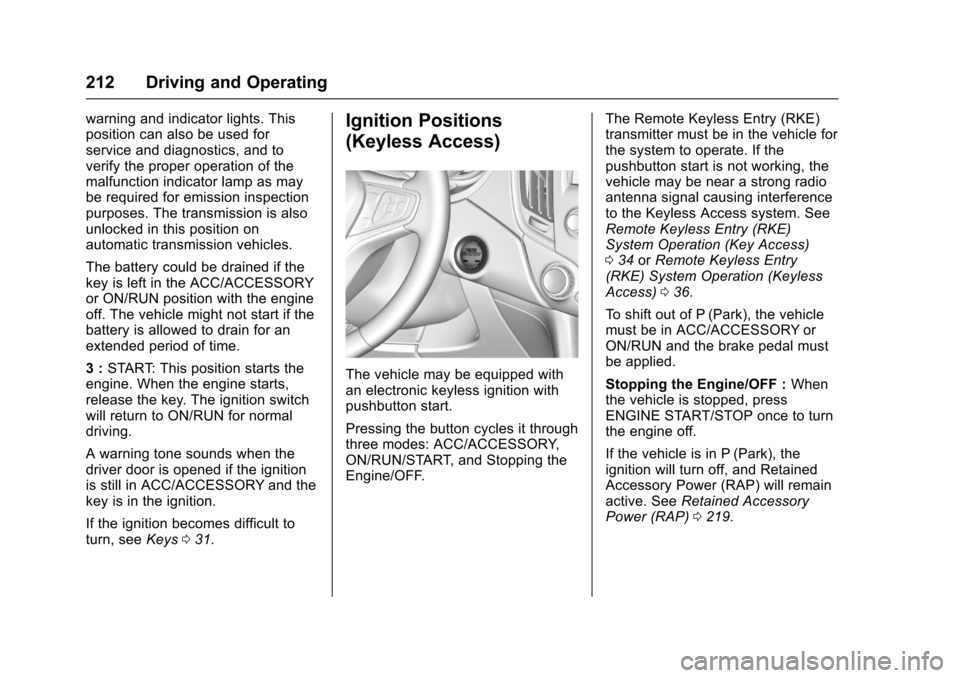
The vehicle may be equipped with
an electronic keyless ignition with
pushbutton start.
Pressing the button cycles it through
three modes: ACC/ACCESSORY,
ON/RUN/START, and Stopping the
Engine/OFF. The Remote Keyless Entry (RKE)
transmitter must be in the vehicle for
the system to operate. If the
pushbutton start is not working, the
vehicle may be near a strong radio
antenna signal causing interference
to the Keyless Access system. See
Remote Keyless Entry (RKE)
System Operation (Key Access)
0
34 orRemote Keyless Entry
(RKE) System Operation (Keyless
Access) 036.
To shift out of P (Park), the vehicle
must be in ACC/ACCESSORY or
ON/RUN and the brake pedal must
be applied.
Stopping the Engine/OFF : When
the vehicle is stopped, press
ENGINE START/STOP once to turn
the engine off.
If the vehicle is in P (Park), the
ignition will turn off, and Retained
Accessory Power (RAP) will remain
active. See Retained Accessory
Power (RAP) 0219.
Page 214 of 405
Chevrolet Cruze Owner Manual (GMNA-Localizing-U.S./Canada/Mexico-
9803785) - 2017 - CRC - 4/13/16
Driving and Operating 213
If the vehicle is not in P (Park), the
ignition will return to ACC/
ACCESSORY and the Driver
Information Center (DIC) will display
the message SHIFT TO PARK. See
Transmission Messages0148.
When the vehicle is shifted into
P (Park), the ignition system will
switch to OFF.
Do not turn the engine off when the
vehicle is moving. This will cause a
loss of power assist in the brake
and steering systems and disable
the airbags.
If the vehicle must be shut off in an
emergency:
1. Brake using a firm and steady pressure. Do not pump the
brakes repeatedly. This may
deplete power assist, requiring
increased brake pedal force.
2. Shift the vehicle to N (Neutral). This can be done while the
vehicle is moving. After shifting
to N (Neutral), firmly apply the
brakes and steer the vehicle to
a safe location. 3. Come to a complete stop. Shift
to P (Park) with an automatic
transmission, or Neutral with a
manual transmission. Press
ENGINE START/STOP.
4. Set the parking brake. See Parking Brake 0234.
{Warning
Turning off the vehicle while
moving may cause loss of power
assist in the brake and steering
systems and disable the airbags.
While driving, only shut the
vehicle off in an emergency.
If the vehicle cannot be pulled over
and must be shut off while driving,
press and hold ENGINE START/
STOP for longer than two seconds,
or press twice in five seconds.
ACC/ACCESSORY : This mode has
an amber light and allows some
electrical accessories to be used
when the engine is off. With the ignition off, pressing the
button one time without the brake
pedal applied will place the ignition
system in ACC/ACCESSORY.
The ignition will switch from ACC/
ACCESSORY to OFF after
five minutes to prevent battery
rundown.
ON/RUN/START :
This mode has a
green light and is for starting the
engine and driving. With the ignition
off, and the brake or clutch pedal
applied, pressing the button once
will place the ignition system in ON/
RUN/START. Once engine cranking
begins, release the button. Engine
cranking will continue until the
engine starts. See Starting the
Engine 0214. The ignition will then
remain in ON/RUN.
Service Only Mode
This power mode is available for
service and diagnostics, and to
verify the proper operation of the
malfunction indicator lamp as may
be required for emission inspection
purposes. With the vehicle off and
the brake pedal not applied,
pressing and holding ENGINE
Page 217 of 405
Chevrolet Cruze Owner Manual (GMNA-Localizing-U.S./Canada/Mexico-
9803785) - 2017 - CRC - 4/13/16
216 Driving and Operating
Stop/Start System
{Warning
Exiting the vehicle without first
shifting into P (Park) may cause
the vehicle to move. You or others
may be injured. Because the
vehicle has the auto engine stop/
start feature, the vehicle's engine
might seem to be shut off;
however, once the brake pedal is
released, the engine will start up
again.
Shift to P (Park) and turn the
ignition to LOCK/OFF, before
exiting the vehicle.
The vehicle may have a fuel saving
stop/start system to shut off the
engine to help conserve fuel. Auto Engine Stop/Start
When the brakes are applied and
the vehicle is at a complete stop,
the engine may turn off. When
stopped, the tachometer displays
AUTO STOP. See
Tachometer
0 121. When the brake pedal is
released or the accelerator pedal is
pushed, the engine will restart.
Auto Stop may be deactivated if:
. A minimum vehicle speed is not
reached.
. The engine or transmission is
not at the required operating
temperature.
. The outside temperature is not
in the required operating range,
typically below 5 °C (41 °F) or
above 50 °C (122 °F).
. The shift lever is in any gear
other than D (Drive).
. The battery has been recently
disconnected.
. The battery charge is low. .
The interior comfort level has not
reached the required level for
the climate control system or
defog settings. Use the eco
(green indicator on) air
conditioning mode for better
efficiency. See Automatic
Climate Control System 0193.
. The Auto Stop time is greater
than two minutes.
Diesel Engine Starting Procedure
The diesel engine starts differently
than a gasoline engine. 1. With the Keyless Access system, the RKE transmitter
must be in the vehicle.
Observe the wait-to-start light.
See Wait-to-Start Light 0131.
This light may not come on if
the engine is warm.
2. Press the ENGINE START/ STOP button with the brake
pedal or clutch pedal applied to
START. The start will be
delayed if the wait-to-start lamp
is illuminated.
Page 233 of 405
Chevrolet Cruze Owner Manual (GMNA-Localizing-U.S./Canada/Mexico-
9803785) - 2017 - CRC - 4/13/16
232 Driving and Operating
3, 4, 5, and 6 :Shift into 3 (Third),
4 (Fourth), 5 (Fifth), and 6 (Sixth) the
same way as for 2 (Second). Slowly
let up on the clutch pedal as the
accelerator pedal Is pressed.
For the best fuel economy, use
6 (Sixth) gear whenever vehicle
speed and driving conditions allow.
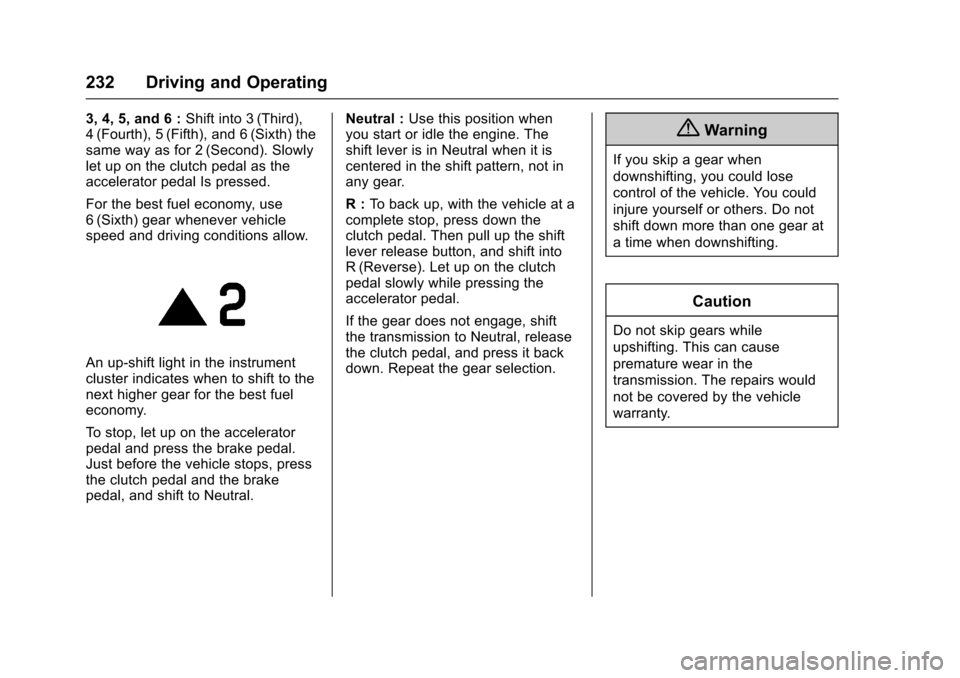
An up-shift light in the instrument
cluster indicates when to shift to the
next higher gear for the best fuel
economy.
To stop, let up on the accelerator
pedal and press the brake pedal.
Just before the vehicle stops, press
the clutch pedal and the brake
pedal, and shift to Neutral. Neutral :
Use this position when
you start or idle the engine. The
shift lever is in Neutral when it is
centered in the shift pattern, not in
any gear.
R : To back up, with the vehicle at a
complete stop, press down the
clutch pedal. Then pull up the shift
lever release button, and shift into
R (Reverse). Let up on the clutch
pedal slowly while pressing the
accelerator pedal.
If the gear does not engage, shift
the transmission to Neutral, release
the clutch pedal, and press it back
down. Repeat the gear selection.
{Warning
If you skip a gear when
downshifting, you could lose
control of the vehicle. You could
injure yourself or others. Do not
shift down more than one gear at
a time when downshifting.
Caution
Do not skip gears while
upshifting. This can cause
premature wear in the
transmission. The repairs would
not be covered by the vehicle
warranty.
Page 234 of 405
Chevrolet Cruze Owner Manual (GMNA-Localizing-U.S./Canada/Mexico-
9803785) - 2017 - CRC - 4/13/16
Driving and Operating 233
Brakes
Antilock Brake
System (ABS)
This vehicle has an Antilock Brake
System (ABS), an advanced
electronic braking system that helps
prevent a braking skid.
When the vehicle begins to drive
away, ABS checks itself.
A momentary motor or clicking noise
may be heard while this test is going
on, and it may even be noticed that
the brake pedal moves a little. This
is normal.
If there is a problem with ABS, this
warning light stays on. SeeAntilock
Brake System (ABS) Warning
Light 0129. If driving safely on a wet road and it
becomes necessary to slam on the
brakes and continue braking to
avoid a sudden obstacle, a
computer senses the wheels are
slowing down. If one of the wheels
is about to stop rolling, the computer
will separately work the brakes at
each wheel.
ABS can change the brake pressure
to each wheel, as required, faster
than any driver could. This can help
you steer around the obstacle while
braking hard.
As the brakes are applied, the
computer keeps receiving updates
on wheel speed and controls
braking pressure accordingly.
Remember: ABS does not change
the time needed to get a foot up to
the brake pedal or always decrease
stopping distance. If you get too
close to the vehicle in front of you,
there will not be enough time to
apply the brakes if that vehicle
suddenly slows or stops. Always
leave enough room up ahead to
stop, even with ABS.
Using ABS
Do not pump the brakes. Just hold
the brake pedal down firmly and let
ABS work. You may hear the ABS
pump or motor operating and feel
the brake pedal pulsate. This is
normal.
Braking in Emergencies
ABS allows you to steer and brake
at the same time. In many
emergencies, steering can help
more than even the very best
braking.
Page 235 of 405
Chevrolet Cruze Owner Manual (GMNA-Localizing-U.S./Canada/Mexico-
9803785) - 2017 - CRC - 4/13/16
234 Driving and Operating
Parking Brake
Lever Apply
With the brake pedal applied, pull
up firmly on the parking brake
handle without pressing the release
button. SeeShifting Into Park 0219
or Parking 0221. If the ignition is in
the ON/RUN position, the brake
system warning light will come on.
See Brake System Warning
Light 0128.
To release the parking brake:
1. Hold the brake pedal down. 2. Pull the parking brake handle
up until you can press the
release button.
3. Hold the release button in as you move the brake handle all
the way down.
Caution
Driving with the parking brake on
can overheat the brake system
and cause premature wear or
damage to brake system parts.
Make sure that the parking brake
is fully released and the brake
warning light is off before driving.
Driving with the parking brake
applied will cause a warning chime
to sound and the RELEASE
PARKING BRAKE message to
appear in the DIC. The message will
remain on until the parking brake is
released or the vehicle is stopped.
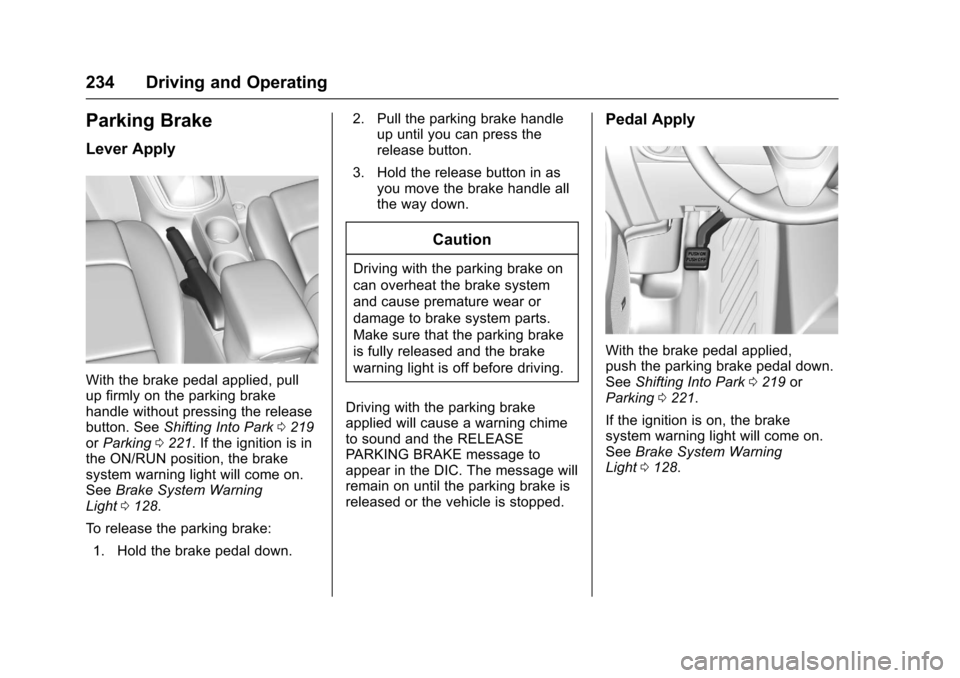
Pedal Apply
With the brake pedal applied,
push the parking brake pedal down.
See Shifting Into Park 0219 or
Parking 0221.
If the ignition is on, the brake
system warning light will come on.
See Brake System Warning
Light 0128.