2017 CHEVROLET COLORADO parking brake
[x] Cancel search: parking brakePage 256 of 419

Chevrolet Colorado Owner Manual (GMNA-Localizing-U.S./Canada/Mexico-10122675) - 2017 - crc - 8/22/16
Driving and Operating 255
Set the parking brake by holding theregular brake pedal down, thenpushing down the parking brakepedal.
If the ignition is on, the brakesystem warning light will come on.SeeBrake System WarningLight0120.
Caution
Driving with the parking brake on
can overheat the brake system
and cause premature wear or
damage to brake system parts.
Make sure that the parking brake
is fully released and the brake
warning light is off before driving.
To r e l e a s e t h e p a r k i n g b r a k e , h o l dthe regular brake pedal down, thenpush down momentarily on theparking brake pedal until you feelthe pedal release. Slowly pull yourfoot up off the parking brake pedal.If the parking brake is not releasedwhen you begin to drive, the brake
system warning light will flash and achime will sound warning you thatthe parking brake is still on.
If you are towing a trailer and areparking on a hill, seeDrivingCharacteristics and TowingTips0270.
Brake Assist
The Brake Assist feature isdesigned to assist the driver instopping or decreasing vehiclespeed in emergency drivingconditions. This feature uses thestability system hydraulic brakecontrol module to supplement thepower brake system underconditions where the driver hasquickly and forcefully applied thebrake pedal in an attempt to quicklystop or slow down the vehicle. Thestability system hydraulic brakecontrol module increases brakepressure at each corner of thevehicle until the ABS activates.
Minor brake pedal pulsation orpedal movement during this time isnormal and the driver shouldcontinue to apply the brake pedal asthe driving situation dictates. TheBrake Assist feature willautomatically disengage when thebrake pedal is released or brakepedal pressure is quicklydecreased.
Hill Start Assist (HSA)
This vehicle has a Hill Start Assist(HSA) feature, which may be usefulwhen the vehicle is stopped on agrade sufficient enough to activateHSA. This feature is designed toprevent the vehicle from rolling,either forward or rearward, duringvehicle drive off. After the drivercompletely stops and holds thevehicle in a complete standstill on agrade, HSA will be automaticallyactivated. During the transitionperiod between when the driverreleases the brake pedal and startsto accelerate to drive off on a grade,
Page 262 of 419
Chevrolet Colorado Owner Manual (GMNA-Localizing-U.S./Canada/Mexico-10122675) - 2017 - crc - 8/22/16
Driving and Operating 261
Ending Cruise Control
There are four ways to end cruisecontrol:
.Step lightly on the brake pedal.
.Press*.
.Press the clutch pedal forseveral seconds or shift thetransmission to N (Neutral).
.To t u r n o f f c r u i s e c o n t r o l ,
press5.
Erasing Speed Memory
The cruise control set speed is
erased from memory if5is pressed
or if the ignition is turned off.
Driver Assistance
Systems
Rear Vision
Camera (RVC)
{Warning
The camera(s) do not display
children, pedestrians, bicyclists,
crossing traffic, animals, or any
other object outside of the
cameras’field of view, below the
bumper, or under the vehicle.
Shown distances may be different
from actual distances. Do not
drive or park the vehicle using
only these camera(s). Always
check behind and around the
vehicle before driving. Failure to
use proper care may result in
injury, death, or vehicle damage.
If equipped, the RVC system isdesigned to help the driver whenbacking up by displaying a view ofthe area behind the vehicle. Whenthe key is in ON/RUN and the driver
shifts the vehicle into R (Reverse),the video image automaticallyappears on the infotainment screen.The infotainment screen goes to theprevious screen after approximatelyfour seconds once the vehicle isshifted out of R (Reverse).
To s e e t h e p r e v i o u s s c r e e n s o o n e r,do one of the following:
.Press a hard key on theinfotainment system.
.Shift into P (Park).
The RVC will not work properly ifthe tailgate is down. If the tailgate isdown, do not use this system.
Guidelines
The RVC system may have aguideline overlay that can help thedriver align the vehicle whenbacking into a parking spot.
To t u r n t h e g u i d e l i n e s o n o r o f f :
1. Shift into P (Park).
2. Press SETTINGS on the homescreen of the infotainmentsystem.
3. Select Rear Camera.
Page 273 of 419
Chevrolet Colorado Owner Manual (GMNA-Localizing-U.S./Canada/Mexico-10122675) - 2017 - crc - 8/22/16
272 Driving and Operating
minutes before turning the engineoff. If the overheat warning comeson, seeEngine Overheating0296.
Parking on Hills
{Warning
Parking the vehicle on a hill with
the trailer attached can be
dangerous. If something goes
wrong, the rig could start to move.
People can be injured, and both
the vehicle and the trailer can be
damaged. When possible, always
park the rig on a flat surface.
If parking the rig on a hill:
1. Press the brake pedal, but donot shift into P (Park) yet. Turnthe wheels into the curb iffacing downhill or into traffic iffacing uphill.
2. Have someone place chocksunder the trailer wheels.
3. When the wheel chocks are inplace, release the regularbrakes until the chocks absorbthe load.
4. Reapply the brake pedal. Thenapply the parking brake andshift into P (Park).
5. Release the brake pedal.
Leaving After Parking on a Hill
1. Apply and hold the brakepedal.
2. Start the engine.
3. Shift into a gear.
4. Release the parking brake.
5. Let up on the brake pedal.
6. Drive slowly until the trailer isclear of the chocks.
7. Stop and have someone pickup and store the chocks.
Maintenance when Trailer
Towing
The vehicle needs service moreoften when pulling a trailer. SeeMaintenance Schedule0366.Things that are especially importantin trailer operation are automatictransmission fluid, engine oil, axlelubricant, belts, cooling system, and
brake system. It is a good idea toinspect these before and duringthe trip.
Check periodically to see that allhitch nuts and bolts are tight.
Trailer Towing
Do not tow a trailer during break-in.SeeNew Vehicle Break-In0232.
{Warning
The driver can lose control when
pulling a trailer if the correct
equipment is not used or the
vehicle is not driven properly. For
example, if the trailer is too heavy
or the trailer brakes are
inadequate for the load, the
vehicle may not stop as expected.
The driver and passengers could
be seriously injured. The vehicle
may also be damaged; the
resulting repairs would not be
covered by the vehicle warranty.
Pull a trailer only if all the steps in
this section have been followed.
(Continued)
Page 277 of 419
Chevrolet Colorado Owner Manual (GMNA-Localizing-U.S./Canada/Mexico-10122675) - 2017 - crc - 8/22/16
276 Driving and Operating
manufacturer or by the trailermanufacturer. Always leave justenough slack so the combinationcan turn. Never allow safety chainsto drag on the ground.
Trailer Brakes
Aloadedtrailerthatweighsmorethan 900 kg (2,000 lb) needs to haveits own brake system that isadequate for the weight of thetrailer. Be sure to read and followthe instructions for the trailer brakesso they are installed, adjusted, andmaintained properly.
Trailer Wiring Harness
For vehicles not equipped withheavy-duty trailering, a harness issecured underneath the left side ofthe vehicle, next to the spare tire.The harness requires the installationof a trailer connector, which isavailable through your dealer. Theseven-wire harness contains thefollowing trailer circuits:
.Ye l l o w : L e f t s t o p / t u r n s i g n a l
.Green: Right stop/turn signal
.Brown: Taillamps/parking lamps
.Black: Ground
.Gray: Back-up lamps
.Orange: Battery feed
.Blue: Trailer brake
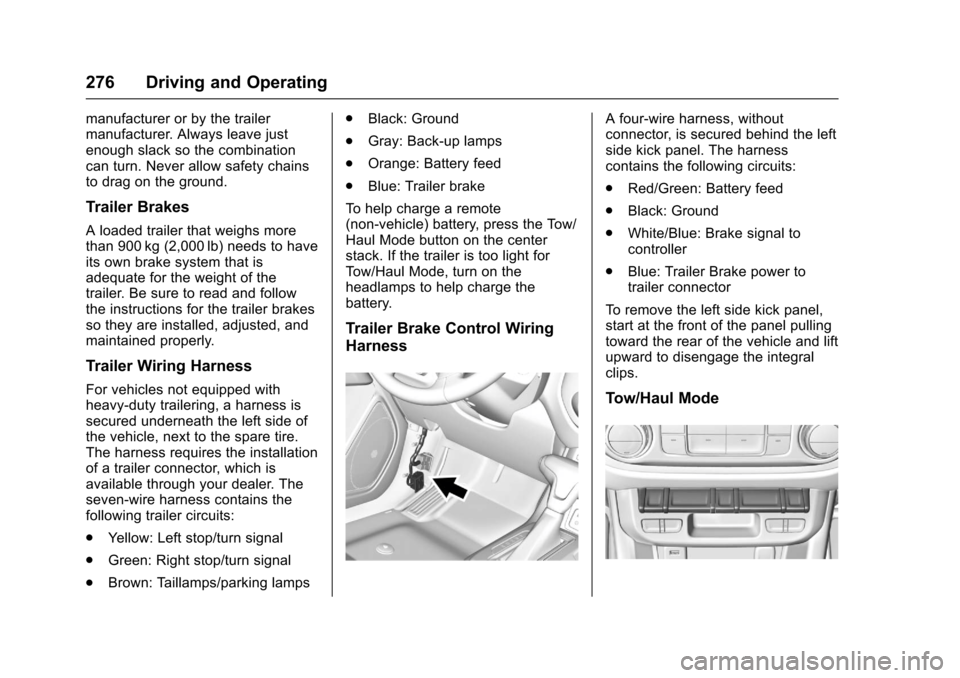
To h e l p c h a r g e a r e m o t e(non-vehicle) battery, press the Tow/Haul Mode button on the centerstack. If the trailer is too light forTo w / H a u l M o d e , t u r n o n t h eheadlamps to help charge thebattery.
Trailer Brake Control Wiring
Harness
Afour-wireharness,withoutconnector, is secured behind the leftside kick panel. The harnesscontains the following circuits:
.Red/Green: Battery feed
.Black: Ground
.White/Blue: Brake signal tocontroller
.Blue: Trailer Brake power totrailer connector
To r e m o v e t h e l e f t s i d e k i c k p a n e l ,start at the front of the panel pullingtoward the rear of the vehicle and liftupward to disengage the integralclips.
Tow/Haul Mode
Page 278 of 419
Chevrolet Colorado Owner Manual (GMNA-Localizing-U.S./Canada/Mexico-10122675) - 2017 - crc - 8/22/16
Driving and Operating 277
Press this button on the centerstack to turn on and off the Tow/Haul Mode.
This indicator light on the instrumentcluster comes on when the Tow/Haul Mode is on.
To w / H a u l i s a f e a t u r e t h a t a s s i s t swhen pulling a heavy trailer or alarge or heavy load. SeeTo w / H a u lMode0245.
To w / H a u l i s d e s i g n e d t o b e m o s teffective when the vehicle andtrailer combined weight is at least75 percent of the vehicle's GrossCombined Weight Rating (GCWR).See“Weight of the Trailer”underTr a i l e r To w i n g0272.Tow/Haulismost useful under the followingdriving conditions:
.When pulling a heavy trailer or alarge or heavy load throughrolling terrain.
.When pulling a heavy trailer or alarge or heavy load instop-and-go traffic.
.When pulling a heavy trailer or alarge or heavy load in busyparking lots where improved lowspeed control of the vehicle isdesired.
Operating the vehicle in Tow/Haulwhen lightly loaded or with no trailerat all will not cause damage.However, there is no benefit to theselection of Tow/Haul when thevehicle is unloaded. Such aselection when unloaded may resultin unpleasant engine andtransmission driving characteristicsand reduced fuel economy. Tow/Haul is recommended only whenpulling a heavy trailer or a large orheavy load.
If the vehicle has a diesel engine,the Tow/Haul button activates theexhaust brake systemsimultaneously. See“ExhaustBrake”in the Duramax dieselsupplement.
Trailer Sway
Control (TSC)
Vehicles with StabiliTrak have aTrailer Sway Control (TSC) feature.Trailer sway is unintendedside-to-side motion of a trailer whilebeing towed. If the vehicle is towingatrailerandtheTSCdetectsthatsway is increasing, the vehiclebrakes are selectively applied ateach wheel, to help reduceexcessive trailer sway. If the vehicleis equipped with the IntegratedTrailer Brake Control (ITBC) system,and the trailer has the electricactuated brake system, StabiliTrakmay also apply the trailer brakes.
If TSC is enabled, the TractionControl System (TCS)/StabiliTrakwarning light will flash on theinstrument cluster. Vehicle speedmust be reduced. If trailer swaycontinues, StabiliTrak can reduceengine torque to help slow thevehicle. SeeTr a c t i o n C o n t r o l /Electronic Stability Control0256.
Page 280 of 419
Chevrolet Colorado Owner Manual (GMNA-Localizing-U.S./Canada/Mexico-10122675) - 2017 - crc - 8/22/16
Vehicle Care 279
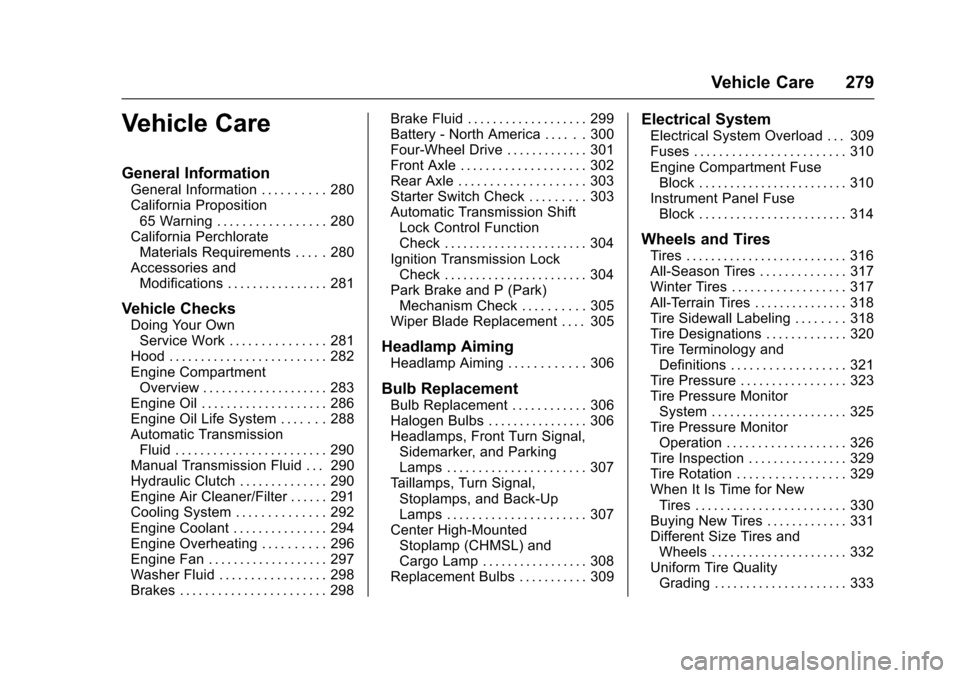
Vehicle Care
General Information
General Information . . . . . . . . . . 280California Proposition65 Warning . . . . . . . . . . . . . . . . . 280California PerchlorateMaterials Requirements . . . . . 280Accessories andModifications . . . . . . . . . . . . . . . . 281
Vehicle Checks
Doing Your OwnService Work . . . . . . . . . . . . . . . 281Hood . . . . . . . . . . . . . . . . . . . . . . . . . 282Engine CompartmentOverview . . . . . . . . . . . . . . . . . . . . 283Engine Oil . . . . . . . . . . . . . . . . . . . . 286Engine Oil Life System . . . . . . . 288Automatic TransmissionFluid . . . . . . . . . . . . . . . . . . . . . . . . 290Manual Transmission Fluid . . . 290Hydraulic Clutch . . . . . . . . . . . . . . 290Engine Air Cleaner/Filter . . . . . . 291Cooling System . . . . . . . . . . . . . . 292Engine Coolant . . . . . . . . . . . . . . . 294Engine Overheating . . . . . . . . . . 296Engine Fan . . . . . . . . . . . . . . . . . . . 297Washer Fluid . . . . . . . . . . . . . . . . . 298Brakes . . . . . . . . . . . . . . . . . . . . . . . 298
Brake Fluid . . . . . . . . . . . . . . . . . . . 299Battery - North America . . . . . . 300Four-Wheel Drive . . . . . . . . . . . . . 301Front Axle . . . . . . . . . . . . . . . . . . . . 302Rear Axle . . . . . . . . . . . . . . . . . . . . 303Starter Switch Check . . . . . . . . . 303Automatic Transmission ShiftLock Control FunctionCheck . . . . . . . . . . . . . . . . . . . . . . . 304Ignition Transmission LockCheck . . . . . . . . . . . . . . . . . . . . . . . 304Park Brake and P (Park)Mechanism Check . . . . . . . . . . 305Wiper Blade Replacement . . . . 305
Headlamp Aiming
Headlamp Aiming . . . . . . . . . . . . 306
Bulb Replacement
Bulb Replacement . . . . . . . . . . . . 306Halogen Bulbs . . . . . . . . . . . . . . . . 306Headlamps, Front Turn Signal,Sidemarker, and ParkingLamps . . . . . . . . . . . . . . . . . . . . . . 307Ta i l l a m p s , T u r n S i g n a l ,Stoplamps, and Back-UpLamps . . . . . . . . . . . . . . . . . . . . . . 307Center High-MountedStoplamp (CHMSL) andCargo Lamp . . . . . . . . . . . . . . . . . 308Replacement Bulbs . . . . . . . . . . . 309
Electrical System
Electrical System Overload . . . 309Fuses . . . . . . . . . . . . . . . . . . . . . . . . 310Engine Compartment FuseBlock . . . . . . . . . . . . . . . . . . . . . . . . 310Instrument Panel FuseBlock . . . . . . . . . . . . . . . . . . . . . . . . 314
Wheels and Tires
Tires . . . . . . . . . . . . . . . . . . . . . . . . . . 316All-Season Tires . . . . . . . . . . . . . . 317Winter Tires . . . . . . . . . . . . . . . . . . 317All-Terrain Tires . . . . . . . . . . . . . . . 318Tire Sidewall Labeling . . . . . . . . 318Tire Designations . . . . . . . . . . . . . 320Tire Terminology andDefinitions . . . . . . . . . . . . . . . . . . 321Tire Pressure . . . . . . . . . . . . . . . . . 323Tire Pressure MonitorSystem . . . . . . . . . . . . . . . . . . . . . . 325Tire Pressure MonitorOperation . . . . . . . . . . . . . . . . . . . 326Tire Inspection . . . . . . . . . . . . . . . . 329Tire Rotation . . . . . . . . . . . . . . . . . 329When It Is Time for NewTires . . . . . . . . . . . . . . . . . . . . . . . . 330Buying New Tires . . . . . . . . . . . . . 331Different Size Tires andWheels . . . . . . . . . . . . . . . . . . . . . . 332Uniform Tire QualityGrading . . . . . . . . . . . . . . . . . . . . . 333
Page 300 of 419

Chevrolet Colorado Owner Manual (GMNA-Localizing-U.S./Canada/Mexico-10122675) - 2017 - crc - 8/22/16
Vehicle Care 299
heard all the time the vehicle ismoving, except when applying thebrake pedal firmly.
{Warning
The brake wear warning sound
means that soon the brakes will
not work well. That could lead to
acrash.Whenthebrakewear
warning sound is heard, have the
vehicle serviced.
Caution
Continuing to drive with worn-out
brake pads could result in costly
brake repair.
Some driving conditions or climatescan cause a brake squeal when thebrakes are first applied or lightlyapplied. This does not meansomething is wrong with the brakes.
Properly torqued wheel nuts arenecessary to help prevent brakepulsation. When tires are rotated,inspect brake pads for wear andevenly tighten wheel nuts in theproper sequence to torquespecifications inCapacities andSpecifications0380.
Brake linings should always bereplaced as complete axle sets.
Brake Pedal Travel
See your dealer if the brake pedaldoes not return to normal height,or if there is a rapid increase inpedal travel. This could be a signthat brake service may be required.
Replacing Brake System Parts
Always replace brake system partswith new, approved replacementparts. If this is not done, the brakesmay not work properly. The brakingperformance expected can changein many other ways if the wrongreplacement brake parts areinstalled or parts are improperlyinstalled.
Brake Fluid
The brake/clutch master cylinderreservoir is filled with GM approvedDOT 3 brake fluid as indicated onthe reservoir cap. SeeEngineCompartment Overview0283forthe location of the reservoir.
Checking Brake Fluid
Place the vehicle in P (Park) orNeutral with the parking brakeapplied if equipped with a manualtransmission. On a level surface,the brake fluid level should bebetween the minimum andmaximum marks on the brake fluidreservoir.
Page 304 of 419

Chevrolet Colorado Owner Manual (GMNA-Localizing-U.S./Canada/Mexico-10122675) - 2017 - crc - 8/22/16
Vehicle Care 303
What to Use
Refer toRecommended Fluids andLubricants0375to determine whatkind of lubricant to use.
Rear Axle
When to Check and ChangeLubricant
It is not necessary to regularlycheck rear axle fluid unless a leak issuspected, or an unusual noise isheard. A fluid loss could indicate aproblem. Have it inspected andrepaired.
All axle assemblies are filled byvolume of fluid during production.They are not filled to reach a certainlevel. When checking the fluid levelon any axle, variations in thereadings can be caused by factoryfill differences between the minimumand the maximum fluid volume.Also, if a vehicle has just beendriven before checking the fluidlevel, it may appear lower thannormal because fluid has traveledout along the axle tubes and hasnot drained back to the sump area.Therefore, a reading taken
five minutes after the vehicle hasbeen driven will appear to have alower fluid level than a vehicle thathas been stationary for an hour ortwo. The rear axle assembly mustbe supported on a flat, level surfaceto get a true reading.
How to Check Lubricant
Rear Axle for 2.5L Shown, Rear
Axle for 3.6L Similar
1. Drain Plug
2. Fill Plug
To g e t a n a c c u r a t e r e a d i n g , t h evehicle should be on a levelsurface.
If the level is below the bottom ofthe fill plug (2) hole, located on therear axle, some lubricant will needto be added. Add enough lubricantto raise the level to the bottom ofthe fill plug (2) hole. Use care not toovertighten the plug.
What to Use
Refer toRecommended Fluids andLubricants0375to determine whatkind of lubricant to use.
Starter Switch Check
{Warning
When you are doing this
inspection, the vehicle could
move suddenly. If the vehicle
moves, you or others could be
injured.
1. Before starting this check, besure there is enough roomaround the vehicle.
2. Apply both the parking brakeand the regular brake.