2017 CHEVROLET CITY EXPRESS cooling
[x] Cancel search: coolingPage 188 of 348
Chevrolet Express Owner Manual (GMNA-Localizing-U.S./Canada/Mexico-
9967827) - 2017 - crc - 9/26/16
Driving and Operating 187
2. Press the +/−buttons on the
shift lever, to select the desired
range of gears for current
driving conditions.
When M (Manual Mode) is selected
a number displays in the DIC next to
the M indicating the current gear.
This number is the highest gear that
can be used. However, the vehicle
can automatically shift to lower
gears as it adjusts to driving
conditions. This means that all
gears below that number are
available. When 5 (Fifth) is selected,
1 (First) through 5 (Fifth) gears are
automatically shifted by the vehicle,
but 6 (Sixth) cannot be used until
the +/− button on the steering
column lever is used to change to
the gear.
Grade Braking is not available when
Range Selection Mode is active.
See Tow/Haul Mode 0187.
While using Range Selection Mode,
cruise control and the Tow/Haul
Mode can be used.Caution
Spinning the tires or holding the
vehicle in one place on a hill
using only the accelerator pedal
may damage the transmission.
The repair will not be covered by
the vehicle warranty. If the vehicle
is stuck, do not spin the tires.
When stopping on a hill, use the
brakes to hold the vehicle in
place.
Low Traction Mode
Low Traction Mode can assist in
vehicle acceleration when road
conditions are slippery. While the
vehicle is at a stop, select the
second gear range using Range
Selection Mode. This will limit
torque to the wheels after it detects
wheel slip, preventing the tires from
spinning.
Tow/Haul Mode
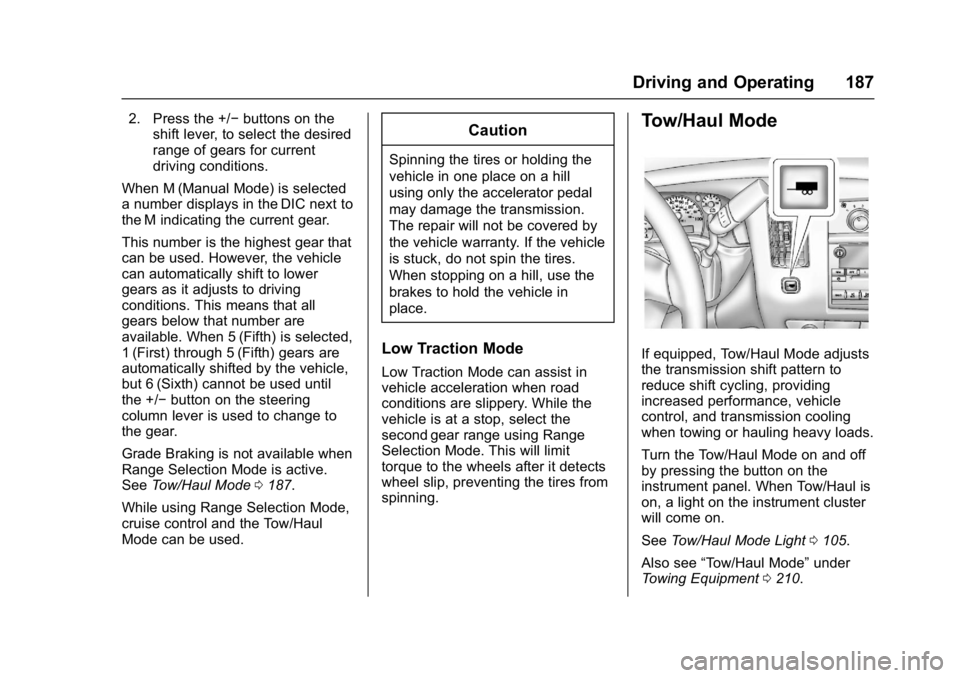
If equipped, Tow/Haul Mode adjusts
the transmission shift pattern to
reduce shift cycling, providing
increased performance, vehicle
control, and transmission cooling
when towing or hauling heavy loads.
Turn the Tow/Haul Mode on and off
by pressing the button on the
instrument panel. When Tow/Haul is
on, a light on the instrument cluster
will come on.
See Tow/Haul Mode Light 0105.
Also see “Tow/Haul Mode” under
Towing Equipment 0210.
Page 206 of 348
Chevrolet Express Owner Manual (GMNA-Localizing-U.S./Canada/Mexico-
9967827) - 2017 - crc - 9/26/16
Driving and Operating 205
If parking the rig on a hill:1. Press the brake pedal, but do not shift into P (Park) yet. Turn
the wheels into the curb if
facing downhill or into traffic if
facing uphill.
2. Have someone place chocks under the trailer wheels.
3. When the wheel chocks are in place, release the regular
brakes until the chocks absorb
the load.
4. Reapply the brake pedal. Then apply the parking brake and
shift into P (Park).
5. Release the brake pedal.
Leaving After Parking on a Hill
1. Apply and hold the brake pedal.
2. Start the engine.
3. Shift into a gear.
4. Release the parking brake.
5. Let up on the brake pedal.
6. Drive slowly until the trailer is clear of the chocks. 7. Stop and have someone pick
up and store the chocks.
Maintenance when Trailer
Towing
The vehicle needs service more
often when pulling a trailer. See
Maintenance Schedule 0298.
Things that are especially important
in trailer operation are automatic
transmission fluid, engine oil, axle
lubricant, belts, cooling system, and
brake system. It is a good idea to
inspect these before and during
the trip.
Check periodically to see that all
hitch nuts and bolts are tight.
Trailer Towing
If the vehicle has a diesel engine,
see the Duramax diesel
supplement.
{Warning
The driver can lose control when
pulling a trailer if the correct
equipment is not used or the
vehicle is not driven properly. For
example, if the trailer is too heavy
or the trailer brakes are
inadequate for the load, the
vehicle may not stop as expected.
The driver and passengers could
be seriously injured. The vehicle
may also be damaged; the
resulting repairs would not be
covered by the vehicle warranty.
Pull a trailer only if all the steps in
this section have been followed.
Ask your dealer for advice and
information about towing a trailer
with the vehicle.
Page 215 of 348

Chevrolet Express Owner Manual (GMNA-Localizing-U.S./Canada/Mexico-
9967827) - 2017 - crc - 9/26/16
214 Vehicle Care
Vehicle Care
General Information
General Information . . . . . . . . . . 215
California Proposition65 Warning . . . . . . . . . . . . . . . . . 215
California Perchlorate Materials Requirements . . . . . 215
Accessories and Modifications . . . . . . . . . . . . . . . . 216
Vehicle Checks
Doing Your OwnService Work . . . . . . . . . . . . . . . 216
Hood . . . . . . . . . . . . . . . . . . . . . . . . . 217
Engine Compartment Overview . . . . . . . . . . . . . . . . . . . . 218
Engine Oil . . . . . . . . . . . . . . . . . . . . 219
Engine Oil Life System . . . . . . . 221
Automatic Transmission Fluid . . . . . . . . . . . . . . . . . . . . . . . . 222
Engine Air Cleaner/Filter . . . . . . 225
Cooling System . . . . . . . . . . . . . . 226
Engine Coolant . . . . . . . . . . . . . . . 227
Engine Overheating . . . . . . . . . . 230
Engine Fan . . . . . . . . . . . . . . . . . . . 232
Power Steering Fluid . . . . . . . . . 232
Washer Fluid . . . . . . . . . . . . . . . . . 233
Brakes . . . . . . . . . . . . . . . . . . . . . . . 234
Brake Fluid . . . . . . . . . . . . . . . . . . . 234 Battery - North America . . . . . . 236
Rear Axle . . . . . . . . . . . . . . . . . . . . 236
Noise Control System . . . . . . . . 237
Starter Switch Check . . . . . . . . . 238
Automatic Transmission Shift
Lock Control Function
Check . . . . . . . . . . . . . . . . . . . . . . . 238
Ignition Transmission Lock Check . . . . . . . . . . . . . . . . . . . . . . . 239
Park Brake and P (Park) Mechanism Check . . . . . . . . . . 239
Wiper Blade Replacement . . . . 239Headlamp Aiming
Headlamp Aiming . . . . . . . . . . . . 240
Bulb Replacement
Bulb Replacement . . . . . . . . . . . . 240
Halogen Bulbs . . . . . . . . . . . . . . . . 240
Headlamps . . . . . . . . . . . . . . . . . . . 241
Front Turn Signal, Sidemarker, and Parking Lamps . . . . . . . . . 242
Taillamps . . . . . . . . . . . . . . . . . . . . . 243
Center High-Mounted Stoplamp (CHMSL) . . . . . . . . . 244
License Plate Lamp . . . . . . . . . . 244
Replacement Bulbs . . . . . . . . . . . 245
Electrical System
Electrical System Overload . . . 245
Fuses and Circuit Breakers . . . 246 Engine Compartment Fuse
Block . . . . . . . . . . . . . . . . . . . . . . . . 246
Floor Console Fuse Block . . . . 250
Wheels and Tires
Tires . . . . . . . . . . . . . . . . . . . . . . . . . . 252
All-Season Tires . . . . . . . . . . . . . . 253
Winter Tires . . . . . . . . . . . . . . . . . . 253
All-Terrain Tires . . . . . . . . . . . . . . . 253
Tire Sidewall Labeling . . . . . . . . 254
Tire Designations . . . . . . . . . . . . . 256
Tire Terminology and Definitions . . . . . . . . . . . . . . . . . . 257
Tire Pressure . . . . . . . . . . . . . . . . . 260
Tire Pressure Monitor System . . . . . . . . . . . . . . . . . . . . . . 261
Tire Pressure Monitor
Operation . . . . . . . . . . . . . . . . . . . 262
Tire Inspection . . . . . . . . . . . . . . . . 265
Tire Rotation . . . . . . . . . . . . . . . . . 265
Dual Tire Rotation . . . . . . . . . . . . 266
When It Is Time for New Tires . . . . . . . . . . . . . . . . . . . . . . . . 267
Buying New Tires . . . . . . . . . . . . . 268
Different Size Tires and Wheels . . . . . . . . . . . . . . . . . . . . . . 269
Uniform Tire Quality Grading . . . . . . . . . . . . . . . . . . . . . 270
Wheel Alignment and Tire Balance . . . . . . . . . . . . . . . . . . . . . 271
Wheel Replacement . . . . . . . . . . 271
Page 220 of 348
Chevrolet Express Owner Manual (GMNA-Localizing-U.S./Canada/Mexico-
9967827) - 2017 - crc - 9/26/16
Vehicle Care 219
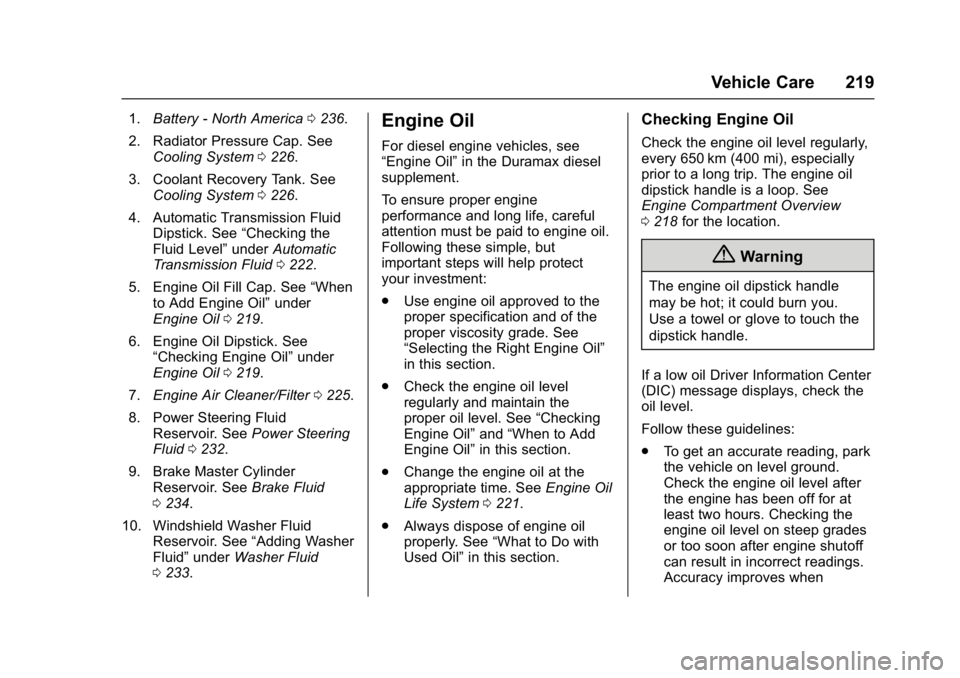
1.Battery - North America 0236.
2. Radiator Pressure Cap. See Cooling System 0226.
3. Coolant Recovery Tank. See Cooling System 0226.
4. Automatic Transmission Fluid Dipstick. See “Checking the
Fluid Level” underAutomatic
Transmission Fluid 0222.
5. Engine Oil Fill Cap. See “When
to Add Engine Oil” under
Engine Oil 0219.
6. Engine Oil Dipstick. See “Checking Engine Oil” under
Engine Oil 0219.
7. Engine Air Cleaner/Filter 0225.
8. Power Steering Fluid Reservoir. See Power Steering
Fluid 0232.
9. Brake Master Cylinder Reservoir. See Brake Fluid
0 234.
10. Windshield Washer Fluid Reservoir. See “Adding Washer
Fluid” under Washer Fluid
0 233.Engine Oil
For diesel engine vehicles, see
“Engine Oil” in the Duramax diesel
supplement.
To ensure proper engine
performance and long life, careful
attention must be paid to engine oil.
Following these simple, but
important steps will help protect
your investment:
. Use engine oil approved to the
proper specification and of the
proper viscosity grade. See
“Selecting the Right Engine Oil”
in this section.
. Check the engine oil level
regularly and maintain the
proper oil level. See “Checking
Engine Oil” and“When to Add
Engine Oil” in this section.
. Change the engine oil at the
appropriate time. See Engine Oil
Life System 0221.
. Always dispose of engine oil
properly. See “What to Do with
Used Oil” in this section.
Checking Engine Oil
Check the engine oil level regularly,
every 650 km (400 mi), especially
prior to a long trip. The engine oil
dipstick handle is a loop. See
Engine Compartment Overview
0218 for the location.
{Warning
The engine oil dipstick handle
may be hot; it could burn you.
Use a towel or glove to touch the
dipstick handle.
If a low oil Driver Information Center
(DIC) message displays, check the
oil level.
Follow these guidelines:
. To get an accurate reading, park
the vehicle on level ground.
Check the engine oil level after
the engine has been off for at
least two hours. Checking the
engine oil level on steep grades
or too soon after engine shutoff
can result in incorrect readings.
Accuracy improves when
Page 227 of 348
Chevrolet Express Owner Manual (GMNA-Localizing-U.S./Canada/Mexico-
9967827) - 2017 - crc - 9/26/16
226 Vehicle Care
3. Clean the air cleaner/filtersealing surface and
housing base.
4. Install the engine air cleaner/ filter by aligning the arrow on
one side of the air cleaner/filter
end cap with the arrow on top
of the housing base.
5. Install the housing cover by aligning the arrow on top of the
cover to the arrow on top of the
housing base, and fasten the
two retaining clips.
See Maintenance Schedule 0298 to
determine when to replace the
engine air cleaner/filter.
{Warning
Operating the engine with the air
cleaner/filter off can cause you or
others to be burned. The air
cleaner not only cleans the air; it
helps to stop flames if the engine
backfires. Use caution when
working on the engine and do not
drive with the air cleaner/filter off.
Caution
If the air cleaner/filter is off, dirt
can easily get into the engine,
which could damage it. Always
have the air cleaner/filter in place
when you are driving.
Cooling System
The cooling system allows the
engine to maintain the correct
working temperature.
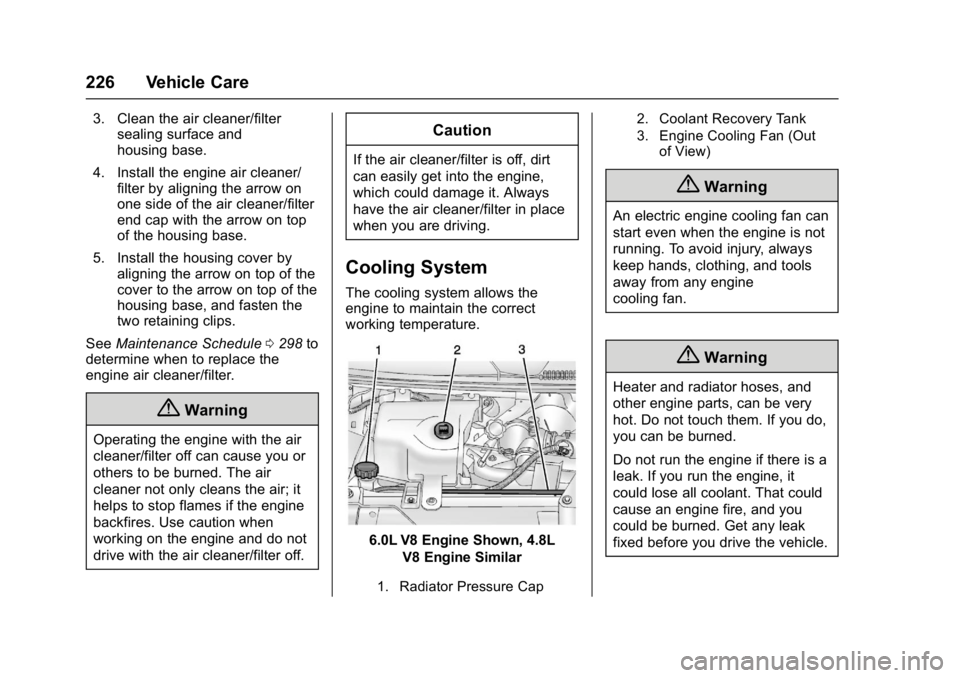
6.0L V8 Engine Shown, 4.8L
V8 Engine Similar
1. Radiator Pressure Cap 2. Coolant Recovery Tank
3. Engine Cooling Fan (Out
of View)
{Warning
An electric engine cooling fan can
start even when the engine is not
running. To avoid injury, always
keep hands, clothing, and tools
away from any engine
cooling fan.
{Warning
Heater and radiator hoses, and
other engine parts, can be very
hot. Do not touch them. If you do,
you can be burned.
Do not run the engine if there is a
leak. If you run the engine, it
could lose all coolant. That could
cause an engine fire, and you
could be burned. Get any leak
fixed before you drive the vehicle.
Page 228 of 348
Chevrolet Express Owner Manual (GMNA-Localizing-U.S./Canada/Mexico-
9967827) - 2017 - crc - 9/26/16
Vehicle Care 227
Caution
Using coolant other than
DEX-COOL®can cause
premature engine, heater core,
or radiator corrosion. In addition,
the engine coolant could require
changing sooner. Any repairs
would not be covered by the
vehicle warranty. Always use
DEX-COOL (silicate-free) coolant
in the vehicle.
Engine Coolant
The cooling system in the vehicle is
filled with DEX-COOL®engine
coolant. This coolant is designed to
remain in the vehicle for 5 years or
240 000 km (150,000 mi), whichever
occurs first.
The following explains the cooling
system and how to check and add
coolant when it is low. If there is a
problem with engine overheating,
see Engine Overheating 0230.
What to Use
{Warning
Adding only plain water or some
other liquid to the cooling system
can be dangerous. Plain water
and other liquids, can boil before
the proper coolant mixture will.
The coolant warning system is set
for the proper coolant mixture.
With plain water or the wrong
mixture, the engine could get too
hot but you would not get the
overheat warning. The engine
could catch fire and you or others
could be burned. Use a 50/
50 mixture of clean, drinkable
water and DEX-COOL coolant.
Use a 50/50 mixture of clean,
drinkable water and DEX-COOL
coolant. If using this mixture,
nothing else needs to be added.
This mixture:
. Gives freezing protection down
to−37 °C (−34 °F), outside
temperature. .
Gives boiling protection up to
129 °C (265 °F), engine
temperature.
. Protects against rust and
corrosion.
. Will not damage aluminum parts.
. Helps keep the proper engine
temperature.
Caution
If improper coolant mixture,
inhibitors, or additives are used in
the vehicle cooling system, the
engine could overheat and be
damaged. Too much water in the
mixture can freeze and crack
engine cooling parts. The repairs
would not be covered by the
vehicle warranty. Use only the
proper mixture of engine coolant
for the cooling system. See
Recommended Fluids and
Lubricants 0306.
Never dispose of engine coolant by
putting it in the trash, pouring it on
the ground, or into sewers, streams,
Page 229 of 348
Chevrolet Express Owner Manual (GMNA-Localizing-U.S./Canada/Mexico-
9967827) - 2017 - crc - 9/26/16
228 Vehicle Care
or bodies of water. Have the coolant
changed by an authorized service
center, familiar with legal
requirements regarding used
coolant disposal. This will help
protect the environment and your
health.
Checking Coolant
The vehicle must be on a level
surface when checking the coolant
level.
Check to see if coolant is visible in
the coolant recovery tank. If the
coolant inside the coolant recovery
tank is boiling, do not do anything
else until it cools down. If coolant is
visible but the coolant level is not at
or above the COLD FILL mark, add
a 50/50 mixture of clean, drinkable
water and DEX-COOL coolant at the
coolant recovery tank, but be sure
the cooling system is cool before
this is done.
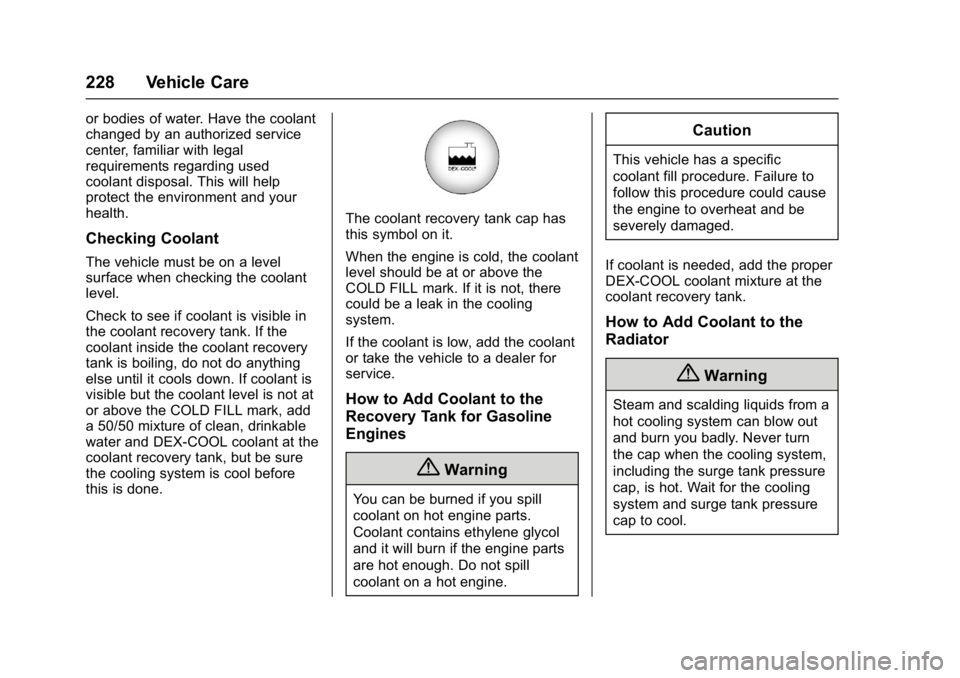
The coolant recovery tank cap has
this symbol on it.
When the engine is cold, the coolant
level should be at or above the
COLD FILL mark. If it is not, there
could be a leak in the cooling
system.
If the coolant is low, add the coolant
or take the vehicle to a dealer for
service.
How to Add Coolant to the
Recovery Tank for Gasoline
Engines
{Warning
You can be burned if you spill
coolant on hot engine parts.
Coolant contains ethylene glycol
and it will burn if the engine parts
are hot enough. Do not spill
coolant on a hot engine.
Caution
This vehicle has a specific
coolant fill procedure. Failure to
follow this procedure could cause
the engine to overheat and be
severely damaged.
If coolant is needed, add the proper
DEX-COOL coolant mixture at the
coolant recovery tank.
How to Add Coolant to the
Radiator
{Warning
Steam and scalding liquids from a
hot cooling system can blow out
and burn you badly. Never turn
the cap when the cooling system,
including the surge tank pressure
cap, is hot. Wait for the cooling
system and surge tank pressure
cap to cool.
Page 230 of 348
Chevrolet Express Owner Manual (GMNA-Localizing-U.S./Canada/Mexico-
9967827) - 2017 - crc - 9/26/16
Vehicle Care 229
If coolant is needed, add the proper
mixture directly to the radiator, but
be sure the cooling system is cool
before this is done.
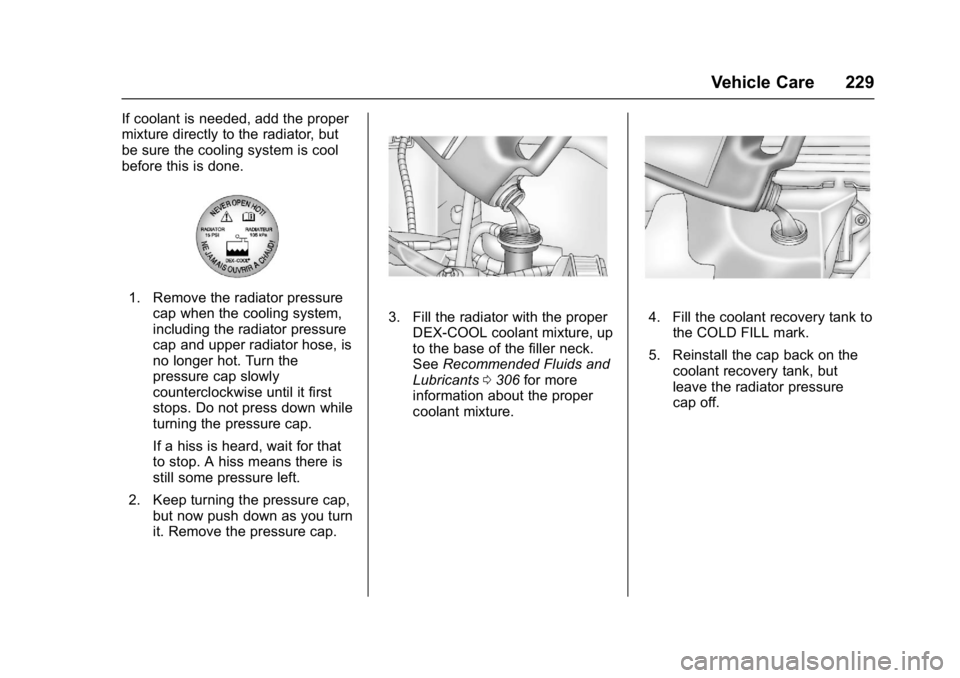
1. Remove the radiator pressurecap when the cooling system,
including the radiator pressure
cap and upper radiator hose, is
no longer hot. Turn the
pressure cap slowly
counterclockwise until it first
stops. Do not press down while
turning the pressure cap.
If a hiss is heard, wait for that
to stop. A hiss means there is
still some pressure left.
2. Keep turning the pressure cap, but now push down as you turn
it. Remove the pressure cap.
3. Fill the radiator with the properDEX-COOL coolant mixture, up
to the base of the filler neck.
See Recommended Fluids and
Lubricants 0306 for more
information about the proper
coolant mixture.4. Fill the coolant recovery tank to
the COLD FILL mark.
5. Reinstall the cap back on the coolant recovery tank, but
leave the radiator pressure
cap off.