2017 CHEVROLET BOLT EV key battery
[x] Cancel search: key batteryPage 6 of 361

Chevrolet Bolt EV Owner Manual (GMNA-Localizing-U.S./Canada/Mexico-
10122739) - 2017 - CRC - 10/3/16
In Brief 5
In Brief
Instrument Panel
Instrument Panel . . . . . . . . . . . . . . . . 6
Initial Drive Information
Initial Drive Information . . . . . . . . . . 8
Remote Keyless Entry (RKE)System . . . . . . . . . . . . . . . . . . . . . . . . 8
Remote Start . . . . . . . . . . . . . . . . . . . . 8
Door Locks . . . . . . . . . . . . . . . . . . . . . 9
Liftgate . . . . . . . . . . . . . . . . . . . . . . . . 10
Windows . . . . . . . . . . . . . . . . . . . . . . . 11
Seat Adjustment . . . . . . . . . . . . . . . 11
Heated Seats . . . . . . . . . . . . . . . . . . 12
Head Restraint Adjustment . . . . 13
Safety Belts . . . . . . . . . . . . . . . . . . . . 13
Passenger Sensing System . . . 13
Mirror Adjustment . . . . . . . . . . . . . . 14
Steering Wheel Adjustment . . . . 14
Interior Lighting . . . . . . . . . . . . . . . . 14
Exterior Lighting . . . . . . . . . . . . . . . 15
Windshield Wiper/Washer . . . . . . 16
Climate Controls . . . . . . . . . . . . . . . 17
Vehicle Features
Radio(s) . . . . . . . . . . . . . . . . . . . . . . . 17
Satellite Radio . . . . . . . . . . . . . . . . . 18
Portable Audio Devices . . . . . . . . 18
Bluetooth
®. . . . . . . . . . . . . . . . . . . . . 18
Steering Wheel Controls . . . . . . . 18
Cruise Control . . . . . . . . . . . . . . . . . 19
Driver Information
Center (DIC) . . . . . . . . . . . . . . . . . 20
Forward Collision Alert (FCA) System . . . . . . . . . . . . . . . . . . . . . . . 20
Forward Automatic Braking (FAB) . . . . . . . . . . . . . . . . 20
Front Pedestrian Braking (FPB) System . . . . . . . . . . . . . . . . . . . . . . . 20
Lane Keep Assist (LKA) . . . . . . . 21
Lane Change Alert (LCA) . . . . . . 21
Rear Vision Camera (RVC) . . . . 21
Rear Cross Traffic Alert (RCTA) System . . . . . . . . . . . . . . . . . . . . . . . 21
Parking Assist . . . . . . . . . . . . . . . . . 21
Power Outlets . . . . . . . . . . . . . . . . . 22
Battery and Efficiency
High Voltage Safety Information . . . . . . . . . . . . . . . . . . . 22
Charging . . . . . . . . . . . . . . . . . . . . . . . 23
Regenerative Braking . . . . . . . . . . 28
Service . . . . . . . . . . . . . . . . . . . . . . . . 28
Performance and Maintenance
Traction Control/Electronic Stability Control . . . . . . . . . . . . . . 29
Tire Pressure Monitor . . . . . . . . . . 29
Driving for Better Energy Efficiency . . . . . . . . . . . . . . . . . . . . . 29
Roadside Assistance Program . . . . . . . . . . . . . . . . . . . . . . 31
Page 27 of 361

Chevrolet Bolt EV Owner Manual (GMNA-Localizing-U.S./Canada/Mexico-
10122739) - 2017 - CRC - 10/3/16
26 In Brief
5. Follow the steps listed on thecharging station to start
charging. The Electric Parking
Brake will automatically apply
once the charge process has
been started.
6. Once charging, the DC vehicle plug will be locked to the DC
charge port and cannot be
disconnected while charging is
active.
7. Verify that the Charging Status Indicator illuminates on top of
the instrument panel and an
audible chirp occurs. See
Charging Status Feedback
0236.
Caution
Do not attempt to disconnect the
DC vehicle plug while charging is
active. This action may damage
vehicle or charging station
hardware. Stop Charge
Controls on the charging station can
be used to stop the charge process
at any time.
To stop the charge when inside the
vehicle, you may use the stop
charging button on the Charging
screen. See
Programmable
Charging 0124.
There is also an available mobile
app with several charging functions.
See KeyPass 044.
Stop Charge —Automatic
When the vehicle no longer needs
to use power from the charging
station, it will stop charging and the
DC vehicle plug will be unlocked
from the DC charge port.
Energy can still be consumed from
the charging station when the
vehicle’s displays and indicators
show that the battery is fully
charged. This is to ensure the
battery is in optimal temperature
operating range to maximize vehicle
range. See Programmable Charging
0 124. End Charge
1. Wait until the charging process has been fully stopped, the
vehicle plug is unlocked, and
the Charging Status Indicator is
solid green or off.
2. Unplug the DC vehicle plug from the DC charge port on the
vehicle and close the dust
cover.
3. Close the charge port door by pressing firmly in the center
until it latches.
4. The Electric Parking Brake should be manually
disengaged before driving the
vehicle.
5. To start another DC charge, remove the DC vehicle plug
and reconnect.
Charge Cord
See Radio Frequency Statement
0 336.
Page 34 of 361
Chevrolet Bolt EV Owner Manual (GMNA-Localizing-U.S./Canada/Mexico-
10122739) - 2017 - CRC - 10/3/16
Keys, Doors, and Windows 33
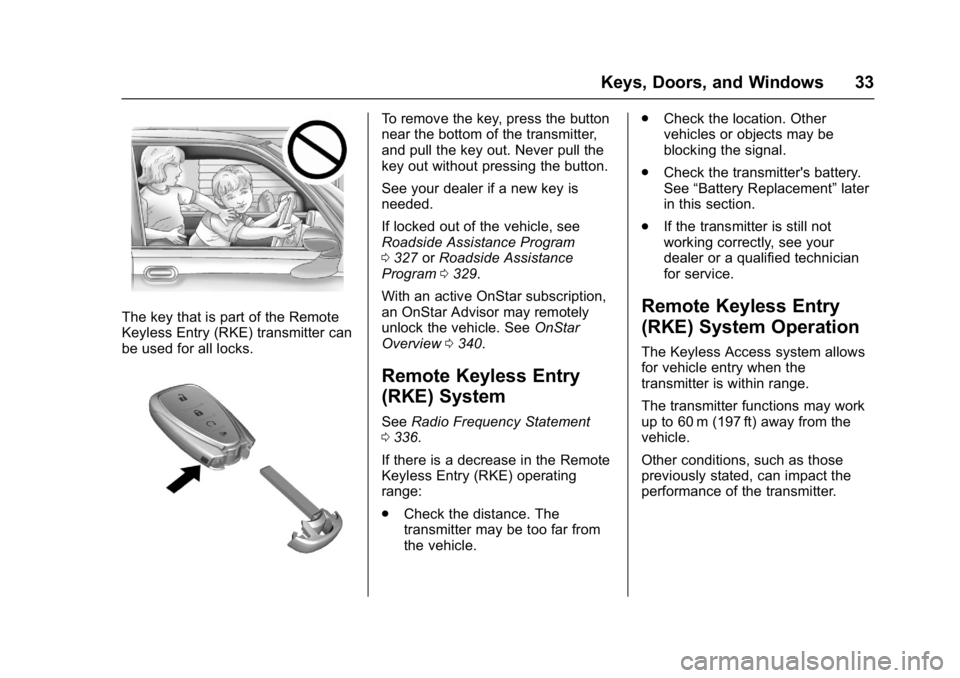
The key that is part of the Remote
Keyless Entry (RKE) transmitter can
be used for all locks.
To remove the key, press the button
near the bottom of the transmitter,
and pull the key out. Never pull the
key out without pressing the button.
See your dealer if a new key is
needed.
If locked out of the vehicle, see
Roadside Assistance Program
0327 orRoadside Assistance
Program 0329.
With an active OnStar subscription,
an OnStar Advisor may remotely
unlock the vehicle. See OnStar
Overview 0340.
Remote Keyless Entry
(RKE) System
See Radio Frequency Statement
0 336.
If there is a decrease in the Remote
Keyless Entry (RKE) operating
range:
. Check the distance. The
transmitter may be too far from
the vehicle. .
Check the location. Other
vehicles or objects may be
blocking the signal.
. Check the transmitter's battery.
See “Battery Replacement” later
in this section.
. If the transmitter is still not
working correctly, see your
dealer or a qualified technician
for service.
Remote Keyless Entry
(RKE) System Operation
The Keyless Access system allows
for vehicle entry when the
transmitter is within range.
The transmitter functions may work
up to 60 m (197 ft) away from the
vehicle.
Other conditions, such as those
previously stated, can impact the
performance of the transmitter.
Page 37 of 361
Chevrolet Bolt EV Owner Manual (GMNA-Localizing-U.S./Canada/Mexico-
10122739) - 2017 - CRC - 10/3/16
36 Keys, Doors, and Windows
Remote No Longer In Vehicle Alert
If the vehicle is on, with a door
open, and then all doors are closed,
the vehicle will check for RKE
transmitter(s) inside. If an RKE
transmitter is not detected, the DIC
will display NO REMOTE
DETECTED and the horn will chirp
three times.
This occurs only once each time the
vehicle is driven.
SeeVehicle Personalization 0142.
Keyless Liftgate Opening
Press the touch pad on the
underside of the liftgate glass and
lift up to open if the RKE transmitter
is within 1 m (3 ft) and the doors are
locked. If the doors are unlocked,
the transmitter is not required to
open the liftgate. See Liftgate046.
Keyed Access
To access a vehicle with a weak
transmitter battery, see Door Locks
0 41.Programming Transmitters to
the Vehicle
Only RKE transmitters programmed
to the vehicle will work. If a
transmitter is lost or stolen, a
replacement can be purchased and
programmed through your dealer.
The vehicle can be reprogrammed
so that lost or stolen transmitters no
longer work. Any remaining
transmitters will need to be
reprogrammed. Each vehicle can
have up to eight transmitters
matched to it.
Programming with Two
Recognized Transmitters
A new transmitter can be
programmed to the vehicle when
there are two recognized
transmitters. To program, the vehicle
must be off and all of the
transmitters, both currently
recognized and new, must be
with you.
1. Place the two recognized transmitters in the cupholder. 2. Remove the key lock cylinder
cover on the driver door
handle. See Door Locks041.
Insert the vehicle key of the
new transmitter into the key
lock cylinder on the driver door
handle and turn the key to the
unlock position five times within
10 seconds.
The Driver Information Center
(DIC) displays READY FOR
REMOTE # 3, 4, 5, 6, 7, or 8.
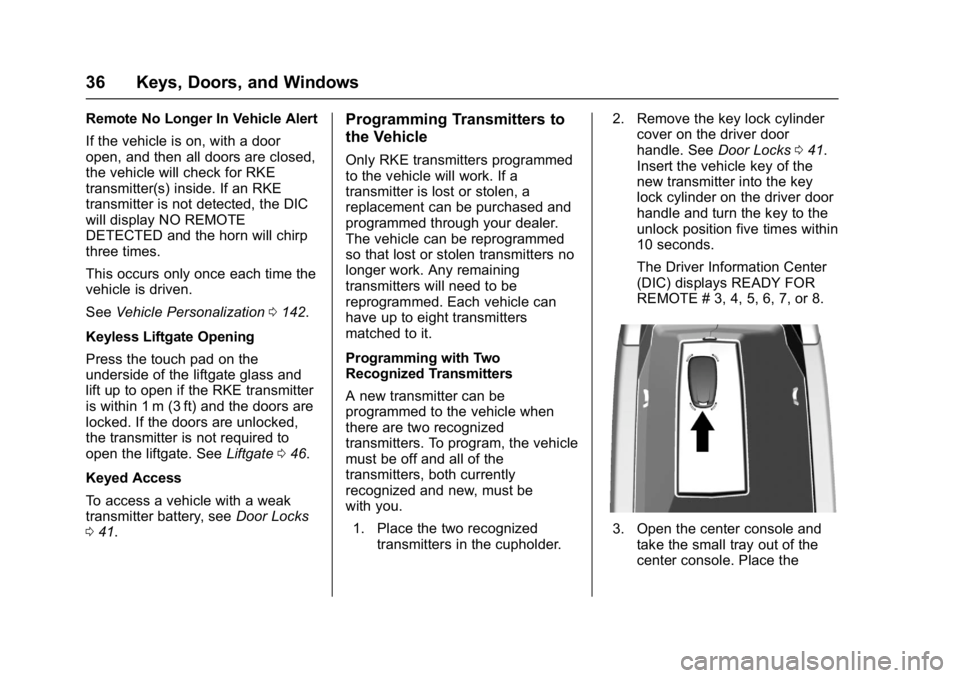
3. Open the center console and take the small tray out of the
center console. Place the
Page 39 of 361
Chevrolet Bolt EV Owner Manual (GMNA-Localizing-U.S./Canada/Mexico-
10122739) - 2017 - CRC - 10/3/16
38 Keys, Doors, and Windows
6. Remove the transmitter fromthe transmitter pocket and
press
KorQ.
To program additional
transmitters, repeat Steps 4–6.
When all additional transmitters
are programmed, press and
hold POWER
Ofor 12 seconds
to exit programming mode.
7. Put the key back into the transmitter.
Starting the Vehicle with a Low
Transmitter Battery
While trying to start the vehicle,
if the transmitter battery is weak or if
there is interference with the signal,
the DIC may display NO REMOTE
DETECTED or USE
TRANSMITTER POCKET TO
START. The REPLACE BATTERY
IN REMOTE KEY message may
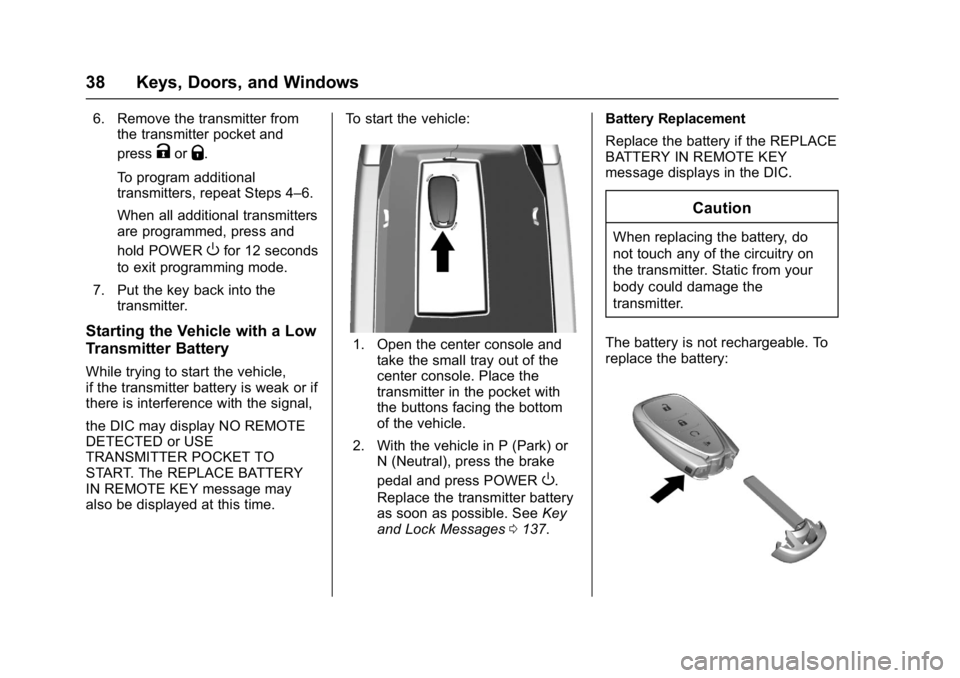
also be displayed at this time. To start the vehicle:
1. Open the center console and
take the small tray out of the
center console. Place the
transmitter in the pocket with
the buttons facing the bottom
of the vehicle.
2. With the vehicle in P (Park) or N (Neutral), press the brake
pedal and press POWER
O.
Replace the transmitter battery
as soon as possible. See Key
and Lock Messages 0137. Battery Replacement
Replace the battery if the REPLACE
BATTERY IN REMOTE KEY
message displays in the DIC.
Caution
When replacing the battery, do
not touch any of the circuitry on
the transmitter. Static from your
body could damage the
transmitter.
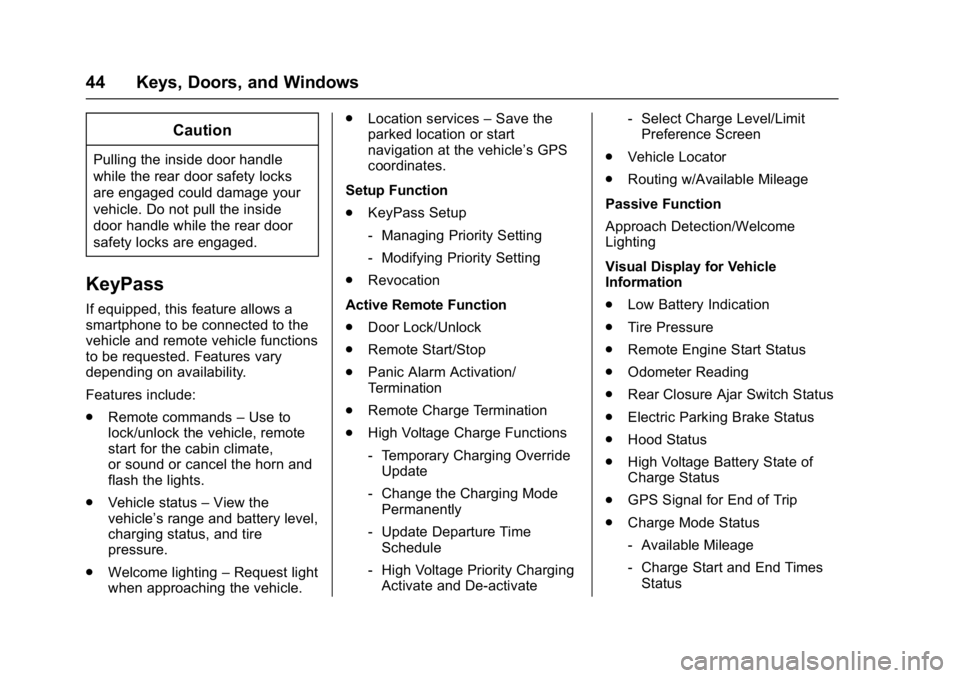
The battery is not rechargeable. To
replace the battery:
Page 40 of 361

Chevrolet Bolt EV Owner Manual (GMNA-Localizing-U.S./Canada/Mexico-
10122739) - 2017 - CRC - 10/3/16
Keys, Doors, and Windows 39
1. Press the button on the side ofthe transmitter near the bottom
and pull the key out.
2. Separate the two halves of the
transmitter using a flat tool
inserted into the area near the
key slot.
3. Remove the battery by pushingon the battery and sliding it
toward the bottom of the
transmitter.
4. Insert the new battery, positive side facing the back cover.
Push the battery down until it is
held in place. Replace with a
CR2032 or equivalent battery.
5. Snap the battery cover back on to the transmitter.
Remote Start
This feature starts the heating or air
conditioning systems and the rear
window defogger from outside the
vehicle.
Use remote start to heat or cool the
interior when the vehicle is plugged
in to maximize electric range by
utilizing electricity from the electrical
outlet. Normal operation of the
system will return after the vehicle
has been turned on.
/:This button will be on the RKE
transmitter if the vehicle has remote
start.
The climate control system will use
the previous settings during a
remote start. The rear defog may
come on during remote start based
on cold ambient conditions. The
rear defog indicator light does not
come on during a remote start.
Laws in some local communities
may restrict the use of remote
starters. For example, some laws
require a person using remote start
Page 45 of 361
Chevrolet Bolt EV Owner Manual (GMNA-Localizing-U.S./Canada/Mexico-
10122739) - 2017 - CRC - 10/3/16
44 Keys, Doors, and Windows
Caution
Pulling the inside door handle
while the rear door safety locks
are engaged could damage your
vehicle. Do not pull the inside
door handle while the rear door
safety locks are engaged.
KeyPass
If equipped, this feature allows a
smartphone to be connected to the
vehicle and remote vehicle functions
to be requested. Features vary
depending on availability.
Features include:
.Remote commands –Use to
lock/unlock the vehicle, remote
start for the cabin climate,
or sound or cancel the horn and
flash the lights.
. Vehicle status –View the
vehicle’s range and battery level,
charging status, and tire
pressure.
. Welcome lighting –Request light
when approaching the vehicle. .
Location services –Save the
parked location or start
navigation at the vehicle’s GPS
coordinates.
Setup Function
. KeyPass Setup
‐Managing Priority Setting
‐ Modifying Priority Setting
. Revocation
Active Remote Function
. Door Lock/Unlock
. Remote Start/Stop
. Panic Alarm Activation/
Termination
. Remote Charge Termination
. High Voltage Charge Functions
‐Temporary Charging Override
Update
‐ Change the Charging Mode
Permanently
‐ Update Departure Time
Schedule
‐ High Voltage Priority Charging
Activate and De-activate ‐
Select Charge Level/Limit
Preference Screen
. Vehicle Locator
. Routing w/Available Mileage
Passive Function
Approach Detection/Welcome
Lighting
Visual Display for Vehicle
Information
. Low Battery Indication
. Tire Pressure
. Remote Engine Start Status
. Odometer Reading
. Rear Closure Ajar Switch Status
. Electric Parking Brake Status
. Hood Status
. High Voltage Battery State of
Charge Status
. GPS Signal for End of Trip
. Charge Mode Status
‐Available Mileage
‐ Charge Start and End Times
Status
Page 46 of 361
Chevrolet Bolt EV Owner Manual (GMNA-Localizing-U.S./Canada/Mexico-
10122739) - 2017 - CRC - 10/3/16
Keys, Doors, and Windows 45
‐Full Week of Time Based
Delayed Charging Status
‐ Disable Rate Based and
Delayed Charging Status
‐ High Voltage Charging System
Fault (Unable to Charge)
‐ High Voltage Charger Power
Level
‐ High Voltage Battery Charge
Cord Connected Indication
‐ Charge Complete
‐ Usable State of Charge
‐ High Voltage Depletion Mode
Range
‐ High Voltage Battery State of
Charge Status
Pairing
A smartphone must be paired to the
KeyPass Module and then it must
be connected to the vehicle before it
can be used.
Setup Information
. Up to three smartphones can be
set up and connected to the
vehicle. .
Setup is disabled when the
vehicle is moving.
. Pairing only needs to be
completed once per smartphone,
unless the pairing information on
the smartphone changes or the
smartphone is deleted.
Setup Process 1. Enable the KeyPass function through vehicle
personalization. See Vehicle
Personalization 0142.
2. Download the myChevrolet app to the smartphone from the
appropriate app store.
3. The vehicle must be on and in P (Park).
4. Open the App and touch Search for New Vehicles.
5. Choose your vehicle and touch Done.
6. Aim the smartphone camera at the QR code on the
infotainment display to scan
the security key. If the camera
is not working, the QR code
can be entered manually. 7. The infotainment display
provides confirmation that the
pairing process was completed
successfully.
. Select Settings from the Home
Page on the infotainment
display.
. Select KeyPass.
. Select Manage KeyPass
Devices.
Deleting a Paired Smartphone 1. Select Settings from the Home Page on the infotainment
display.
2. Select KeyPass.
3. Select Manage KeyPass Devices.
4. Touch Delete next to the smartphone to be deleted, and
follow the prompts.