2017 CADILLAC CTS change time
[x] Cancel search: change timePage 162 of 352

Cadillac CTS/CTS-V Owner Manual (GMNA-Localizing-MidEast-10293089) -
2017 - crc - 6/22/16
LIGHTING 161
Hazard Warning Flashers
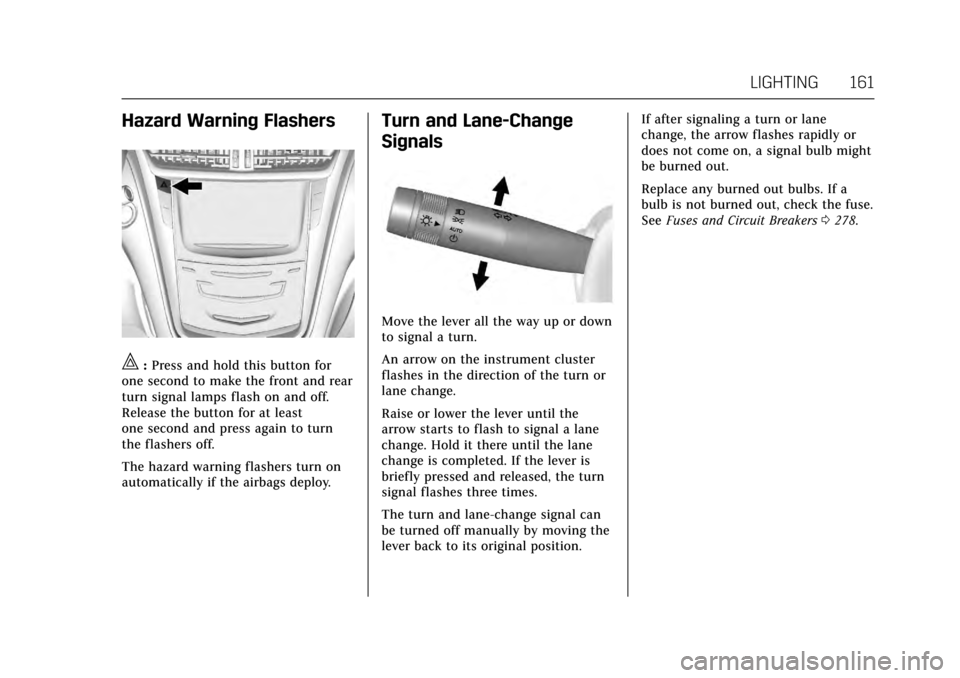
|:Press and hold this button for
one second to make the front and rear
turn signal lamps flash on and off.
Release the button for at least
one second and press again to turn
the flashers off.
The hazard warning flashers turn on
automatically if the airbags deploy.
Turn and Lane-Change
Signals
Move the lever all the way up or down
to signal a turn.
An arrow on the instrument cluster
flashes in the direction of the turn or
lane change.
Raise or lower the lever until the
arrow starts to flash to signal a lane
change. Hold it there until the lane
change is completed. If the lever is
briefly pressed and released, the turn
signal flashes three times.
The turn and lane-change signal can
be turned off manually by moving the
lever back to its original position. If after signaling a turn or lane
change, the arrow flashes rapidly or
does not come on, a signal bulb might
be burned out.
Replace any burned out bulbs. If a
bulb is not burned out, check the fuse.
See
Fuses and Circuit Breakers 0278.
Page 164 of 352

Cadillac CTS/CTS-V Owner Manual (GMNA-Localizing-MidEast-10293089) -
2017 - crc - 6/22/16
LIGHTING 163
Press the lamp lenses over the rear
passenger doors.
Lighting Features
Entry Lighting
The headlamps, taillamps, license
plate lamps, dome lamps, and most of
the interior lights turn on briefly at
night when
Kis pressed on the
Remote Keyless Entry (RKE)
transmitter. See Remote Keyless Entry
(RKE) System Operation 029. After
about 30 seconds the exterior lamps
turn off, then the dome and remaining
interior lamps dim to off. Entry
lighting can be disabled manually by
changing the ignition out of the OFF
position, or by pressing
Qon the RKE
transmitter.
This feature can be turned on or off.
See “Vehicle Locator Lights” under
Vehicle Personalization 0149.
Exit Lighting
Some exterior lamps and interior
lights come on at night, or in areas
with limited lighting, when the driver
door is opened after the ignition is
turned off. The dome lamp comes on
after the ignition is changed to the OFF position. The exterior lamps and
dome lamp remain on for a set
amount of time, then automatically
turn off.
The exterior lamps turn off
immediately by turning the exterior
lamp control off.
This feature can be changed. See
Vehicle Personalization
0149.
Battery Load Management
The vehicle has Electric Power
Management (EPM), which estimates
the battery's temperature and state of
charge. It then adjusts the voltage for
best performance and extended life of
the battery.
When the battery's state of charge is
low, the voltage is raised slightly to
quickly bring the charge back up.
When the state of charge is high, the
voltage is lowered slightly to prevent
overcharging. If the vehicle has a
voltmeter gauge or a voltage display
on the Driver Information Center
(DIC), you may see the voltage move
up or down. This is normal. If there is
a problem, an alert will be displayed.
Page 168 of 352

Cadillac CTS/CTS-V Owner Manual (GMNA-Localizing-MidEast-10293089) -
2017 - crc - 6/22/16
INFOTAINMENT SYSTEM 167
Touch Start Recording to begin
recording. After recording begins, this
button changes to Stop Recording.
Touch to stop the recording session.
The recording must be stopped and
the file closed before removing the SD
card, or the recording cannot be
reviewed.
The elapsed time will show when
recording. To define a finish line, see
“Define Finish Line”later in this
section.
If there is no available space on the
SD card, a message displays. Delete or
transfer recordings on the SD card or
use another SD card with free space.
To delete a recording, go to the
Recorded Sessions menu and touch
z
next to the item. See “Recorded
Sessions” later in this section.
If no SD card is inserted, a message
displays. Define Finish Line
To track and record the vehicle’s lap
times, the starting point of a lap must
be set. Crossing this point activates
the lap timer when recording.
To set the finish line, position the
vehicle with the front bumper at the
start/finish point. From the PDR
menu, touch Define Finish Line and
then touch Mark Finish Line. This can
be done with the vehicle moving.
Recorded Sessions
To view recorded videos, touch
Recorded Sessions.
Page 169 of 352

Cadillac CTS/CTS-V Owner Manual (GMNA-Localizing-MidEast-10293089) -
2017 - crc - 6/22/16
168 INFOTAINMENT SYSTEM
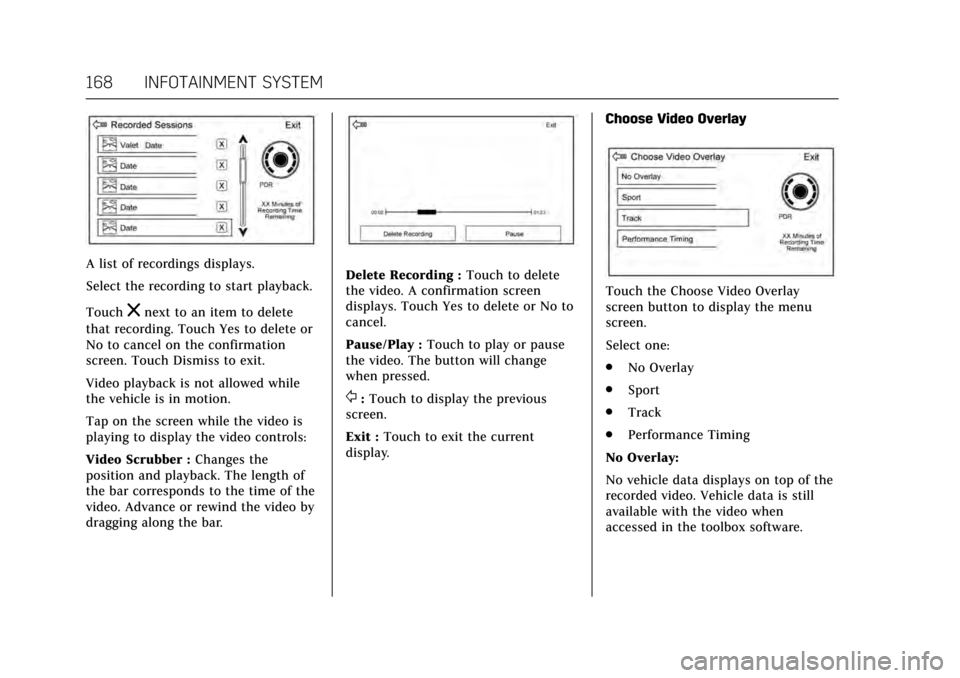
A list of recordings displays.
Select the recording to start playback.
Touch
znext to an item to delete
that recording. Touch Yes to delete or
No to cancel on the confirmation
screen. Touch Dismiss to exit.
Video playback is not allowed while
the vehicle is in motion.
Tap on the screen while the video is
playing to display the video controls:
Video Scrubber : Changes the
position and playback. The length of
the bar corresponds to the time of the
video. Advance or rewind the video by
dragging along the bar.
Delete Recording : Touch to delete
the video. A confirmation screen
displays. Touch Yes to delete or No to
cancel.
Pause/Play : Touch to play or pause
the video. The button will change
when pressed.
/: Touch to display the previous
screen.
Exit : Touch to exit the current
display. Choose Video Overlay
Touch the Choose Video Overlay
screen button to display the menu
screen.
Select one:
.
No Overlay
. Sport
. Track
. Performance Timing
No Overlay:
No vehicle data displays on top of the
recorded video. Vehicle data is still
available with the video when
accessed in the toolbox software.
Page 175 of 352

Cadillac CTS/CTS-V Owner Manual (GMNA-Localizing-MidEast-10293089) -
2017 - crc - 6/22/16
174 CLIMATE CONTROLS
Automatic Operation
The system automatically controls the
fan speed, air delivery, air
conditioning, and recirculation in
order to heat or cool the vehicle to the
desired temperature.
When the indicator light is on or
AUTO is displayed on the touch
screen, the system is in full automatic
operation. If the air delivery mode or
fan setting is manually adjusted, the
auto indicator turns off and the
display will show the selected settings.
Auto operation can be turned off
individually for climate settings.
For automatic operation:1. Press AUTO.
2. Set the temperature. Allow the system time to stabilize. Then
adjust the temperature as needed
for best comfort.
To improve fuel efficiency and to cool
the vehicle faster, recirculation may be
automatically selected in warm
weather. The recirculation light will
not come on. Press
@to select
recirculation; press it again to select
outside air. English units can be changed to
metric units through the instrument
cluster. See
“Cluster Options Menu ”
under Instrument Cluster 0114.
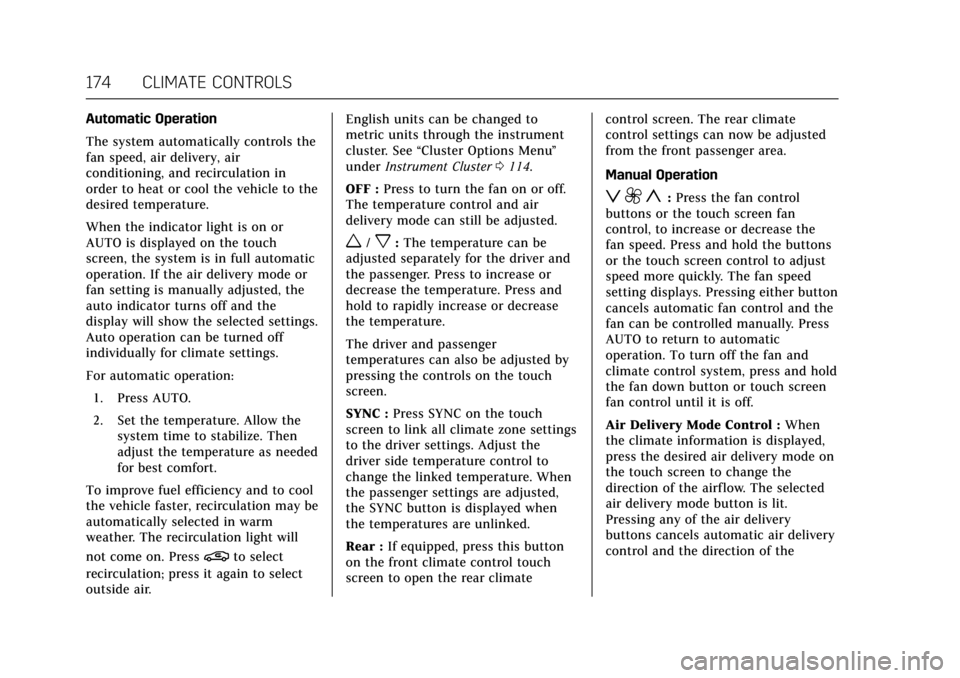
OFF : Press to turn the fan on or off.
The temperature control and air
delivery mode can still be adjusted.
w/x: The temperature can be
adjusted separately for the driver and
the passenger. Press to increase or
decrease the temperature. Press and
hold to rapidly increase or decrease
the temperature.
The driver and passenger
temperatures can also be adjusted by
pressing the controls on the touch
screen.
SYNC : Press SYNC on the touch
screen to link all climate zone settings
to the driver settings. Adjust the
driver side temperature control to
change the linked temperature. When
the passenger settings are adjusted,
the SYNC button is displayed when
the temperatures are unlinked.
Rear : If equipped, press this button
on the front climate control touch
screen to open the rear climate control screen. The rear climate
control settings can now be adjusted
from the front passenger area.
Manual Operation
z 9 y:
Press the fan control
buttons or the touch screen fan
control, to increase or decrease the
fan speed. Press and hold the buttons
or the touch screen control to adjust
speed more quickly. The fan speed
setting displays. Pressing either button
cancels automatic fan control and the
fan can be controlled manually. Press
AUTO to return to automatic
operation. To turn off the fan and
climate control system, press and hold
the fan down button or touch screen
fan control until it is off.
Air Delivery Mode Control : When
the climate information is displayed,
press the desired air delivery mode on
the touch screen to change the
direction of the airflow. The selected
air delivery mode button is lit.
Pressing any of the air delivery
buttons cancels automatic air delivery
control and the direction of the
Page 199 of 352

Cadillac CTS/CTS-V Owner Manual (GMNA-Localizing-MidEast-10293089) -
2017 - crc - 6/22/16
198 DRIVING AND OPERATING
ON/RUN/START (Green Indicator
Light) :This mode is for driving and
starting. With the ignition off, and the
brake pedal applied, pressing the
button once will place the ignition
system in ON/RUN/START. Once
engine cranking begins, release the
button. Engine cranking will continue
until the engine starts. See Starting the
Engine 0198. The ignition will then
remain in ON/RUN.
Service Only Mode
This power mode is available for
service and diagnostics, and to verify
the proper operation of the
malfunction indicator lamp as may be
required for emission inspection
purposes. With the vehicle off, and the
brake pedal not applied, pressing and
holding the button for more than
five seconds will place the vehicle in
Service Only Mode. The instruments
and audio systems will operate as they
do in ON/RUN, but the vehicle will
not be able to be driven. The engine
will not start in Service Only Mode.
Press the button again to turn the
vehicle off.Starting the Engine
Move the shift lever to P (Park) or
N (Neutral). To restart the engine
when the vehicle is already moving,
use N (Neutral) only.
Caution
Do not try to shift to P (Park) if the
vehicle is moving. If you do, you
could damage the transmission.
Shift to P (Park) only when the
vehicle is stopped.
Caution
If you add electrical parts or
accessories, you could change the
way the engine operates. Any
resulting damage would not be
covered by the vehicle warranty. See
Add-On Electrical Equipment 0246.
Starting Procedure 1. With the Keyless Access system, the Remote Keyless Entry (RKE)
transmitter must be in the vehicle. Press ENGINE START/
STOP, if equipped, with the brake
pedal applied. When the engine
begins cranking, let go of the
button.
The idle speed will go down as
the engine gets warm. Do not
race the engine immediately
after starting it.
If the RKE transmitter is not in
the vehicle, if there is
interference, or if the RKE
battery is low, a Driver
Information Center (DIC) will
display a message. See
Key and
Lock Messages 0141 and Remote
Keyless Entry (RKE) System
Operation 029.
Caution
Cranking the engine for long
periods of time, by returning the
ignition to the START position
immediately after cranking has
ended, can overheat and damage
the cranking motor, and drain the
(Continued)
Page 208 of 352

Cadillac CTS/CTS-V Owner Manual (GMNA-Localizing-MidEast-10293089) -
2017 - crc - 6/22/16
DRIVING AND OPERATING 207
a sudden obstacle, a computer senses
the wheels are slowing down. If one of
the wheels is about to stop rolling, the
computer will separately work the
brakes at each wheel.
ABS can change the brake pressure to
each wheel, as required, faster than
any driver could. This can help you
steer around the obstacle while
braking hard.
As the brakes are applied, the
computer keeps receiving updates on
wheel speed and controls braking
pressure accordingly.
Remember: ABS does not change the
time needed to get a foot up to the
brake pedal or always decrease
stopping distance. If you get too close
to the vehicle in front of you, there
will not be enough time to apply the
brakes if that vehicle suddenly slows
or stops. Always leave enough room
up ahead to stop, even with ABS.Using ABS
Do not pump the brakes. Just hold the
brake pedal down firmly and let ABS
work. You may hear the ABS pump or
motor operating and feel the brake
pedal pulsate. This is normal.
Braking in Emergencies
ABS allows you to steer and brake at
the same time. In many emergencies,
steering can help more than even the
very best braking.
Electric Parking Brake
The vehicle has an Electric Parking
Brake (EPB). The switch for the EPB is
on the instrument panel, to the left of
the steering wheel. The EPB can
always be activated, even if the
ignition is off. To prevent draining the
battery, avoid repeated cycles of the
EPB system when the engine is not
running.
The system has a red parking brake
status light and an amber parking
brake warning light. SeeParking Brake
Light 0125 and Service Electric Parking
Brake Light 0126. There are also
parking brake-related Driver
Information Center (DIC) messages.
See Brake System Messages 0138. In
case of insufficient electrical power,
the EPB cannot be applied or released.
Before leaving the vehicle, check the
red parking brake status light to
ensure that the parking brake is
applied.
EPB Apply
To apply the EPB:
1. Be sure the vehicle is at a complete stop.
Page 216 of 352

Cadillac CTS/CTS-V Owner Manual (GMNA-Localizing-MidEast-10293089) -
2017 - crc - 6/22/16
DRIVING AND OPERATING 215
not limit wheel spin, the Electronic
Limited-Slip Differential (eLSD) allows
increased vehicle agility, and more
effort is required to turn the steering
wheel. See“Limited-Slip Differential
(V-Series Only)” later in this section.
Adjust your driving accordingly.
Press
Yagain, or turn the ignition to
ACC/ACCESSORY and restart the
vehicle, to turn TCS back on. The
traction off light
iand StabiliTrak
OFF light
gwill go out in the
instrument cluster.
Caution
When traction control is turned off,
or Competitive Driving Mode is
active, it is possible to lose traction.
Performance Traction
Management (V-Series Only)
Performance Traction Management
(PTM) integrates the Traction Control,
StabiliTrak, and Selective Ride Control
systems to provide improved and
consistent performance when
cornering. The amount of available engine power is based on the mode
selected, track conditions, driver skill,
and the radius of each corner.
This light is on when the vehicle is in
the PTM mode.
To select this optional handling mode,
the vehicle mode must be Track. Then
quickly press
Yon the center
console two times. PERF TRAC 1 -
WET ACTIVE HANDLING ON displays
in the DIC.
When PTM is active, the up and down
buttons will no longer change Drive
Modes, but instead change PTM
modes.
To select a mode while in PTM, press
the Driver Mode Control/PTM buttons
on the center console.
To experience the performance benefit
of this system, after entering a curve
and at the point where normal acceleration occurs, fully push the
accelerator pedal. The PTM system
will modify the level of engine power
for a smooth and consistent
corner exit.
The PTM system contains five modes.
These modes are selected by pressing
the Driver Mode Control/PTM buttons
on the center console. Scroll up or
down through modes 1–5 by pressing
the MODE SELECT up and down
buttons The following is a DIC display
description and the recommended
usage of each mode:PERF TRAC 1
–WET ACTIVE
HANDLING ON
. Intended for all driver skill levels.
. Wet or damp conditions only —
not intended for use in heavy rain
or standing water.
. StabiliTrak is on and engine power
is reduced based on conditions.