Page 5 of 20

5
Start
With the vehicle in Park or Neutral, press the brake pedal and then press and hold the ENGINE START/STOP button to start the engine.
Note: The transmitter must be in the vehicle to turn on the ignition. If the transmitter battery is weak, place the transmitter in the pocket in front of the center console cupholders to enable the engine to start.
Stop
Shift to Park and press the ENGINE START/STOP button to turn off the engine.
The audio system will be powered for 10 minutes or until the driver’s door is opened. The windows and sunroofF will be powered for 10 minutes or until any door is opened.
Accessory
With the engine off, press the ENGINE START/STOP button once to place the ignition system in the accessory position.
See Driving and Operating in your Owner Manual.
Seats
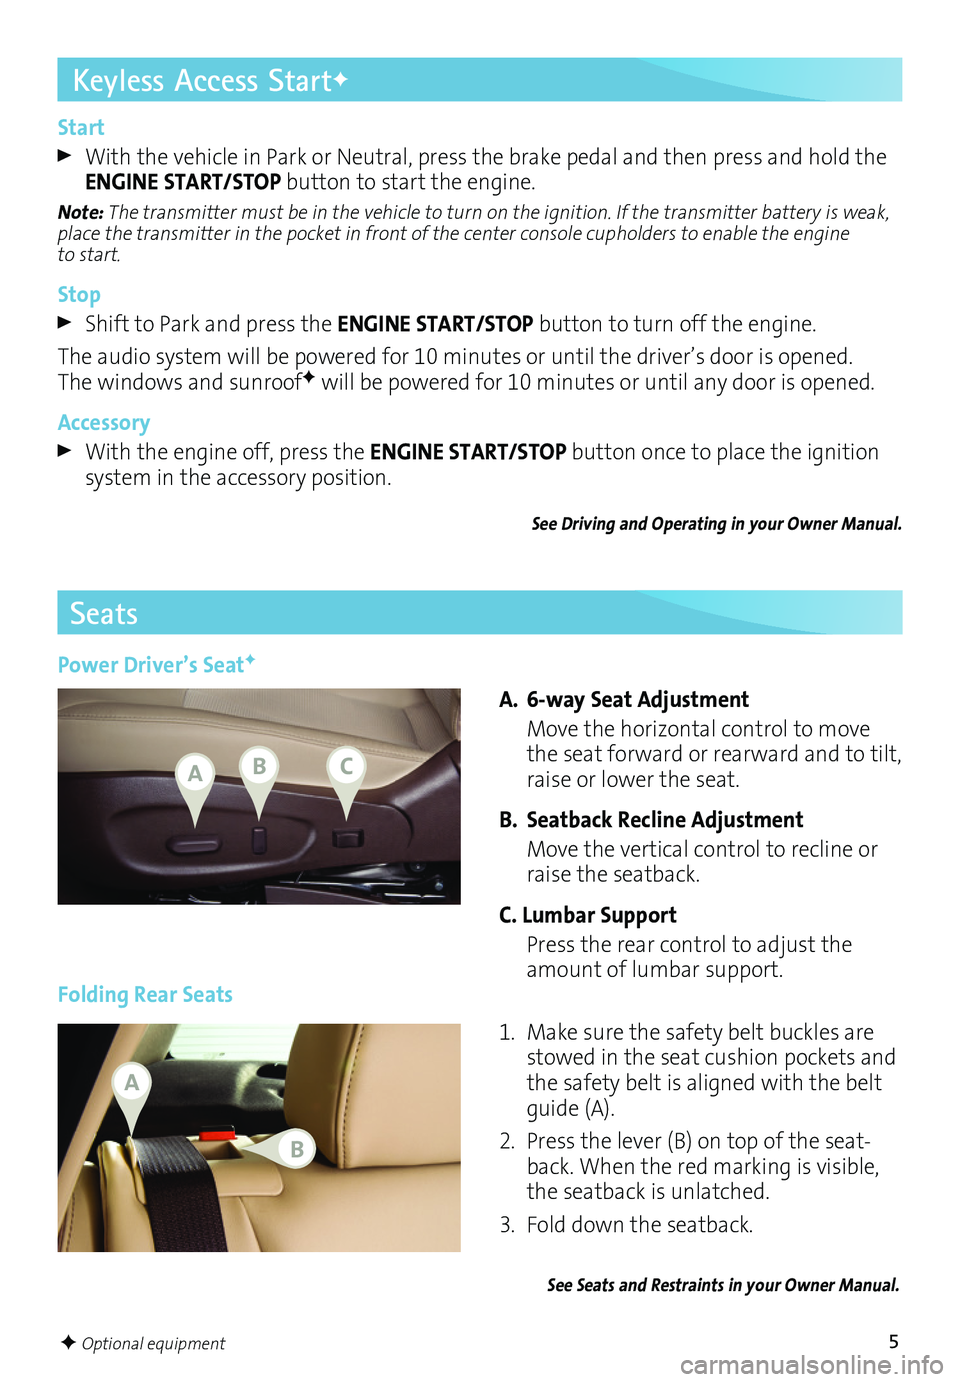
A. 6-way Seat Adjustment
Move the horizontal control to move the seat forward or rearward and to tilt, raise or lower the seat.
B. Seatback Recline Adjustment
Move the vertical control to recline or raise the seatback.
C. Lumbar Support
Press the rear control to adjust the amount of lumbar support.Folding Rear Seats
1. Make sure the safety belt buckles are stowed in the seat cushion pockets and the safety belt is aligned with the belt guide (A).
2. Press the lever (B) on top of the seatback. When the red marking is visible, the seatback is unlatched.
3. Fold down the seatback.
See Seats and Restraints in your Owner Manual.
F Optional equipment
Keyless Access StartF
Power Driver’s SeatF
ABC
A
B
Page 9 of 20

9
Audio System
Setting the Time
1. Turn on the audio system.
2. Press the Clock button.
3. Press the MENU knob chrome ring to highlight the desired time.
4. Turn the MENU knob to change the value; press the chrome ring to confirm the set value. Press the BACK button to return to the Time Settings menu.
Note: Open the Time and Date Settings in the Configuration menu to make other time and date adjustments.
Storing Favorite Stations
Radio stations from all bands (AM, FM or XMF) can be stored, in any order, on up to six pages of favorites.
1. Tune in the desired radio station.
2. Press the FAV button to display the page where the station is to be stored.
3. Press and hold one of the six numeric pushbuttons for more than two seconds.
4. Repeat the steps for each pushbutton on each page.
Portable Audio Devices
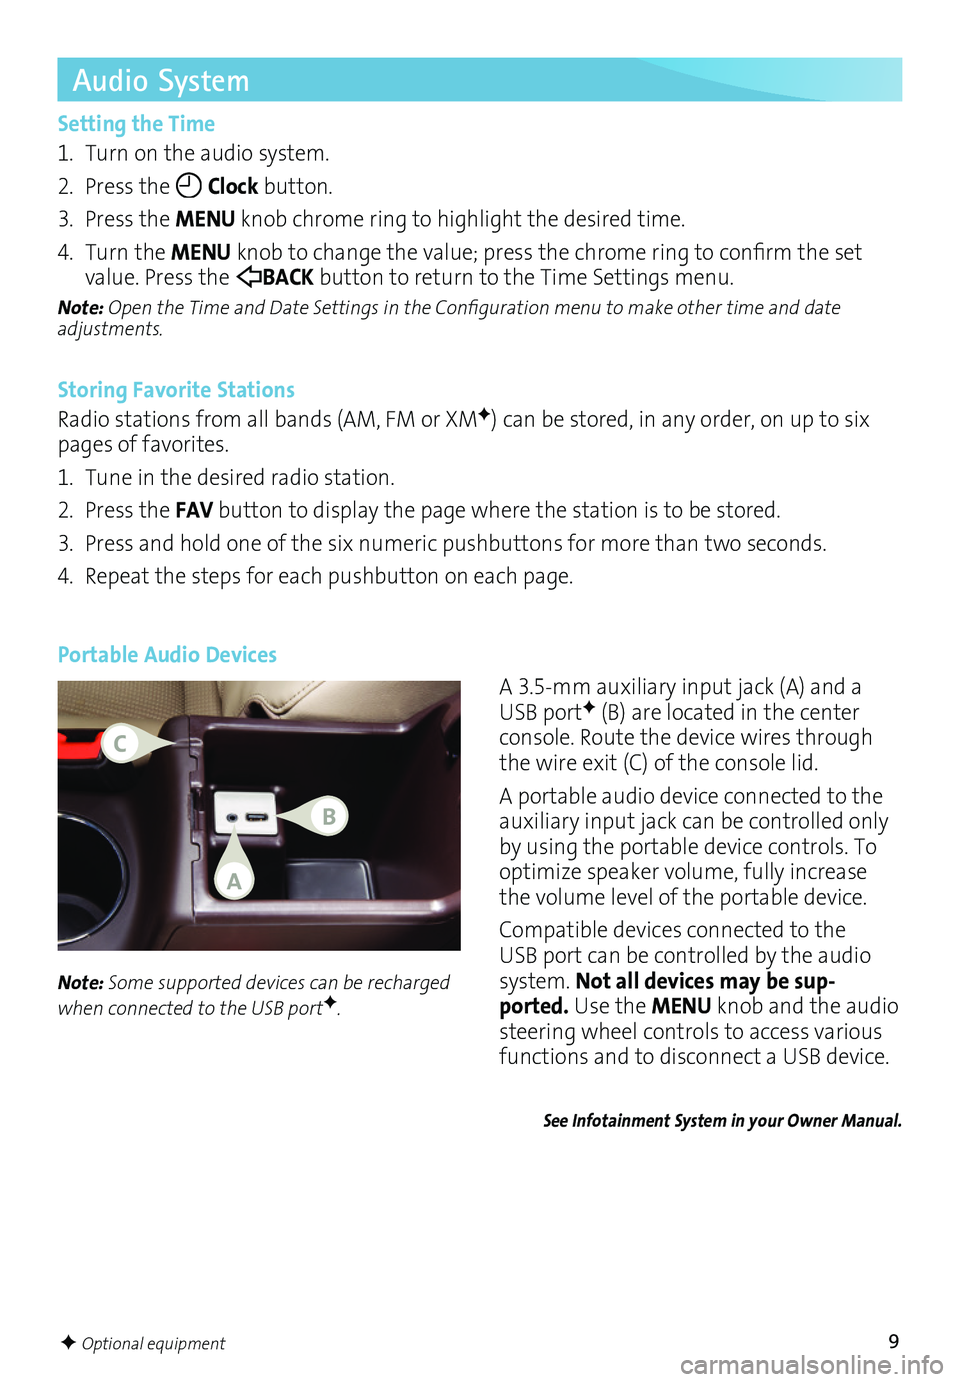
A 3.5mm auxiliary input jack (A) and a USB portF (B) are located in the center console. Route the device wires through the wire exit (C) of the console lid.
A portable audio device connected to the auxiliary input jack can be controlled only by using the portable device controls. To optimize speaker volume, fully increase the volume level of the portable device.
Compatible devices connected to the USB port can be controlled by the audio system. Not all devices may be sup-ported. Use the MENU knob and the audio
steering wheel controls to access various
functions and to disconnect a USB device.
Note: Some supported devices can be recharged when connected to the USB portF.
See Infotainment System in your Owner Manual.
F Optional equipment
A
C
B
Page 13 of 20

13
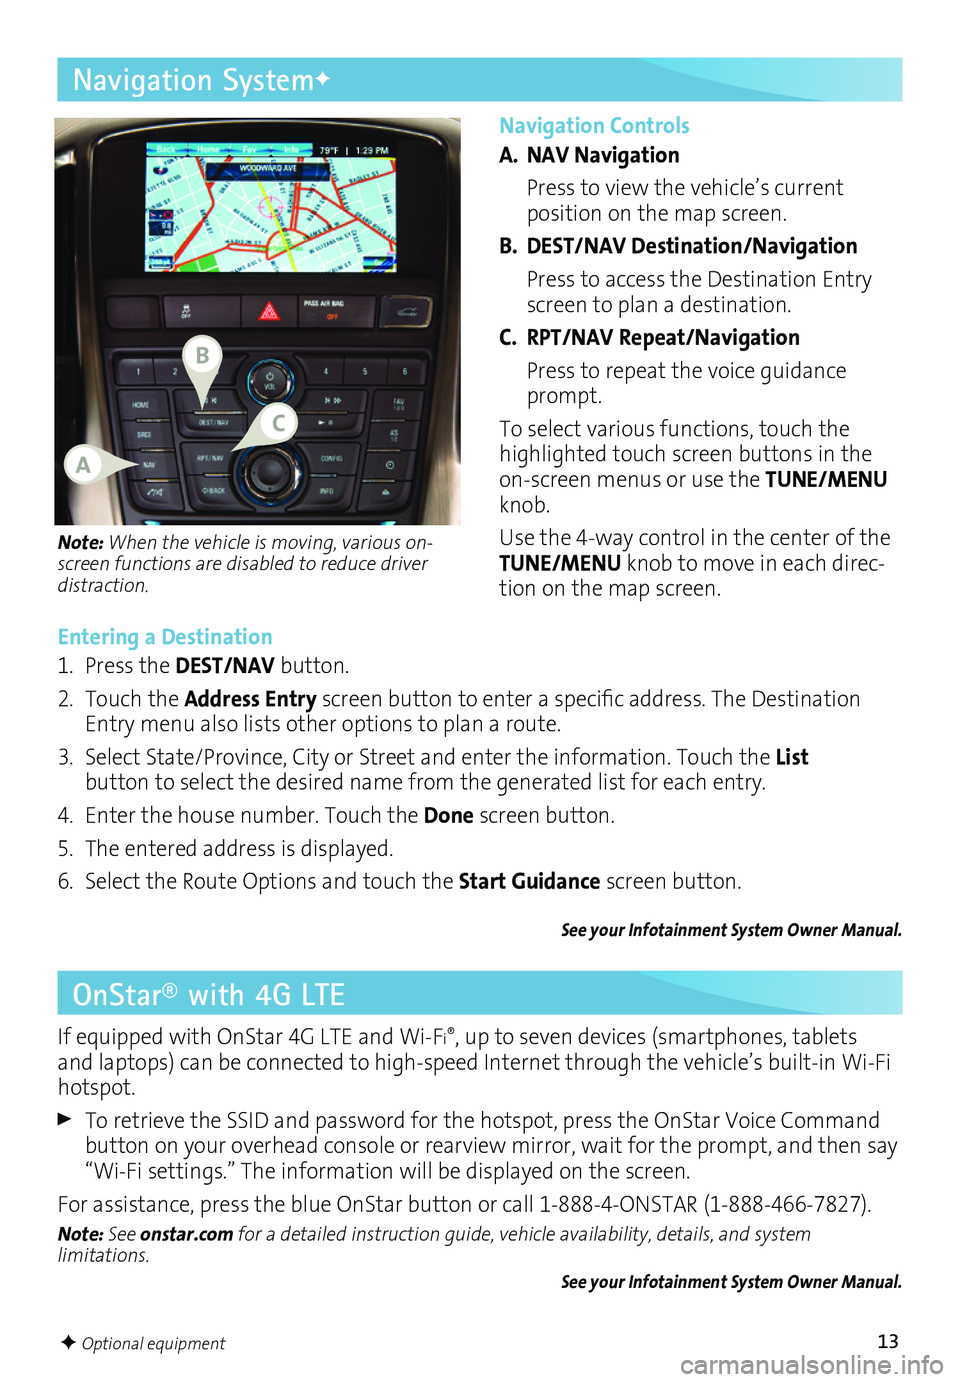
Navigation Controls
A. NAV Navigation
Press to view the vehicle’s current
position on the map screen.
B. DEST/NAV Destination/Navigation
Press to access the Destination Entry screen to plan a destination.
C. RPT/NAV Repeat/Navigation
Press to repeat the voice guidance prompt.
To select various functions, touch the highlighted touch screen buttons in the onscreen menus or use the TUNE/MENU knob.
Use the 4way control in the center of the TUNE/MENU knob to move in each direction on the map screen.
Navigation SystemF
Note: When the vehicle is moving, various
on-screen functions are disabled to reduce driver distraction.
Entering a Destination
1. Press the DEST/NAV button.
2. Touch the Address Entry screen button to enter a specific address. The Destination Entry menu also lists other options to plan a route.
3. Select State/Province, City or Street and enter the information. Touch the List
button to select the desired name from the generated list for each entry.
4. Enter the house number. Touch the Done screen button.
5. The entered address is displayed.
6. Select the Route Options and touch the Start Guidance screen button.
See your Infotainment System Owner Manual.
OnStar® with 4G LTE
If equipped with OnStar 4G LTE and WiFi®, up to seven devices (smartphones, tablets and laptops) can be connected to highspeed Internet through the vehicle’s builtin WiFi hotspot.
To retrieve the SSID and password for the hotspot, press the OnStar Voice Command button on your overhead console or rearview mirror, wait for the prompt, and then say “WiFi settings.” The information will be displayed on the screen.
For assistance, press the blue OnStar button or call 18884ONSTAR (18884667827).
Note: See onstar.com for a detailed instruction guide, vehicle availability, details, and system limitations. See your Infotainment System Owner Manual.
F Optional equipment
B
A
C