2017 BMW X3 height
[x] Cancel search: heightPage 65 of 265

WARNING
The stability of the child restraint system
is limited or compromised with incorrect seat
adjustment or improper installation of the child
seat. There is a risk of injury or danger to life.
Make sure that the child restraint system fits
securely against the backrest. If possible, ad‐
just the backrest tilt for all affected backrests
and correctly adjust the seats. Make sure that
seats and backrests are securely engaged. If
possible, adjust the height of the head re‐
straints or remove them.◀
Installing child restraint
systems
Information Pay attention to the specifications of the child
restraint system manufacturer when selecting,
installing, and using child restraint systems.
WARNING
The stability of the child restraint system
is limited or compromised with incorrect seat
adjustment or improper installation of the child
seat. There is a risk of injury or danger to life.
Make sure that the child restraint system fits
securely against the backrest. If possible, ad‐
just the backrest tilt for all affected backrests
and correctly adjust the seats. Make sure that
seats and backrests are securely engaged. If
possible, adjust the height of the head re‐
straints or remove them.◀
On the front passenger seat
Deactivating airbags WARNING
Active front-seat passenger airbags can
injure a child in a child restraint system when
the airbags are activated. There is a risk of in‐
jury. Make sure that the front-seat passengerairbags are deactivated and that the PASSEN‐
GER AIRBAG OFF indicator lamp lights up.◀
After installing a child restraint system in the
front passenger seat, make sure that the front,
knee and side airbags on the front passenger
side are deactivated.
Deactivate the front-seat passenger airbags
automatically, refer to page 107.
Seat position and height
Before installing a child restraint system, move
the front passenger seat as far back as possi‐
ble and bring it as far up as possible to obtain
the best possible position for the belt and to
offer optimal protection in the event of an acci‐
dent.
If the upper anchorage of the safety belt is lo‐
cated in front of the belt guide of the child seat,
move the passenger seat carefully forward un‐
til the best possible belt guide position is
reached.
Backrest width Adjustable backrest width: before installing a
child restraint system in the front passenger
seat, open the backrest width completely. Do
not change the backrest width again and do
not call up a memory position.
Child seat security
The rear safety belts and the front passenger
safety belt can be permanently locked to fas‐
ten child restraint systems.
Seite 65Transporting children safelyControls65
Online Edition for Part no. 01 40 2 969 976 - II/16
Page 99 of 265

Adjusting the height
On the Control Display:1."Settings"2."Head-Up Display"3."Height"4.Turn the Controller until the desired height
is reached.5.Press the Controller.
Settings are stored for the profile currently
used.
Setting the rotation
The screen of the Head-up Display can be ro‐
tated around its own axis.
On the Control Display:
1."Settings"2."Head-Up Display"3."Rotation"4.Turn the Controller until the desired set‐
ting is selected.5.Press the Controller.
Settings are stored for the profile currently
used.
Special windshield
The windshield is part of the system.
The shape of the windshield makes it possible
to display a precise image.
A film in the windshield prevents double im‐
ages from being displayed.
For this reason, it is strongly suggested to
have the special windshield replaced by a
dealer’s service center or another qualified
service center or repair shop.
Seite 99DisplaysControls99
Online Edition for Part no. 01 40 2 969 976 - II/16
Page 174 of 265

If equipped with through-loading system: the
rear seat backrest is divided in the ratio 40–20–
40. The sides and the middle section can be
folded down separately.
Information WARNING
Danger of jamming with folding down the
backrests. There is a risk of injuries or a risk of
property damage. Make sure that the area of
movement of the rear backrest and the of the
head restraint is clear prior to folding down.◀
WARNING
The stability of the child restraint system
is limited or compromised with incorrect seat
adjustment or improper installation of the child
seat. There is a risk of injury or danger to life.
Make sure that the child restraint system fits
securely against the backrest. If possible, ad‐
just the backrest tilt for all affected backrests
and correctly adjust the seats. Make sure that
seats and backrests are securely engaged. If
possible, adjust the height of the head re‐
straints or remove them.◀
WARNING
With an unlocked backrest, an unsecured
load can be thrown into the vehicle's interior,
e.g., in case of an accident, braking or evasive
maneuver. There is a a risk of injury. Make sure
that the backrest engages into the locking af‐
ter folding it back.◀
WARNING
With a rear backrest that is not locked,
the protective function of the middle safety
belt is not guaranteed. There is a risk of inju‐
ries or danger to life. If you are using the mid‐
dle safety belt, lock the wider rear backrest.◀
Folding down the sidesThe right side can be folded down separately.
The left side can be folded down in combina‐
tion with the middle section.
Reach into the recess and pull forward.
Folding down the middle section
Reach into the recess and pull forward.
Cargo area partition net
Information WARNING
If the cargo net snaps back, it can cause
injuries or damage. There is a risk of injuries or
a risk of property damage. Do not let the cargo
area partition net snap back into place.◀
With a normal cargo area
1.Fold open the rear covers on the roofliner.2.Pull the cargo area partition net out of the
case by the strap.3.Insert the bars into the brackets on both
sides in the roofliner toward the front, ar‐Seite 174ControlsInterior equipment174
Online Edition for Part no. 01 40 2 969 976 - II/16
Page 210 of 265

Tire treadSummer tires
Do not drive with a tire tread depth of less than
0.12 inches/3 mm.
There is an increased danger of hydroplaning if
the tire tread depth is less than 0.12 in‐
ches/3 mm.
Winter tires
Do not drive with a tire tread depth of less than
0.16 inches/4 mm.
Below a tread depth of 0.16 inches/4 mm, tires
are less suitable for winter operation.
Minimum tread depth
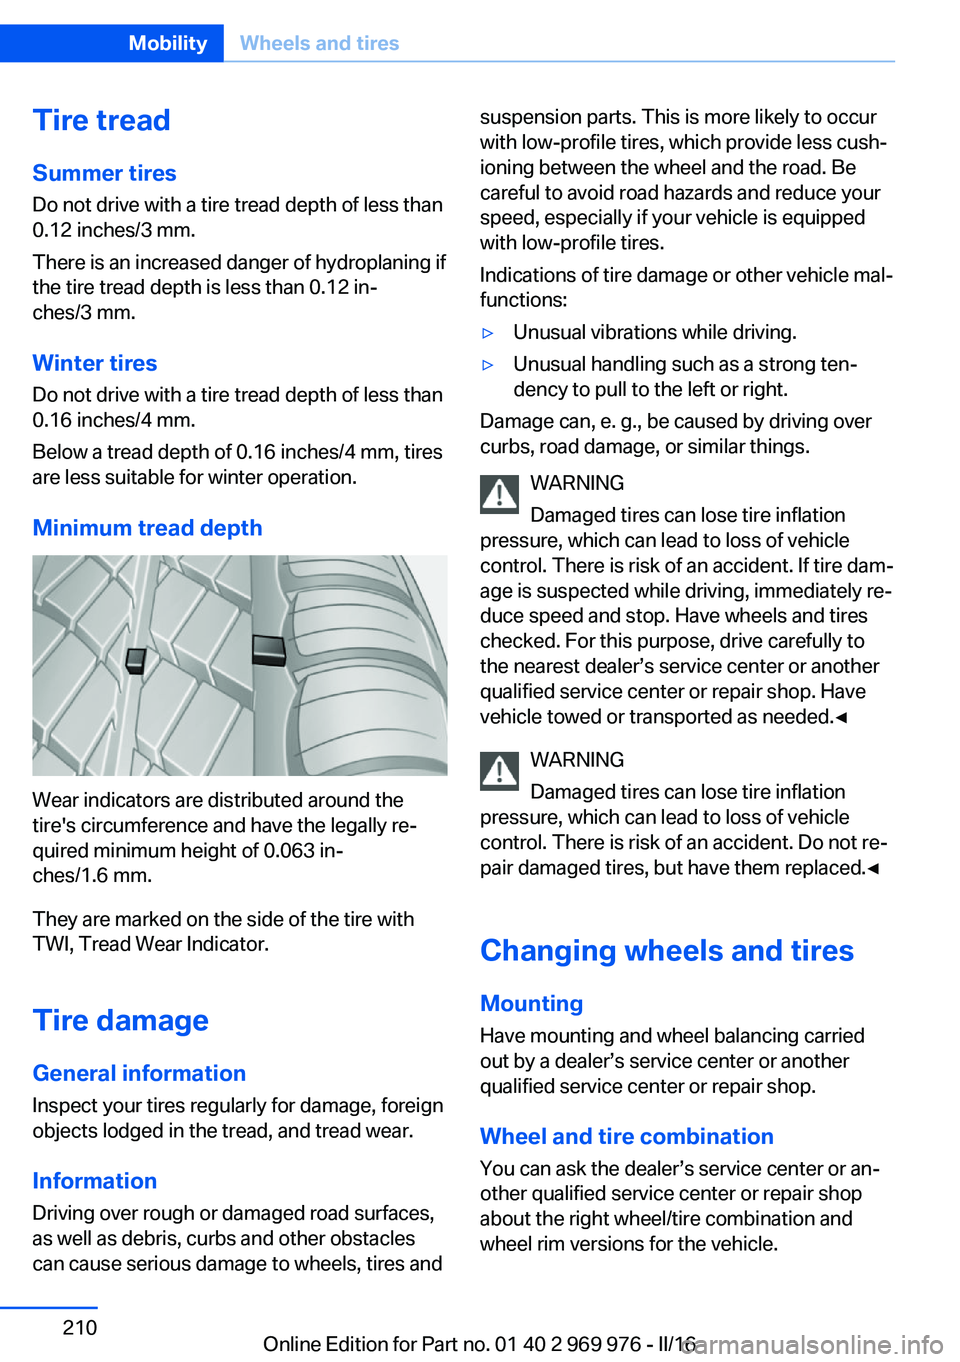
Wear indicators are distributed around the
tire's circumference and have the legally re‐
quired minimum height of 0.063 in‐
ches/1.6 mm.
They are marked on the side of the tire with
TWI, Tread Wear Indicator.
Tire damage
General information
Inspect your tires regularly for damage, foreign
objects lodged in the tread, and tread wear.
Information Driving over rough or damaged road surfaces,
as well as debris, curbs and other obstacles
can cause serious damage to wheels, tires and
suspension parts. This is more likely to occur
with low-profile tires, which provide less cush‐
ioning between the wheel and the road. Be
careful to avoid road hazards and reduce your
speed, especially if your vehicle is equipped
with low-profile tires.
Indications of tire damage or other vehicle mal‐
functions:▷Unusual vibrations while driving.▷Unusual handling such as a strong ten‐
dency to pull to the left or right.
Damage can, e. g., be caused by driving over
curbs, road damage, or similar things.
WARNING
Damaged tires can lose tire inflation
pressure, which can lead to loss of vehicle
control. There is risk of an accident. If tire dam‐
age is suspected while driving, immediately re‐
duce speed and stop. Have wheels and tires
checked. For this purpose, drive carefully to
the nearest dealer’s service center or another
qualified service center or repair shop. Have
vehicle towed or transported as needed.◀
WARNING
Damaged tires can lose tire inflation
pressure, which can lead to loss of vehicle
control. There is risk of an accident. Do not re‐
pair damaged tires, but have them replaced.◀
Changing wheels and tires
Mounting Have mounting and wheel balancing carriedout by a dealer’s service center or another
qualified service center or repair shop.
Wheel and tire combination
You can ask the dealer’s service center or an‐
other qualified service center or repair shop
about the right wheel/tire combination and
wheel rim versions for the vehicle.
Seite 210MobilityWheels and tires210
Online Edition for Part no. 01 40 2 969 976 - II/16
Page 219 of 265

Closing the hood
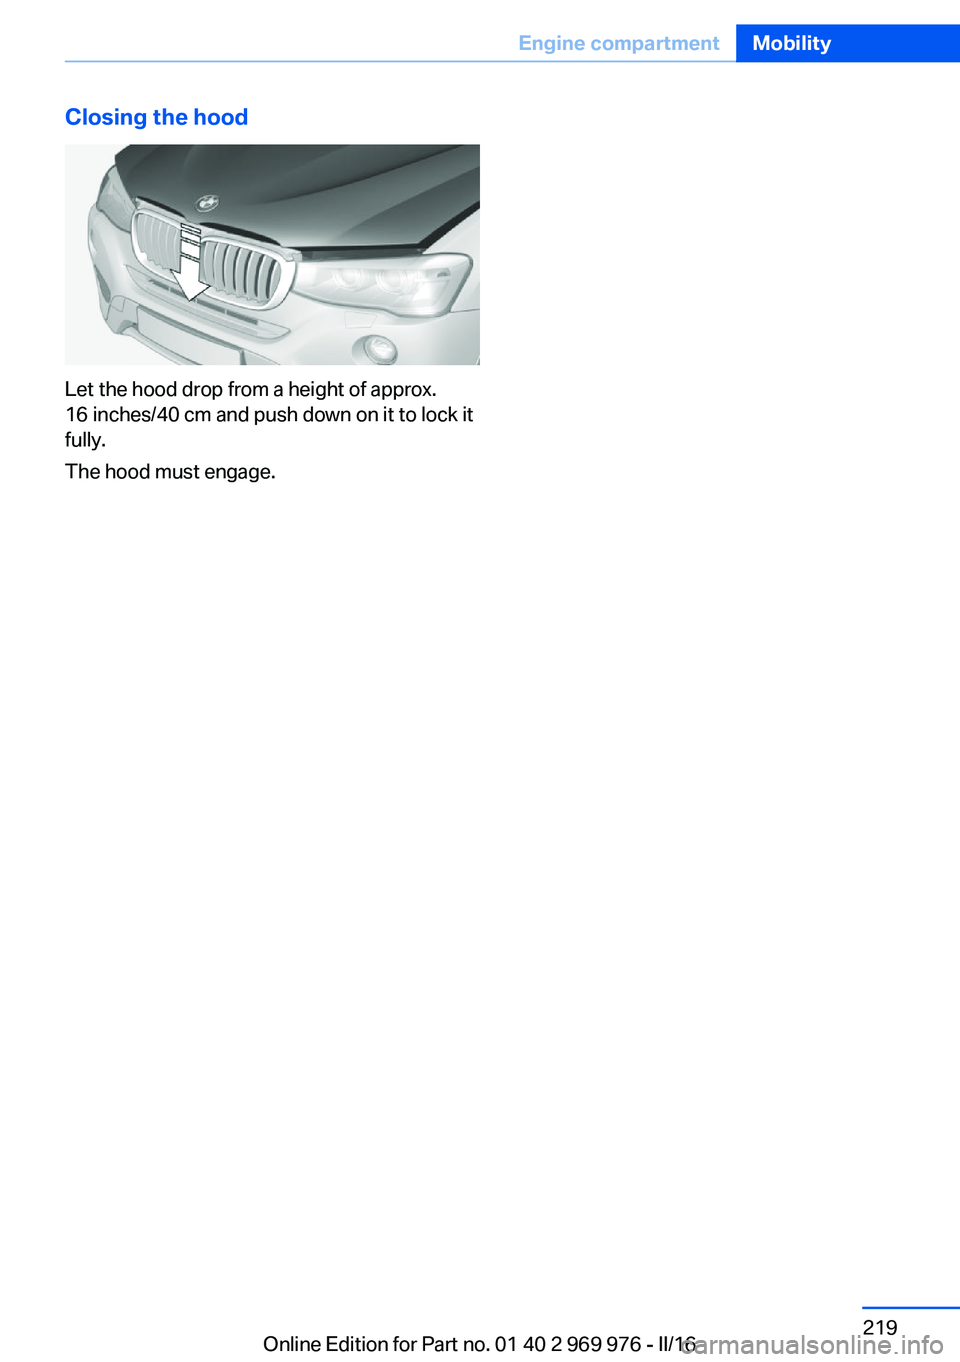
Let the hood drop from a height of approx.
16 inches/40 cm and push down on it to lock it
fully.
The hood must engage.
Seite 219Engine compartmentMobility219
Online Edition for Part no. 01 40 2 969 976 - II/16
Page 250 of 265

Technical dataVehicle features and options
This chapter describes all standard, country-
specific and optional features offered with the
series. It also describes features that are not
necessarily available in your car, e. g., due tothe selected options or country versions. This
also applies to safety-related functions and
systems. The respectively applicable country
provisions must be observed when using the
respective features and systems.
Information
The technical data and specifications in this
Owner's Manual are used as guidance values.
The vehicle-specific data can deviate from this,
for example, due to the selected special equip‐
ment, country version or country-specific
measurement method. Detailed values can be
found in the approval documents, on labels onthe vehicle or can be obtained from a dealer’s
service center or another qualified service cen‐
ter or repair shop.
The information in the vehicle documents al‐
ways has priority over the information in this
Owner's Manual.
Dimensions
The dimensions can vary depending on the
model version, equipment or country-specific
measurement method.
The specified heights do not take into account
attached parts, for example, a roof antenna,roof racks or spoiler. The heights can deviate,
for example, due to the selected special equip‐
ment, tires, load and chassis version. BMW X3Width with mirrorsinches/mm82.2/2,089Width without mirrorsinches/mm74.1/1,881Heightinches/mm66.1-66.1/1,678-1,679Lengthinches/mm183.6/4,663Wheelbaseinches/mm110.6/2,810Smallest turning radius diam.ft/m39.1/11.9Seite 250ReferenceTechnical data250
Online Edition for Part no. 01 40 2 969 976 - II/16