2017 BMW 6 SERIES GRAN COUPE length
[x] Cancel search: lengthPage 66 of 261

DrivingVehicle features and options
This chapter describes all standard, country-
specific and optional features offered with the
series. It also describes features that are not
necessarily available in your car, e. g., due to
the selected options or country versions. This
also applies to safety-related functions and
systems. The respectively applicable country
provisions must be observed when using the
respective features and systems.
Start/Stop button The concept Pressing the Start/Stop button
switches the ignition on or off
and starts the engine.
The engine starts with the brake
pedal pressed when you press
the Start/Stop button.
Ignition on Press the Start/Stop button, and do not press
on the brake pedal at the same time.
All vehicle systems are ready for operation.
Most of the indicator and warning lights in the
instrument cluster light up for a varied length
of time.
To save battery power when the engine is off,
switch off the ignition and any unnecessary
electronic systems/power consumers.
Ignition offPress the Start/Stop button again without
stepping on the brake.
All indicator lights in the instrument cluster go
out.To save battery power when the engine is off,
switch off the ignition and any unnecessary
electronic systems/power consumers.
Information
When switching off the ignition, the selector
lever position P is selected automatically if the
selector lever position D or R is selected.
The ignition is switched off automatically in the
following situations while the vehicle is station‐
ary and the engine is off:▷When locking the vehicle, and when the
low beams are activated.▷Shortly before the battery is discharged
completely, so that the engine can still be
started.▷When opening or closing the driver door, if
the driver's safety belt is unbuckled and
the low beams are turned off.▷While the driver's safety belt is unbuckled
with driver's door open and low beams off.
The low beams switch to parking lights after
approx. 15 minutes of no use.
Radio ready state
Activate radio-ready state: when the engine is
running: press the Start/Stop button.
Some electronic systems/power consumers
remain ready for operation.
The radio-ready state is switched off automati‐
cally in the following situations:
▷After approx. 8 minutes.▷When the vehicle is locked using the cen‐
tral locking system.▷Shortly before the battery is discharged
completely, so that the engine can still be
started.Seite 66ControlsDriving66
Online Edition for Part no. 01 40 2 969 305 - II/16
Page 69 of 261

▷Vehicle battery is heavily discharged.▷At higher elevations.▷The engine compartment lid is unlocked.▷HDC Hill Descent Control is activated.▷The parking assistant is activated.▷Stop-and-go traffic.▷Selector lever in selector lever position N,
M/S or R.▷Use of fuel with high ethanol content.
Starting the engine
The engine starts automatically under the fol‐
lowing conditions:
▷Steptronic transmission: by releasing the
brake pedal.
When Automatic Hold is activated: press
the accelerator pedal.
After the engine starts, accelerate as usual.
Safety mode
After the engine switches off automatically, it
will not start again automatically if any one of
the following conditions are met:
▷The driver's safety belt is unbuckled and
the driver's door is open.▷The hood was unlocked.
Some indicator lights light up for a varied
length of time.
The engine can only be started via the Start/
Stop button.
Functional limitations
Even if driving off was not intended, the deacti‐
vated engine starts up automatically in the fol‐
lowing situations:
▷Excessive warming of the car's interior
when the cooling function is switched on.▷The steering wheel is turned.▷Fogging of the windows when the auto‐
matic climate control is switched on.▷Vehicle battery is heavily discharged.▷Excessive cooling of the car's interior when
the heating is switched on.
Activating/deactivating the system
manually
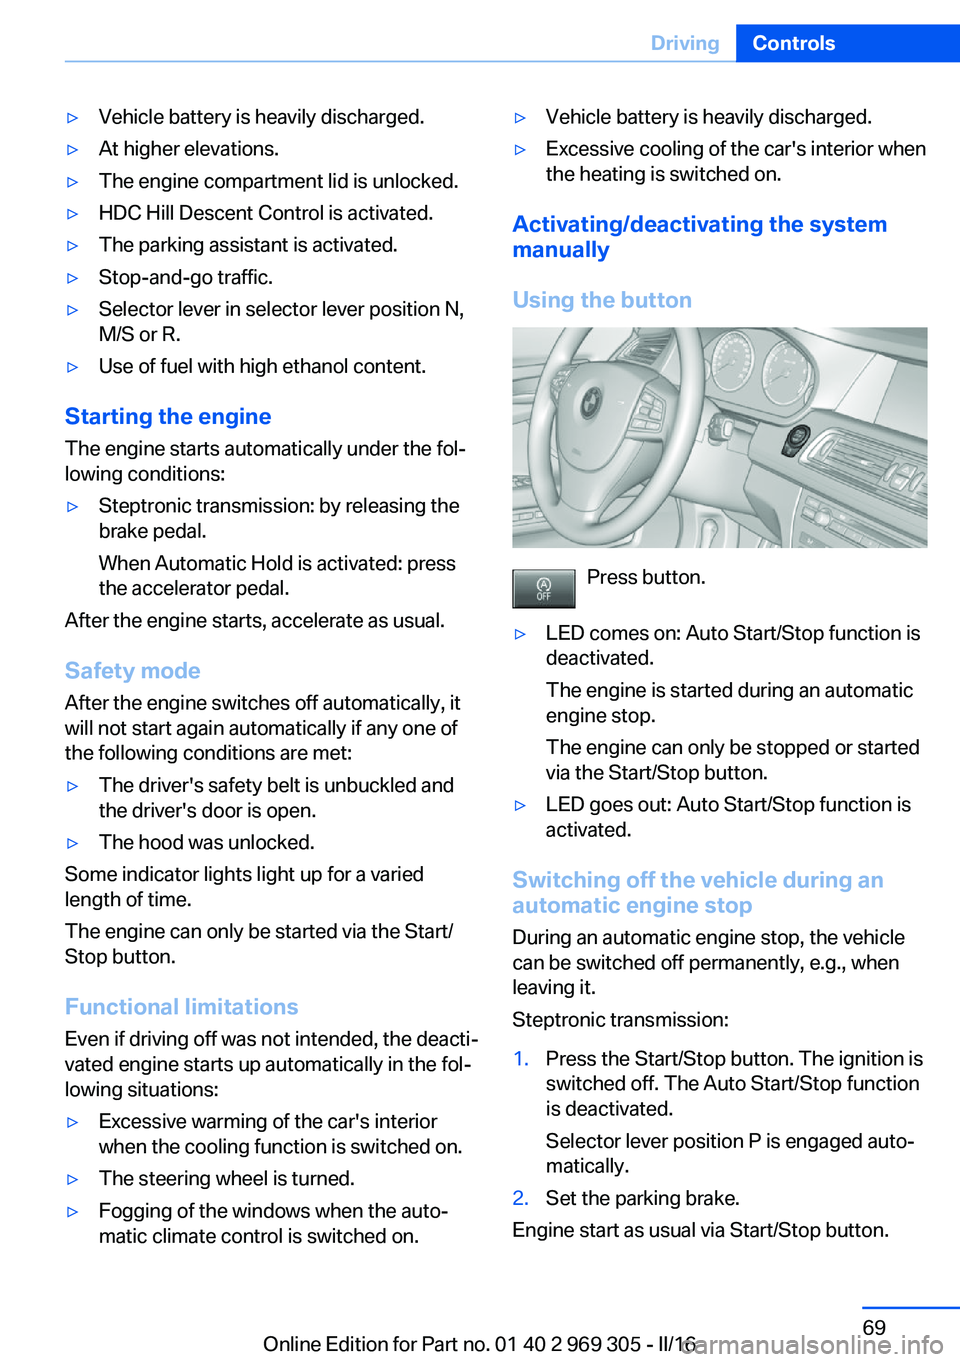
Using the button
Press button.
▷LED comes on: Auto Start/Stop function is
deactivated.
The engine is started during an automatic
engine stop.
The engine can only be stopped or started
via the Start/Stop button.▷LED goes out: Auto Start/Stop function is
activated.
Switching off the vehicle during an
automatic engine stop
During an automatic engine stop, the vehicle
can be switched off permanently, e.g., when
leaving it.
Steptronic transmission:
1.Press the Start/Stop button. The ignition is
switched off. The Auto Start/Stop function
is deactivated.
Selector lever position P is engaged auto‐
matically.2.Set the parking brake.
Engine start as usual via Start/Stop button.
Seite 69DrivingControls69
Online Edition for Part no. 01 40 2 969 305 - II/16
Page 101 of 261

Switching on
With the ignition switched off, press the lever
either up or down past the resistance point for
approx. 2 seconds.
Switching off Briefly press the lever to the resistance point in
the opposite direction.
Welcome lights and
headlight courtesy delay
feature
Welcome lights
General information Depending on the equipment, when switching
off the vehicle, switch position
or .
Depending on the ambient brightness, individ‐
ual light functions may be switched on briefly,
when the vehicle is unlocked.
Activating/deactivating
On the Control Display:
1."Settings"2."Lighting"3."Welcome lights"
Settings are stored for the profile currently
used.
Headlight courtesy delay feature
General information
The low beams stay lit for a short while after
the radio-ready state is switched off if the
lights are turned off and the headlight flasher is
switched on.
Setting the durationOn the Control Display:1."Settings"2."Lighting"3."Pathway lighting:"4.Set length of time.
Settings are stored for the profile currently
used.
Automatic headlamp control
The concept The low beams are switched on and off auto‐
matically depending on the ambient bright‐
ness, for example in tunnels, in twilight or if
there is precipitation.
General information
A blue sky with the sun low on the horizon can
cause the lights to be switched on.
When emerging from a tunnel during the day,
the low beams are not switched off immedi‐
ately but instead only after approx. 2 minutes.
The low beams always stay on when the fog
lamp is switched on.
ActivatingPosition of switch:
The indicator lamp in the instrument cluster is
illuminated, when the low beams are switched
on.
Seite 101LightsControls101
Online Edition for Part no. 01 40 2 969 305 - II/16
Page 131 of 261

be detected in time. There is risk of an acci‐
dent. Make sure that the driver is rested and
alert. Adjust the driving style to the traffic con‐
ditions.◀
Function
The system is activated each time the engine
is started and cannot be switched off.
After travel has begun, the system is trained
about the driver, so that decreasing alertness
or fatigue can be detected.
This procedure takes the following criteria into
account:▷Personal driving style, for example, steer‐
ing behavior.▷Driving conditions, for example, length of
trip.
Starting at approximately 43 mph/70 km/h, the
system is active and can display a recommen‐
dation to take a break.
Break recommendation
If the driver becomes less alert or fatigued, a
message is displayed in the Control Display
with the recommendation to take a break.
A recommendation to take a break is displayed
only once during an uninterrupted trip.
After a break, another recommendation to take
a break cannot be displayed until after approxi‐
mately 45 minutes.
System limits
The function may be limited in the following
situations, for instance, and will either output
an incorrect warning or no warning at all:
▷When the clock is set incorrectly.▷When the vehicle speed is mainly below
about 43 mph/70 km/h.▷With a sporty driving style, such as during
rapid acceleration or when cornering fast.▷In active driving situations, such as when
changing lanes frequently.▷When the road surface is poor.▷In the event of strong side winds.
The system is reset approx. 45 minutes after
parking the vehicle, e.g. in the case of a break
during longer trips on highways.
PreCrash
The concept
With this system critical driving situations that
might result in an accident can be detected
above a speed of approx. 20 mph/30 km/h. In
these situations, preventive measures are au‐
tomatically taken to minimize the risk of an ac‐
cident as much as possible.
Critical driving situations may include:
Emergency stop.
If the vehicle includes the front-end collision
warning or front-end collision warning with
braking feature, impending collisions with vehi‐
cles driving ahead or stopped in front of you
can also be detected within the system's
range.
Information WARNING
The system does not release from the
personal responsibility. Due to the system lim‐
its, critical situation could not be detected reli‐
ably or in time. There is risk of an accident. Ad‐
just the driving style to the traffic conditions.
Watch traffic closely and actively intervene in
the respective situations.◀
Function
After the safety belt is buckled, the front safety
belts are automatically tightened once after the
vehicle drove off.
In critical driving situations, the following indi‐
vidual functions become active as needed:
▷The front safety belts are automatically
pretensioned.Seite 131SafetyControls131
Online Edition for Part no. 01 40 2 969 305 - II/16
Page 159 of 261

Overview
Button in the vehicle
Park assistance button
Ultrasound sensors
The ultrasound sensors for measuring parking
spaces are located on the side of the vehicle.
To ensure full functionality:
▷Keep the sensors clean and free of ice.▷When using high-pressure washers, do not
spray the sensors for long periods and
maintain a distance of at least 12 in‐
ches/30 cm.▷Do not put stickers over sensors.
Requirements
For measuring parking spaces
▷Maximum speed while driving forward ap‐
prox. 22 mph/35 km/h.▷Maximum distance to row of parked vehi‐
cles: 5 ft/1.5 m.Suitable parking space▷Gap between two objects with a minimum
length of approx. 5 ft/1.5 m.▷Min. length of gap between two objects:
your vehicle's length plus approx.
4 ft/1.2 m.▷Minimum depth: approx. 5 ft/1.5 m.
Regarding the parking procedure
▷Doors and tailgate closed.▷Parking brake released.▷When parking in parking spaces on the
driver's side, the corresponding turn signal
must be set where applicable.
Switching on and activating
Switching on with the button Press park assistance button.
The LED lights up.
The current status of the parking space search
is indicated on the Control Display.
Parking assistant is activated automatically.
Switching on with reverse gear
Shift into reverse.
The current status of the parking space search
is indicated on the Control Display.
To activate:
"Parking Assistant"
Display on the Control Display
System activated/deactivated
SymbolMeaning Gray: the system is not available.
White: the system is available but
not activated. The system is activated.Seite 159Driving comfortControls159
Online Edition for Part no. 01 40 2 969 305 - II/16
Page 175 of 261

5.Plug safety belt buckles into the notches
provided for this.6.Fold backrest forward.
Closing
WARNING
With an unlocked backrest, an unsecured
load can be thrown into the vehicle's interior,
e.g., in case of an accident, braking or evasive
maneuver. There is a a risk of injury. Make sure
that the backrest engages into the locking af‐
ter folding it back.◀
1.Return the rear seat backrest to the upright
seating position and engage it.2.Release the belt tongue from the fixture on
the rear window shelf.3.Insert the belt tongue in the belt lock of the
center safety belt. Make sure you hear the
latch plate engage.
To secure cargo, refer to page 189, with nets
or draw straps, the cargo area is fitted with
lashing eyes.
Ski bag
Capacity
The ski bag can be used to transport up to four
pairs of skis with a length of up to 6 ft/2.10 m
or, depending on the binding, up to two snow‐
boards with a length of up to 5 ft/1.60 m.
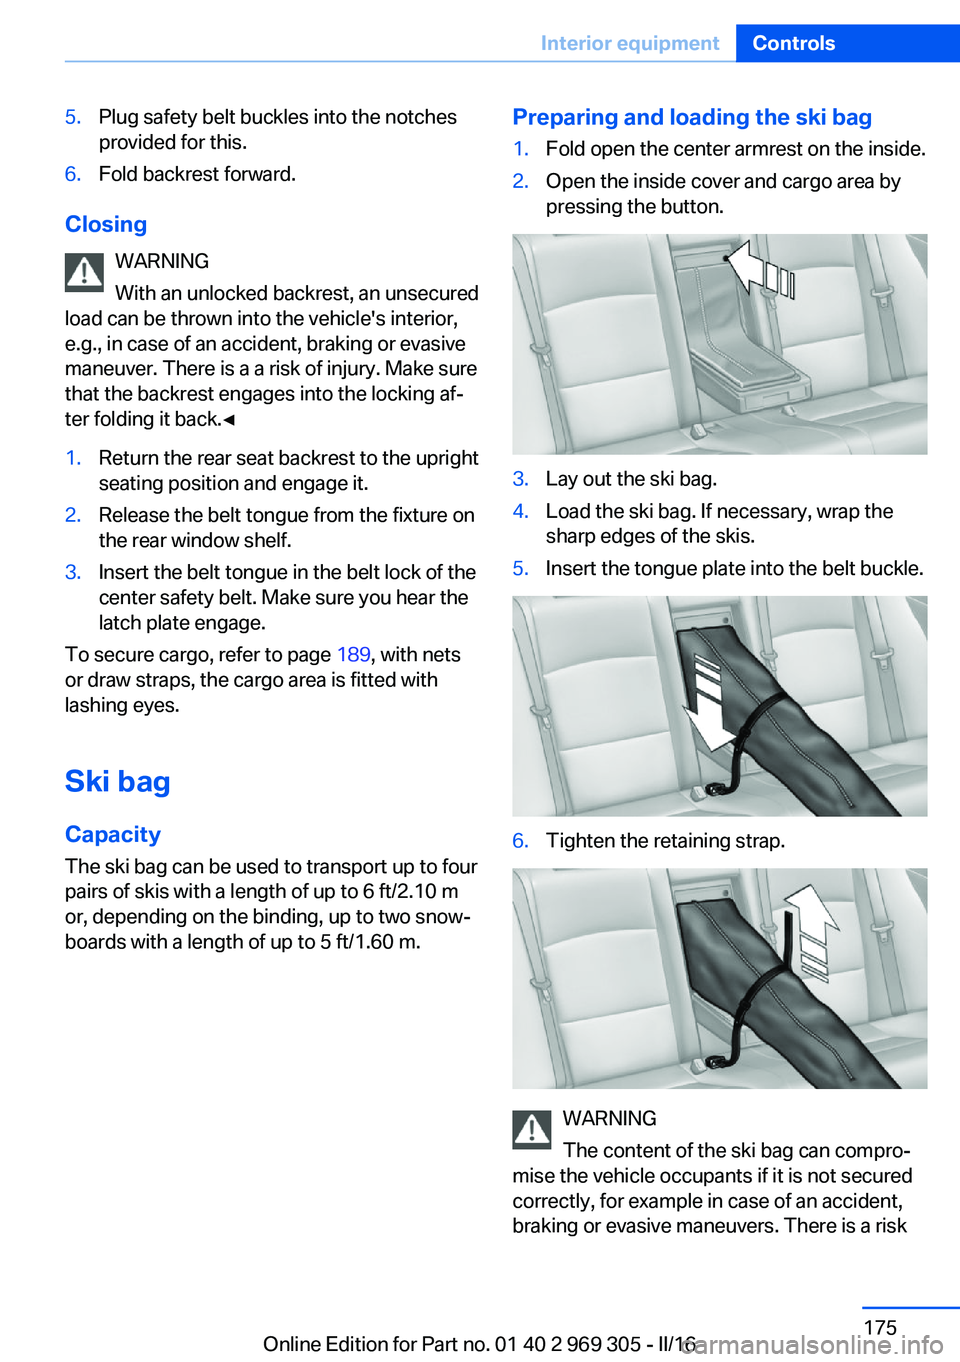
Preparing and loading the ski bag1.Fold open the center armrest on the inside.2.Open the inside cover and cargo area by
pressing the button.3.Lay out the ski bag.4.Load the ski bag. If necessary, wrap the
sharp edges of the skis.5.Insert the tongue plate into the belt buckle.6.Tighten the retaining strap.
WARNING
The content of the ski bag can compro‐
mise the vehicle occupants if it is not secured
correctly, for example in case of an accident,
braking or evasive maneuvers. There is a risk
Seite 175Interior equipmentControls175
Online Edition for Part no. 01 40 2 969 305 - II/16
Page 246 of 261

Technical dataVehicle features and options
This chapter describes all standard, country-
specific and optional features offered with the
series. It also describes features that are not
necessarily available in your car, e. g., due tothe selected options or country versions. This
also applies to safety-related functions and
systems. The respectively applicable country
provisions must be observed when using the
respective features and systems.
Information
The technical data and specifications in this
Owner's Manual are used as guidance values.
The vehicle-specific data can deviate from this,
for example, due to the selected special equip‐
ment, country version or country-specific
measurement method. Detailed values can be
found in the approval documents, on labels onthe vehicle or can be obtained from a dealer’s
service center or another qualified service cen‐
ter or repair shop.
The information in the vehicle documents al‐
ways has priority over the information in this
Owner's Manual.
Dimensions
The dimensions can vary depending on the
model version, equipment or country-specific
measurement method.
The specified heights do not take into account
attached parts, for example, a roof antenna,roof racks or spoiler. The heights can deviate,
for example, due to the selected special equip‐
ment, tires, load and chassis version. BMW 6 Series Gran CoupeWidth with mirrorsinches/mm82.3/2,090 Width without mirrorsinches/mm74.6/1,894Heightinches/mm54.8/1,392Lengthinches/mm197.2/5,009Wheelbaseinches/mm116.9/2,968Smallest turning radius diam.ft/m39.3/12.0Seite 246ReferenceTechnical data246
Online Edition for Part no. 01 40 2 969 305 - II/16
Page 255 of 261

Lamp replacement, rear 230
Lane departure warning 126
Lane margin, warning 126
Language on Control Dis‐ play 97
Lashing eyes, securing cargo 189
LATCH child restraint fixing system 64
Launch Control 80
Leather, care 241
LED headlights, bulb replace‐ ment 229
LED light 229
LEDs, light-emitting di‐ odes 229
Length, vehicle 246
Letters and numbers, enter‐ ing 24
License plate lamp, bulb re‐ placement 230
Light 100
Light-alloy wheels, care 241
Light control 102
Light-emitting diodes, LEDs 229
Lighting 100
Lighting, speaker 104
Lights and bulbs 228
Light switch 100
Load 189
Loading 188
Lock, door 39
Locking/unlocking via door lock 39
Locking/unlocking with re‐ mote control 38
Locking, automatic 44
Locking, settings 44
Locking via tailgate 41
Lock, power window 47
Locks, doors, and win‐ dows 65
Low beams 100
Low beams, automatic, see High-beam Assistant 103 Lower back support 52
Lumbar support 52
M
Maintenance 226
Maintenance require‐ ments 226
Maintenance, service require‐ ments 91
Maintenance system, BMW 226
Make-up mirror 171
Malfunction displays, see Check Control 85
Manual air distribution 164
Manual air flow 164
Manual brake, see Parking brake 70
Manual mode, Steptronic transmission 78
Manual operation, door lock 39
Manual operation, exterior mirrors 59
Manual operation, Park Dis‐ tance Control PDC 151
Manual operation, rearview camera 153
Manual operation, Side View 156
Manual operation, Top View 157
Marking, run-flat tires 212
Massage seat, front 53
Master key, see Remote con‐ trol 34
Maximum cooling 163
Maximum speed, display 92
Maximum speed, winter tires 211
Measurement, units of 97
Medical kit 234
Memory for seat, mirrors, steering wheel 57
Menu, EfficientDynamics 193 Menu in instrument clus‐
ter 93
Menus, operating, iDrive 18
Menus, see iDrive operating concept 19
Messages, see Check Con‐ trol 85
Microfilter 165
Minimum tread, tires 209
Mirror 58
Mirror memory 57
Mobile communication devi‐ ces in the vehicle 185
Mobility System 212
Modifications, technical, see Own Safety 7
Moisture in headlight 229
Monitor, see Control Dis‐ play 18
Mounting of child restraint systems 63
Multifunctional instrument display 82
Multifunction steering wheel, buttons 14
N
Navigation, see Owner's Manual for Navigation, En‐
tertainment and Communi‐
cation
Neck restraints, front, see Head restraints 56
Neutral cleaner, see wheel cleaner 241
New wheels and tires 210
Night Vision 123
Night Vision device, see Night Vision 123
O OBD Onboard Diagnosis 227
OBD, see OBD Onboard Di‐ agnosis 227 Seite 255Everything from A to ZReference255
Online Edition for Part no. 01 40 2 969 305 - II/16