2017 BMW 6 SERIES GRAN COUPE weight
[x] Cancel search: weightPage 62 of 261

Transporting children safelyVehicle features and optionsThis chapter describes all standard, country-
specific and optional features offered with the
series. It also describes features that are not
necessarily available in your car, e. g., due tothe selected options or country versions. This
also applies to safety-related functions and
systems. The respectively applicable country
provisions must be observed when using the
respective features and systems.
The right place for children
Information
WARNING
Unattended children or animals can
cause the vehicle to move and endanger them‐
selves and traffic, e.g., due to the following ac‐
tions:▷Pressing the Start/Stop button.▷Releasing the parking brake.▷Opening and closing the doors or win‐
dows.▷Engaging selector lever position N.▷Using vehicle equipment.
There is risk of accidents or injuries. Do not
leave children or animals unattended in the ve‐
hicle. Take the remote control with you when
exiting and lock the vehicle.◀
Children should always be in the rear WARNING
Children shorter than 5 ft, 150 cm cannot
correctly fasten the safety belt without suitable
additional restraint systems. The protective ef‐
fect of the safety belts can be limited or lost
when safety belts are fastened incorrectly. An
incorrectly fastened safety belt can cause ad‐
ditional injuries, e.g., in the event of an acci‐
dent or during braking and evasive maneuvers.
There is a risk of injury or danger to life. Secure
children shorter than 5 ft, 150 cm using suita‐
ble restraint systems.◀
Accident research shows that the safest place
for children is in the rear seat.
Only transport children younger than 13 years
of age or shorter than 5 ft, 150 cm in the rear in
suitable child restraint systems provided in ac‐
cordance with the age, weight and size of the
child.
Children 13 years of age or older must wear a
safety belt as soon as a suitable child restraint
system can no longer be used due to their age,
weight and size.
Children on the front passenger seat
Should it ever be necessary to use a child re‐
straint system in the front passenger seat,
make sure that the front, knee and side airbags
on the front passenger side are deactivated.
Automatic deactivation of front-seat passen‐
ger airbags, refer to page 107.
Information WARNING
Active front-seat passenger airbags can
injure a child in a child restraint system when
the airbags are activated. There is a risk of in‐
jury. Make sure that the front-seat passenger
airbags are deactivated and that the PASSEN‐
GER AIRBAG OFF indicator lamp lights up.◀Seite 62ControlsTransporting children safely62
Online Edition for Part no. 01 40 2 969 305 - II/16
Page 64 of 261
Locking the safety belt1.Pull out the belt strap completely.2.Secure the child restraint system with the
safety belt.3.Allow the belt strap to be pulled in and pull
it tight against the child restraint system.
The safety belt is locked.Unlocking the safety belt1.Unbuckle the belt buckle.2.Remove the child restraint system.3.Allow the belt strap to be pulled in com‐
pletely.
LATCH child restraint fixing system
Information
LATCH: Lower Anchors and Tether for Chil‐
dren.
Pay attention to the operating and safety infor‐
mation of the child restraint system manufac‐
turer when installing and using LATCH child
restraint fixing system.
Mounts for the lower LATCH anchors The lower anchors may be used to attach the
CRS to the vehicle seat up to a combined child
and CRS weight of 65 lb/30 kg when the child
is restrained by the internal harnesses.
Information WARNING
If the LATCH child restraint fixing sys‐
tems are not correctly engaged, the protective
effect of the LATCH child restraint fixing sys‐
tem can be limited. There is a risk of injury or
danger to life. Make sure that the lower an‐
chors are securely engaged and that the
LATCH child restraint fixing system fits se‐
curely against the backrest.◀
Position The corresponding symbol shows the
mounts for the lower LATCH anchors.
Seats equipped with lower anchors are
marked with a pair, 2, of LATCH sym‐
bols. It is not recommended to use the
inner lower anchors of standard outer
LATCH positions to fasten a child restraintsystem on the middle seat. Use the vehicle
seat belt instead for the middle seat.
Before installing LATCH child
restraint fixing systems
Pull the safety belt away from the area of the
child restraint system.
Assembly of LATCH child restraint
fixing systems1.Install child restraint system, see manufac‐
turer's information.2.Ensure that both LATCH anchors are prop‐
erly connected.
Child restraint system with a tether
strap
Mounting points The respective symbol shows the an‐
chor for the upper retaining strap.
Seats with an upper Top Tether are
marked with this symbol. It can be found on
the rear seat backrest or the rear window shelf.
Information ATTENTION
The mounting points for the upper re‐
taining straps of child restraint systems are
only provided for these retaining straps. When
other objects are mounted, the anchors can be
damaged. There is a risk of damage to prop‐
Seite 64ControlsTransporting children safely64
Online Edition for Part no. 01 40 2 969 305 - II/16
Page 179 of 261
Clothes hooksInformation WARNING
Clothing articles on the clothes hooks
can obstruct the view while driving. There is
risk of an accident. When suspending clothing
articles from the hooks, ensure that they will
not obstruct the driver's view.◀
WARNING
Improper use of the clothes hooks can
lead to a danger of objects flying about during
braking and evasive maneuvers. There is a risk
of injury and risk of property damage. Only
hang lightweight objects, e.g., clothing articles,
from the clothes hooks.◀
General information Two folding clothes hooks are provided in the
rear of the vehicle. To unfold them, press on
the top edge of the clothes hooks.
Cup holders Information WARNING
Unsuitable containers in the cup holder
and hot beverages can damage the cup holder
and increase the a risk of injury in the event of
an accident. There is a risk of injury or risk of
property damage. Use light-weight, unbreaka‐ ble, and sealable containers. Do not transport
hot beverages. Do not force objects into the
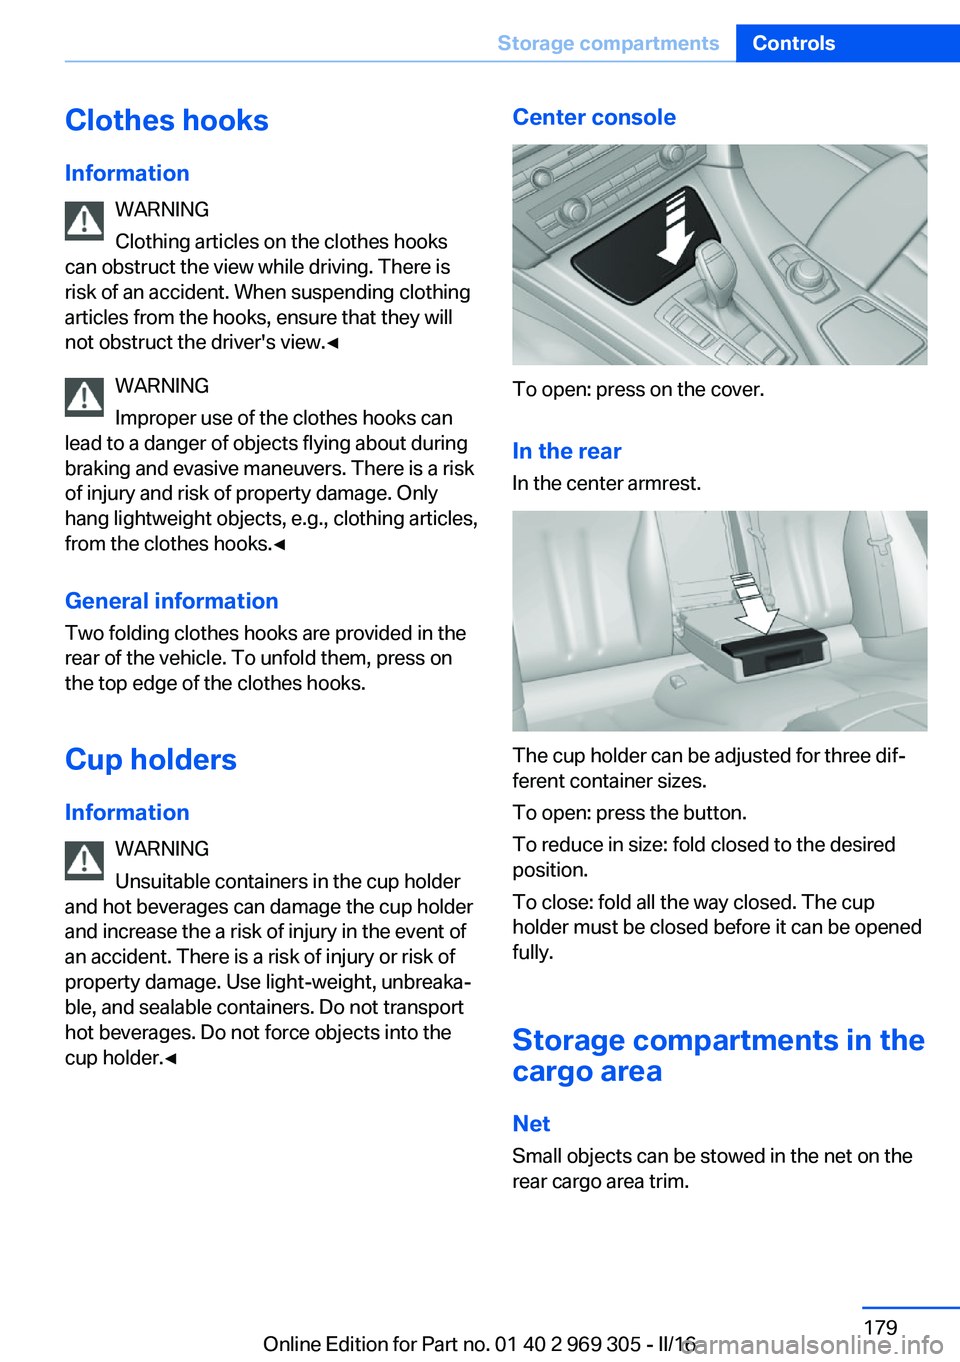
cup holder.◀Center console
To open: press on the cover.
In the rearIn the center armrest.
The cup holder can be adjusted for three dif‐
ferent container sizes.
To open: press the button.
To reduce in size: fold closed to the desired
position.
To close: fold all the way closed. The cup
holder must be closed before it can be opened
fully.
Storage compartments in the
cargo area
Net
Small objects can be stowed in the net on the
rear cargo area trim.
Seite 179Storage compartmentsControls179
Online Edition for Part no. 01 40 2 969 305 - II/16
Page 188 of 261
LoadingVehicle features and options
This chapter describes all standard, country-
specific and optional features offered with the
series. It also describes features that are not
necessarily available in your car, e. g., due to
the selected options or country versions. This
also applies to safety-related functions and
systems. The respectively applicable country
provisions must be observed when using the
respective features and systems.
Information WARNING
High gross weight can overheat the tires,
damage them, and cause a sudden drop in tire
inflation pressure. There is risk of an accident.
Pay attention to the permitted load capacity of
the tires and never exceed the permitted gross
weight.◀
WARNING
Loose objects or devices with a cable
connection to the vehicle, e.g., mobile phones,
can be thrown into the vehicle's interior while
driving, e.g.,in the event of an accident or dur‐
ing braking and evasive maneuvers. There is a
a risk of injury. Secure loose objects or devices
with a cable connection to the vehicle in the
vehicle's interior.◀
ATTENTION
Fluids in the cargo area can cause dam‐
age. There is a risk of damage to property.
Make sure that no fluids leak in the cargo
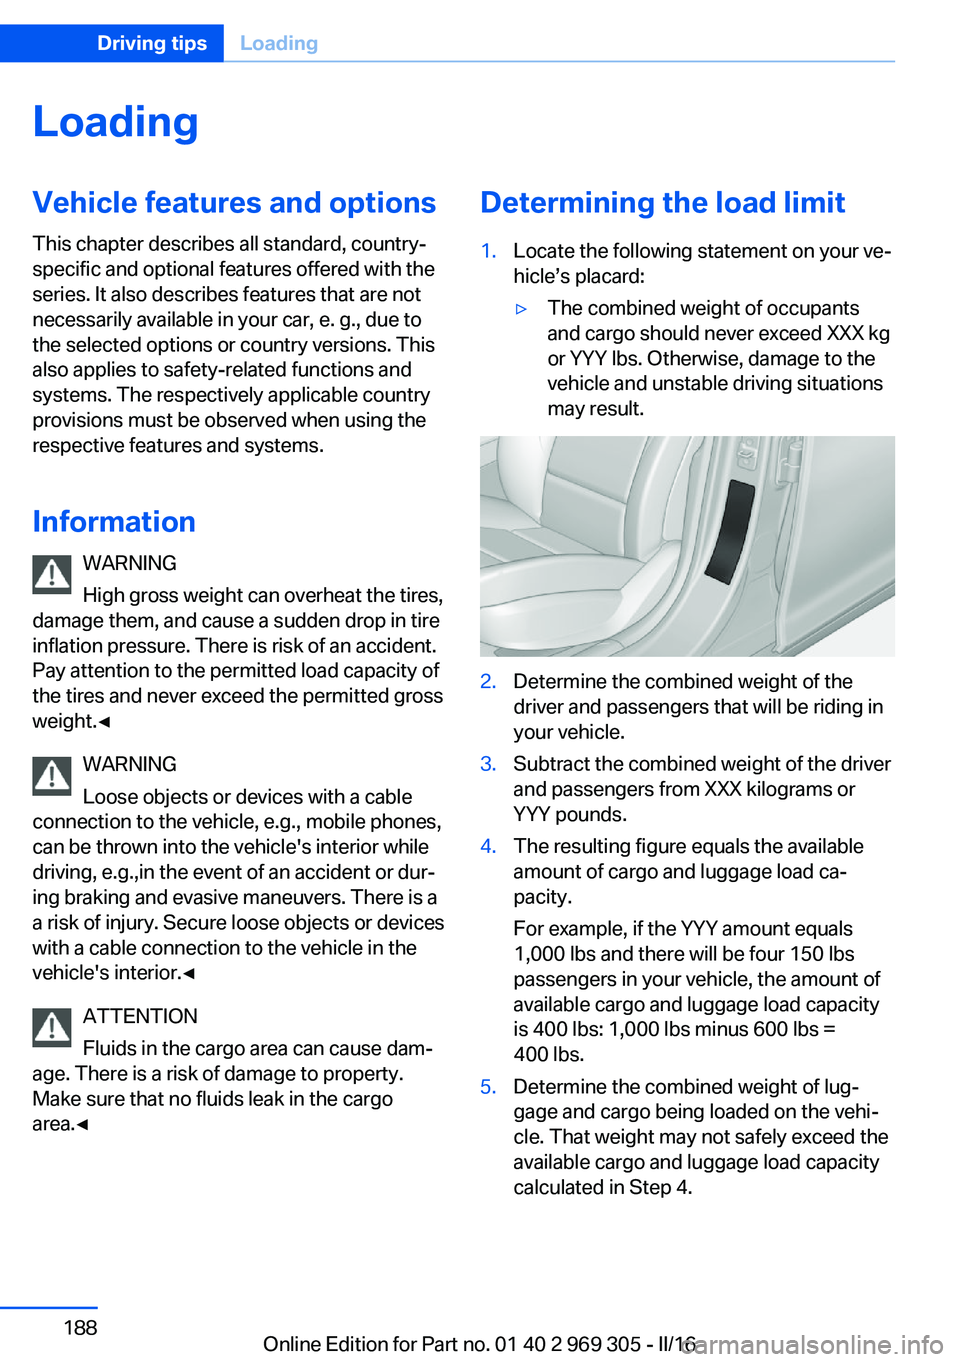
area.◀Determining the load limit1.Locate the following statement on your ve‐
hicle’s placard:▷The combined weight of occupants
and cargo should never exceed XXX kg
or YYY lbs. Otherwise, damage to the
vehicle and unstable driving situations
may result.2.Determine the combined weight of the
driver and passengers that will be riding in
your vehicle.3.Subtract the combined weight of the driver
and passengers from XXX kilograms or
YYY pounds.4.The resulting figure equals the available
amount of cargo and luggage load ca‐
pacity.
For example, if the YYY amount equals
1,000 lbs and there will be four 150 lbs
passengers in your vehicle, the amount of
available cargo and luggage load capacity
is 400 lbs: 1,000 lbs minus 600 lbs =
400 lbs.5.Determine the combined weight of lug‐
gage and cargo being loaded on the vehi‐
cle. That weight may not safely exceed the
available cargo and luggage load capacity
calculated in Step 4.Seite 188Driving tipsLoading188
Online Edition for Part no. 01 40 2 969 305 - II/16
Page 189 of 261
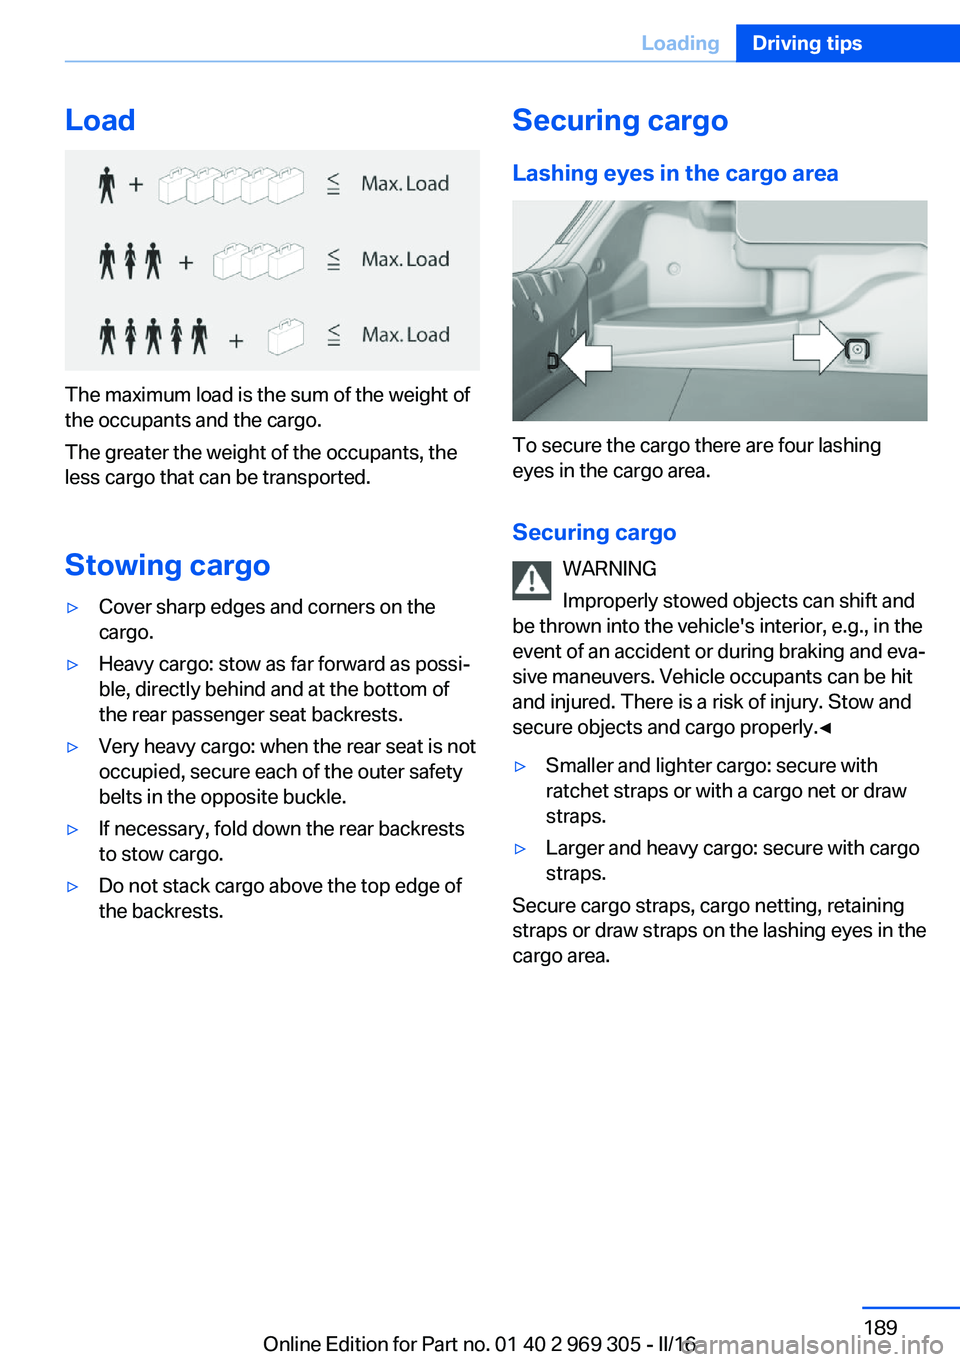
Load
The maximum load is the sum of the weight of
the occupants and the cargo.
The greater the weight of the occupants, the
less cargo that can be transported.
Stowing cargo
▷Cover sharp edges and corners on the
cargo.▷Heavy cargo: stow as far forward as possi‐
ble, directly behind and at the bottom of
the rear passenger seat backrests.▷Very heavy cargo: when the rear seat is not
occupied, secure each of the outer safety
belts in the opposite buckle.▷If necessary, fold down the rear backrests
to stow cargo.▷Do not stack cargo above the top edge of
the backrests.Securing cargo
Lashing eyes in the cargo area
To secure the cargo there are four lashing
eyes in the cargo area.
Securing cargo WARNING
Improperly stowed objects can shift and
be thrown into the vehicle's interior, e.g., in the
event of an accident or during braking and eva‐
sive maneuvers. Vehicle occupants can be hit
and injured. There is a risk of injury. Stow and
secure objects and cargo properly.◀
▷Smaller and lighter cargo: secure with
ratchet straps or with a cargo net or draw
straps.▷Larger and heavy cargo: secure with cargo
straps.
Secure cargo straps, cargo netting, retaining
straps or draw straps on the lashing eyes in the
cargo area.
Seite 189LoadingDriving tips189
Online Edition for Part no. 01 40 2 969 305 - II/16
Page 190 of 261
Saving fuelVehicle features and optionsThis chapter describes all standard, country-
specific and optional features offered with the
series. It also describes features that are not
necessarily available in your car, e. g., due to
the selected options or country versions. This
also applies to safety-related functions and
systems. The respectively applicable country
provisions must be observed when using the
respective features and systems.
General information Your vehicle contains advanced technology for
the reduction of fuel consumption and emis‐
sions.
Fuel consumption depends on a number of dif‐
ferent factors.
Carrying out certain measures, such as a mod‐
erate driving style and regular maintenance,
can influence fuel consumption and the envi‐
ronmental impact.
Remove unnecessary cargo
Additional weight increases fuel consumption.
Remove attached parts
following use
Attached parts on the vehicle impair the aero‐
dynamics and increase the fuel consumption.
Close the windows and glass
sunroof
Driving with the glass sunroof and windows
open results in increased air resistance and
thereby reduces the range.Tires
General information
Tires can affect fuel consumption in various
ways, e.g., tire size may influence fuel con‐
sumption.
Check the tire inflation pressure
regularly
Check and, if needed, correct the tire inflation
pressure at least twice a month and before
starting on a long trip.
Low tire inflation pressure increases rolling re‐
sistance and thus raises fuel consumption and
tire wear.
Drive away immediately
Do not wait for the engine to warm-up while
the vehicle remains stationary. Start driving
right away, but at moderate engine speeds.
This is the quickest way of warming the cold
engine up to operating temperature.
Look well ahead when
driving
Avoid unnecessary acceleration and braking.
By maintaining a suitable distance to the vehi‐
cle driving ahead of you.
Driving smoothly and proactively reduces fuel
consumption.
Avoid high engine speeds
As a rule: driving at low engine speeds lowers
fuel consumption and reduces wear.
If necessary, observe the gear shift indicator of
the vehicle, refer to page 92.Seite 190Driving tipsSaving fuel190
Online Edition for Part no. 01 40 2 969 305 - II/16
Page 236 of 261
corresponding engine or body ground of
the vehicle to be started.
Starting the engine
Never use spray fluids to start the engine.
1.Start the engine of the assisting vehicle
and let it run for several minutes at an in‐
creased idle speed.2.Start the engine of the vehicle that is to be
started in the usual way.
If the first starting attempt is not success‐
ful, wait a few minutes before making an‐
other attempt in order to allow the dis‐
charged battery to recharge.3.Let both engines run for several minutes.4.Disconnect the jumper cables in the re‐
verse order.
Check the battery and recharge if needed.
Tow-starting and towing Information WARNING
Due to system limits, individual functions
can malfunction during tow-starting/towing
with the Intelligent Safety systems activated,
e.g., approach control warning with light brak‐
ing function. There is risk of an accident.
Switch all Intelligent Safety systems off prior to
tow-starting/towing.◀
Steptronic transmission: transporting
the vehicle
Information
The vehicle is not permitted to be towed.
ATTENTION
The vehicle can be damaged when tow‐
ing the vehicle with a single lifted axle. There is a risk of damage to property. The vehicle
should only be transported on a loading plat‐
form.◀
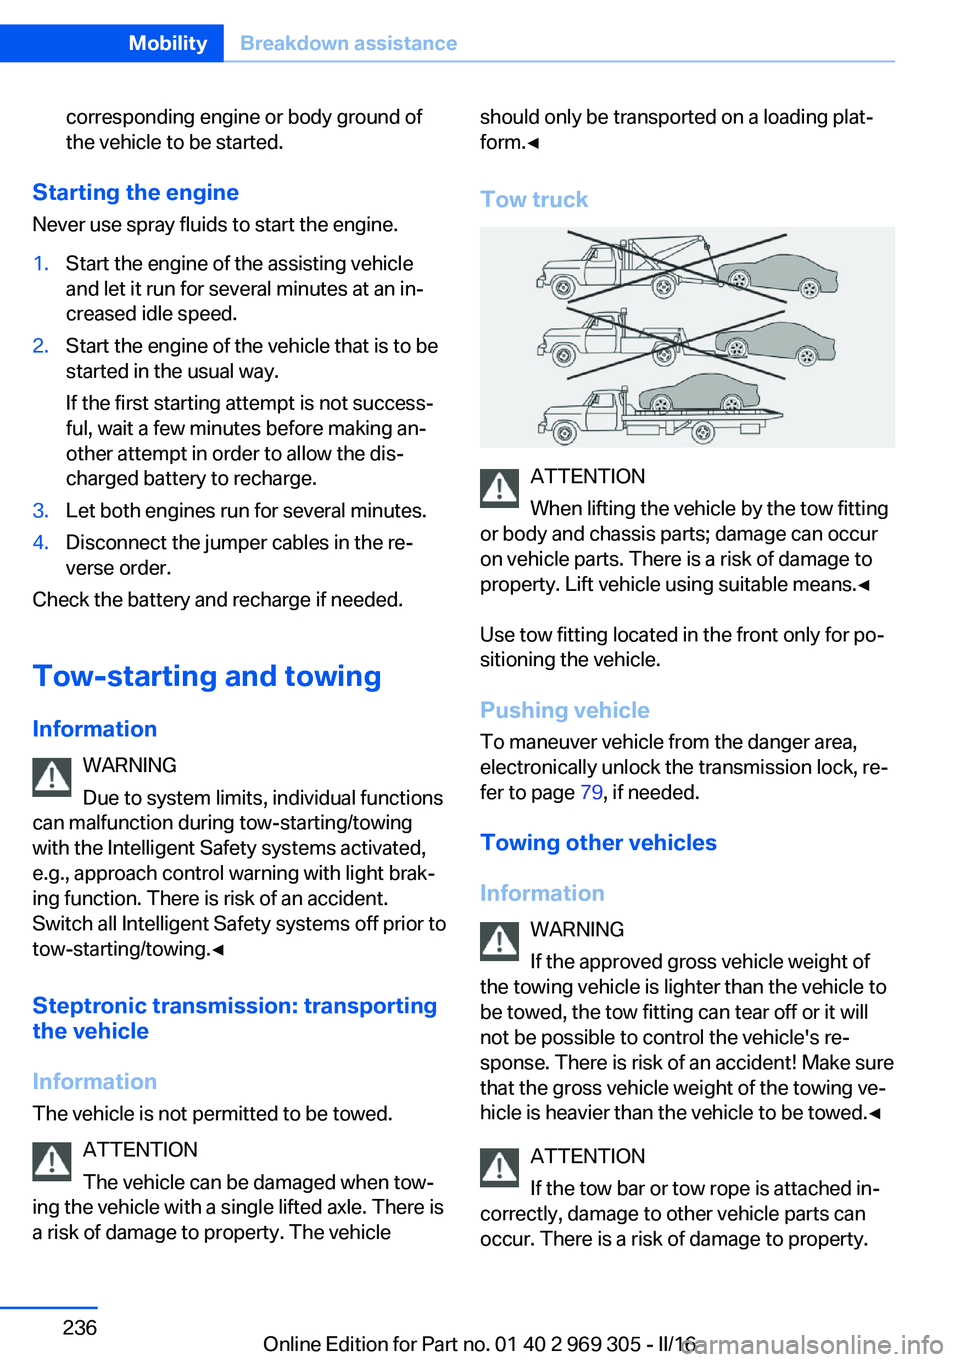
Tow truck
ATTENTION
When lifting the vehicle by the tow fitting
or body and chassis parts; damage can occur
on vehicle parts. There is a risk of damage to
property. Lift vehicle using suitable means.◀
Use tow fitting located in the front only for po‐
sitioning the vehicle.
Pushing vehicle To maneuver vehicle from the danger area,
electronically unlock the transmission lock, re‐
fer to page 79, if needed.
Towing other vehicles
Information WARNING
If the approved gross vehicle weight of
the towing vehicle is lighter than the vehicle to
be towed, the tow fitting can tear off or it will
not be possible to control the vehicle's re‐
sponse. There is risk of an accident! Make sure
that the gross vehicle weight of the towing ve‐
hicle is heavier than the vehicle to be towed.◀
ATTENTION
If the tow bar or tow rope is attached in‐
correctly, damage to other vehicle parts can
occur. There is a risk of damage to property.
Seite 236MobilityBreakdown assistance236
Online Edition for Part no. 01 40 2 969 305 - II/16
Page 247 of 261
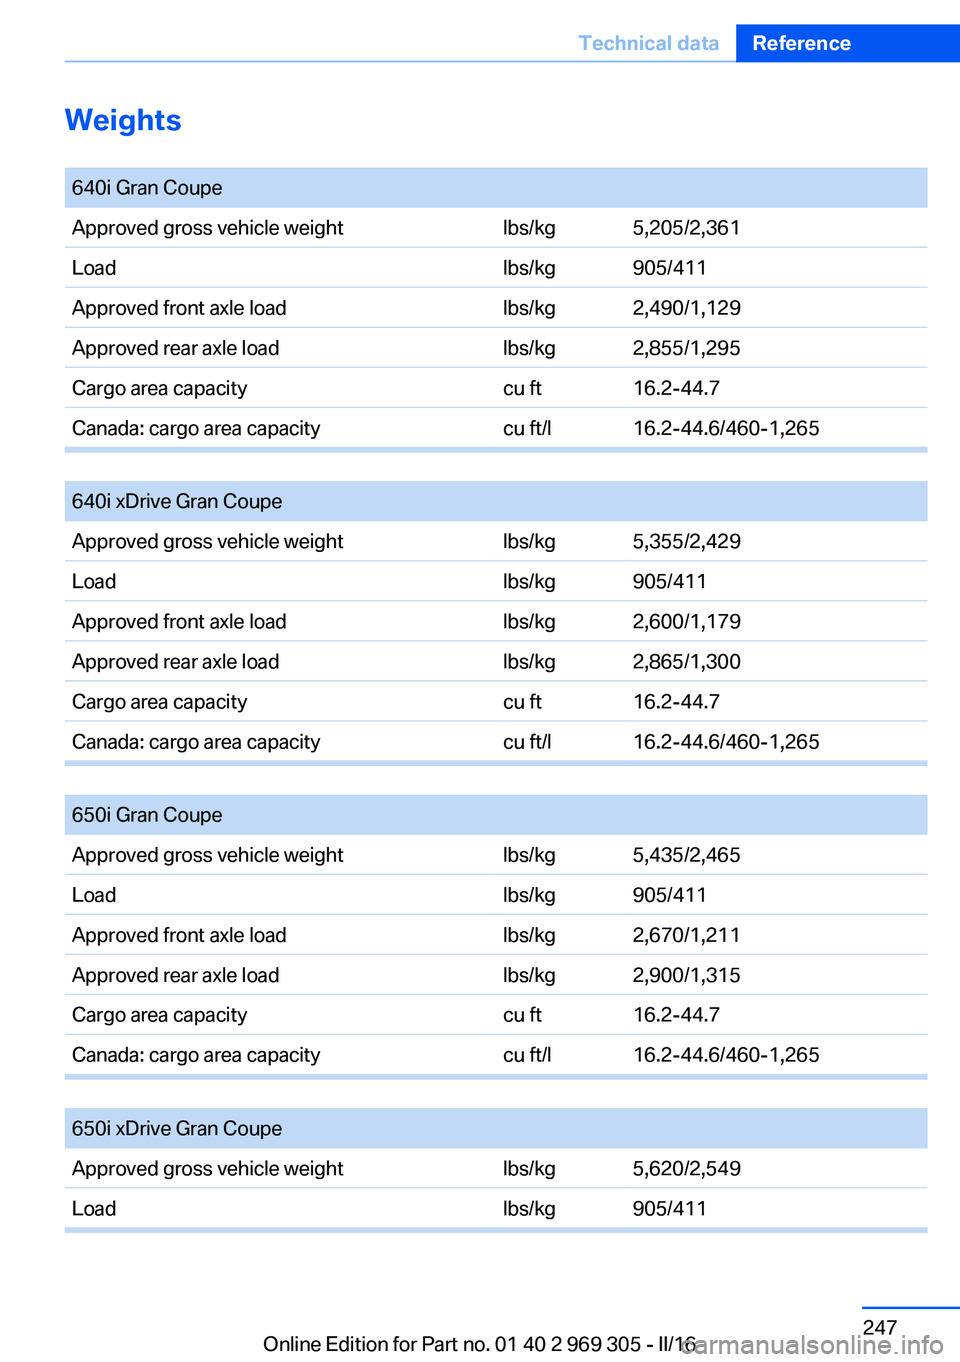
Weights
640i Gran CoupeApproved gross vehicle weightlbs/kg5,205/2,361Loadlbs/kg905/411Approved front axle loadlbs/kg2,490/1,129Approved rear axle loadlbs/kg2,855/1,295Cargo area capacitycu ft16.2-44.7Canada: cargo area capacitycu ft/l16.2-44.6/460-1,265
640i xDrive Gran CoupeApproved gross vehicle weightlbs/kg5,355/2,429Loadlbs/kg905/411Approved front axle loadlbs/kg2,600/1,179Approved rear axle loadlbs/kg2,865/1,300Cargo area capacitycu ft16.2-44.7Canada: cargo area capacitycu ft/l16.2-44.6/460-1,265
650i Gran CoupeApproved gross vehicle weightlbs/kg5,435/2,465Loadlbs/kg905/411Approved front axle loadlbs/kg2,670/1,211Approved rear axle loadlbs/kg2,900/1,315Cargo area capacitycu ft16.2-44.7Canada: cargo area capacitycu ft/l16.2-44.6/460-1,265
650i xDrive Gran CoupeApproved gross vehicle weightlbs/kg5,620/2,549Loadlbs/kg905/411Seite 247Technical dataReference247
Online Edition for Part no. 01 40 2 969 305 - II/16