2017 Alfa Romeo Giulia remove seats
[x] Cancel search: remove seatsPage 28 of 268

Unlocking The Doors
With A Discharged
Battery
Proceed as follows to unlock the doors
if the vehicle battery is discharged.
Rear Doors And Passenger Door
1. With the doors unlocked insert the
emergency key from the key fob or a
flat bladed screwdriver into the door
lock manual release lock cylinder.
2. Turn the manual release lock
cylinder clockwise for the right door
locks or counterclockwise for the left
door locks.3. Remove the key/screwdriver from
the manual release lock.
Proceed as follows to realign the door
lock device (only when the battery
charge has been restored):
Push the lock button on the
electronic key
Push the unlock button on the door
panel
Unlock driver’s door lock with the
emergency key.
Operate the internal door handle
Note: For the rear doors, if the Child
Safety Locks are engaged, and the
previously described locking procedure
is carried out, operating the internal
handle will not open the door. Instead, it
will only realign the lock release device.
To open the door, the outside handle
must be used. The door central
locking/unlocking buttons are not
deactivated when the emergency lock
is engaged.
SEATS
Warning!
It is dangerous to ride in a cargo area,
inside or outside of a vehicle. In a collision,
people riding in these areas are more likely
to be seriously injured or killed.
Do not allow people to ride in any area
of your vehicle that is not equipped with
seats and seat belts. In a collision, people
riding in these areas are more likely to be
seriously injured or killed.
Be sure everyone in your vehicle is in a
seat and using a seat belt properly.
Front Seats
The front seats can be adjusted to
ensure maximum comfort for the
occupants.
When adjusting the driver’s seat, keep
the shoulders resting firmly against the
backrest, and the wrists within reach of
the top of the steering wheel.
Also, the driver must be able to fully
depress the brake pedal once the seat
has been adjusted.
04056S0008EMDoor Lock Manual Release Lock Cylinder
26
GETTING TO KNOW YOUR VEHICLE
Page 31 of 268
certain period of time has elapsed. This
varies on a case-by-case basis, in
accordance with the specific operating
conditions.
Note:To preserve the battery charge,
this function cannot be activated when
the engine is off.
Warning!
Persons who are unable to feel pain to
the skin because of advanced age, chronic
illness, diabetes, spinal cord injury,
medication, alcohol use, exhaustion or
other physical condition must exercise care
when using the seat heater. It may cause
burns even at low temperatures, especially
if used for long periods of time
Do not place anything on the seat or
seatback that insulates against heat, such
as a blanket or cushion. This may cause
the seat heater to overheat. Sitting in a seat
that has been overheated could cause
serious burns due to the increased surface
temperature of the seat.
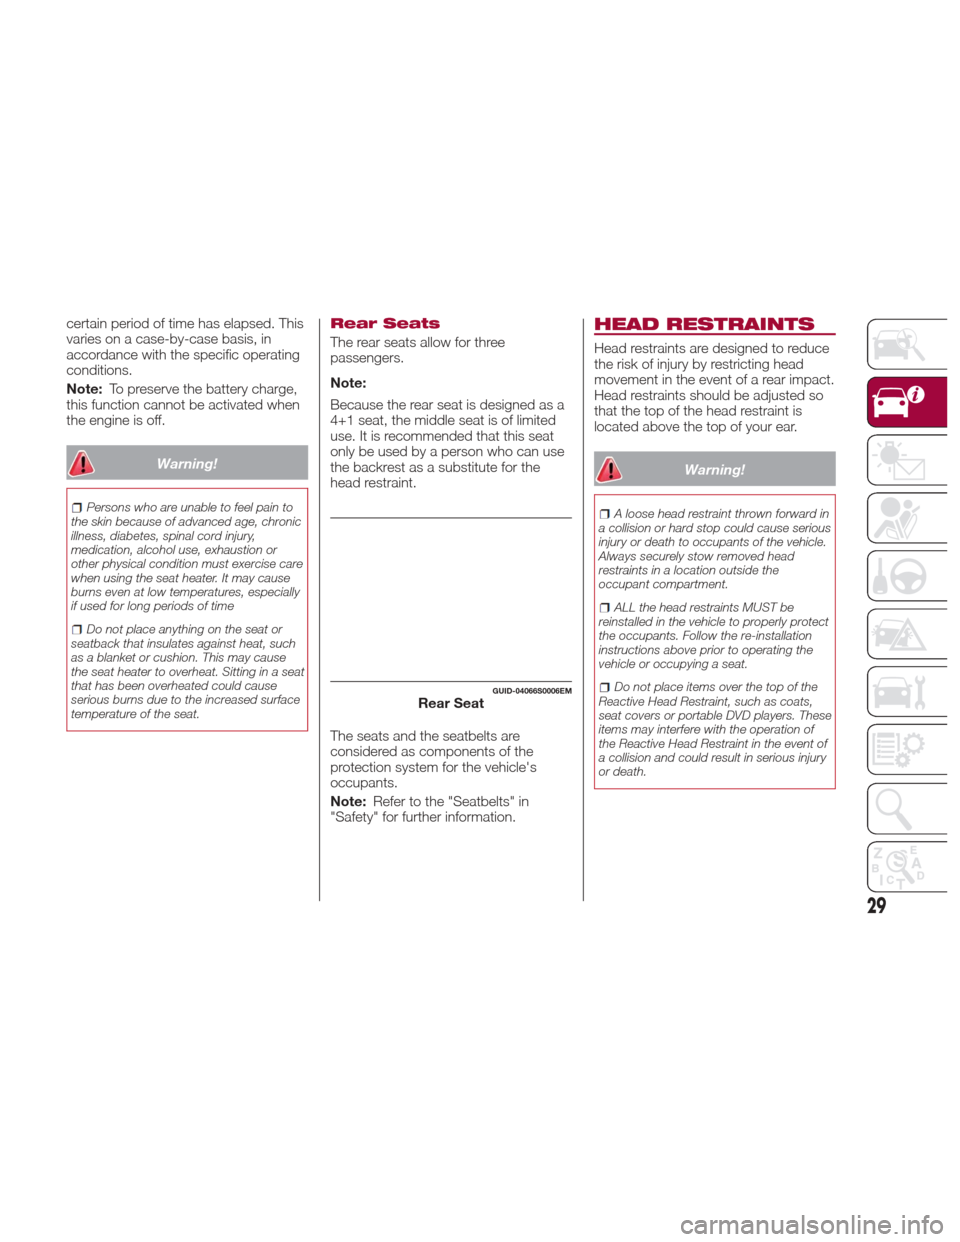
Rear Seats
The rear seats allow for three
passengers.
Note:
Because the rear seat is designed as a
4+1 seat, the middle seat is of limited
use. It is recommended that this seat
only be used by a person who can use
the backrest as a substitute for the
head restraint.
The seats and the seatbelts are
considered as components of the
protection system for the vehicle's
occupants.
Note: Refer to the "Seatbelts" in
"Safety" for further information.
HEAD RESTRAINTS
Head restraints are designed to reduce
the risk of injury by restricting head
movement in the event of a rear impact.
Head restraints should be adjusted so
that the top of the head restraint is
located above the top of your ear.
Warning!
A loose head restraint thrown forward in
a collision or hard stop could cause serious
injury or death to occupants of the vehicle.
Always securely stow removed head
restraints in a location outside the
occupant compartment.
ALL the head restraints MUST be
reinstalled in the vehicle to properly protect
the occupants. Follow the re-installation
instructions above prior to operating the
vehicle or occupying a seat.
Do not place items over the top of the
Reactive Head Restraint, such as coats,
seat covers or portable DVD players. These
items may interfere with the operation of
the Reactive Head Restraint in the event of
a collision and could result in serious injury
or death.GUID-04066S0006EMRear Seat
29
Page 114 of 268
Lap/Shoulder Belt Untwisting
Procedure
Use the following procedure to untwist
a twisted lap/shoulder belt.
1. Position the latch plate as close as
possible to the anchor point.
2. At about 6 to 12 inches (15 to
30 cm) above the latch plate, grasp and
twist the seat belt webbing
180 degrees to create a fold that begins
immediately above the latch plate.
3. Slide the latch plate upward over the
folded webbing. The folded webbing
must enter the slot at the top of the
latch plate.
4. Continue to slide the latch plate up
until it clears the folded webbing and
the seat belt is no longer twisted.
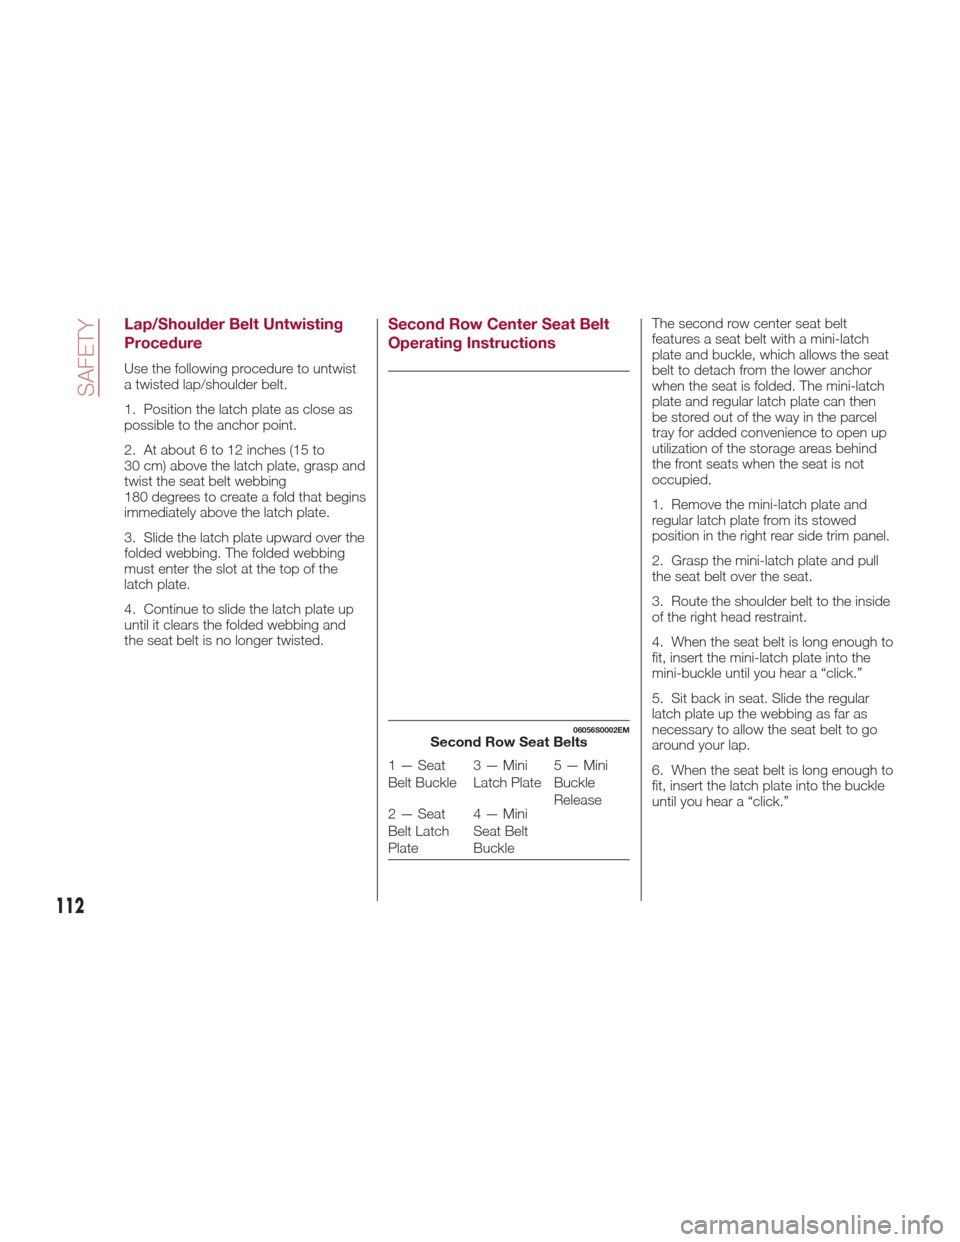
Second Row Center Seat Belt
Operating InstructionsThe second row center seat belt
features a seat belt with a mini-latch
plate and buckle, which allows the seat
belt to detach from the lower anchor
when the seat is folded. The mini-latch
plate and regular latch plate can then
be stored out of the way in the parcel
tray for added convenience to open up
utilization of the storage areas behind
the front seats when the seat is not
occupied.
1. Remove the mini-latch plate and
regular latch plate from its stowed
position in the right rear side trim panel.
2. Grasp the mini-latch plate and pull
the seat belt over the seat.
3. Route the shoulder belt to the inside
of the right head restraint.
4. When the seat belt is long enough to
fit, insert the mini-latch plate into the
mini-buckle until you hear a “click.”
5. Sit back in seat. Slide the regular
latch plate up the webbing as far as
necessary to allow the seat belt to go
around your lap.
6. When the seat belt is long enough to
fit, insert the latch plate into the buckle
until you hear a “click.”
06056S0002EMSecond Row Seat Belts
1 — Seat
Belt Buckle3 — Mini
Latch Plate5 — Mini
Buckle
Release
2 — Seat
Belt Latch
Plate 4 — Mini
Seat Belt
Buckle
112
SAFETY
Page 116 of 268
Switchable Automatic Locking
Retractors (ALR)
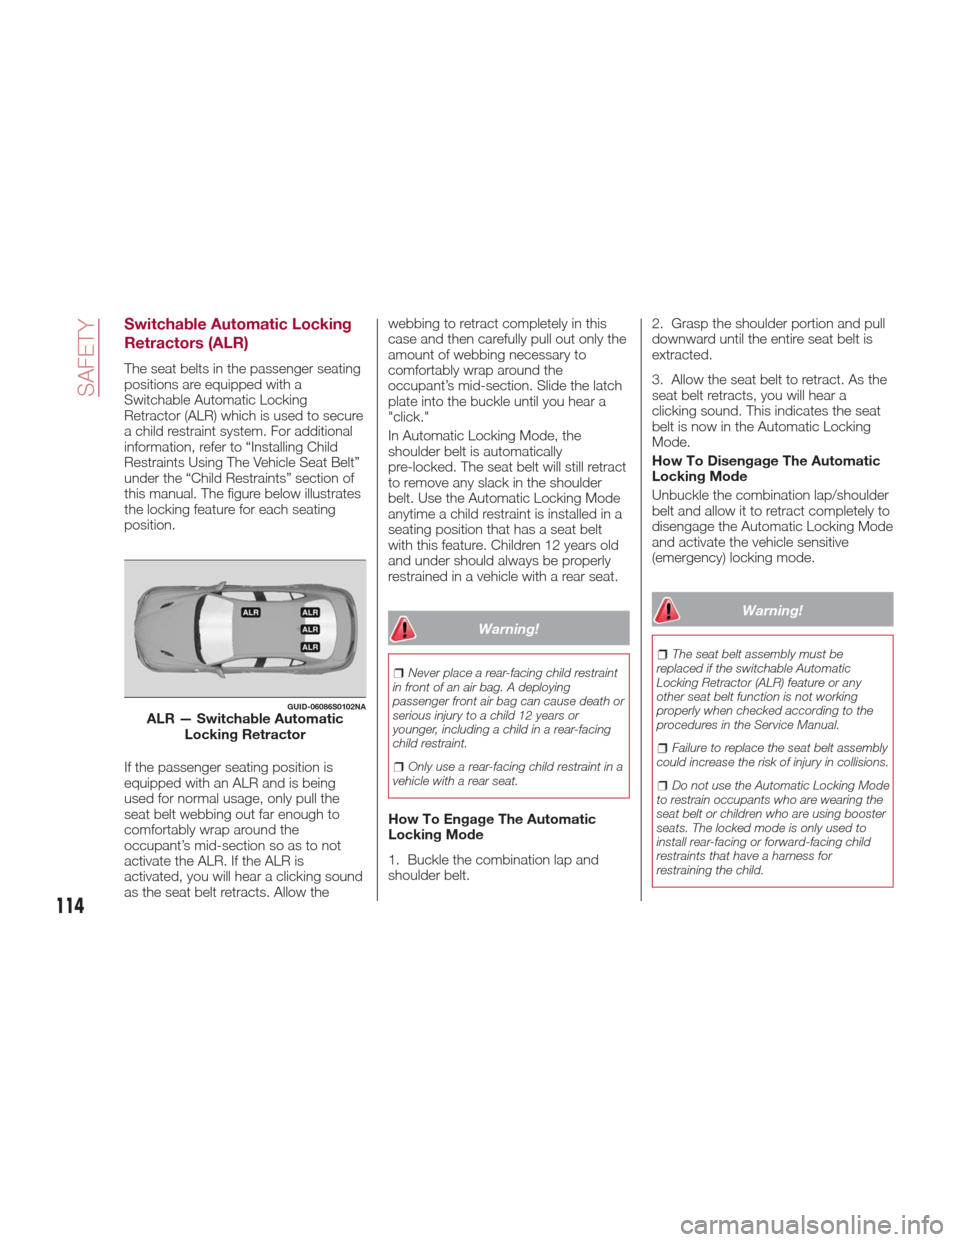
The seat belts in the passenger seating
positions are equipped with a
Switchable Automatic Locking
Retractor (ALR) which is used to secure
a child restraint system. For additional
information, refer to “Installing Child
Restraints Using The Vehicle Seat Belt”
under the “Child Restraints” section of
this manual. The figure below illustrates
the locking feature for each seating
position.
If the passenger seating position is
equipped with an ALR and is being
used for normal usage, only pull the
seat belt webbing out far enough to
comfortably wrap around the
occupant’s mid-section so as to not
activate the ALR. If the ALR is
activated, you will hear a clicking sound
as the seat belt retracts. Allow thewebbing to retract completely in this
case and then carefully pull out only the
amount of webbing necessary to
comfortably wrap around the
occupant’s mid-section. Slide the latch
plate into the buckle until you hear a
"click."
In Automatic Locking Mode, the
shoulder belt is automatically
pre-locked. The seat belt will still retract
to remove any slack in the shoulder
belt. Use the Automatic Locking Mode
anytime a child restraint is installed in a
seating position that has a seat belt
with this feature. Children 12 years old
and under should always be properly
restrained in a vehicle with a rear seat.
Warning!
Never place a rear-facing child restraint
in front of an air bag. A deploying
passenger front air bag can cause death or
serious injury to a child 12 years or
younger, including a child in a rear-facing
child restraint.
Only use a rear-facing child restraint in a
vehicle with a rear seat.
How To Engage The Automatic
Locking Mode
1. Buckle the combination lap and
shoulder belt. 2. Grasp the shoulder portion and pull
downward until the entire seat belt is
extracted.
3. Allow the seat belt to retract. As the
seat belt retracts, you will hear a
clicking sound. This indicates the seat
belt is now in the Automatic Locking
Mode.
How To Disengage The Automatic
Locking Mode
Unbuckle the combination lap/shoulder
belt and allow it to retract completely to
disengage the Automatic Locking Mode
and activate the vehicle sensitive
(emergency) locking mode.
Warning!
The seat belt assembly must be
replaced if the switchable Automatic
Locking Retractor (ALR) feature or any
other seat belt function is not working
properly when checked according to the
procedures in the Service Manual.
Failure to replace the seat belt assembly
could increase the risk of injury in collisions.
Do not use the Automatic Locking Mode
to restrain occupants who are wearing the
seat belt or children who are using booster
seats. The locked mode is only used to
install rear-facing or forward-facing child
restraints that have a harness for
restraining the child.
GUID-06086S0102NAALR — Switchable Automatic Locking Retractor
114
SAFETY
Page 127 of 268
with a harness for as long as possible,
up to the highest weight or height
allowed by the child seat.
All children whose weight or height is
above the forward-facing limit for the
child seat should use a belt-positioning
booster seat until the vehicle’s seat
belts fit properly. If the child cannot sit
with knees bent over the vehicle’s seat
cushion while the child’s back is against
the seatback, they should use a
belt-positioning booster seat. The child
and belt-positioning booster seat are
held in the vehicle by the seat belt.
Warning!
Improper installation can lead to failure
of an infant or child restraint. It could come
loose in a collision. The child could be
badly injured or killed. Follow the child
restraint manufacturer’s directions exactly
when installing an infant or child restraint.
After a child restraint is installed in the
vehicle, do not move the vehicle seat
forward or rearward because it can loosen
the child restraint attachments. Remove
the child restraint before adjusting the
vehicle seat position. When the vehicle seat
has been adjusted, reinstall the child
restraint.
When your child restraint is not in use,
secure it in the vehicle with the seat belt or
LATCH anchorages, or remove it from the
vehicle. Do not leave it loose in the vehicle.
In a sudden stop or accident, it could strike
the occupants or seatbacks and cause
serious personal injury.
Children Too Large For Booster
Seats
Children who are large enough to wear
the shoulder belt comfortably, and
whose legs are long enough to bend
over the front of the seat when their
back is against the seatback, should
use the seat belt in a rear seat. Use this
simple 5-step test to decide whether
the child can use the vehicle’s seat belt
alone:
1. Can the child sit all the way back
against the back of the vehicle seat?
2. Do the child’s knees bend
comfortably over the front of the vehicle
seat – while they are still sitting all the
way back?
3. Does the shoulder belt cross the
child’s shoulder between their neck and
arm? 4. Is the lap part of the belt as low as
possible, touching the child’s thighs and
not their stomach?
5. Can the child stay seated like this for
the whole trip?
If the answer to any of these questions
was “no,” then the child still needs to
use a booster seat in this vehicle. If the
child is using the lap/shoulder belt,
check seat belt fit periodically and make
sure the seat belt buckle is latched. A
child’s squirming or slouching can move
the belt out of position. If the shoulder
belt contacts the face or neck, move
the child closer to the center of the
vehicle, or use a booster seat to
position the seat belt on the child
correctly.
Warning!
Never allow a child to put the shoulder belt
under an arm or behind their back. In a
crash, the shoulder belt will not protect a
child properly, which may result in serious
injury or death. A child must always wear
both the lap and shoulder portions of the
seat belt correctly.
125
Page 131 of 268
Center Seat LATCH
Warning!
Do not install a child restraint in the
center position using the LATCH system.
This position is not approved for installing
child seats using the LATCH attachments.
You must use the seat belt and tether
anchor to install a child seat in the center
seating position.
Never use the same lower anchorage to
attach more than one child restraint. Please
refer to “Installing The LATCH-Compatible
Child Restraint System” for typical
installation instructions.
Always follow the directions of the child
restraint manufacturer when installing
your child restraint. Not all child restraint
systems will be installed as described
here.
To Install A LATCH-Compatible
Child Restraint
If the selected seating position has a
Switchable Automatic Locking
Retractor (ALR) seat belt, stow the seat
belt, following the instructions below.
See the section “Installing Child
Restraints Using The Vehicle Seat Belt”
to check what type of seat belt each
seating position has. 1. Loosen the adjusters on the lower
straps and on the tether strap of the
child seat so that you can more easily
attach the hooks or connectors to the
vehicle anchorages.
2. Place the child seat between the
lower anchorages for that seating
position. For some second row seats,
you may need to recline the seat and /
or raise the head restraint to get a
better fit. If the rear seat can be moved
forward and rearward in the vehicle, you
may wish to move it to its rear-most
position to make room for the child
seat. You may also move the front seat
forward to allow more room for the child
seat.
3. Attach the lower hooks or
connectors of the child restraint to the
lower anchorages in the selected
seating position.
4. If the child restraint has a tether
strap, connect it to the top tether
anchorage. See the section “Installing
Child Restraints Using The Top Tether
Anchorage” for directions to attach a
tether anchor.
5. Tighten all of the straps as you push
the child restraint rearward and
downward into the seat. Remove slack
in the straps according to the child
restraint manufacturer’s instructions.
6. Test that the child restraint is
installed tightly by pulling back and forth
on the child seat at the belt path. It
should not move more than 1 inch
(25.4 mm) in any direction.
How To Stow An Unused
Switchable-ALR (ALR) Seat Belt
When using the LATCH attaching
system to install a child restraint, stow
all ALR seat belts that are not being
used by other occupants or being used
to secure child restraints. An unused
belt could injure a child if they play with
it and accidentally lock the seat belt
retractor. Before installing a child
restraint using the LATCH system,
buckle the seat belt behind the child
restraint and out of the child’s reach. If
the buckled seat belt interferes with the
child restraint installation, instead of
buckling it behind the child restraint,
route the seat belt through the child
restraint belt path and then buckle it.
Do not lock the seat belt. Remind all
children in the vehicle that the seat belts
are not toys and that they should not
play with them.
129
Page 133 of 268
Frequently Asked Questions About Installing Child Restraints With Seat Belts
What is the weight limit (child’s weight + weight of
the child restraint) for using the Tether Anchor with
theseatbelttoattachaforwardfacingchild
restraint? Weight limit of the Child
Restraint
Always use the tether anchor when using the seat
belt to install a forward facing child restraint, up to
the recommended weight limit of the child restraint.
Can the rear-facing child restraint touch the back of
the front passenger seat? Ye sContact between the front passenger seat and the
child restraint is allowed, if the child restraint
manufacturer also allows contact.
Can the head restraints be removed? YesThe head restraints should only be removed by
qualified technicians. If any of the head restraints
require removal, see your authorized dealer.
Can the buckle stalk be twisted to tighten the seat
belt against the belt path of the child restraint? NoDo not twist the buckle stalk in a seating position
with an ALR retractor.
Installing A Child Restraint With
A Switchable Automatic
Locking Retractor (ALR):
Child restraint systems are designed to
be secured in vehicle seats by lap belts
or the lap belt portion of a lap/shoulder
belt.
Warning!
Improper installation or failure to properly
secure a child restraint can lead to failure of
the restraint. The child could be badly
injured or killed.
Follow the child restraint manufacturer’s
directions exactly when installing an infant
or child restraint.
1. Place the child seat in the center of
the seating position. For some second
row seats, you may need to recline the
seat and/or raise the head restraint to
get a better fit. If the rear seat can be
moved forward and rearward in the
vehicle, you may wish to move it to its
rear-most position to make room for the
child seat. You may also move the front
seat forward to allow more room for the
child seat.
2. Pull enough of the seat belt webbing
from the retractor to pass it through the
belt path of the child restraint. Do not
twist the belt webbing in the belt path.
3. Slide the latch plate into the buckle
until you hear a “click.” 4. Pull on the webbing to make the lap
portion tight against the child seat.
5. To lock the seat belt, pull down on
the shoulder part of the belt until you
have pulled all the seat belt webbing
out of the retractor. Then, allow the
webbing to retract back into the
retractor. As the webbing retracts, you
will hear a clicking sound. This means
the seat belt is now in the Automatic
Locking mode.
6. Try to pull the webbing out of the
retractor. If it is locked, you should not
be able to pull out any webbing. If the
retractor is not locked, repeat step 5.
131
Page 137 of 268
STARTING THE
ENGINE
Starting The Engine
Before starting the engine, be sure to
adjust the seat, the interior rear view
mirrors, and the door mirrors, and
fasten the seat belt correctly.
Never press the accelerator pedal
before starting the engine.
If necessary, messages indicating the
starting procedure can be shown in the
display.
Warning!
When leaving the vehicle, always remove
the key fob from the vehicle and lock your
vehicle.
Never leave children alone in a vehicle,
or with access to an unlocked vehicle.
Allowing children to be in a vehicle
unattended is dangerous for a number of
reasons. A child or others could be
seriously or fatally injured. Children should
be warned not to touch the parking brake,
brake pedal or the transmission gear
selector.
Do not leave the key fob in or near the
vehicle, or in a location accessible to
children. A child could operate power
windows, other controls, or move the
vehicle.
Do not leave children or animals inside
parked vehicles in hot weather. Interior heat
build-up may cause serious injury or death.
Starting Procedure
Proceed as follows:
1. Apply the electric park brake and set
the gear selector to PARK (P) or
NEUTRAL (N).
2. Fully depress the brake pedal
without touching the accelerator.
3. Briefly push the ignition button.
4. If the engine doesn't start within a
few seconds, you need to repeat the
procedure.
If the problem persists, contact an
authorized dealer.
Warning!
Never pour fuel or other flammable liquid
into the throttle body air inlet opening in an
attempt to start the vehicle. This could
result in flash fire causing serious personal
injury.
Do not attempt to push or tow your
vehicle to get it started. Vehicles equipped
with an automatic transmission cannot be
started this way. Unburned fuel could enter
the catalytic converter and once the engine
has started, ignite and damage the
converter and vehicle.
If the vehicle has a discharged battery,
booster cables may be used to obtain a
start from a booster battery or the battery
in another vehicle. This type of start can be
dangerous if done improperly. Refer to
“Emergency Starting” in “In Case Of
Emergency” for further information.
Caution!
To prevent damage to the starter, do not
continuously crank the engine for more
than 25 seconds at a time. Wait
60 seconds before trying again.
Remote Starting System
— If Equipped
This system uses the key fob to start
the engine conveniently from outside
the vehicle while still maintaining
security. The system has a range of at
least 300 feet (91 meters).
The remote starting system also
activates the climate control (if
equipped), the heated seats (if
equipped), and the heated steering
wheel (if equipped), depending on
temperatures outside and inside of the
car.
Note:
The vehicle must be equipped with
an automatic transmission in order to
include remote start.
Obstructions between the vehicle
and key fob may reduce this range.
135