2017 Alfa Romeo Giulia Emergency release
[x] Cancel search: Emergency releasePage 16 of 268

KEYS
Key Fob
Your vehicle uses a keyless ignition
system. This system includes a key fob
and a keyless push button ignition.
The key fob with Remote Control
contains a Remote Keyless Entry key
fob. The Remote Keyless Entry system
allows you to lock or unlock the doors
and trunk or activate the Panic Alarm
from distances. The key fob does not
need to be pointed at the vehicle to
activate the system.
PANIC Function
To activate the PANIC function, push
and hold the PANIC button for at least
one second. When the panic alarm is
active, the headlights turn on, the turn
signals flash, the horn honks
intermittently, and all internal adjustablelights turn on. The panic alarm will
remain active for three minutes, and
can be deactivated:By pushing the PANIC button again.
Automatically if the vehicle speed
exceeds 5 mph (8 km/h).
In both cases, the panic alarm is
immediately deactivated.
Warning!
Before exiting a vehicle, always shift the
automatic transmission into PARK, apply
the parking brake, turn the engine OFF,
remove the key fob from the vehicle and
lock your vehicle.
Never leave children alone in a vehicle,
or with access to an unlocked vehicle.
Allowing children to be in a vehicle
unattended is dangerous for a number of
reasons. A child or others could be
seriously or fatally injured. Children should
be warned not to touch the parking brake,
brake pedal or the gear selector.
Do not leave the key fob in or near the
vehicle, or in a location accessible to
children. A child could operate power
windows, other controls, or move the
vehicle.
Do not leave children or animals inside
parked vehicles in hot weather. Interior heat
build-up may cause serious injury or death.
Operation
Door And Trunk Lid Unlock
Briefly pushing the unlock button on the
key fob will unlock the doors and trunk
lid, turn on the interior lights, and flash
the turn signals once (if activated from
the Connect system).
Push and release the unlock button on
the key fob once to unlock the driver
side front door or twice within one
second to unlock all doors and the
trunk lid.
The current unlock setting can be
changed through the Connect system
menu, so that the system unlocks:
All doors unlock on the first push of
the key fob unlock button.
Unlock the driver door on the first
push of the key fob unlock button.
Flashing of the turn signals upon
locking/unlocking the doors and
activation of the courtesy light upon
unlocking the doors can be activated or
deactivated through the Connect
system. For further information, refer to
the “Connect Owner’s Manual
Supplement.”
The doors can also be unlocked by
using the emergency key, located inside
the key fob.
Door And Trunk Lid Lock
Briefly pushing the lock button on the
key fob will lock the doors and trunk lid,
switch off the internal lights, and flash
04016S0001EMKey Fob
14
GETTING TO KNOW YOUR VEHICLE
Page 17 of 268
the turn signals (if activated in the
Connect System).
If one or more doors are open, these
doors will also lock, and this is
indicated by a rapid flashing of the turn
signals. The doors prepare for locking,
which becomes active from the
moment they are closed. The doors will
unlock again only if the key fob is
detected inside the passenger
compartment.
The doors can be locked by using the
emergency key in the driver’s side door
lock.
Automatic Window Opening/
Closing Function
Pushing and holding the unlock button
on the key fob will allow all windows to
open to a desired position. Release the
unlock button on the key fob anytime
during this operation, and the windows
will stop automatically.
Pushing and holding the lock button on
the key fob will allow all windows to
close to a desired position. Release the
lock button on the key fob anytime
during this operation, and the windows
will stop automatically.
Trunk Lid Opening
Rapidly push the trunk lid key fob
button twice to open the trunk lid. The
turn signals will flash to indicate that the
trunk lid has been opened.Remote Start — If Equipped
The remote start button on the key fob
enables engine starting (push the
button twice to start the engine).
Car Finder
Push the lock or unlock button to
remotely and temporarily switch on turn
signals and headlights.
This is useful for finding the vehicle
easily in a crowded area like a parking
garage, for example.
Pushing the lock or unlock button again
will restart the lights switch on timer (if
the parking lights functions was already
active, it will remain active).
This function is available only if the
doors are closed.
Replacing The
Electronic Key Fob
Battery
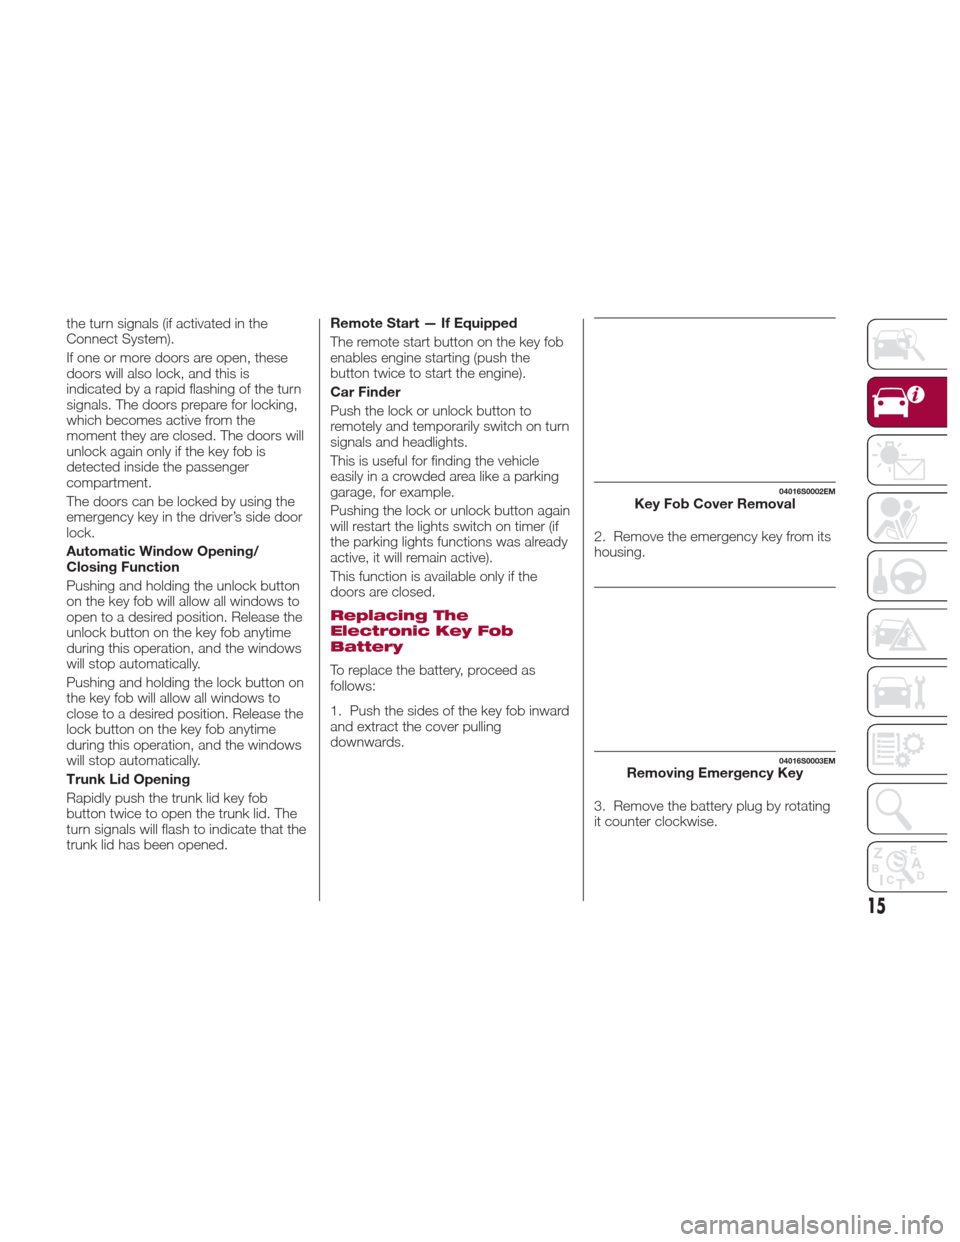
To replace the battery, proceed as
follows:
1. Push the sides of the key fob inward
and extract the cover pulling
downwards.
2. Remove the emergency key from its
housing.
3. Remove the battery plug by rotating
it counter clockwise.
04016S0002EMKey Fob Cover Removal
04016S0003EMRemoving Emergency Key
15
Page 24 of 268

Unlock — Turn the emergency key to
the left (counter clockwise)
Passive Entry — If
Equipped
The Passive Entry system can identify
the presence of a key fob near the
doors and trunk lid.
The system enables the doors and
trunk lid to be locked or unlocked
without pushing any button on the key
fob.
The key fob is detected only after the
system recognizes the presence of a
hand on one of the front door handles.
If the detected key fob is valid, the
doors and the trunk lid are unlocked
(refer to the Connect Supplement for
Passive Entry Settings).
Grasping the handle of the driver's door
unlocks the driver's side door, or all
doors depending on the mode set
using the Connect system (refer to the
Connect Supplement for Passive Entry
Settings).
Note:
If wearing gloves, or if it has rained and
the door handle is wet, the activation
sensitivity of the Passive Entry function
may be reduced, resulting in a longer
reaction time. Door Locking
To lock the doors, proceed as follows:
1. Make sure that you have the key fob
and are close to the driver’s or
passenger’s side door handle.
2. Push the Passive Entry door handle
button or the Passive Entry trunk lid
button, which is located next to the
external trunk lid release button. This
will lock all doors and the trunk lid. Door
locking will activate the alarm as well.
Note:
After pushing the Passive Entry door
handle button, you must wait two
seconds before the doors can be
unlocked again using the passive entry
door handle button. This feature makes
it possible to check whether the vehicle
has been locked correctly by pulling the
door handle within two seconds. The
doors will not be unlocked again.
The vehicle doors and trunk lid can be
locked by pushing the lock button on
the key fob or on the interior door lock.
04056S0003EMPassive Entry Door Handle Button
GUID-04056S0006EMPassive Entry Trunk Lid Button
22
GETTING TO KNOW YOUR VEHICLE
Page 25 of 268
Driver Side Door Emergency
Opening
If the key fob does not work, e.g.
because its battery is discharged or the
vehicle battery is discharged, the
emergency key can be used to unlock
the driver side door.
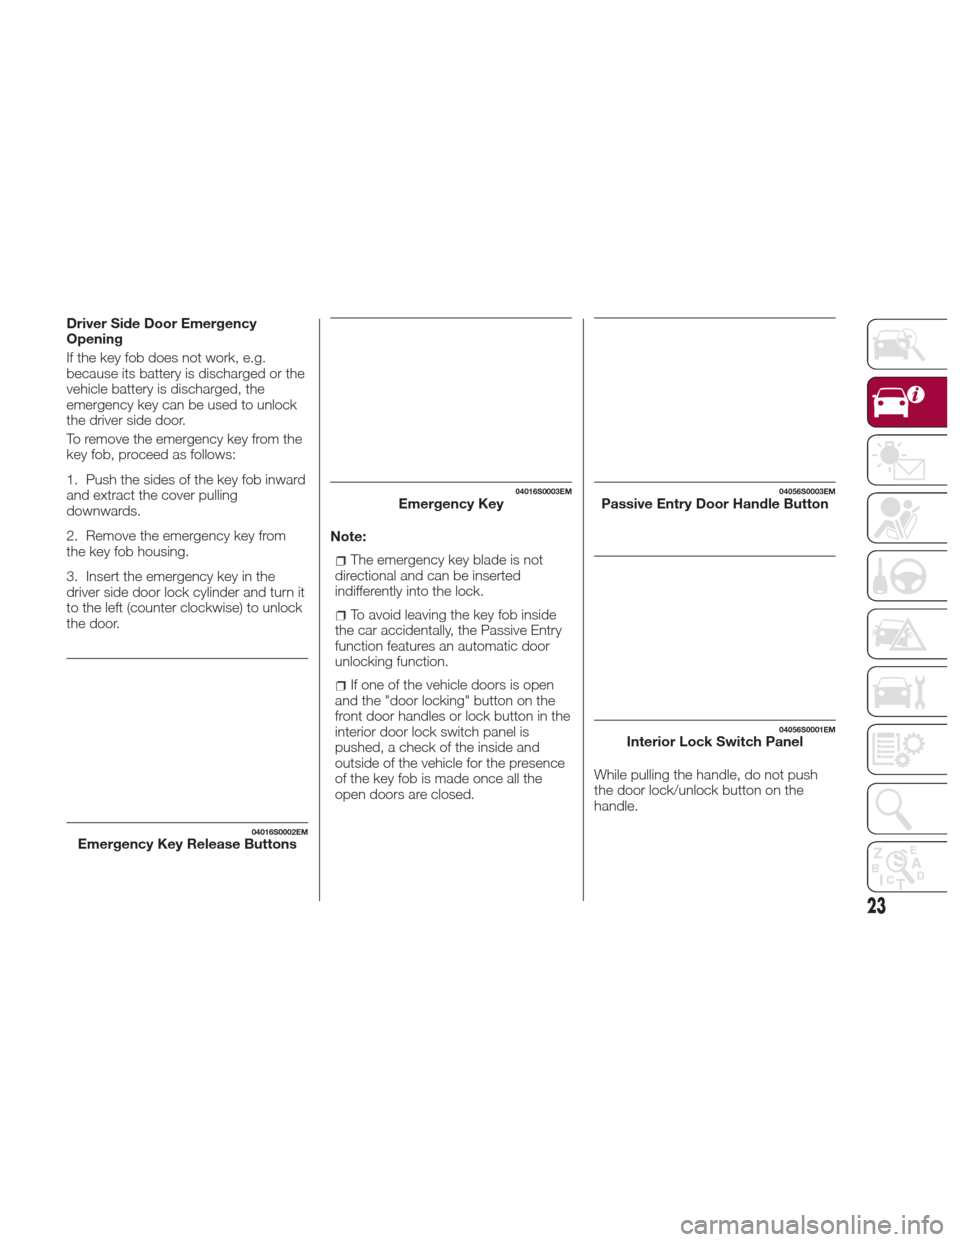
To remove the emergency key from the
key fob, proceed as follows:
1. Push the sides of the key fob inward
and extract the cover pulling
downwards.
2. Remove the emergency key from
the key fob housing.
3. Insert the emergency key in the
driver side door lock cylinder and turn it
to the left (counter clockwise) to unlock
the door.Note:
The emergency key blade is not
directional and can be inserted
indifferently into the lock.
To avoid leaving the key fob inside
the car accidentally, the Passive Entry
function features an automatic door
unlocking function.
If one of the vehicle doors is open
and the "door locking" button on the
front door handles or lock button in the
interior door lock switch panel is
pushed, a check of the inside and
outside of the vehicle for the presence
of the key fob is made once all the
open doors are closed. While pulling the handle, do not push
the door lock/unlock button on the
handle.
04016S0002EMEmergency Key Release Buttons
04016S0003EMEmergency Key04056S0003EMPassive Entry Door Handle Button
04056S0001EMInterior Lock Switch Panel
23
Page 28 of 268

Unlocking The Doors
With A Discharged
Battery
Proceed as follows to unlock the doors
if the vehicle battery is discharged.
Rear Doors And Passenger Door
1. With the doors unlocked insert the
emergency key from the key fob or a
flat bladed screwdriver into the door
lock manual release lock cylinder.
2. Turn the manual release lock
cylinder clockwise for the right door
locks or counterclockwise for the left
door locks.3. Remove the key/screwdriver from
the manual release lock.
Proceed as follows to realign the door
lock device (only when the battery
charge has been restored):
Push the lock button on the
electronic key
Push the unlock button on the door
panel
Unlock driver’s door lock with the
emergency key.
Operate the internal door handle
Note: For the rear doors, if the Child
Safety Locks are engaged, and the
previously described locking procedure
is carried out, operating the internal
handle will not open the door. Instead, it
will only realign the lock release device.
To open the door, the outside handle
must be used. The door central
locking/unlocking buttons are not
deactivated when the emergency lock
is engaged.
SEATS
Warning!
It is dangerous to ride in a cargo area,
inside or outside of a vehicle. In a collision,
people riding in these areas are more likely
to be seriously injured or killed.
Do not allow people to ride in any area
of your vehicle that is not equipped with
seats and seat belts. In a collision, people
riding in these areas are more likely to be
seriously injured or killed.
Be sure everyone in your vehicle is in a
seat and using a seat belt properly.
Front Seats
The front seats can be adjusted to
ensure maximum comfort for the
occupants.
When adjusting the driver’s seat, keep
the shoulders resting firmly against the
backrest, and the wrists within reach of
the top of the steering wheel.
Also, the driver must be able to fully
depress the brake pedal once the seat
has been adjusted.
04056S0008EMDoor Lock Manual Release Lock Cylinder
26
GETTING TO KNOW YOUR VEHICLE
Page 55 of 268
TRUNK
The trunk unlocking is electrically
operated and is deactivated when the
car is in motion.
Opening
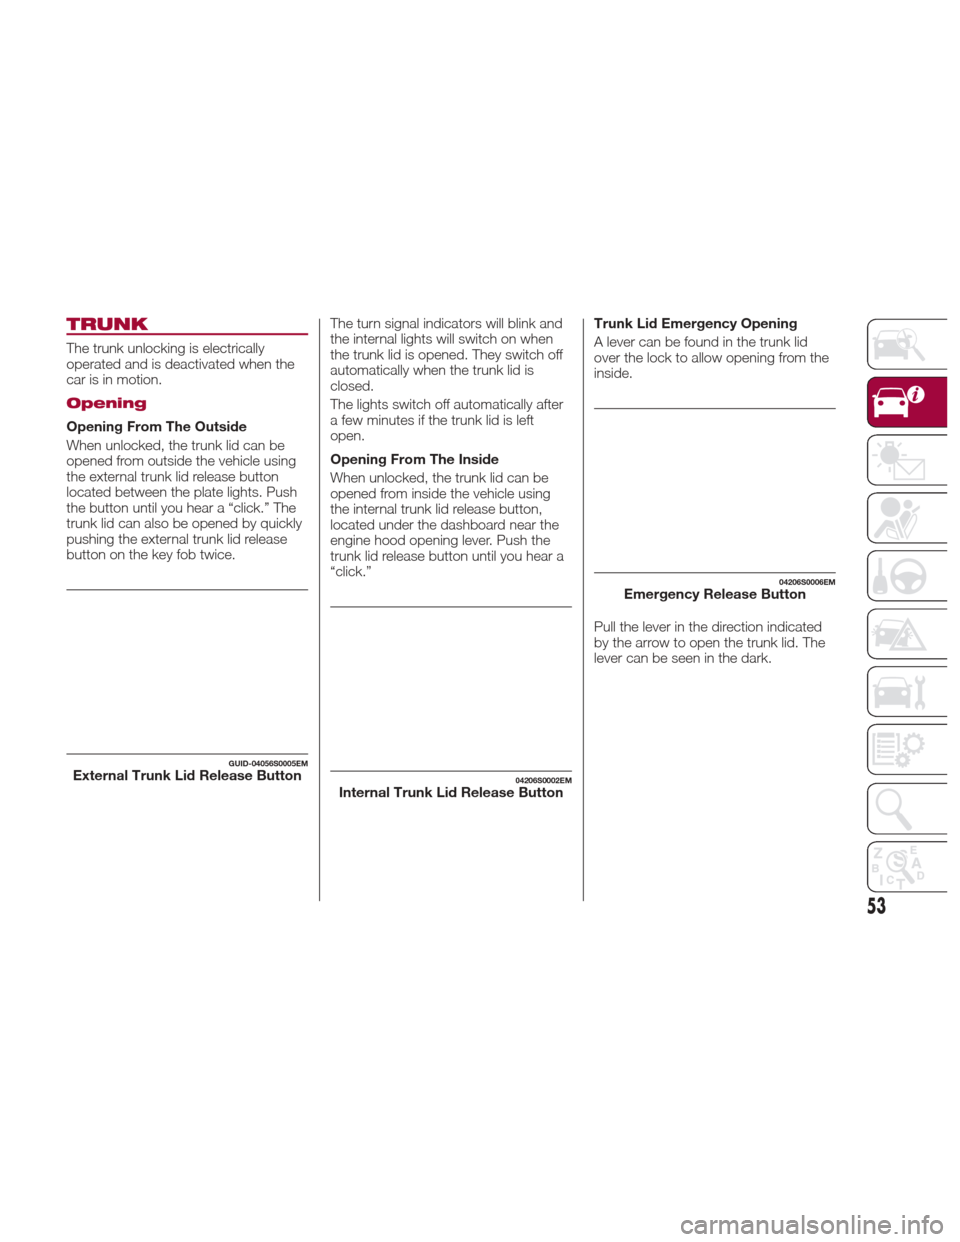
Opening From The Outside
When unlocked, the trunk lid can be
opened from outside the vehicle using
the external trunk lid release button
located between the plate lights. Push
the button until you hear a “click.” The
trunk lid can also be opened by quickly
pushing the external trunk lid release
button on the key fob twice.The turn signal indicators will blink and
the internal lights will switch on when
the trunk lid is opened. They switch off
automatically when the trunk lid is
closed.
The lights switch off automatically after
a few minutes if the trunk lid is left
open.
Opening From The Inside
When unlocked, the trunk lid can be
opened from inside the vehicle using
the internal trunk lid release button,
located under the dashboard near the
engine hood opening lever. Push the
trunk lid release button until you hear a
“click.”Trunk Lid Emergency Opening
A lever can be found in the trunk lid
over the lock to allow opening from the
inside.
Pull the lever in the direction indicated
by the arrow to open the trunk lid. The
lever can be seen in the dark.
GUID-04056S0005EMExternal Trunk Lid Release Button04206S0002EMInternal Trunk Lid Release Button
04206S0006EMEmergency Release Button
53
Page 100 of 268
System Intervention
The intervention of the system is
indicated by the flashing of the ESC
warning light on the instrument panel,
to inform the driver that the vehicle
stability and grip are critical.
Panic Brake Assist
(PBA) System
The PBA system is designed to improve
the vehicle’s braking capacity during
emergency braking.
The system detects emergency braking
by monitoring the speed and force with
which the brake pedal is pressed, and
consequently applies the optimal brake
pressure. This can reduce the braking
distance: the PBA system therefore
complements the ABS.
Maximum assistance from the PBA
system is obtained by pressing the
brake pedal very quickly. In addition, the
brake pedal should be pressed
continuously during braking, avoiding
intermittent presses, to get the most
out of the system. Do not reduce
pressure on the brake pedal until
braking is no longer necessary.
The PBA system is deactivated when
the brake pedal is released.
Warning!
The Panic Brake Assist (PBA) cannot
prevent the natural laws of physics from
acting on the vehicle, nor can it increase
the traction afforded by prevailing road
conditions. PBA cannot prevent collisions,
including those resulting from excessive
speed in turns, driving on very slippery
surfaces, or hydroplaning. The capabilities
of a PBA-equipped vehicle must never be
exploited in a reckless or dangerous
manner, which could jeopardize the user's
safety or the safety of others.
Hill Start Assist (HSA)
System
This is an integral part of the ESC
system and facilitates starting on
slopes, activating automatically in the
following cases:
Uphill: vehicle stationary on a road
with a gradient higher than 5%, engine
running, brake pressed and
transmission in neutral or gear other
than reverse engaged;
Downhill: vehicle stationary on a road
with a gradient higher than 5%, engine
running, brake pressed and reverse
gear engaged.
When setting off, the ESC system
control unit maintains the braking
pressure on the wheels until the engine
torque necessary for starting is reached, or in any case for a maximum
of two seconds, allowing your right foot
to be moved easily from the brake
pedal to the accelerator.
When two seconds without starting
have elapsed, the system is
automatically deactivated, gradually
releasing the braking pressure. During
this release stage, it is possible to hear
a typical mechanical brake release
noise, indicating the imminent
movement of the car.
Warning!
There may be situations where the Hill
Start Assist (HSA) will not activate and
slight rolling may occur, such as on minor
hills or with a loaded vehicle, or while
pulling a trailer. HSA is not a substitute for
active driving involvement. It is always the
driver’s responsibility to be attentive to
distance to other vehicles, people, and
objects, and most importantly brake
operation to ensure safe operation of the
vehicle under all road conditions. Your
complete attention is always required while
driving to maintain safe control of your
vehicle. Failure to follow these warnings
can result in a collision or serious personal
injury.
98
SAFETY
Page 202 of 268
TOWING A
DISABLED VEHICLE
This section describes procedures for
towing a disabled vehicle using a
commercial towing service.
Caution!
The vehicle should be transported with
all four wheels OFF the ground on the
flatbed of a roadside assistance vehicle.
Avoid towing with only the front (or rear)
wheels lifted. When towing with only the
front (or rear) wheels lifted, in addition to
damaging the body, it could damage the
transmission.
Do not use sling-type equipment when
towing. Vehicle damage may occur.
When securing the vehicle to a flatbed
truck, do not attach to front or rear
suspension components. Damage to your
vehicle may result from improper towing.
Ensure that the Electric Park Brake is
released, and remain released, while being
towed.
Damage from improper towing is not
covered under the New Vehicle Limited
Warranty.
The operators of the assistance vehicle
must be informed of your vehicle's
minimum required height from the
ground, in order to avoid contact
between the ends of the bumpers and
the equipment of the breakdown truck.
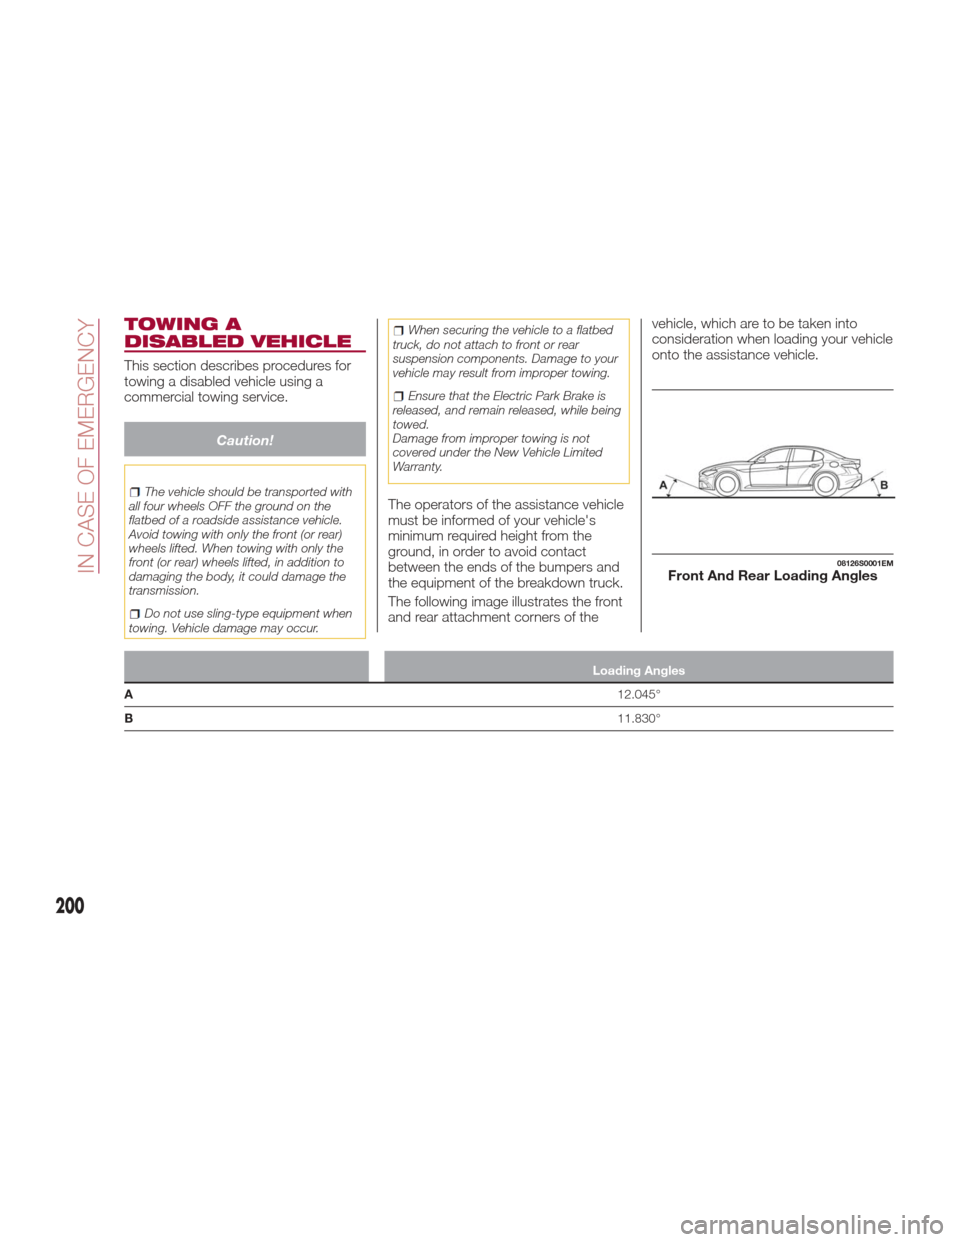
The following image illustrates the front
and rear attachment corners of the vehicle, which are to be taken into
consideration when loading your vehicle
onto the assistance vehicle.
Loading Angles
A 12.045°
B 11.830°
08126S0001EMFront And Rear Loading Angles
200
IN CASE OF EMERGENCY